While we are no longer making active post of Cricut projects on this blog as of 8/1/2013, we invite you to use it for continued die cut inspiration as we will leave the blog up for viewing. Happy Cricuting !

Showing posts with label Birthday. Show all posts

Monday, July 1, 2013

Happy Birthday on 4th of July

Greetings to my fellow Cricuteers !  It's Debbie O'Neal from Scrap Me Quick Designs to show you my final Cricut FANatics Blog project as we are closing the blog as of July 31st.  Please read the farewell details HERE.
 
My final project to show you is for my dad. His birthday is actually on the 4th of July.  When we were little kiddos, he used to tell us the fireworks were all for him !  Can you imagine our wonder that all those lovely explosions in the sky were just for him? As I got older, Dad finally had to fuss up that they were actually for 4th of July, not just his special birthday.  
 
4th of July and Dad's birthday were always special occasions with picnics and watermelon and watching the fireworks together.  It still is when we can get the family together.
 
This year I made dad an extra special card for his extra special 4th of July birthday card as this is his 75th birthday and we are glad he is still here to celebrate with us as he struggles with lung cancer.
 
Okay, now you know why I made what I did, time to show you what I actually made.
 
4th of JULY BIRTHDAY CARD:
 
Using the Independence Day Cricut Cartridge, I selected the Uncle Sam hat image, then WELDED  two of the shapes together to create a card. I cut it out at 5.24 inches.  Tip: be sure and flip one of the images before you weld it so when you close the card, the shape matches up correctly.


Next I cut out the hat layers using glitter paper to give it that special touch. I wanted to add a silver star background to the blue layer piece so I used the HIDE Feature on a second banded piece to eliminate the stars as you see on the silver glitter paper. 


Now that I had the glitter paper cut out, I needed to adhere the layers.  The best way to add glittered layers together is to use score tape.  You can see here how I did that to add the blue band to the silver under layer. 


Next, I added the red glitter paper to the front of the hat.  Then I decided I wanted to stamp a birthday sentiment to the front of the card. But since the shape was curved, I needed to do a little something special to make it look right.  Taking an acrylic block and a wax pencil, I drew the shape of the curve on the block.

 
Next I flipped over the block and added the birthday sentiment stamp letters placing them within the curved shape. I used silver ink to stamp the sentiment.  The sentiment was made using CTMH A1117 A Type Face Alpha set.

 
As you can see below, I also added the word DAD in glitter paper to front of the card. 
I just love how this turned out !

 
On the inside of the card, I stamped a sentiment which says "May this year be your Grandest year yet" which I also stamped in silver.  I used the star negative pieces from the hat band to decorate the inside.  The stamp is from CTMH D1491 Hooray Bouquet.

 
I have a feeling my dad is gonna love his special 4th of July Birthday !
 
Be sure and come follow me over at Scrap Me Quick Designs as I continue my die cutting exploration of not only the Cricut but also the Silhouette. I have lots of things planned with tutorials and tips to inspire you to keep creating !
 
Cricut Info and Other Supplies Used:
Designed by:  Debbie O'Neal
Cricut Machine Used: Expression
Cricut Cartridge Used:  Independence Day
Other Supplies Used: CTMH Stamp Sets, glitter paper, cardstock, silver ColorBox ink, acrylic block 

Thursday, June 20, 2013

Happy 21st Birthday Card

Hi Everyone! Melody Lane here to share a card I made for a coworker. He went to a Casino on his Birthday so I thought this card would fit.

I used the Las Vegas CCR Exclusive to make the roulette wheel. The font is from Feeling Groovy, I welded everything together in Cricut Craft Room, I also made a CCR tutorial and show how I created this whole card on 4 videos. I used the Cuttlebug on the red paper and used a Martha Stewart corner punch in the corners.

I used Recollections cardstock and raised the roulette wheel up on foam squares.

Thanks for looking and don't forget to check out my blog and Youtube Channel
Come back here tomorrow for more!

Cricut Info & Supplies Used
Designed By:  Melody Lane
Machine:  Cricut Expression2, Cricut Craft Room, Cuttlebug
Cricut Cartridge:  Feeling Groovy, Las Vegas
Other Supplies Used:
Paper:Recollections
Punch:  Martha Stewart corner punch-star

Thursday, April 11, 2013

Birthday Invitation

Ladies - Here is Maura's project for April that she sent me to post.  Unfortunately I have been very sick and was unable to get it posted earlier.  Please enjoy it today.  It is really cute !
 
 
Hello and happy spring everyone. Maura here with a birthday invitation that I created for my granddaughter.

 I used the cricut craft room to weld and cut the strawberry and all it's layers from the "Preserves" cartridge at 6 inches. With the red layer I used craft room basics to create the window frame for Straberry Shortcake by placing one circle inside the other with the outside circle at 1.5 inches.

The red layer I ran through my "Cuttlebug" using the Swiss dots folder I then used Tim Holtz walnut distress ink to ink up the edges and the raised dots. I found the Strawberry Shortcake image on line and then just cut it to fit the window.
 
For the inside I printed all the info using my computer and then used a negative cut of the strawberry front sized just a quarter inch smaller to place the info inside just how I wanted it and cut it out by hand.
 
I had to make the envelopes which was a new experience for me. Lol. I thought they would fit an A2 size but was mistaken. To seal the flap once again I found the image on line and the just used punches for the layers and glue dots to seal them.
 
 
Next my daughter wanted some bags for all the goodies that the kids would collect from the piñata.
 
For the bags I cut the strawberry at 5 inches wound a little twine and added a place for each child's name using a ticket punch.
 
 
For the flap on the back I used a Martha Stewart border punch and cut circles at 1 in and 1.5 inches from craft room basics, then used a stamp for the treats sentiment and inked and layered them together. To keep the bags closed I used small Velcro circles.
 
I am also working on a banner that I would have liked to share but it is not quite completed. Hope everyone has a great month.   Maura
 
Cricut Info & Other Supplies
Designed by:  Maura
Cricut Info : Preserves, Cuttlebug, CCR
Other Info: Paper bags, cardstock, velcro, border bunch, twin, ink


Saturday, April 6, 2013

Basketball Birthday

Hello!  I am Michele Green from www.michelegreen.com, here today to share a birthday card with you.  We have a basketball fanatic in our family who just celebrated a birthday.


The basketball hoop is from the All Sports cart at 3".


The inside was printed from my computer. 

I hope you enjoy this boy birthday card!


Cricut Info & Supplies Used
Designer: Michele Green

Machines Used: Expression

Cartridges Used: All Sports

Other Supplies: Cardstock, adhesive, pop dots, printer, birthday stamp

Wednesday, March 20, 2013

Sketch Challenge #5

Welcome to our Sketch Challenge.  
This is Amy from Amy's Digi Scraps and welcome to the another Sketch Challenge! On the 20th of each month, I will post a sketch for you to enjoy!  I generally post a card sketch with a card that I create, but you can make it a layout as well.  Please visit the Sketch Challenge link for more information about our monthly Sketch Challenges.

Here is the sketch for today:


And here is the card I created from the Sketch:


This sketch allows the design focal point, the flower, to not be overly competitive with the sentiment.  I used a paper stack from atd called "Urban Oasis" for all the paper except the card base, which was basic ivory card stock.  The flower is from Prima and the button is SEI.  I used a sentiment stamp from Close To My Heart and covered the sentiment and the flower petals using Icicle Stickles by Ranger. 
Unfortunately, my trimmer won't cut straight lines anymore, so I will have to look for a new one.  That turned out to be a good thing though since you have to use your Cricut for the sketch challenge.  I quickly laid this out using my Gypsy and George cartridge and cut each of the blocks and the two strips using my Cricut Mini machine.  Seems like overkill, but when your trimmer gets warped and you need blocks, what's a girl to do?


We would love to see what you can do with this Sketch.  Please create a card or layout and upload the image to this post in the InLinkz!  Remember that you must use your Cricut in creating your project for the Sketch Challenge.


Thursday, March 14, 2013

A Birthday on Saint Patrick's Day!

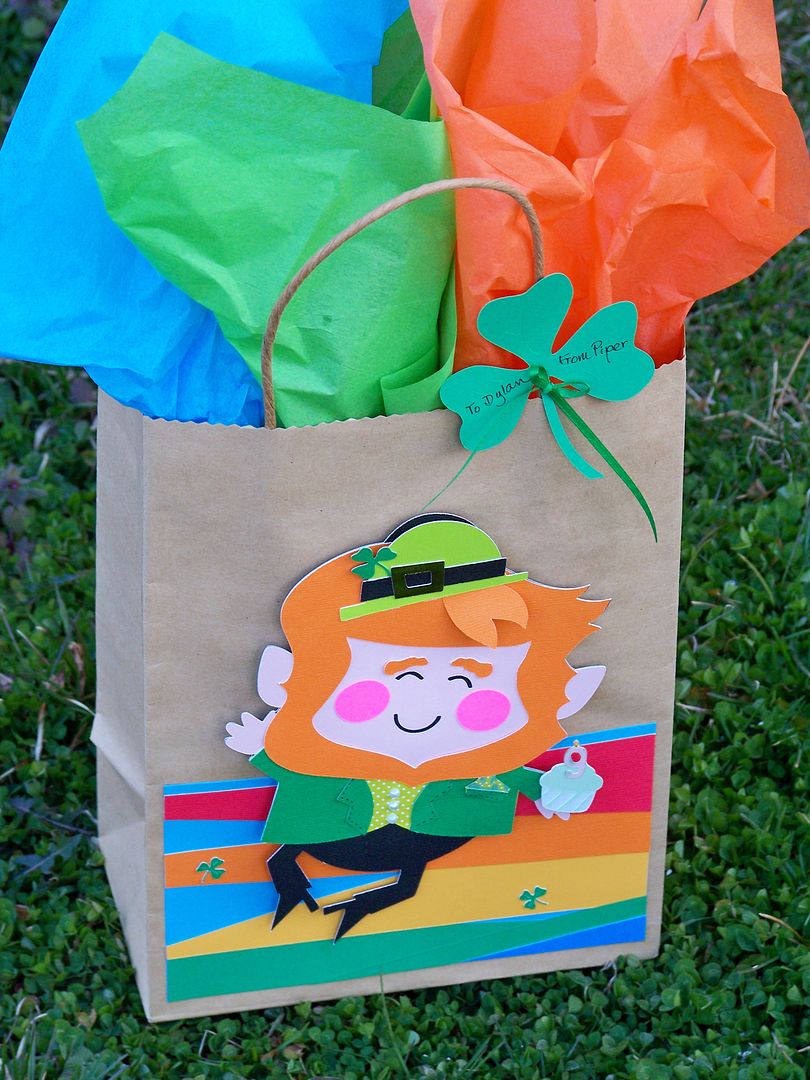
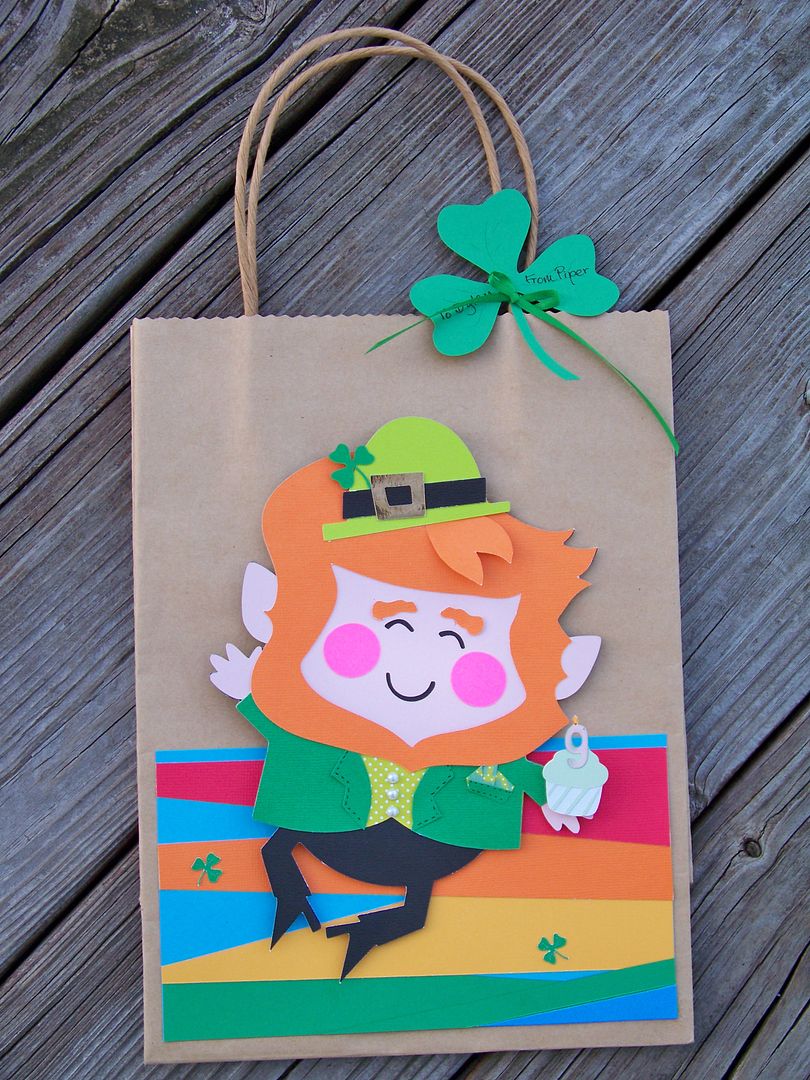
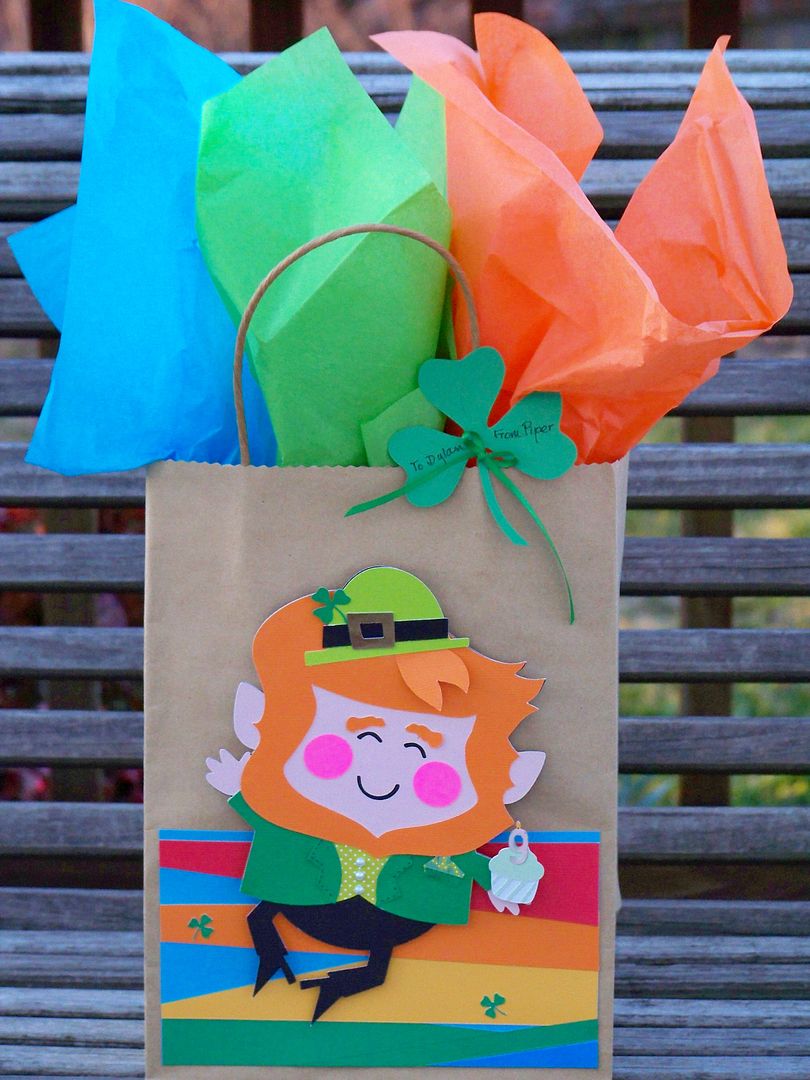
This is Nadia from my blog, With Glittering Eyes.  (If you have visited me before, please note that I have a new blog address:  www.withglitteringeyes.blogspot.com.)  Today I have a project to share that I made for one of my daughter's little BFFs.  Her birthday is on St. Patty's Day so I came up with a little gift bag for her with a birthday leprechaun.


I keep on-hand 7-1/2" x 10-1/2" kraft paper gift bags-- that was my base.  (That is the measurement minus the handles.)  I cut the jumping leprechaun from Simply Charmed (page 32) at 7".


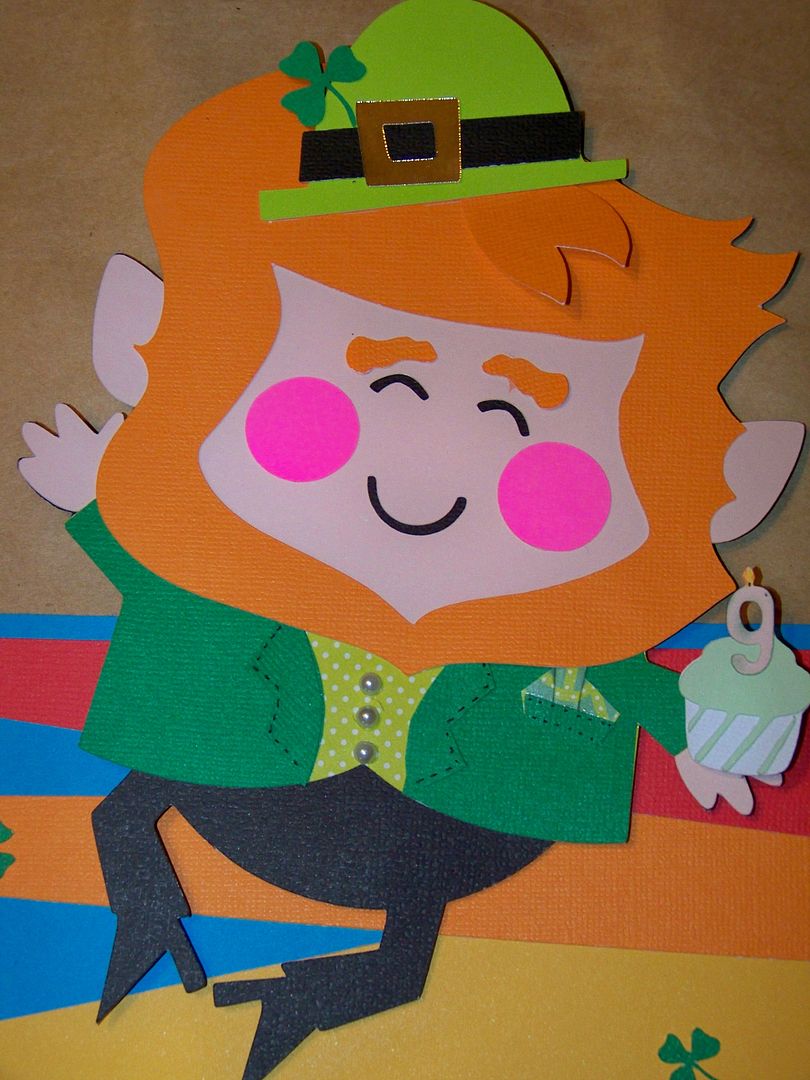
The thing with a big cut is that you kind of have to add extra details and pop up some elements to keep the die cut from flattening out.  For this little guy, I hand-cut an extra lock of hair.  I glued it flush on the 'scalp end' and popped it up with 1/8" pop dots on the 'curl end'.  I also popped up his little hat and added a shamrock to the hat band cut from A Child's Year (page 31), cut at 3/4".  I added a vest layer to his outfit but cutting two jackets and cutting one away so that I could layer them and see the second layer, like a vest.  I added adhesive pearls for vest buttons.  I hand-cut lapels for the top layer, the jacket, and added a breast pocket and pocket square.  

To make him a 'birthday' leprechaun, I cut a little cupcake from Something to Celebrate (page 22) at 1".  I only cut the first two layers since it was so tiny.  I cut a "9" candle from the same cart (page 30) at 3/4".  I hand-colored (with pencils) the flame and wick.

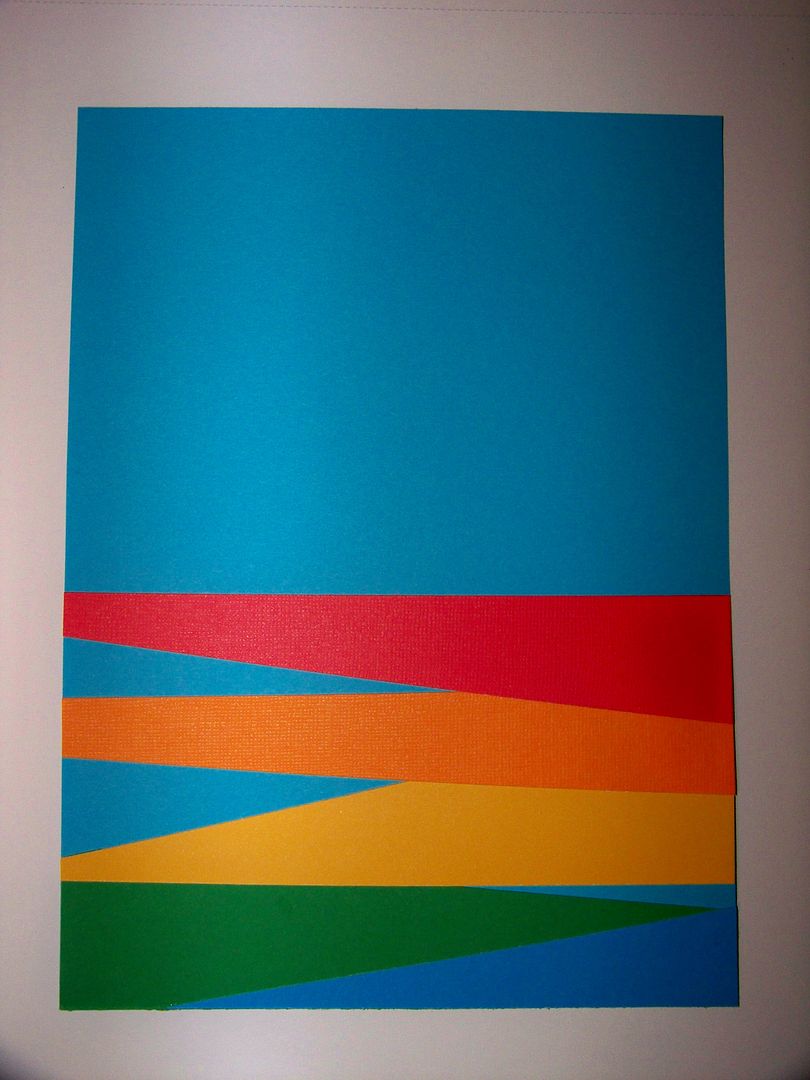
To give him a "place" to exist, I trimmer-cut rainbow-colored solids and layered them to create a ground and horizon line.  I placed a couple of tiny shamrocks, cut from A Child's Year at 1/2".


Lastly, for a tag, I cut a last shamrock, also from A Child's Year, at 3-1/4", and tied it on with 1/8" ribbon.


Lately, I have taken a little inventory of my Cricut cartridges and, as you have also probably figured out, there are many repeating icons among them!  I used to 'need' all the cartridges and came pretty close to getting them all before last autumn.  The good thing about this economy, hopefully there is a silver lining, is that many of us have gotten a chance to re-prioritize and to be more creative!  So... if you don't have the cartridges listed above, you can find shamrocks on the following cartridges that you may have:

  • Create-A-Critter 2
  • Designer's Calendar
  • Elmo and Friends Holiday
  • Give A Hoot
  • Imagine More Cards
  • Celebrate with a Flourish
  • Paper Doll Dress Up
  • Phrases 
  • Spring Fever
  • Holiday Cards
You can find leprechauns on the following cartridges that you may have:
  • CCR Exclusive:  St. Patrick's Day
  • Teddy Bear Parade
  • Paper Doll Dress Up
A cupcake image can be found on dozens of cartridges.  This is just a sampling:
  • A Child's Year
  • American Alphabet
  • Best Images of 2006 and 2009
  • Birthday Bash
  • Create-A-Critter 1 and 2
  • Storks Delivery
  • Divine Wedding
  • Doodlecharms
  • Elmo's Party
  • Every Day Paper Dolls
  • Hello Kitty Greetings... and the list goes on and on!!!!
Numbers can be found on any cartridge with font of course.

Thank you for checking my post today!  I hope you will visit my blog in the future.  You can always find my blog on Facebook at facebook.com/WithGlitteringEyesBlog and on Pinterest at pinterest.com/nadiahm/withglitteringeyes-blogspot-com-my-crafts/.  


Cricut Info & Supplies Used:
Designed By: Nadia Herbst-McConnell
Cricut Machines Used: Expression
Project Type: Gifts
Project Theme: Birthday, St. Patrick's Day
Cricut Cartridges Used:  Simply Charmed, A Child's Year, Something to Celebrate
Suppies Used: Paper, Quick Dry Glue, pop dots, adhesive pearls, microfine pen, ribbon
Friday, March 8, 2013

Musical Birthday Card

Hi fellow fanatics!  This is Erika from http://www.EKittyScraps.blogspot.com.  I am glad to be able to share my new project with you today.  I designed this card for my stepdaughter Kim using the Quarter Note cartridge.  Kim is a music major in college so I wanted to make a musical themed birthday card.
I started with a kraft cardstock for the card at 5 x 7 inches.  I add a piece of black cardstock at 4.75 x 6.75 inches and attached to kraft cardstock.  I cut Bazzill Basics Antique Sheet Music paper to 4.50 x 6.50 inches and adhered to black cardstock.  I added a silver treble clef embellishment that I had in my stash.
Next I stamped a birthday cake from Inkadinkaclings birthday stamp.  I wet embossed the stamp with Ranger Inkssentials tinted embossing ink and used Stampendous Marcasite Opaque embossing powder which has a nice glittery black color.  I used my Copic markers to color the stamp. 
Hint-an advantage to wet embossing and coloring is that you have raised lines when wet embossing to color in versus just stamping a flat image with regular ink and trying to color inside the lines.

  Now I used my Quarter Note cartridge and cut out Happy Birthday in music notes using font 3 and shift font 3 for capital letters B and H at .75 inches.  I also cut out two corner roses at 1 inch and adhered with Scotch quick dry adhesive.  I pop dotted the stamp and added to the card.  The stamped image above does not really show how glittery the cake stamp from the embossing power is nor the nice colors of the copic markers.  I hope you like my card.  Have a nice day and keep crafting!

List of Supplies used:
Cricut Expression Machine
Quarter Note Cartridge
Cardstock-kraft, pink, red and black (Tim Holtz Craft core)
Bazzill Basics Paper-Antique Sheet Music (has french words on it)
Inkadinkaclings-Happy Birthday Cling
Ranger Inkssentials-Emboss It Tinted ink pad
Stampendous-Marcasite Opaque embossing powder
Copic Markers-RV11-Pink,  R29-Lipstick Red, W5-Warm Gray, Y13-Lemon Yellow and YR07-Cadmium Orange
Scotch Quick Dry Glue
Silver Treble Clef embellishment


Tuesday, February 19, 2013

Cricut Craftroom Freebies


Hello again, it’s Freda from CannCreateDesigns here with two quickie projects using the Mini Books Project Cartridge and the Freebie Creative Cards preview that are free in the CraftRoom through the 20th.
It’s my son’s birthday next month and even though no one else in the family drinks coffee he has developed a taste for it. When I saw the Starbucks Lovers Gift Box on the Cricut With Heart Blog at Christmas time I printed out the page and put it in my “to make” pile for his birthday.


Using the Cricut Mini Books Project Cartridge I cut the outside layer only of the exploding box on pg. 11, scored the fold lines and inked all the folds on the inside and outside. To make this project even quicker I used coordinating double sided paper from my stash so I didn’t have to cut any panels to decorate it. I also used a couple of leftover stickers from my stash for decorating the top.


I suggest that you put the thicker objects on panels across from each other and the thinner items on the other 2 panels, that way when you close up the box the folded “wings” have somewhere to hide without distorting your box. I left these “wings” in to provide support since the gum and cookies are heavy. I stacked pop dots on the bottom of the cup until they were tall enough to stick to the center of the box bottom. The empty panel is waiting for a Starbucks Gift Card. They were out of the Happy Birthday ones the day I was in there getting the cup, samplers and gum.


The Banner came from the Artiste chipboard and stamp set that came with the cartridge (pop dot it up to make room for the ribbon to slide under). The cut itself is on page 35 cut at 1 ¼ “. I used a coordinating VersaMagic chalk round the edges of the banner. Butchers string was used as a ribbon since it matched the ribbons on the paper.

Next I decided to make a card from the Creative Card Freebies. When I first saw the samples I thought they were a little too plain for my taste so I wanted to “bling” one up to see if I would like it better. The card on the right was just cut and assembled. The card on the left was embossed, glittered, inked and bling’d up.


The extra bling didn’t take too long so I guess this cartridge would come in handy to use in a pinch when I needed a card quickly.
NOTE: I sized the card in CraftRoom to be a 4 ¼ x 5.5 and only cut the layers. I used up some of my stash of 8 ½ x 11 cardstock cut in half for the bases of the cards instead of cutting them on the cricut and I have tons of envelopes. Skipping those items saved a lot of time making these cards.
Thanks for stopping by, Freda

Cricut Info and Other Supplies:
Designed by: Freda
Cartridges Used: Mini Books, Artiste, Creative Cards
Cricut Machines Used: CCR, Cricut E2
Other Supplies Used: card stock, distress ink, swiss dot embossing folder, Queen & Co Goosebumps & Rhinestone Trios, CTMH Artiste stamp set & chipboard, extra fine glitter.

Friday, January 25, 2013

Happy 1st Birthday - Teddy Bear style


Hi this is Terri from http://www.scrappinwiththebug.blogspot.com/. Wow where has this year already gone.
A few weeks ago a friend asked me to help her create a cute little "bear" theme for her son's 1st birthday. She also owns a cricut and wasn't too failure with it. So I told her to come over and we would play I mean create something. We brain stormed for a while and came up with what she wanted.

This took us a few weeks to put together as it was lots of little things - and then also design changes, waiting for a special product.
The fun thing about the bear is we did laminate him - and I made several extra noses - they used the noses with names on them to play pin the nose on the bear.
The first thing was we found the perfect bear from the BEST cartridge - I mean my new favorite cartridge Teddy Bear on Parade. I cut the bear welcome sign at 15" - and I will admit I cheated. I didn't use a 12x24 paper (as I didn't have brown in that color). I used my gypsy and created the upper section - since I knew the bear would be covered then I just cut the top 1/2 of the bear then the bottom 1/2 of the bear by moving the bear up/down on the mat.

The paper is all printed from the imagine - and what I did was just made little .4" small circles on the screen then colored them differently . She wanted to keep with a royal, teal, green, light blue theme. The shirt comes on the Birthday Bear but not the pants. She wanted little pants (actually her husband said it looked like a skirt w/ the banner). So I found another bear w/ pants and made them and tweaked them slightly on the gypsy.  I knew she was going to use this a few different places/times so I actually cut it out 3 times 2 out of cardstock and 1 out of thin cereal box so it would with stand the different uses.

All the letters are from Birthday Bash cartridge - these on the Welcome banner were cut at 3/4", and the name Brayden cut at 3/4" welded w/ the gypsy.
Next we worked on the Happy 1st Birthday, and I am 1 signs.
We used stock card stock from Michael's - and cut a 5" scallops, 4" circles and 3" letters.

The smaller bears holding the banner are cut at 5".

Now here was the fun fun fun part. We made his cute little T-shirt. It is from a special iron- on printable fabric from Square1 masterpiece. I will say this was so fun making the shirt. We made the #1, Brayden on the little birthday hat too from the same stuff.

I again selected small circles on the imagine at .8" and flood field the circles w/ the different colors. I then cut out the 1 from Birthday Bash that measures at 5.12 x 3.22. (I used the gypsy and then cut it off on my expression). The bear measures at 2" printed again on the iron on fabric. The name Brayden is 1" x 5 long welded. We did use the layer function and I will say this was very easy to put together. Just iron and it was done. The cool thing is it is washable.


We also made the cute little birthday hat. That is also printed iron-on fabric. I will admit I didn't make the bib - my friend did though - using just regular iron on transfer paper. The saying is very cute, "It's about time I got some cake to wash down all that milk". She also printed it on the back of his shirt.

Well I hope you enjoyed this cute little birthday decorations.

Designed By: Terri Szymanski
 
Machine Used: Cricut Expression, Imagine, and Gypsy

Cartridges Used: Teddy Bear on Parade

Other Materials: Card stock, Square1 master piece printable iron on fabric.
 
Thanks for stopping buy and Happy Scrappin'

Sunday, October 14, 2012

Boxed Birthday Card

Hello!  This is Nadia from the my blog, With Glittering Eyes.  Today, I have a boxed birthday card to share!

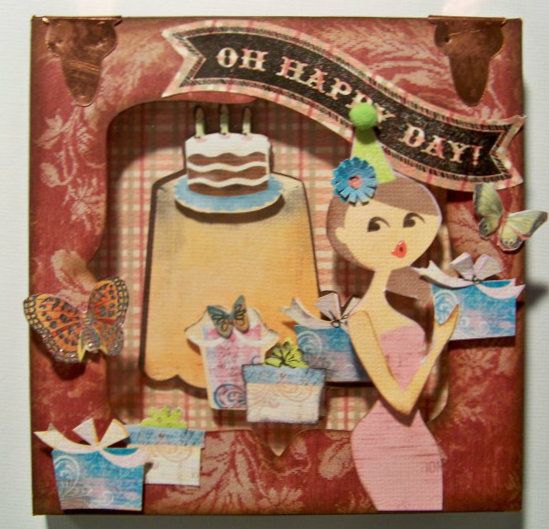
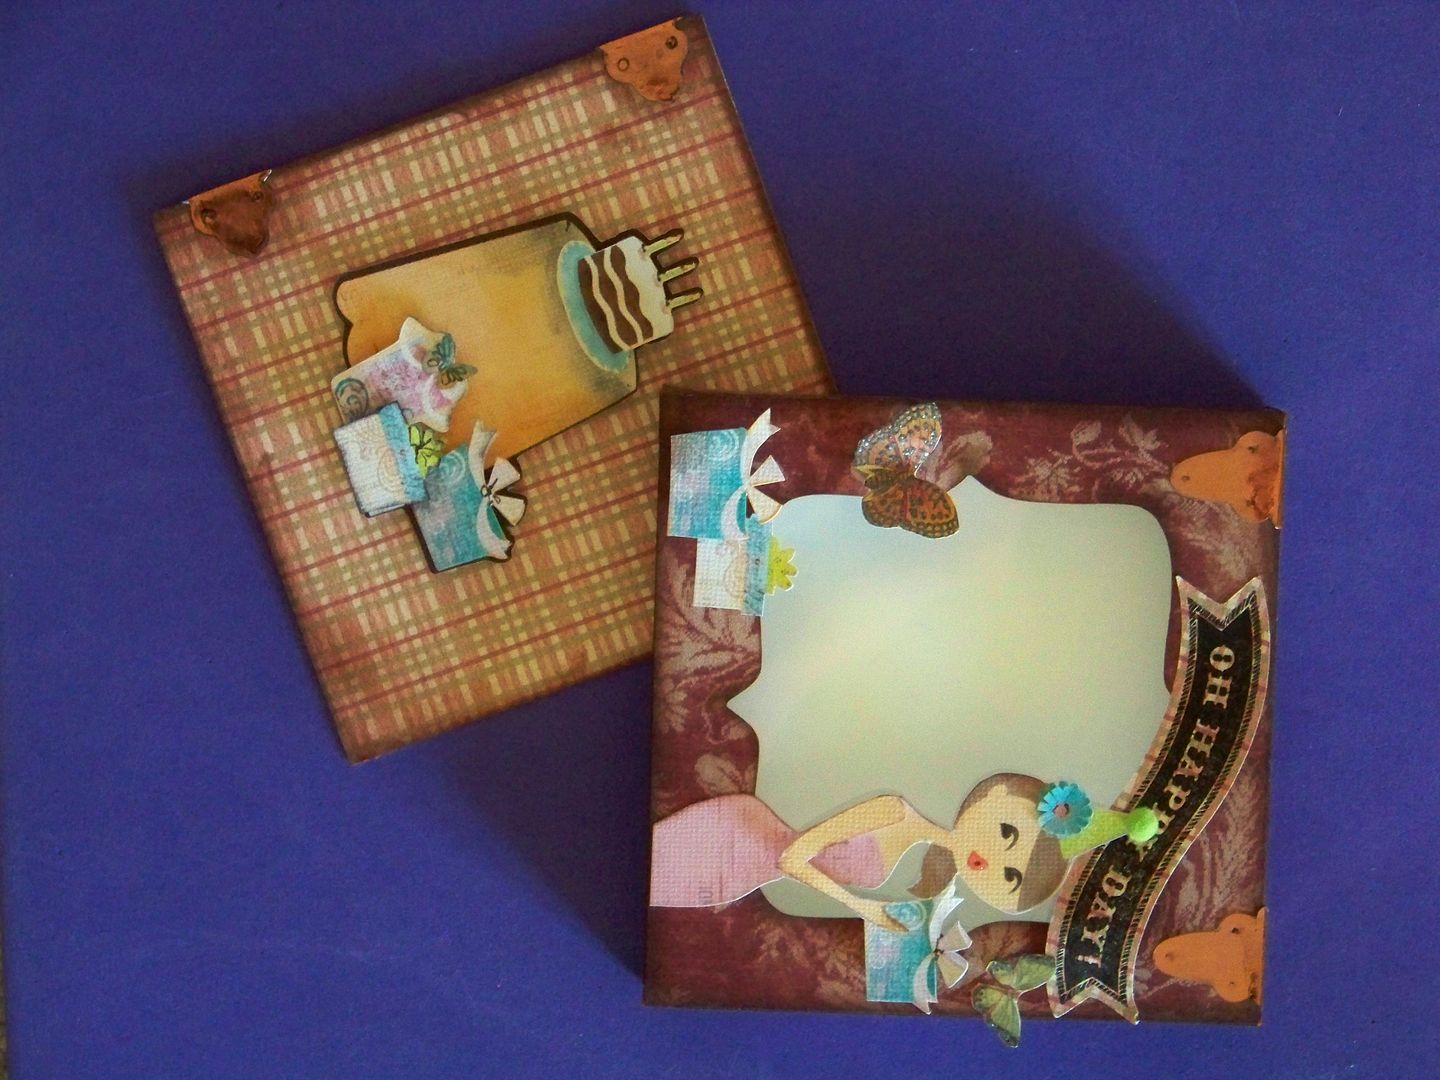
Sometimes the card we make is the gift we give.  To make it more gift-like, I have been thinking about creating boxes for cards that are part of the design, where the card peeks through a window.  With this idea in mind, I decided to make a boxed birthday card for my message board friend, Sherry (Octoberbeauty), who is having a milestone birthday this year (yesterday actually).  We share a day as designers on this blog!  


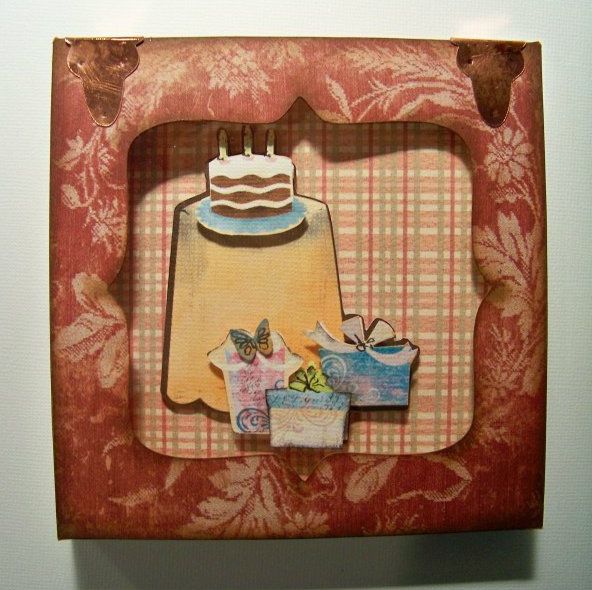
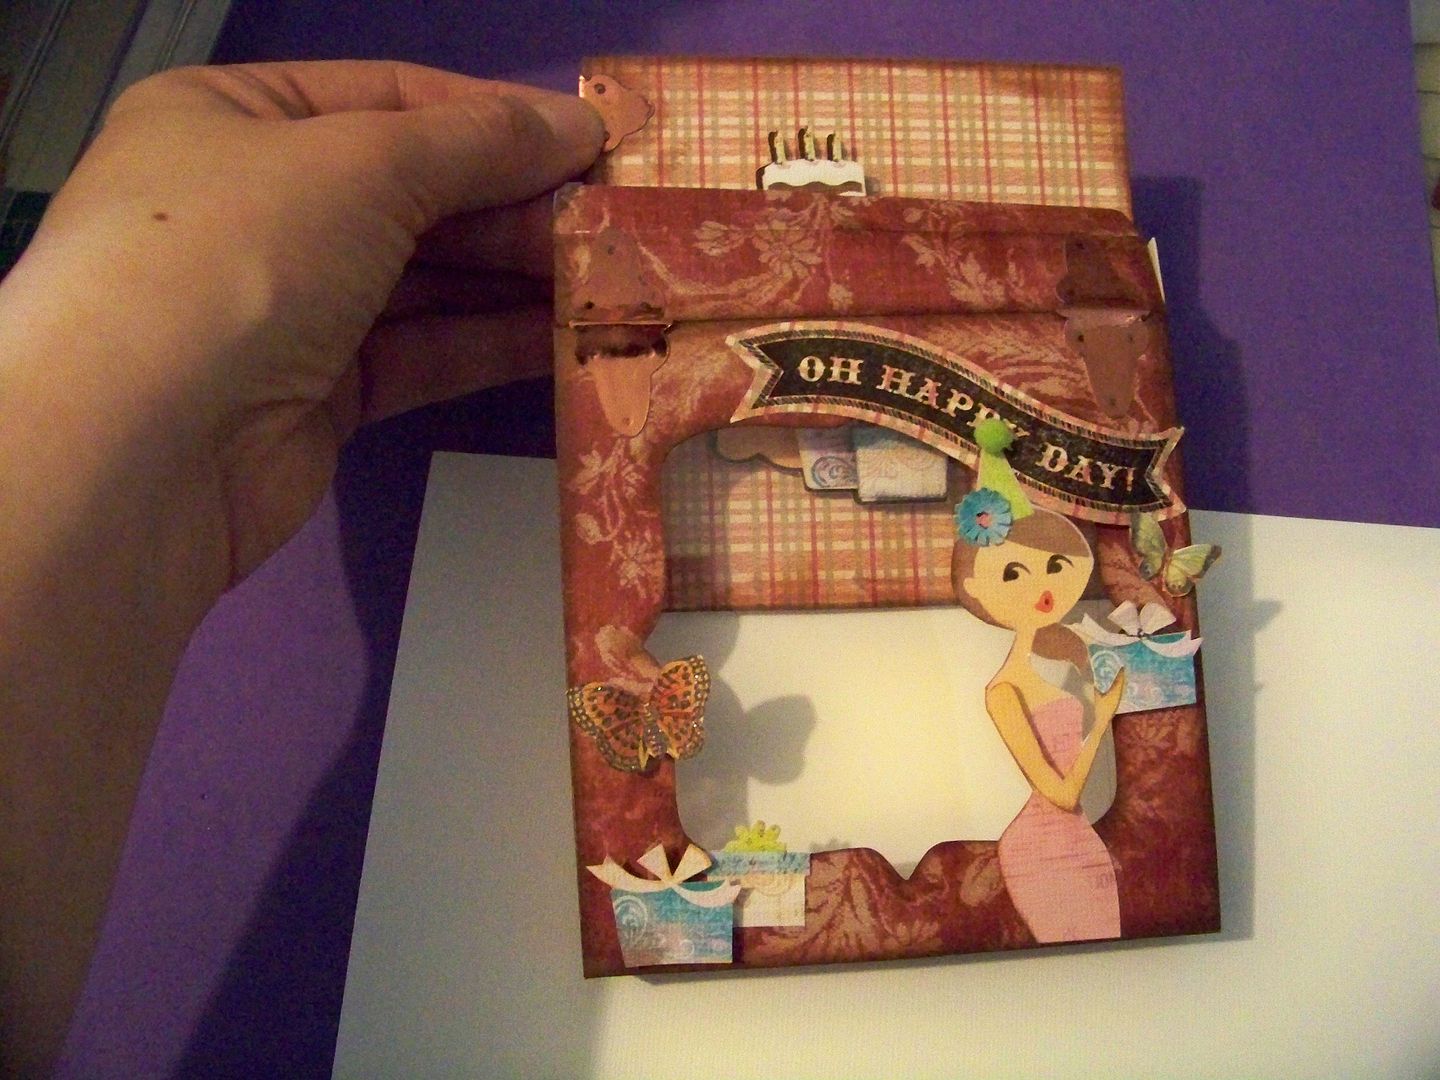
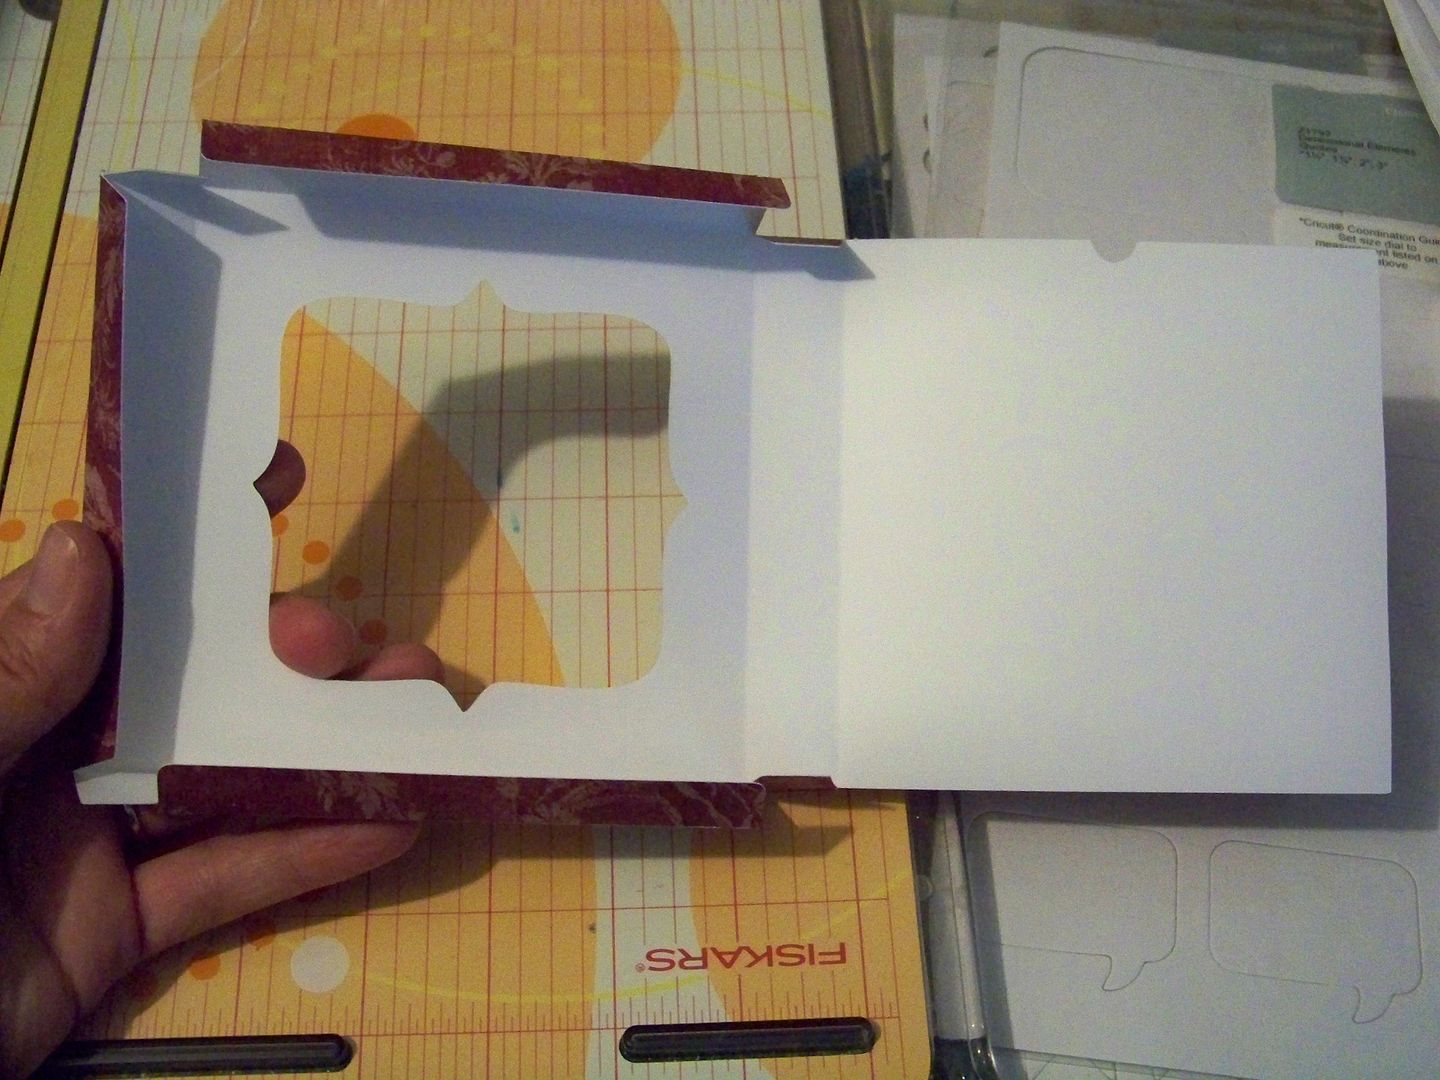
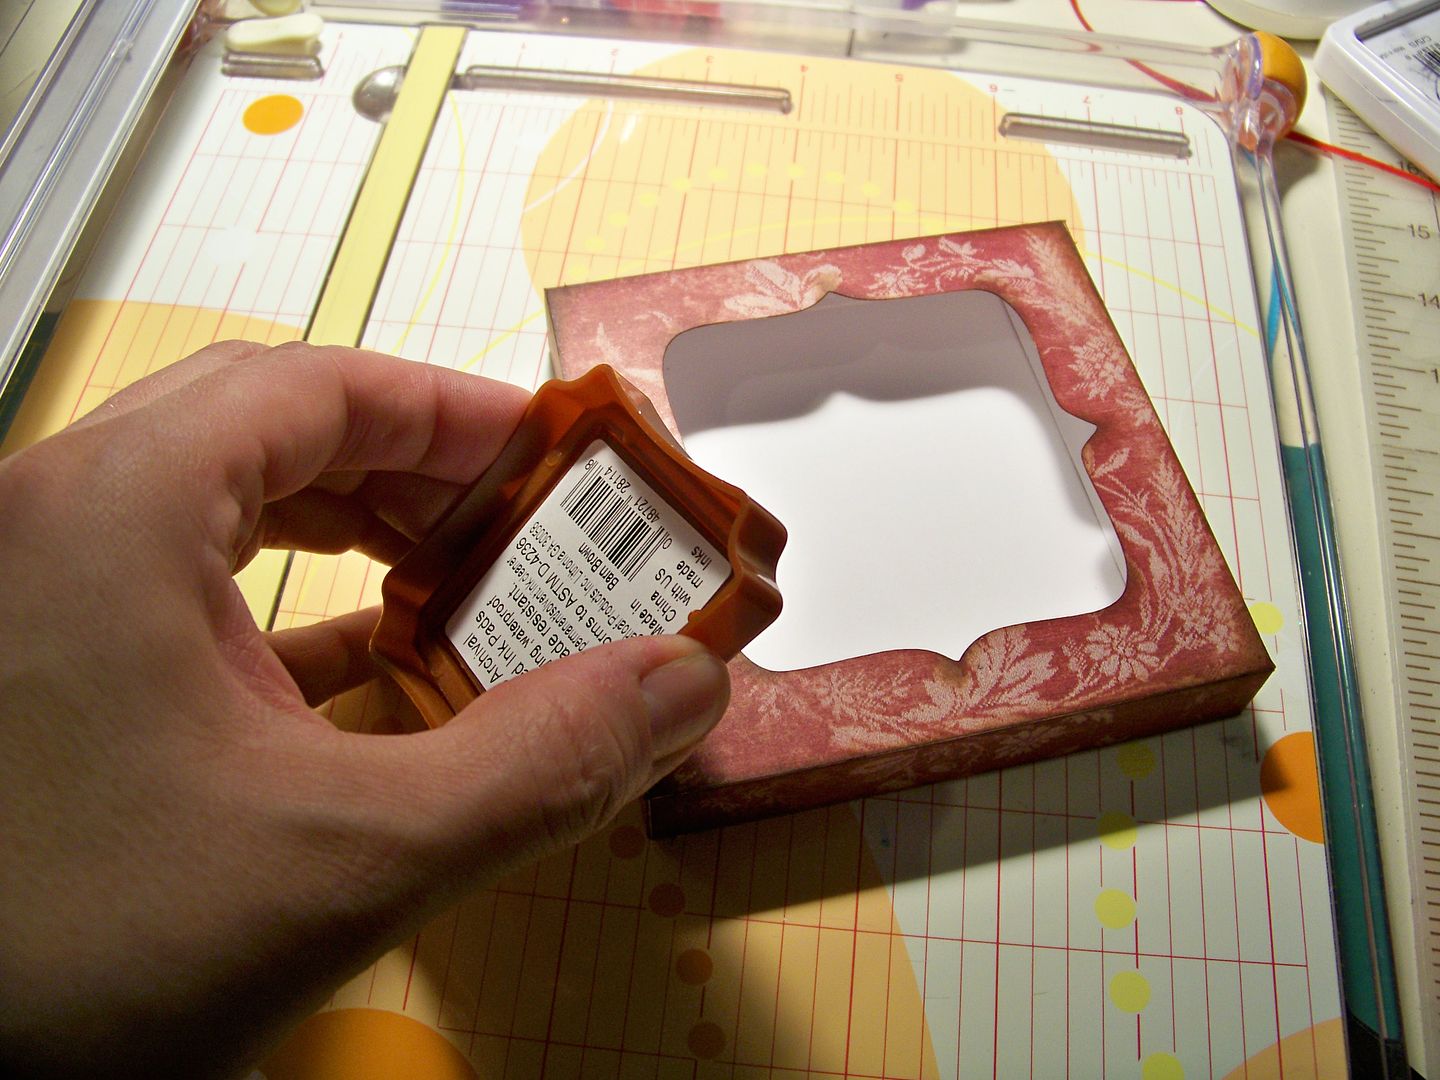
First, I created a box using Cricut Wild Card (page 80), cut at 7".  I used a print and positioned the paper on my mat for cutting with the Expression by placing the top of the print on the right of the mat. I later cut a piece of recycled clamshell for a window at 4-7/16" square.  (Packaging from Cuttlebug folders works great for this!)


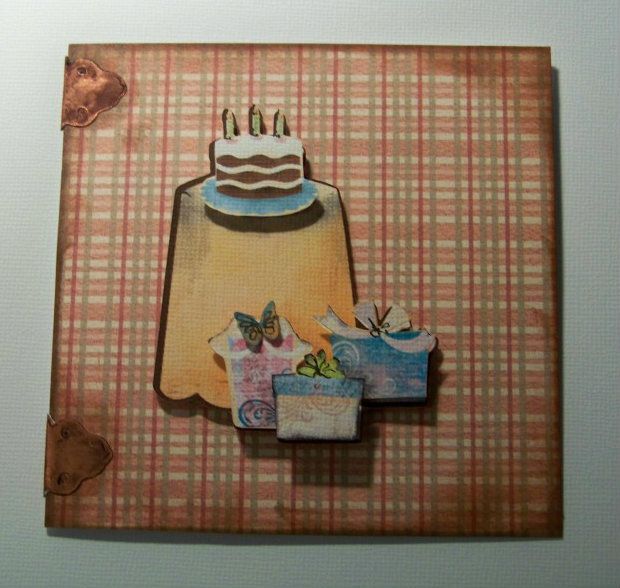
Next, I cut a card to insert by cutting an 8-7/8" x 4-7/16" rectangle on the paper trimmer.  I scored at the middle with an Xacto knife to have a card that finishes at 4-7/16" square.  I cut a decorative paper at 4-7/16" and applied to the top.  


I used a brown ink pad and rubbed it over the edges of the box and card to give it a little character... you know, the way aging gives character.  (Get used to the aging jabs, you whippersnapper, you!  Just another service I provide as a person who is older than you, Sherry.)


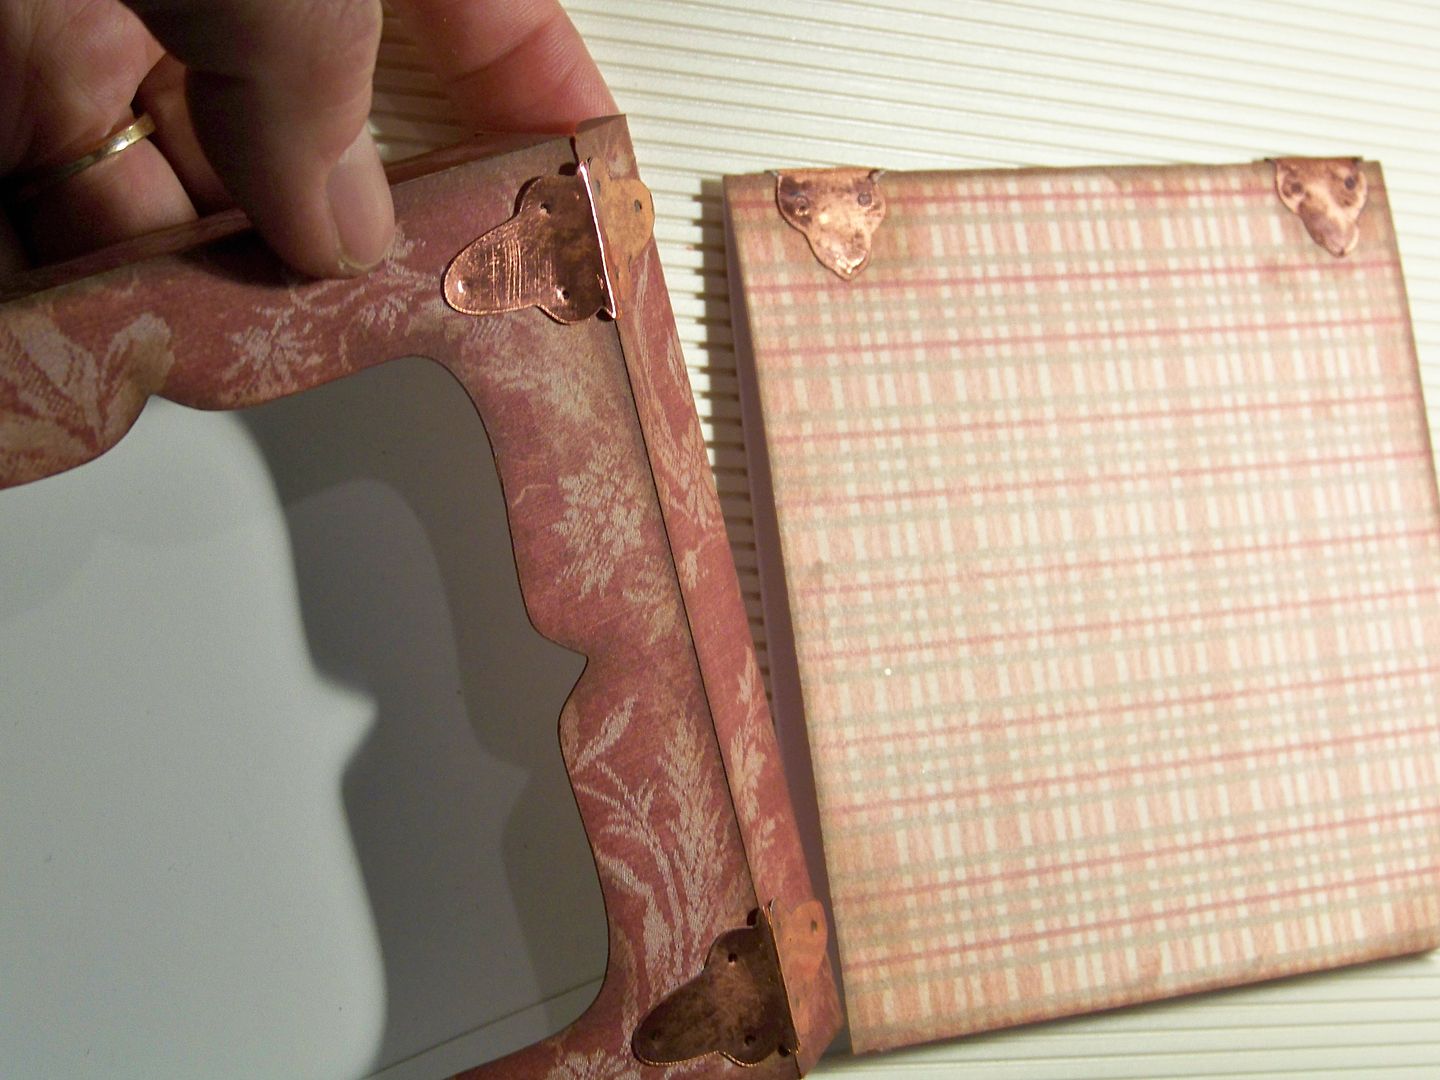
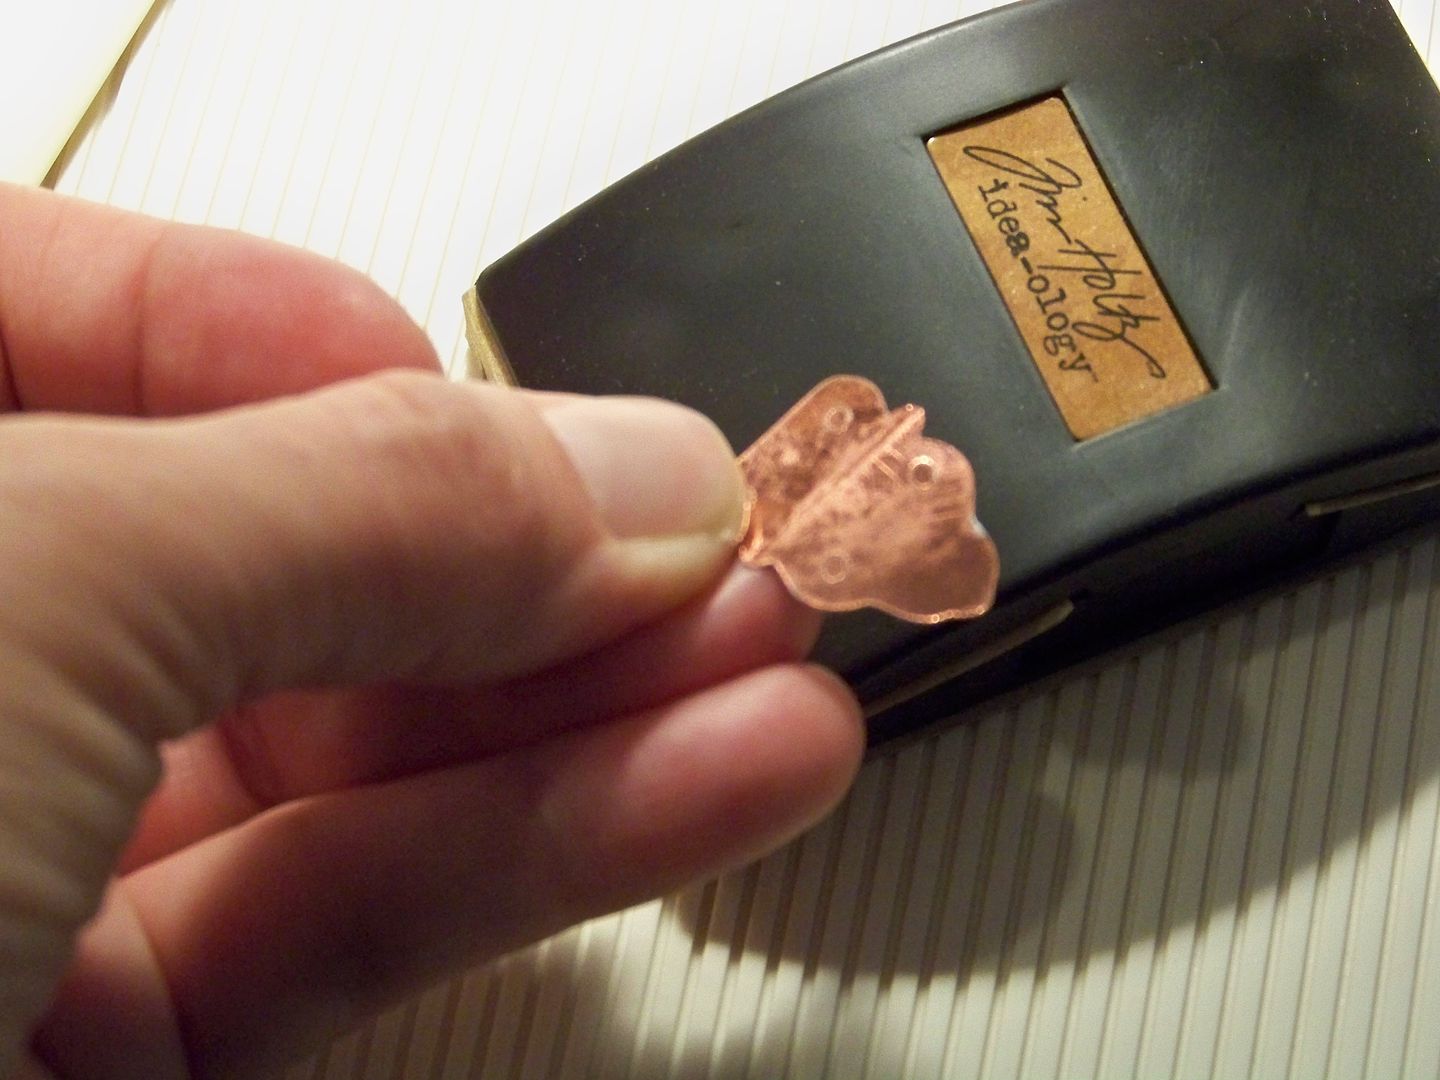
I created hinges-- more character-- by cutting them from Fabulous Finds (page 118) at 3/4".  I sanded the metallic paper to scuff it up and make it more authentic-looking. I scored the centers with a bone folder to help them bend smoothly.  I attached the hinges to the fold of the card and the top of the box at the opening with Scotch Quick Dry Glue and used a burnishing tool to indent them where screws would be inserted on a real hinge.


For the card insert, I added artwork from the Imagine Yummy cartridge, cutting extra layers to pop up for dimension.  I kept it simple because the box design elements had to work with it. I added a tiny hand-colored butterfly.  These elements were popped up 1/8" to 3/8".


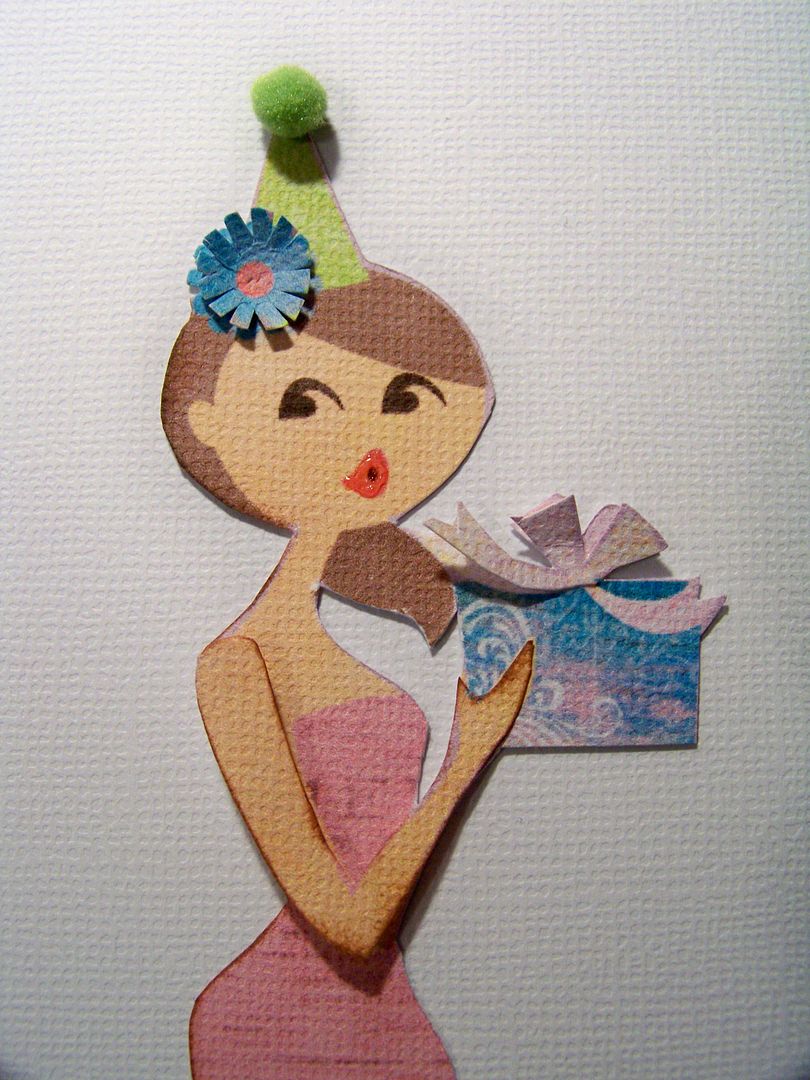
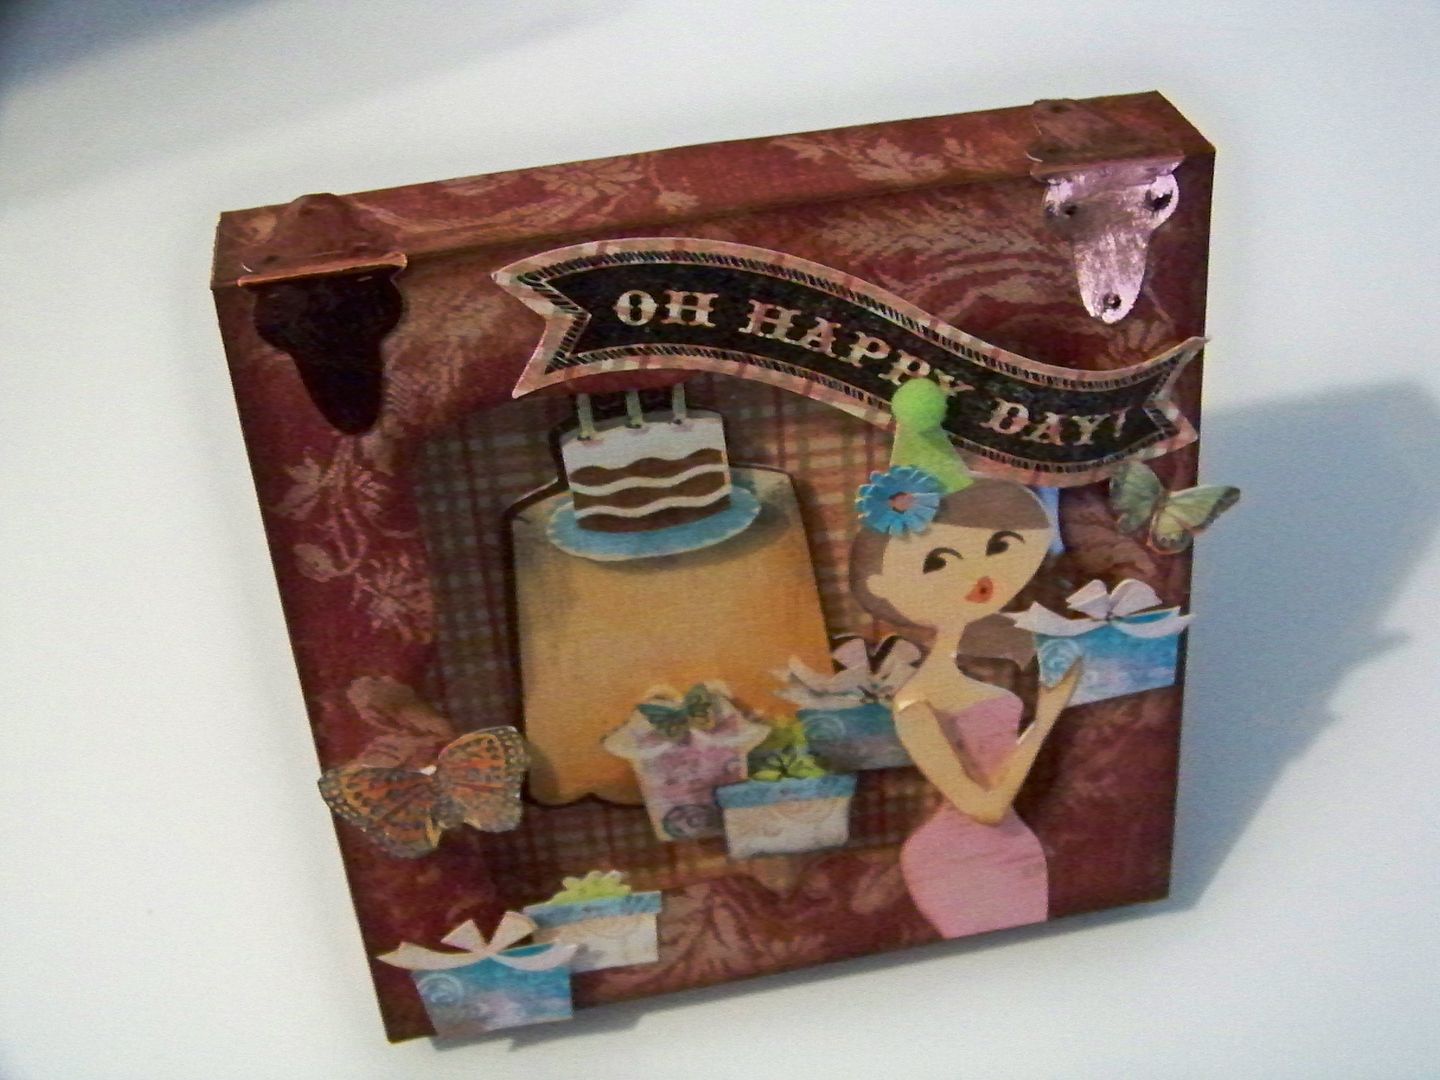
For the front of the box, I printed and cut a 6" figure from the Yummy cartridge twice.  I cropped off her legs, hand-cut off one arm from the second figure and popped it up and inked it for dimension.  I added an extra popped up bow and flower on her hat.  I added a pompom for her party hat and Glossy Accents to her lips.


I applied her to the box with 1/8" pop dots on her upper body and box, but adhered her flush at the bottom.

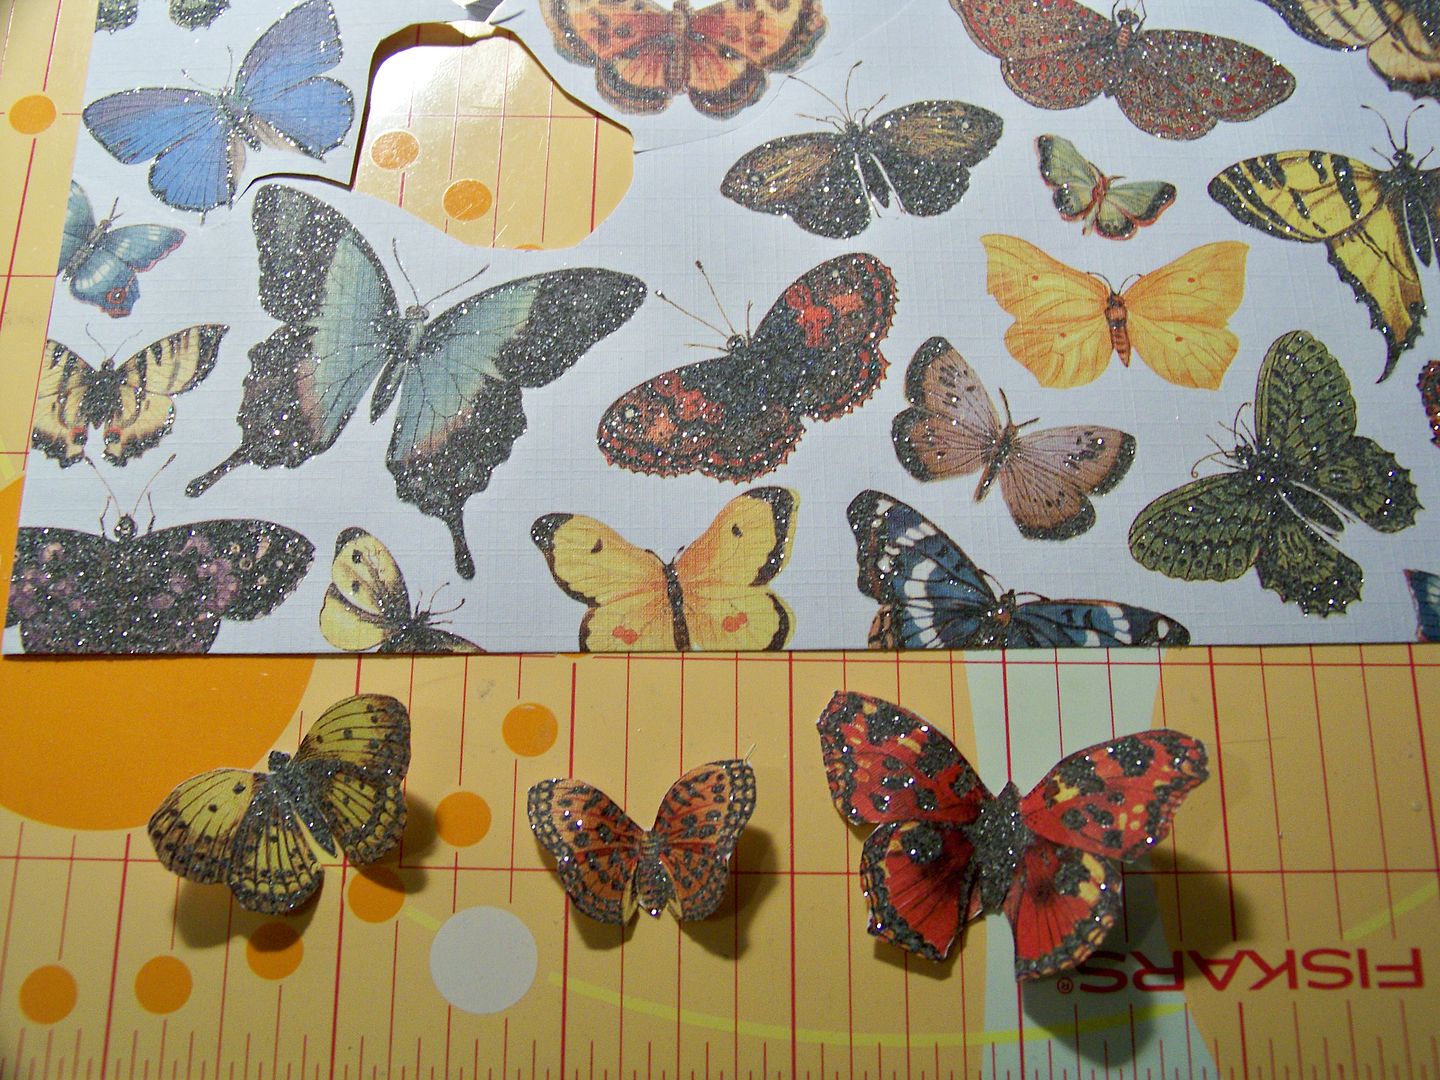
I hand-cut butterflies from a glittery printed paper for the box front embellishments.


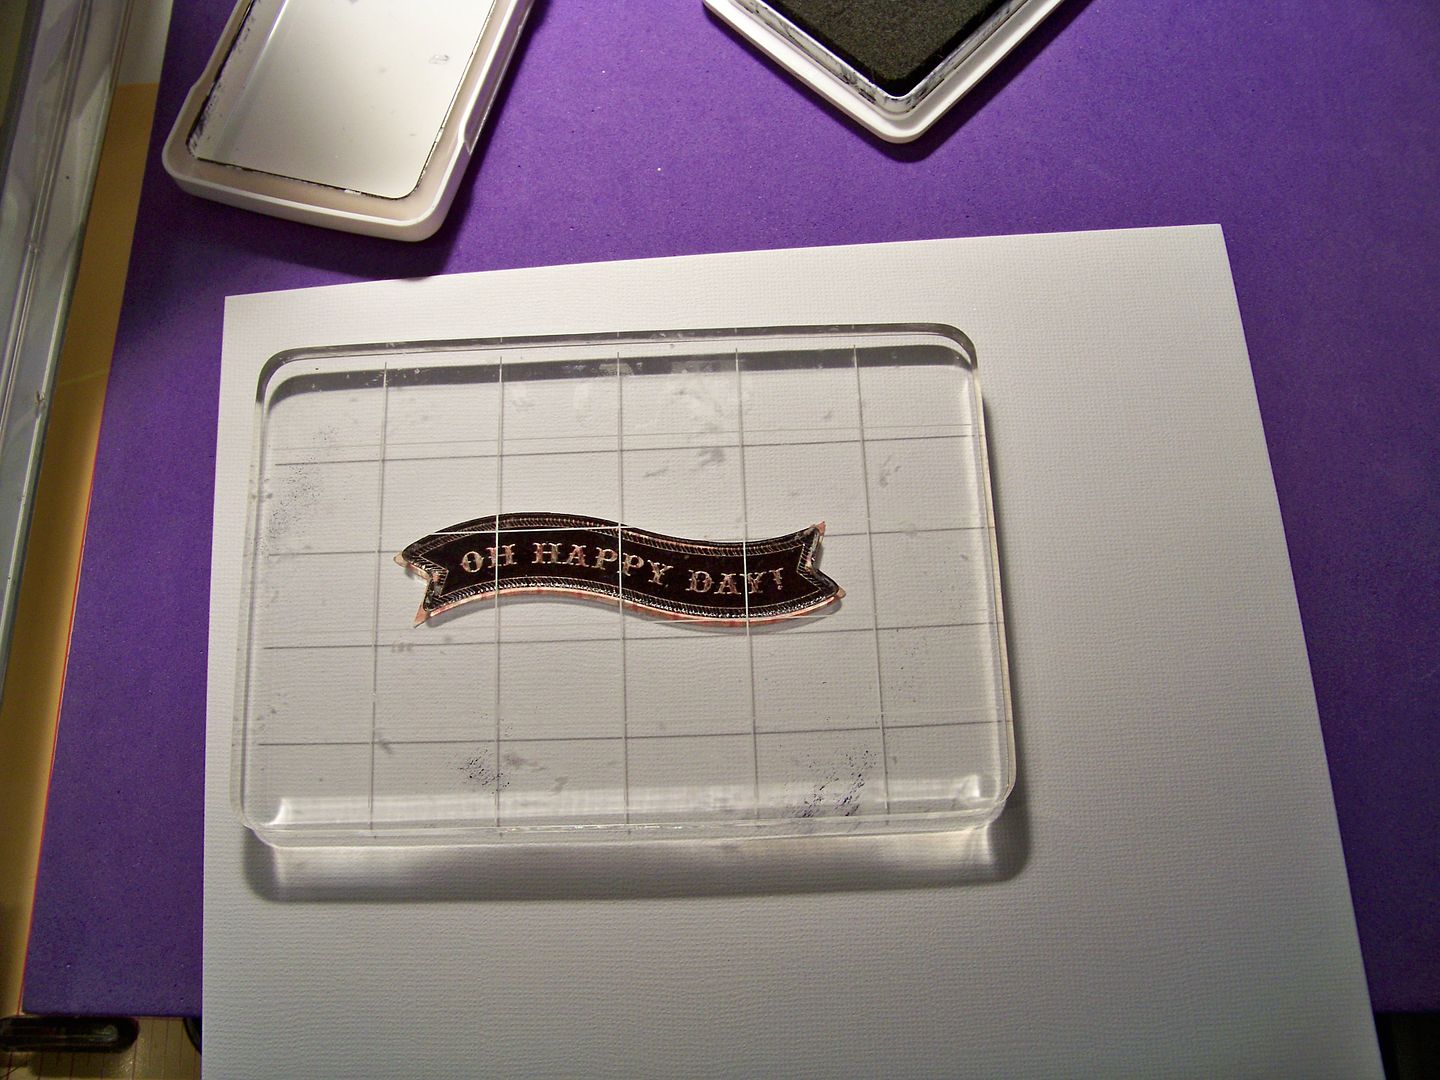
I cut a banner from Artiste (page 58) at 1" in the same plaid used on the card insert and stamped it with the coordinating CTMH stamp.


I adhered the banner after bowing it out.  The butterflies were adhered with pop dots and Scotch Quick Dry Glue.  I added extra packages, popping up one.


When the card is inserted...


It becomes a fun, boxed gift card!


To Sherry:  I hope you had a Happy Birthday yesterday!  (And I hope my card got to you before you saw this post... if not, well, surprises are over-rated anyway and hard on the aged... hahaha)  And I am looking forward to your project later today on this blog!

For everyone else, thank you for checking out my project today!  You can see many of my previous projects by visiting My Project Gallery on my blog.....And be sure you visit my blog November 10 when I will be part of the Holly Jolly Blog Hop!


Cricut Info & Supplies Used:
Designed By: Nadia Herbst-McConnell
Cricut Machines Used: Expression and Imagine
Project Type: card
Project Theme: Birthday
Cricut Cartridges Used: Wild Card, Fabulous Finds, Yummy, Artiste
Suppies Used: Card stock and metallic paper from my scrap bin, ATG tape, Scotch Scrapbookers glue, 1/8" foam squares (pop dots), white and black gel pens, brown and black ink pads, recycled clamshell plastic, Terrifically Tacky Tape, sanding block, Artiste Stamp from CTMH