While we are no longer making active post of Cricut projects on this blog as of 8/1/2013, we invite you to use it for continued die cut inspiration as we will leave the blog up for viewing. Happy Cricuting !

Showing posts with label Kids. Show all posts

Monday, September 24, 2012

Cute School Home Decor Project

Good morning everyone!  This is Julie (Hurricane Zuri on the Cricut message board) of http://mommys-playroom.blogspot.ca/. I am really happy to be a part of the Cricut FANatics.  Today I have a home décor project to share with you.
 
As I was thinking about what type of project to do, I was also dealing with my entire family being sick.  It seems that the beginning of each school year brings home new germs.  So I decided that a school themed tissue box cover would be an appropriate project.
 
 
 To make the box cover I used the Gypsy and the George and Basic Shapes Cricut cartridge.  The yellow portion of the cover measures 15“ x 4 ¼ ”.  It is scored at 5 ¼” and 9 ¾”.  The red portion is the same size with four 1” x 5 ¼ ” rectangles welded to it and scored for the tabs.  I welded an oval (cut at 1 ¼” wide and 3 ½ “ tall on the Gypsy) to both pieces for the opening on the top.


The chalkboards measure 4 ¼ “ x 5 “ with white faux stitching added using a white pigment ink gel pen.  All of the images are from the Recess Cricut cartridge and were adhered with pop dots.  The pile of books was cut at 2 ¾”.  I embossed the apple using the PC Divine Swirl embossing folder to make the apple pop a little.  I love the dimension it adds. The veins on the leaves were drawn in with a Stampin’ Up Old Olive marker.  The stem was colored using a Stampin’ Up Early Espresso marker.  I embossed the pages of the book using the Stampin’ Up  Woodgrain embossing folder. 


My favorite part of the tissue box cover is the old-fashioned school house.  It was cut at 3 ¾ “.


I always picture an old school house as brick.  I used the PC Brickyard embossing folder to create the look.  The school bus was cut at 2 “ and the ABC was cut at 2 ½ “.
I hope you enjoyed my project today.  Have a wonderful week!

Cricut Info & Supplies Used:
Designed By: Julie (Hurricane Zuri on the Cricut message board)
Cricut Machines Used: Gypsy, Expression, Cuttlebug
Cricut Cartridges Used: George and Basic Shapes, Recess
Other Supplies Used: PC Brickyard embossing folder, PC Divine Swirl embossing folder, Stampin’ Up Woodgrain embossing folder, assorted colors of cardstock, Uni-ball Signo white gel pen, Stampin’ Up markers, pop dots, adhesive
 
DON'T FORGET TO LEAVE A COMMENT THIS WEEK ON EACH DESIGNERS POST SO YOU HAVE A CHANCE TO WIN A CARTRIDGE.

Tuesday, September 18, 2012

Bus 87

Hello everyone! This is Michele, aka dancingarden on the Cricut Message Board. You can visit my blog at Scrap - N - Dance!  I have created a layout for you with the Cricut Stencil material!


I wanted to go along with the "back to school" theme for the month but we will be homeschooling our son... however, I just started this year working part-time driving a school bus! My son gets to ride with me so we don't have to do any sort of day-care - what a great job perk!  So I decided I would do a page about me driving the bus (and my son riding along!).

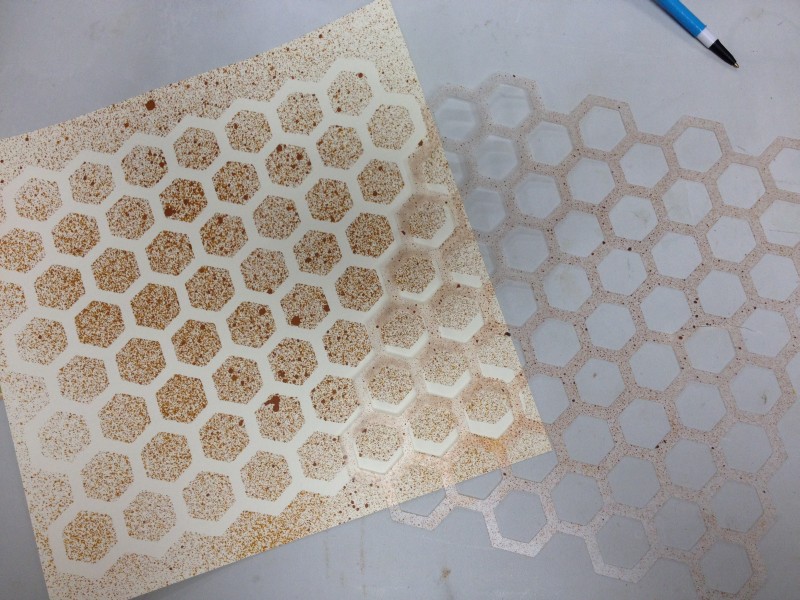
Some of us Circle members got to use the Cricut Craft Room Exclusives for free during August! So I spent most of the past month and a half cutting things from those CCR exclusives, using my gypsy. In this case, I used the CCR exclusive Teresa Collins Basics, the honeycomb background, which I used to cut the Cricut Stencil material. I set it up on my gypsy to cut as large as it could on the mat, which you can also do on CCR.

Have you ever used the stencil material? It's SO EASY! I followed the settings instructions on the box:  Speed 3, Pressure 5, Blade Depth 6 and multicut 2.


The stencil cut perfectly! I actually cut two of these since the stencil sheet is 12x24, and gave one to a friend. :)

I used some spray mist (in this case, Ranger's Butterscotch) to spray the stencil and cardstock. Do you know the stencil has a sticky back? You just remove the backing and stick it to the cardstock (or other surface). It came right off the cardstock after I'd let it dry.  However, after I used this color, I realized it didn't "go" with my photos!

So I tried a different color, Glimmermist Jazz Blue. :)  This color was perfect for my project! I love that my stencil is re-usable!

I finished up my layout with Jillibean papers and stickers from my stash (I've been trying to use up my stash!), the title is cut from the Street Sign cartridge.

I hope you try out the stencil material! I loved working with it and I'm glad I have another package of it! :)  Happy crafting!

Cricut Info & Supplies Used:
Designed by:  Michele Donner-Ramsey
Cricut Machines used:  Gypsy, Expression
Cricut Cartridges used:  CCR Exclusive Teresa Collins Basics, Street Sign
Other supplies:  Jillibean papers, stickers; Glimmermist Jazz Blue, EK Circles Scallop border punch, mini alpha stickers, cardstock, Cricut Cutables Adhesive-backed Stencil Material

Friday, September 14, 2012

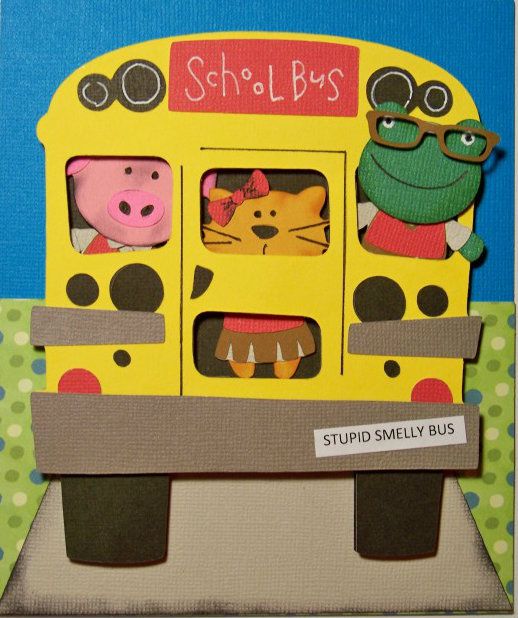
Back-to-School Card -- Stupid Smelly Bus

Hello!  It's Nadia from my blog, With Glittering Eyes, and I have a fun back-to-school project to share!  Later this month, I will be out-of-town for a few school days so I thought colorful cards for my daughter would be fun ways to remind her that I am thinking of her even though I will be far away!  I am sharing one here today!

For my card, I used animals that I morphed together with Teddy Bear Parade to create new and different critters that wear the little school uniforms!  You can see my initial post on that by clicking here to see a whole menagerie of characters!  Some of the critters from that post were used on this card.  

Stupid Smelly Bus card...


Here's a little background bit:
There are no buses at my daughter's school but we always get behind at least one heading to another school on our morning commute! In Kindergarten and First Grade, my daughter used to enjoy reading Junie B. Jones stories.  Once she read the Stupid Smelly Bus, we started referring to all school buses that way, in honor of Junie!  My daughter is always intrigued by what goes on in a school bus... always making up scenarios as we pass them or follow them.

For this card, I used three critters from a previous post on my blog, adding school uniforms.  I stuffed 'em in my favorite bus cut and added a little scenery to plant the bus on the road! 


Crafty Details for Stupid Smelly Bus:
  • This card finishes at 5" wide by 6" tall and is created by simply scoring a 6" x 10" rectangle of card stock in the middle.
  • Pig - body cut at 2" on the Expression from Teddy Bear Parade; head cut at 2" from County Fair. (Head was manually separated from the body).  School uniform cut from Teddy Bear Parade at 2".
  • Cat -  body cut at 2" on the Expression from Teddy Bear Parade; head cut at 1" from Doodlecharms.  School uniform cut from Teddy Bear Parade at 2".  
  • Frog -  body cut at 2" on the Expression from Teddy Bear Parade; head cut at 1-1/2" (real dial size) from New Arrival.  School uniform and glasses cut from Teddy Bear Parade at 2".  His glasses are popped up 1/8".

  • School bus - cut at 5" on the Expression from Locker Talk (page 34).  Rear bumper was popped up 1/8".  Two black bases were cut and 1/8" pop dots were used between the two bases to create a little space for the critters to exist in.  I adhered one black base to the the yellow bus, removing the windows.  (After the critters were placed, I connected the two bases with the pop dots.)   The bumper sticker was trimmer-cut after printing with Microsoft font.

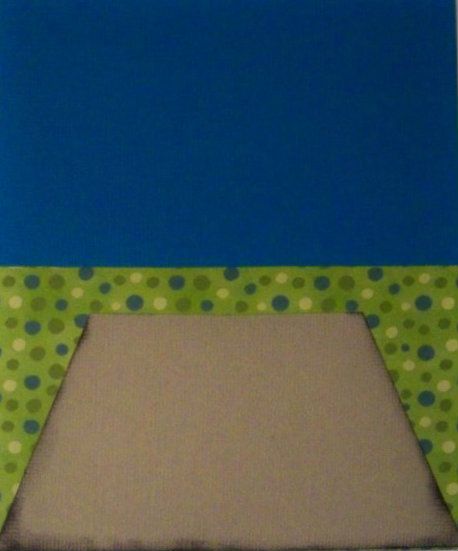
  • Blue base - trimmer-cut at 5" x 6"
  • Green mat - trimmer-cut at 5" x 3"
  • Gray mat - trimmer-cut at 2-1/2" high with top cut at 2-7/8" and bottom cut at 5"


If you enjoyed this card, check out my new project on my blog.  It is a whole classroom vignette in a shadowbox, called Ms. Elephant's Third Grade!  There are lots of fun details, pictures, tips, and lots of new morphed animals!  Additionally, later in the month on my blog, I will be posting the whole set of back-to-school kids cards like the one I have shared here.  Hope to see you over there! 


Here's a sneak peek of Ms. Elephant's Third Grade:


Cricut Info & Supplies Used:
Designed By: Nadia Herbst-McConnell
Cricut Machines Used: Expression
Project Type: card
Project Theme: Kids
Cricut Cartridges Used: Teddy Bear Parade, Locker Talk, County Fair, Doodlecharms, New Arrival
Suppies Used: Card stock from my scrap bin, ATG tape, Scotch Scrapbookers glue, 1/8" foam squares (pop dots), white and black gel pens, black ink and sponge applicator
DON'T FORGET TO LEAVE A COMMENT TO BE ENTERED TO WIN OUR WEEKLY DRAWING IN SEPTEMBER.

Wednesday, September 5, 2012

Cricut Crafty Challenge #1- Back to School


Welcome Everyone to the Cricut Crafty Challenge day!
This is Becka from Creations With Becka and I am so excited to share the very first Cricut Crafty Challenge with you all today.
This time of year is all about getting the kids back to school, so this month's challenge is to make a Back to School gift, layout, card etc.
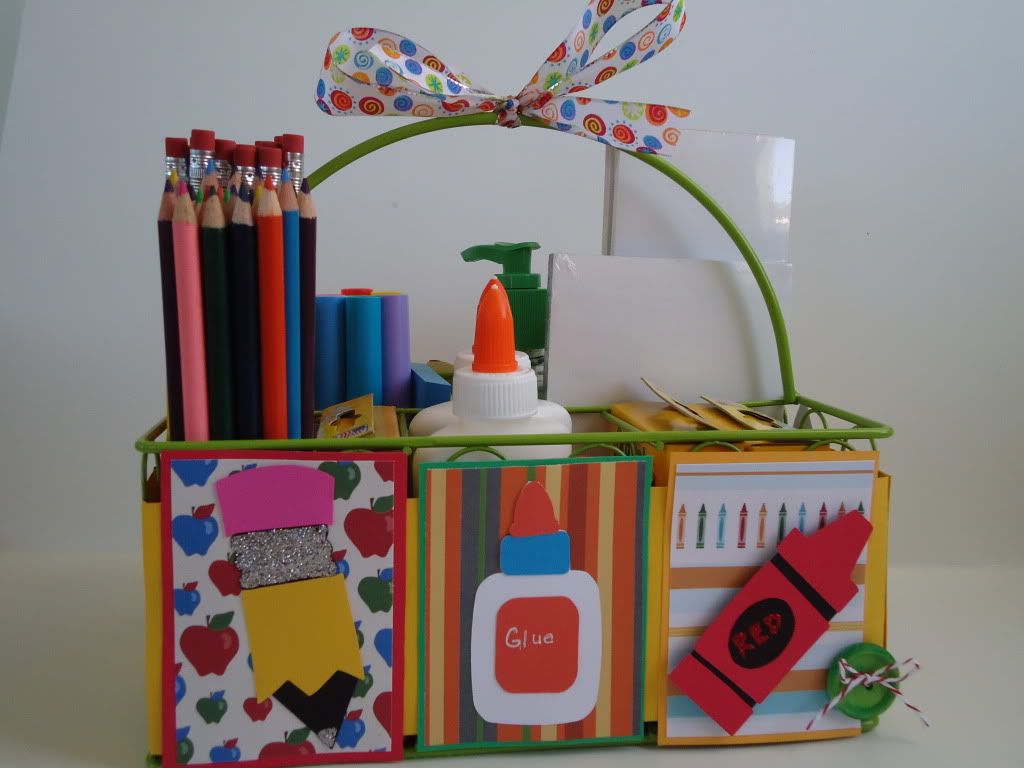
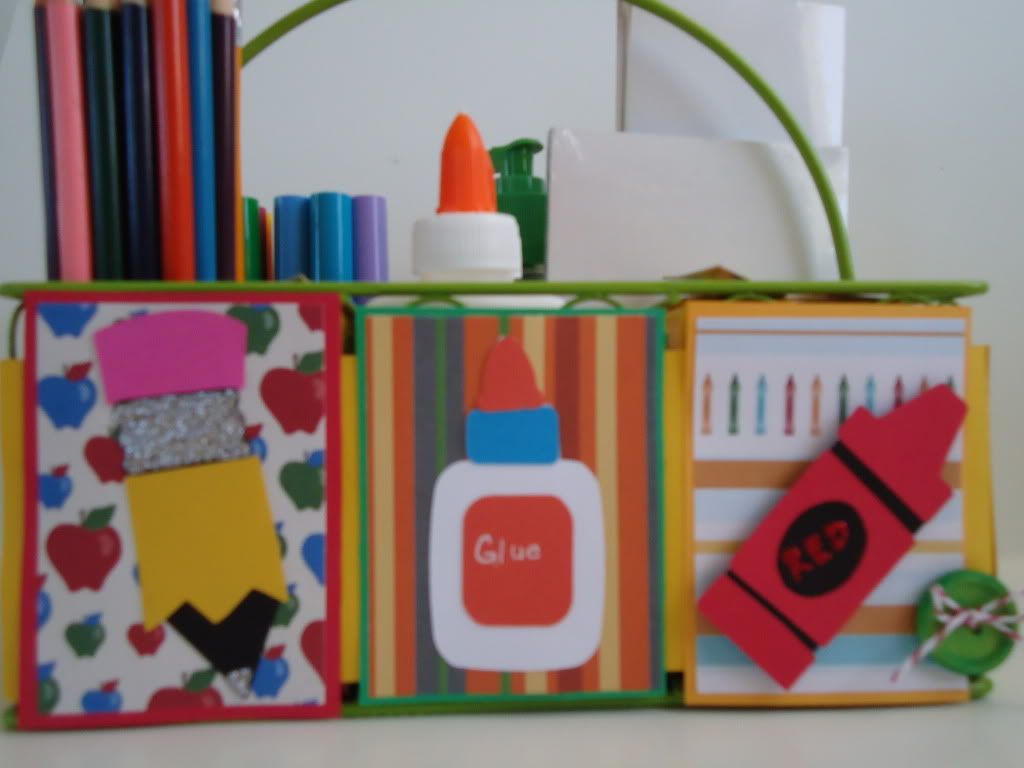
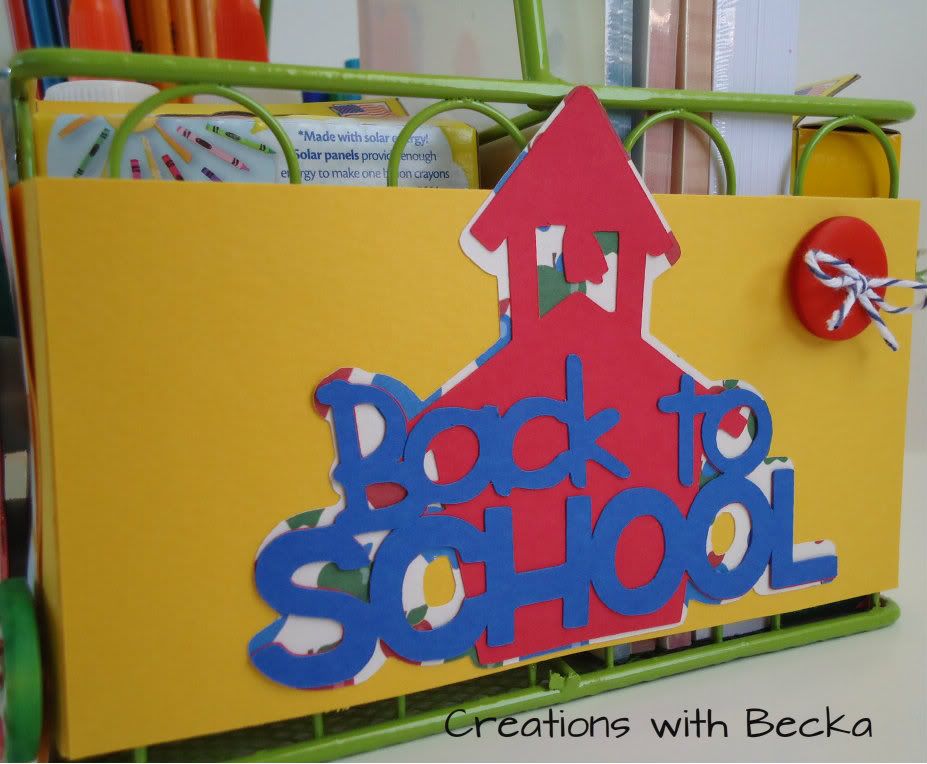
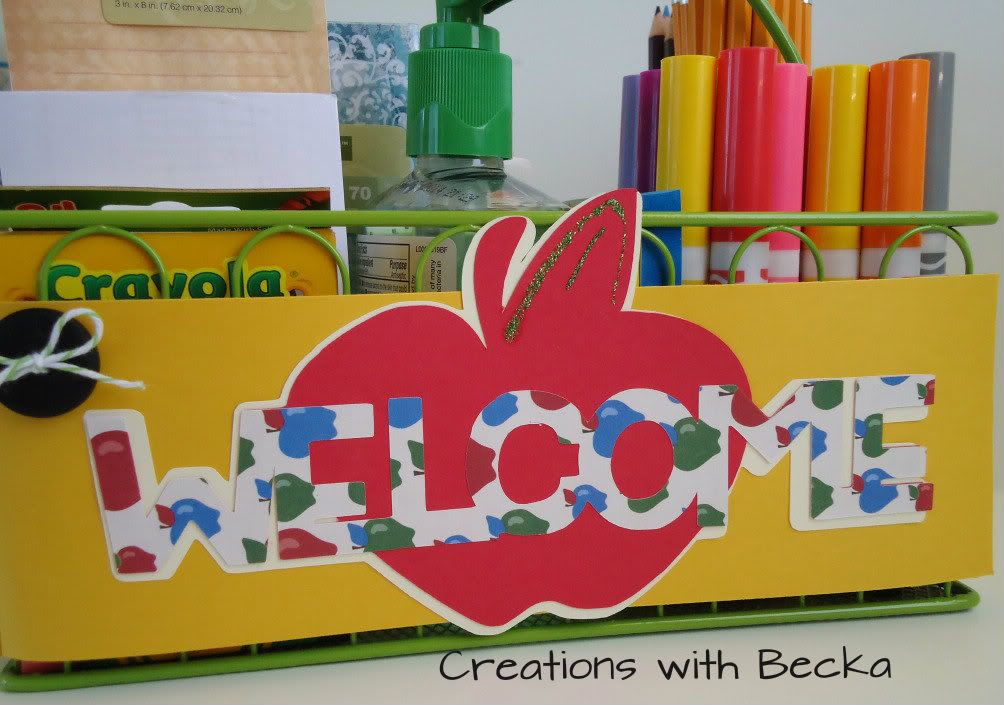
I made this awesome supply basket to give to my son's teacher on the first day of school. He started 3rd grade this year and has two new teachers. So I thought we would welcome them with this gift


 For my project, I  first wrapped the basket with yellow paper. I cut and added "photo mats" for the backgrounds of the glue, pencil and crayon. Then I pieced together and added all of the cricut cuts. The finishing touches were the ribbon and the buttons and of course some stickles.
 
Cricut Info & Supplies Used:
Designed By: Rebecca Maddux
Cricut Machine Used: Expression 2, Gypsy, CCR
Cricut Cartridges Used: Simply Charmed, Create A Critter, Cursive 101, Classroom August & September
Other Supplies Used:Cardstock, DCWV patterned paper, stickles, ribbon, twine, buttons
Cricut Crafty Challenge #1 - Back to School 
Ok, so now it is your turn! The Cricut Crafty Challenge is to  Make a Back to School project, this can be anything and if you don't have kids you can still play along, make a project that reminds you of school.
Here is what your project has to incorporate.
1. Must use at least 3 cricut cuts.
2. Must use ribbon and buttons.
3. Must be a new project for this challenge. Please link your project with the link below.
Now RUN don't walk you only have until the 26th to link up your project to eligible for this month's prize and you don't want to miss out! RockinRobin1  from www.robingoens.stampinup.net has generously donated a $35.00 gift certificate to her Stampin Up Store. So please stop by her site and give her some love.


Monday, September 3, 2012

This is Absolutely Fantastic!

Hi! This is Sara from www.sarawandrews.com  with a quick mini album to share.

I don't think I've had this much fun crafting in a long time. Also,I think I giggled through the whole process.

It all started with the purchase of the DCWV the Snapshot Stack. I love this stack. I love the colors, the prints and of course the camera images.  So when I had to come up with a project to share here, I decided to make this a family affair. I wanted to have snapshots of the kids and me just having some good old, silly fun.

And what's more fun than making your 13 year olds wear funny looking hats, glasses and mustaches while posing with a giant Polaroid cut out?

I know NOTHING! Right?

My props~


I used various images from my Cricut Imagine collection to make my props with the Hello Speech Bubble being my absolute favorite.

With all the options found on the Best Friends cartridge I could have made an entire wardrobe, but I think I'll save that for next time.

The Mustaches and Glasses Digital Cartridge was perfect for this as well.  Those glasses were super easy to assemble.

I simply adhered all of the images on to wood skewers with Glossy Accents.

My album~


My album pages are 5 x 6" giving me plenty of room for multiple pictures and embellishments.
I printed all of my pictures as 3 x 3", so they could easily be trimmed to fit into the glittered Polaroid paper found in the stack.

I have to tell you that I am still giggling at these pictures.So, I think that means this project was a success! Plus, I have some pretty embarrassing pictures of the kids to use in the future if needed.

Cricut Info & Supplies Used:
Designed By: Sara W Andrews
Cartridges Used:
Best Friends for the Tie, Spinner Hat and Crown cut at Fit to Page
Imagine More Cards for the Pointing Finger and Hello Speech Bubble cut at Fit to Page
Mustaches and Glasses Digital Cartridge for the Mustaches cut at 5.5" and 8.8" and Glasses cut at 7.5"
Cricut Machine used: Cricut Imagine and Cricut Expression
Project Type: Mini Album
Project Theme: Family, Kids
Suppies Used:DCWV the Snapshot Stack, Studio Calico Mistable Fabric Camera Sticker Shapes, Mister Huey's Inky Black, Tim Holtz Paper Clips, Tim Holtz Type Charms, Amy Tangerine Bits Happy Memory tag, Pebbles Clothes Pins, Doodlebug Boutique Buttons in Bettle Black, Crate Paper Storyteller Brads, Papertrey Ink Twine, Misc Flair Buttons and Brads, Making Memories Tiny Alphas, Recollection Gems, and White Chipboard
Studio Calico PL Adventure, Heyday Sentiments and Wonderful World Stamps, Basic Grey Guest Check Stamps, Unity Simple Pointers Stamps, Dear Lizzy Date Stamp, Smash Date Stamp and Glitz Destressing Stamps
 
DON'T FORGET TO LEAVE A COMMENT TO BE ENTERED TO WIN OUR WEEKLY DRAWING IN SEPTEMBER.