While we are no longer making active post of Cricut projects on this blog as of 8/1/2013, we invite you to use it for continued die cut inspiration as we will leave the blog up for viewing. Happy Cricuting !

Showing posts with label Expression 2. Show all posts

Monday, July 29, 2013

Butterfly Theme

 Hello There,

I'm sad to say this will be my last post on this blog. I've really enjoyed sharing my cricut creations with all of you. I invite you to visit me over at Ink-spirations. Butterflies make me think we are always changing and evolving....

The base of the card is 4 1/4 x 5 1/2 folded. Butterfly image cut at 2.5" and then glittered. There are dimensions between the green background and the navy blue background. Pearls on the butterflies and the half fans at top of card.
Pattern paper cut using Imagine and All Wrapped Up.

Butterfly bookmark cut at 5.5" and laminated. Butterfly on gift bag cut from Home Accents at 6".

The Hersey Kiss butterflies cut from Stampin' Up double-sided pattern paper. No glueing needed for assembley. Directions can be found at Qbees Quest. Really easy to make.

 
Yvonne
 
Designed by: Yvonne Balmer - Ink-spirations

Machines Used:
Expression 2, Cricut Imagine

Cartridges Used:
Sophie - card (Feature key card 2)
Sophie - bookmark (Feature key bookmark)
All Wrapped Up. Green cardstock and pattern paper.
Home Accents - Butterfly on gift bag

Other Supplies:
pearls, Stampin' Up designer paper, white gift bag, glitter, dimensionals, laminator, Hersey Kisses

Thursday, January 10, 2013

Working Girl

Hi.  It's Renee from I came, I saw, I created...ummm late!  So sorry.  I was having Blogger issues with posting pictures and had to research how to get around the issue.

Today I am sharing with you an office collection I created for my hubby's admin.  When the Cricut cartridge Suburbia first came out, I knew it would coordinate perfectly with October Afternoon's 9 to 5 collection.

This is the cover to a notepad.


Materials Used:
  • Cricut cartridge Suburbia
  • October Afternoon's 9 to 5 collection
  • Stampin' Up! cardstock in Night of Navy, Old Olive, Daffodil Delight and Groovy Guava
  • Seam binding ribbon in black and white
CCR file:  https://www.box.com/s/599uzmrlslvvh3rv8kz7

Thank you for joining me today!  See ya next month!  =)

Monday, December 10, 2012

Folk Art Lanterns

Hello Everyone!  It's Renee from I came, I saw, I created ready to share a quick holiday project with you.  I know that many of you are looking for quick, easy and inexpensive ways to decorate for the holidays or simply to add some cheer to a small space.  How about creating some paper "gilded" lanterns?


Materials Used:
  • Cricut cartridge Folk Art Festival
  • Gold paper
  • Variety of colored vellum
  • Tea lights
CCR file:
https://www.box.com/s/52rkxuauyugy84eigs34

Gypsy file:
https://www.box.com/s/8sfh8l7qmex7ssaf1ogk

Directions:
  1. Using the files provided, cut each lantern from gold paper.  I used gold placemats from Target that I found in the holiday decor dept.  I liked the lightness and "gilded" look of the paper.
  2. When cutting the homes, remove just the house base from the mat at first.  Then use transfer paper to capture and move the house "insides" (this is optional, but easier then moving each  piece one by one) and set aside. Pull the 12x12 piece of paper from the mat.
  3. Using different colored vellum for each lantern, adhere it to the back of each gold sheet.  Take  your transfer tape and adhere the house "insides" on to the the vellum of each coordinating house.  At this point, I took an extra step and cut two of the lanterns down a bit in size (height) to create more of a trio look upon completion (optional).
  4. Using a tape runner or strip tape, bring the two ends together and adhere one end on top of the other.
  5. Now just add tea lights to the inside of each lantern to light up your "gilded" lanterns.

Friday, November 23, 2012

Deck the Halls

Happy Saturday everyone!  This is Julie from Mommy's Playroom.  I hope everyone had a wonderful Thanksgiving!

We will be moving into our new house in another city only a couple of days before Christmas so I won't have much time to decorate.  I wanted to create a quick and easy home decor project  to make Christmas decorating a little faster.

I am a huge Teresa Collins fans so I decided to base my project on the reindeer silhouette on her December 25th Cricut cartridge.

I started with the reindeer silhouette using the fit to page feature to make it as large as possible.


The title was also cut from December 25th.  The paper is from Bo Bunny and is called St. Nick stocking.

 
The ornaments are from Christmas Cheer and were cut at 2.5".  The snowflake is from a Stampin' Up punch.  It was cut on setting 3.


I wanted to add a little sparkle to the project so I covered the title with Candy Cane Stickles.  Black Diamond, Green, and Candy Cane Stickles were used on the ornaments.  The snowflake is covered in Crystal Stickles. 


I wanted to decorate something other than a Christmas tree for my project so I used Stampin' Up silver elastic cord to tie the ornaments to the reindeer's antlers.  I think he looks adorable!


Designed By:  Julie K.
Cricut Machine Used:  Expression 2
Cricut Cartridges Used:  December 25th & Christmas Cheer
Other Supplies Used: MME paper - 12 Days of Christmas "Wrap It Up"; Bo Bunny paper - St. Nick Stocking; Stampin' Up cardstock - Whisper White, Read Red, Basic black; silver paper from my scraps; Stickles - Candy Cane, Green, Crystal, Black Diamond; Stampin' Up silver elastic cord; Tombow Multi Liquid Glue


Sunday, November 18, 2012

Christmas Swing Card

Hey there, it’s Freda from CannCreate Designs, stopping by with a quick Christmas Card Project.  It seems that once people discovered the swing cards on the Artiste cartridge they are popping up everywhere.  The designs with the coordinating cuts make the swing card extremely easy to make.  I used my Imagine to print double sided paper from the Christmas Wish Cartridge for the card base.  Be sure to let your ink dry completely before flipping and printing the second side or you’ll have a beautifully printed mat and faded papers.

Step 1:  Cut the shapes listed at the end of this posting.
Step 2:  Score card and fold in half.  Score the front where indicated and fold back to reveal the cut swing shape.
Step 3:  Adhere the stamped 2 ½” white Shape 10 cut to the 2 ¾“ dark coordinating color.  (On the next card I will pop up the sentiment piece).  Attach this piece to the revealed window are of the front of the card.
Step 4:  Assemble the remaining 2 ¾“ shape 10,  2 ½” Shape 10, and 2” white stamped Shape 10.   Adhere to the center of the white doily.  (sorry for the blurry, the camera  just wouldn’t focus on this for some reason)
Step 5:  Open the card and align the sentiment/doily piece with the front sentiment  so that the inside sentiment won’t be seen when the card is closed.  I held them in place with tweezers while closing the card so the doily adheres in place to the back.
 
I thought the card needed a little bling so I added pearls to the front sentiment.
 
Directions:
Imagine& Christmas Wish: Print your own double sided paper

Artiste:
Double sided paper: Page 52, <shift> Accent 1, Cut at 5 ½”

Art Philosophy:
Dark Coordinating color: Page 67, Shape 10, cut 2 at 2 ¾”
Double sided paper: Page 67, Shape 10, cut 1 at 2 ½“
White: Page 67, Shape 10, cut 2 at 2 ½”
White: Page 65, Font Layer feature <shift> Petal 1, cut at 4”
 
Thanks for looking and have a Happy Thanksgiving.  Freda
Cricut Info & Other Supplies Used:
Designed By: Freda Cannon
Cricut Machines used: Imagine, E2Cricut Cartridges Used: Artiste, Art Philosophy, Christmas Wish
Other Supplies Used: Queen & Co Pearls, American Crafts White cardstock, Stampin Up Taken With Teal Ink, Stamps-CTMH  Holiday Wishes and Christmas Joy Holiday.

Thursday, November 15, 2012

November Special Guest Designer - Kristen Swain

Please give a big welcome to our November Special Guest Designer - Kristen Swain. 
Kristen was a former Circle Blog DT member and also currently designs for Northridge Publishings Cricut Magazine.  We are so pleased to have her on Cricut FANatics Blog today.

Hello you all! Kristen Swain here from Blankety Blank Blank. I just have to tell you, I miss our Cricut Circle Blog so much! I was always so inspired by the other team members,we felt like a real family,  and let me tell you, working with the new cartridges was so much fun! But life is full of change and I am loving working for Northridge Media on the Cricut Magazine.

I was wondering, what can I share? I have so many ideas and thoughts about using the carts. But I have been reflecting lately on using my supplies better, getting more use from papers and wasting less. Let's face it. Crafting is costly. I'll be honest. I get too overwhelmed with looking at online stores to actually buy anything. I know, I'm a shopping reject, but I start out loving everything, then I ponder, do I really need this, by then, I've spent 2 hours looking and I end up not buying anything. I'm hopeless! (or a cheapskate) I also really love certain colors of paper, and patterned paper. So when I have something I really love, I try not to hoard it, but use every last little scrap, since I'm so limited in my online buying. So that's when I decided that I would share a couple of cards made entirely of scraps.

I looked through and found two half sheets of cardstock- 6x12, and folded them in half for my card base. Then I sorted through my patterned paper and cardstock and pulled out some nice bright colors.
                                              
One thing I think that helps me the most in using my scraps, is that I use Cricut Craft Room exclusively now. I love that I can see the images so much better on my laptop or computer screen. I can place cuts anywhere on the mat, and I can see exactly what size paper I will need to create a cut. So, I can add a 2x2 piece of paper and get a cut from it, using up more smaller scraps and wasting less. See what I'm saying?

Now, I know, my cards aren't seasonal. But they could be. Change the colors out to be orange, rust, brown, sage, sunflower, tans and you could change the greetings. Happy Fall, Autumn you glad I wrote, Give Thanks. They could also make great birthday cards. Change the How's life to .. Happy Birthday Chick. Change the Celebrate Life, to just Celebrate. It's all about the basic idea. Don't like apples? Use Preserves to cut a Pear, a Banana, or a Plum. Don't want to use the Chick, change it up with Create a Critter and make a snake, squirrel, or a  bunny.
 

Thanks for having me today! I hope you enjoy my cards!  Kris
 
Cricut Info & Supplies Used:
Designed By:  Kristen Swain
Cricut Machines Used: Cricut Craft Room, Circut Expression2.
Cricut Cartridges Used: Preserves, Create A Critter
Other Supplies Used: Papers from various manufacturers like- My Mind's Eye, Echo Park, SEI, American Crafts and Imaginice. Buttons/twine are craft supplies.Foam tape, black pen, Fiskars Cloud deco scissors. Greeting stickers by SRM Press, punch ( 1.5 circle) marvy.
 
Cut Details:
Preserves- cut <Apple3> at 2.75 inches. <Apple3-s> at 1.98 inches and <Apple4-s> at 1 inch (2x)
Create a Critter.- <Chick> at 2.5inches, <Chick>Layer1, Layer2, Layer3 at 2.5 inches

Friday, October 19, 2012

Happy Halloween!

Hi Everyone! This is Kim from imlosingitonceandforall again. Hope you all are enjoying your October so far. It's amazing that we are already half way through the month! I was really undecided on what to do for this month's post but decided to go with the Halloween theme since this is the month and all. :o) So without further adieu here it is!


I had a lot of fun creating this and used several of my crafty items that I've either long forgot about or just recently purchased and didn't bother to use yet. Signing up for this blog was one of the best things for me because I really have been using things from my stash. The only thing I had to buy for this was the vellum  I could have swore I had some but had no luck in locating it and really wanted the effect it would bring. 

It really was super easy. I started out with a $2 unfinished frame that I purchased from Michael's some time back and painted it with an Adirondack Citrus paint dabber. I was a bit impatient for it to dry so I went ahead and used my heat gun to dry it. I actually hoped that it would age it a bit but no luck. No worries though because to get the darkened edges I just swiped my Black Soot distress stain from Tim Holtz all around.

As for the cuts I used a couple cartridges for this. The web was cut twice once in vellum and then again in black cardstock (all of the measurements are from my Gypsy so they are not in normal inch format) and are 4.93 for the width and 4.71 for the height. The bat was from Paper Doll Dress Up in purple cardstock and measured at 5.02 for width and 6.29 for the height. Lastly I cut the Boo! from Mini Monsters in orange cardstock at 3.59 for the width and 4.00 for the height.


After cutting everything out I cut the black spider from the web and glued it to the top of the vellum spider. I then found some mismatched googly eyes and glued those on. 


For the bat I really wanted him to have some dimension so I scored his wings and did a little accordion fold. He also needed some googly eyes so I found a couple more and stuck them on. I also outlined the cricut cut lines to give a mouth and define his wings.


Lastly I had the Boo! to deal with. The orange was a bit bright for my taste on this project so I wanted to rough it up a bit. I recently purchased some Faber Castell Gelatos so I snagged the purple one and outlined all of the edges. I then just took my finger and smeared it everywhere to rough it up. I really liked how it turned out. 

I then glued all my pieces on but I still felt that it could use something else so I pulled out my Goosebumps Shimmer Texture Spray and misted the entire project. Unfortunately the picture just won't turn out of the entire frame coated in it but you can see some of it in the other pictures I've posted. This was the first time that I've altered or dolled up a frame and I'm quite pleased. I do wish though that the picture I have in it printed out better but that's our home printer for you! I'll be looking to have one printed at the local store I think LOL

Hope you've enjoyed my project and I look forward to posting again for you next month! 
Happy Halloween!

Cricut Info & Supplies Used:
Designed By: Kim
Cricut Machines Used: E2, Gypsy
Cricut Cartridges Used:  Paper Trimmings, Paper Doll Dress Up, Mini Monsters
Supplies Used: Purple, Black, and Orange cardstock, vellum. Random googly eyes, wooden frame from Michael's, Goosebumps Shimmer Texture Spray, Adirondack Citrus Paint Dabber, Tim Holtz Black Soot Distress stain and Fiber Castell dark purple gelato stick.


Thursday, October 4, 2012

Recipe book

Hey ya'll, this is Trinity from http://trinityscraftingcreation.blogspot.com/. Welcome to the second month of our new blog.
Today I have made my very first recipe book with my cinch and the From My Kitchen cartridge. This was made for MizEster for our fall swap that Sherry put together for us. It was so much fun and can't wait for the christmas on to come around.
The book is an 8x8 chipboard and I used a piece of pattened paper from The Paper Studio's Persnickety pack. I love all the pinks and browns and greens that they have in it. I took a strip of brown craft paper and used my MS leaf punch and punched both sides for a boarder that went acroos the middle of the book. I cut the apron from page 51 out at 4" and also used a piece of patten paper out of the same stack. I cut the bowl from page 48, timer from page 54 and oven mitten from page 53 out at 1.5" and used the same paper as the apron and cuttlebuged the bowl and used gel pens to make it look like a set of temp tations bake ware that I have. I cut the measuring cup and spoons from page 47 out at 2" and used liquid glass for the dark blue liquid and also used it on the spoons. I took some white Enamel Accents and put it on the white trim on the apron and oven mitt and also used it on the cuttlebuged swirls on the bowl. I took my white gel pen and put the number lines on the timer to give it a little extra. I cut the word "recipes" from page 43 at 2" and the paper came from the same stack as the other did. I used my white gel pen and kinda stiched on it some. I cut out another but 1/4 inch bigger and kinda off set it from the printed paper word to give it that shadow look. I also took and to give it a little bit of a girly look I took some pink and white ribbon and tied it on a few of the loops. On the inside I took 50 recipe cards and broke them down into 5 groups of 10 and stair steped them with tabs(sorry I forgot to take a picture of that before I sent it to her).
 

Designed By: Trinity Wallace
Cricut Machines Used: Annv. Expression 2, Cuttlebug
Cricut Cartridges Used: From My Kitchen
Other Supplies Used: Cinch, Enamel accents, liquid glass, gel pens, pattern paper from the paper studio, solid card stock

Tuesday, September 25, 2012

Baby layout

Hi, this is Kelly Bienvenu from kbiendesigns.  First I'd like to say I am very excited and honored to be a part of such a wonderful group of ladies!  From what I've seen, there are lots of super talented ladies out there!

I was recently asked to make a baby album for a soon to be born little girl.  I was asked to incorporate guitars into the book in a few places.  I have no idea what this was all about, but if guitars and music were that important I would do my best.

Here are two of the pages from the book.  For these two facing pages, I chose to print my paper from Teresa Collins Baby Boutique on my Imagine.  It's a very, very pale pink background which worked perfectly with the colors I had chosen, which were black and white, with a touch of pink.

I then cut the word "Lullaby" from Everyday Pop Up Cards at 3" on white cardstock, using black cardstock for the shadow feature, again at 3".  The guitar is from American Alphabet (one of the pre-loaded carts on the E2) and was also cut out at 3".  I used Tim Holtz tissue tape to border the page and made a flower for the bottom left hand corner.


The facing page also began with Teresa Collins Baby Boutique paper printed on the Imagine.

I wanted a banner, but since I did not have a baby name, I decided to use the storks from the Pretty Pennants cartridge.  These were cut at 1". I added the baby carriage from Everyday Pop Up Cards, cut at 2".  Again I used black and white cardstock, but thought the carriage needed something, so I used black and white ribbon to dress it up a bit.


The alphabet is 7 Gypsies tape which went perfectly with my theme of black and white!

All in all, these pages were very easy to make, and even though I used a lot of different carts, the process was quick!  Thanks for looking!

Wednesday, September 19, 2012

Thank You!!

Hi Everyone! Happy Hump Day!

This is Kimberly Karl from imlosingitonceandforall with a thank you card created for a baby shower. I am currently expecting my first child and our shower is this Saturday so I wanted to get a jump on making my thank you notes since it's so easy to get behind on those!

I didn't get too terribly intricate on them as I had to make 30 and am trying to work on other projects as well. Here is the completed card and I'll show you how I did it.


First I used my Gypsy with the Elegant Edges cartridge for the center medallion so that I could make the most of paper space on my cutting mat. I used 3 of the layers from the Flower3 cut found on page 65 of the handbook - original layer, original layer plus shift and the Frame layer all cut at a height of 3.47 and I let the width calculate automatically. This is the cut on the bottom row, 5th cut in from the left on the keypad overlay. I used my Cricut Expression 2 to make the cuts. I choose the colors green, pink, brown and white because those are the colors we are using at the shower. Below you can see the first column are the cuts separately, the second is the white on top of the green and finally I added the frame layer.


I then stamped the center white piece with the top left stamp that says thank you from the Round Frames stamp set by Inkadinkado using the Green with Envy Powder Puff chalking ink.


The background is a piece of 5.25 inch by 4 inch brown paper from Recollections brand at Michael's. I used my Cuttlebug and embossed it using the Victoria Emboss A2 embossing folder.


I then took a 3/4 in white satin ribbon purchased at Michael's and wrapped it around the brown paper with a half inch allowance on each side so I could glue it to the back. I glued the brown cardstock to my card and then glued the medallion on top of it. At this point you could add some more sparkle if you wished to the little flowers in the stamp going all around. You also could use pop dots to add some dimension to the card.

Voila! 


Thank you so much for checking out my post today! I hope it's inspired you and shown you that we don't have to get too intricate to kick out some really nice cards. Also, if you stop by my blog you'll see I haven't put up much this year, I think my last project was from January! I'm hoping just as you all are that this blog will give me the inspiration I need to get moving on crafting and posting! Have a wonderful week and I'll see you all next month!

Cricut Info & Supplies Used:
Designed By:  Kimberly Karl
Cricut Machine Used:  Expression 2, Cuttlebug and Gypsy
Cricut Cartridges Used:  Elegant Edges
Other Supplies Used: Victoria Emboss A2 folder by Provo Craft, Recollections paper from Michael's, 3/4 inch white satin ribbon from Michael's, 4.375 x 5.5 white card from The Paper Company 25 count card pack sold at JoAnn's. Thank you stamp from the Round Frames Inkadinkado stamp set, Powder Puff chalking ink in Green with Envy

Tuesday, September 11, 2012

When I think of Back to School.............

I think of fall! The air gets crisper, I can hear the trains in the distance and the leaves start to turn so many amazing colors. 

I am Randi from www.craftycricutcreations.blogspot.com I am so happy to be a part of this blog. I have had my cricut fetish since May of 2006. Since then my creating styles has changed greatly. I must use my cricut for something at least once a day.

Each month we will have a Theme of the Month that our designers may follow. Our theme forSeptember is End of Summer...projects can run the gamet from Back to School, Vacations or  Things We Loved About Summer.
 Here is my project for this months theme.........I made fall note cards and gave a set the elementary school teacher my dd has this year.

1 made a set of 4 just like this. The note card is cut 4x8 out of kraft cardstock then folded in half to make a 4x4 note card. I cut the patterned card topper at 3 3/4 x 2 3/4.  I cut the polka dot paper 3 3/4 x 2 and overlapped them a bit then added brown grossgrain ribbon to hide the seam I cut the bird from the Cricut 3 Birds on Parade cartridge at 3 inches as well as all of his layers, using various colors of Bazzill cardstock. There are so many cute birds on this cartridge it was hard to decide.
I then cut out square envelopes at 4 1/4 inches from the CTMH Art Philosophy Cricut Cartridge page 29 I cut it a bit bigger to allow for my bird being on pop dots.  

Cricut Info & Supplies Used:
Designed By: Randi Collins
Cricut Machine Used: Expression
Cricut Cartridges Used: 3 Birds On Parade
Other Supplies Used: Various colors of Bazzill Solid Cardstock, Craft Cardstock, SEI Patterned paper, Moxie Patterned paper, Scrappy Mom Stamps. ATG adhesive & pop dots 
 
DON'T FORGET TO LEAVE A COMMENT TO BE ENTERED TO WIN OUR WEEKLY DRAWING IN SEPTEMBER.

Sunday, September 9, 2012

Gone Fishin'

Hi everyone, I’m Helen of Scrapbooking Fun.Biz and I’m so excited to be able to share a 12x12 scrapbooking page I created!
As you all know it's not that easy to get good photo's of older boys, so I’m only using one photo to scrap. Our kids are older now and vacation time is done whenever the opportunity arises, so this mid week mini vacation worked out perfectly for us and our older son. We planned to do some fishing, so we planned a charter boat fishing trip! We really enjoyed the chartered fishing, so we did the boat thing the next day too! We caught so many fish and just incase you're wondering who caught the biggest fish on this trip.....it was me! It was a Walleye!!

For my 12x12 scrapbooking page I didn't want to use to many embellishment, so it didn't look feminine. The photo I used is of my husband and our oldest son as we're waiting for the charter boat to leave the dock. For the base of my page I used the 12x12 School Days Multimedia Pad by Martha Stewart.

I couldn't find a bobber in any of the Cricut images by PC, so I had to create my own. I also wrapped some twine around the two "i" to make it look a little more nautical.

I used one of the Cuttlebug embossing folder from the Asian Bundle on the cloud cuts and I added some Pearl Ex to give them a little sparkle. I also use some Gum Arabic to adhere the Pearl Ex, so it wouldn't all rub off.

I used some twine to wrap around the bout and the hand writing on the boat is the date and I made it to resemble a boat license. The waves are embossed using one of the Cuttlebug Wedding Borders and I also used the Pearl Ex on them.

Cricut  Info & Supplies Used:
Designed By: Helen Hodge
Cricut Machine(s) used: Expression 2, CCR, Cuttlebug
Project Type: Scrapbook Page
Other Supplies used: Twine, Pearl Ex, Gum Arabic, Uniball Signo Black Pen, Pop Dots, Tombo Liquid Glue, ATG Adhesive
Sizes:
Title: Gone Fishin’ – 5” Relative one red and one white – Wildlife.

Boat: 4” Relative – hide control the waves – Going Places.

Fly Fisherman: 3” Relative – Fun in the Sun.

Waves: 3.5” Real – Crocs Rule.

Cloud: 2.5 Real – Create A Critter.

Cloud: 2” Real – April Showers.

Bobbers: .375” Real Circles – All Mixed Up.

Bobbers: .5” Real Circles – All Mixed Up.

Bobbersr: .375 Real Cylinders – George & Basic Shapes.

DON'T FORGET TO LEAVE A COMMENT TO BE ENTERED TO WIN OUR WEEKLY DRAWING IN SEPTEMBER.

Green Bay Baby Shower Invitation


Hello. This is Maura aka Happy Granny. Today I wanted to share the baby shower invitations that I am making for my niece. She wanted a "Green Bay" theme.


I made the card using CCR. First, I made a rectangle that measures 4.25 x 11 in. And added the paper pattern from Greeting Cards then print and cut it with my Imagine. Then cut the gray layer at 5 x 3.75 and used the Seeing Spots Cuttlebug folder to emboss.

The baby and all it's layers were cut from the Baby Steps Cartridge at 1.75. The dream bubble was cut at 1.68 from the Cuttin' Up cartridge.

I inked all the edges, popped up the baby and thought bubble. The Green Bay G I found on line and printed it out and cut by hand. The face stamp is from "Peachy Keen" baby faces stamp set.
 
Cricut Info and Other Supplies:
Designed by:  Maura
Cartridges Used: Baby Steps, Cuttin Up, CCR Basics and Greeting Cards Inside and Out
Criuct Machines Used: CCR, Imagine, E2, Gypsy and Cuttlebug
Other Supplies Used: card stock, embossing folder, pop dots, stamps,ink, white pen
 
 DON'T FORGET TO LEAVE A COMMENT TO BE ENTERED TO WIN OUR WEEKLY DRAWING IN SEPTEMBER.


Wednesday, September 5, 2012

Cricut Crafty Challenge #1- Back to School


Welcome Everyone to the Cricut Crafty Challenge day!
This is Becka from Creations With Becka and I am so excited to share the very first Cricut Crafty Challenge with you all today.
This time of year is all about getting the kids back to school, so this month's challenge is to make a Back to School gift, layout, card etc.
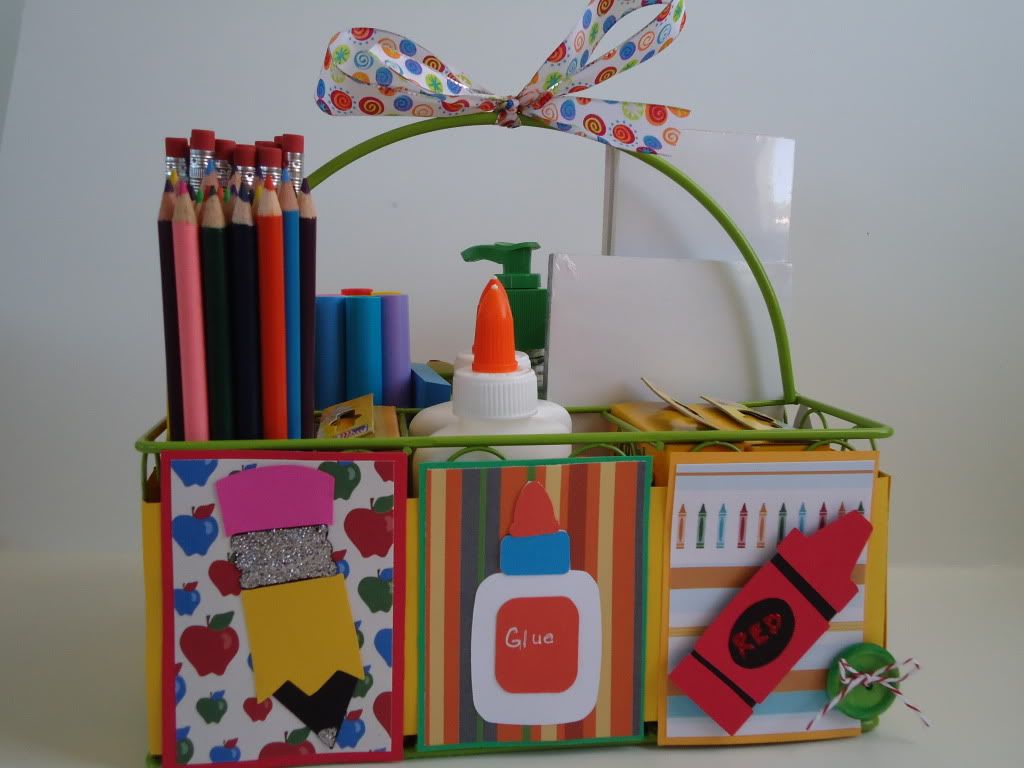
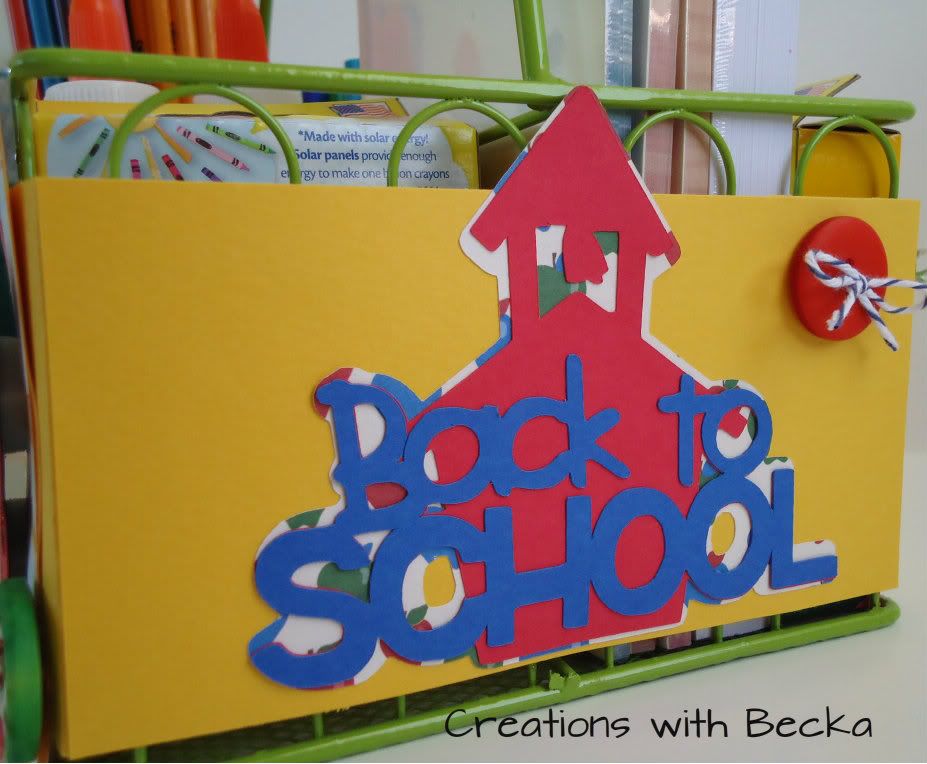
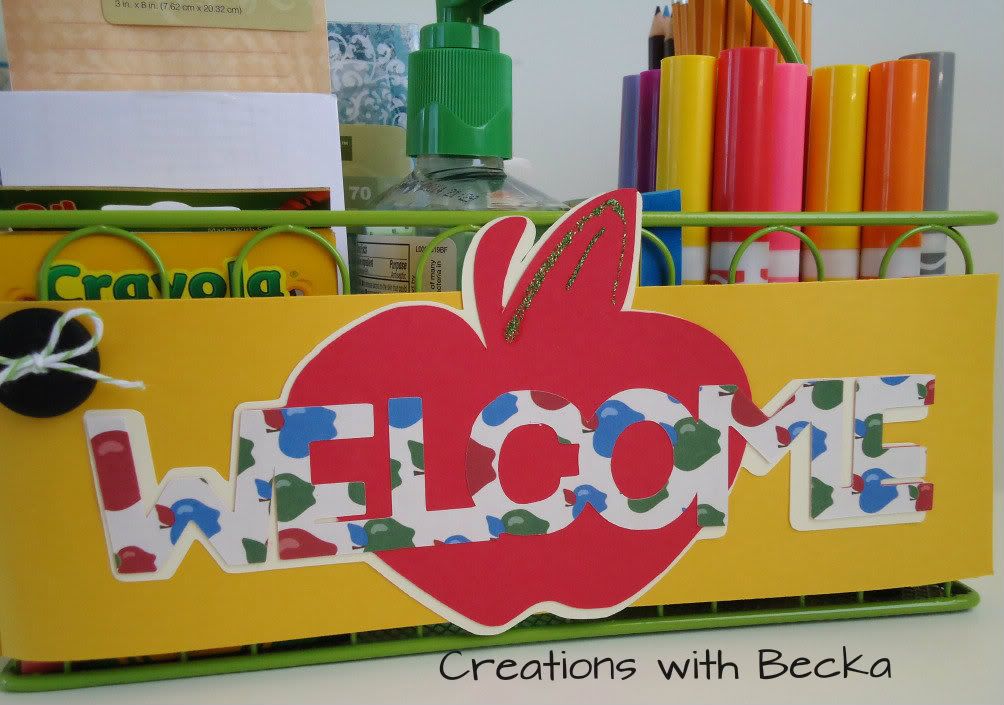
I made this awesome supply basket to give to my son's teacher on the first day of school. He started 3rd grade this year and has two new teachers. So I thought we would welcome them with this gift


 For my project, I  first wrapped the basket with yellow paper. I cut and added "photo mats" for the backgrounds of the glue, pencil and crayon. Then I pieced together and added all of the cricut cuts. The finishing touches were the ribbon and the buttons and of course some stickles.
 
Cricut Info & Supplies Used:
Designed By: Rebecca Maddux
Cricut Machine Used: Expression 2, Gypsy, CCR
Cricut Cartridges Used: Simply Charmed, Create A Critter, Cursive 101, Classroom August & September
Other Supplies Used:Cardstock, DCWV patterned paper, stickles, ribbon, twine, buttons
Cricut Crafty Challenge #1 - Back to School 
Ok, so now it is your turn! The Cricut Crafty Challenge is to  Make a Back to School project, this can be anything and if you don't have kids you can still play along, make a project that reminds you of school.
Here is what your project has to incorporate.
1. Must use at least 3 cricut cuts.
2. Must use ribbon and buttons.
3. Must be a new project for this challenge. Please link your project with the link below.
Now RUN don't walk you only have until the 26th to link up your project to eligible for this month's prize and you don't want to miss out! RockinRobin1  from www.robingoens.stampinup.net has generously donated a $35.00 gift certificate to her Stampin Up Store. So please stop by her site and give her some love.