While we are no longer making active post of Cricut projects on this blog as of 8/1/2013, we invite you to use it for continued die cut inspiration as we will leave the blog up for viewing. Happy Cricuting !

Showing posts with label George and Basic Shapes. Show all posts

Saturday, July 27, 2013

Train Picture Frame

Happy Saturday Cricut Fanatics!  This is Rita from Rita's Paper Obsession.

Today I wanted to share a picture frame I created for a picture of my husband and our nephew.  We went to the train museum and I wanted to create a keepsake for our nephew.


I selected the train from the Carousel cart and used Design Studio to layout the frame.  The train image is 8 inches.  The window was too small for my picture so I used the hide contour and placed a 3 inch square from George & Basic Shapes in its place.  I cut this out three times on blue, green and red pattern paper and twice from chipboard.


Next using the shadow function, I welded a rectangle to the bottom of the image to give me a flat surface.  I cut this out of black pattern paper and chipboard.


For the frame back, I used the welded shadow/rectangle and used the vertical frame back from the Fancy Frames cart.  Again using the hide contour function I hide the rectangle utilizing only the stand portion of the image.  I cut this from chipboard.


To assemble, I glued the red train to a chipboard cut and the blue train to the other chipboard cut.  I hand cut the smoke stack and light off the blue train.  From the green train I hand cut the top of the smoke stack, the roof of the train and the cow catcher.  I cut circles from George & Basic Shapes to match the size of the wheels and I created a window frame by cutting a 2 3/4 square inside a 3 1/2 square.  All pieces were inked with Versa Magic "Jumbo Java"


Finally assembly of the frame, layer the train on to the shadow leaving an opening to insert the picture.  Adhere to the frame back.


The frame looked a little plain so I doodled some and added a number cut from the Lovely Floral cart.  The numbers represent the date we went to the museum.


Thank you for stopping by and allowing me to share with you this weekend.  It has been a pleasure being a part of the Cricut FANatics blog.  Happy Cricuting!

Designed by: Rita Poteat
Cricut Cartridges Used: Carousel, George and Basic Shapes, Fancy Frames
Cricut Machines Used: Cricut Expression
Project type: Home Decor

Thursday, June 27, 2013

Best in Class Celebration

Good morning Cricut Fanatics! Hope you are enjoying your summer so far.

This is Rita from Rita's Paper Obsession. Every year my boss recognizes our work unit with a luncheon celebration.  She comes up with a theme and it's my job to create her vision.  This year's theme was "Best in Class".  She wanted to see our accomplishments recognized with blue ribbons.  Here's our accomplishments highlighted on our conference room wall.


The project had to be quick and simple as I had a limited amount of time so I made the rosettes for the banner and ribbons using strips cut from card stock. 


The banner and letters were cut from the Birthday Bash cart.


I cut the leaf wreath on the ribbon from the Sweathearts cart and the stars are from George and Basic Shapes from gold poster board.

Our celebrations must include party favors.  My boss wanted everyone to have a blue ribbon.


I found 1 1/2 inch blue lollipops at the party store and decided to attach a smaller version of the blue ribbon to them.  The "Best in Class" was a computer image that matched everything perfectly.

Thank you for stopping by today.  May you have a wonderful summer full of memories worthy of scrapping!

Designed by: Rita Poteat
Cricut Cartridges Used: Birthday Bash, George and Basic Shapes, Sweethearts
Cricut Machines Used: Cricut Expression
Project type: Party decorations

Thursday, June 20, 2013

Sketch Challenge #8

Welcome to our Sketch Challenge.  
This is Amy from Amy's Digi Scraps and welcome to the another Sketch Challenge! On the 20th of each month, I will post a sketch for you to enjoy!  I generally post a card sketch with a card that I create, but you can make it a layout as well.  Please visit the Sketch Challenge link for more information about our monthly Sketch Challenges.

Here is the sketch for today:


And here is the card I created for it:


This sketch was created as part of a class I will be teaching locally.  It is similar to what is known as a One Sheet Wonder, where you create several cards from one sheet of printed paper.  This class will allow the participants to create 17+ cards using very minimal supplies, adhesive, inks and stamps.  I will have the entire class and patterns available on my blog after the class has finished.  My purpose for these cards and the class is to encourage new card makers who want some creativity without having a lot of bulk or "extras" on their cards.  To show that simplicity can be beautiful.
 In addition, I am asking those who take the class to consider donating one or two of the cards they create in class to Operation Write Home (OWH).  This is a wonderful organization that sends blank cards overseas to our military so they have cards to send home to their loved ones.  Stationery supplies are not a priority there, so the cards really do fill a need.
I used paper that I bought in bulk from Tuesday Morning for both the printed paper and the solid color paper.  The stamps and ink are from Close To My Heart.
Now - what makes this class - and card - so fun for the Cricut Fanatics blog is that all the cuts are done by the Cricut Expression machine and George Cartridge!  Again, once the class is finished, I will share the information, but I drew out the cuts I wanted and then designed it on my Gypsy machine to cut with my Cricut.  The cricut doesn't cut all the way to the edges of the paper, but this is a simple cut with my scissors to finish separating and this saves a lot of time, measuring, and errors!!
If you've ever been in a class that requires a lot of cutting, you know how easy it is to get lost and make the wrong cuts, even with the diagram in front of you.  Having taught these classes before, I know how it can slow down the class, as well as create problems with paper waste.
By using my Cricut to cut these multiple, simple cuts, I am able to keep the class moving forward, plus promote the Cricut machine and Gypsy.
Some edge inking, a little bit of stamping, and glue everything down and presto! 17 different cards (or more) in under an hour.


We would love to see what you can do with this Sketch.  Please create a card or layout and upload the image to this post in the InLinkz!  Remember that you must use your Cricut in creating your project for the Sketch Challenge.

Tuesday, May 14, 2013

Hello and Good-bye!


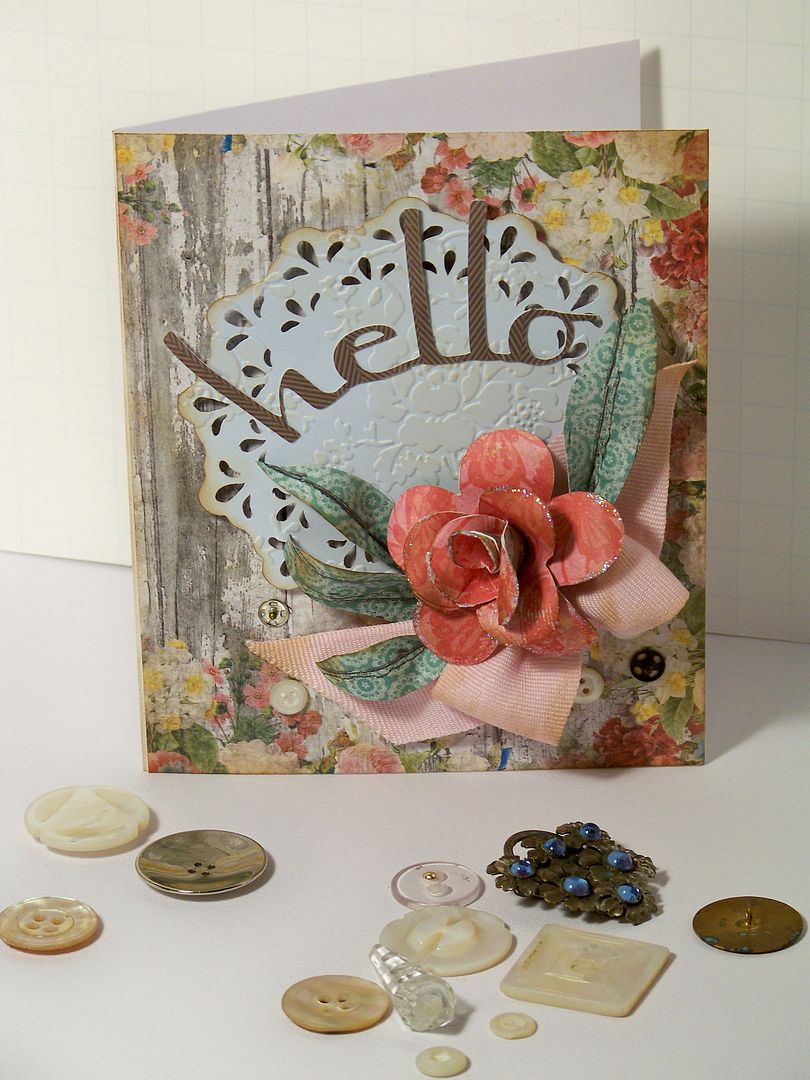
Hello!  This is Nadia from my blog, With Glittering Eyes.  I have been so inspired lately by the beautiful cards created by Michele Kovak on her blog, Thoughts of a Cardmaking Scrapbooker.  I love her style and have learned so much from her since finding her on the old Circle Design Team.  I thought it would be fun to get out my 'Michele sponge' and make a card inspired by some things I have been seeing on her blog.  I love her recent Mother's Day card tutorial,  mini album, and Easter card.  I also wanted to make something that looked vintage.  I thought this would be a fun card for my last project here as a designer on the Cricut Fanatics blog.

I started with a paper pack from My Mind's Eye with lots of weathered wood and shabby chic florals.

I cut a doily from Artiste (page 31) at 4".  After inking it and embossing it, I popped it up 1/4" so that a natural shadow would separtate it from the card surface.  I added my ribbon.


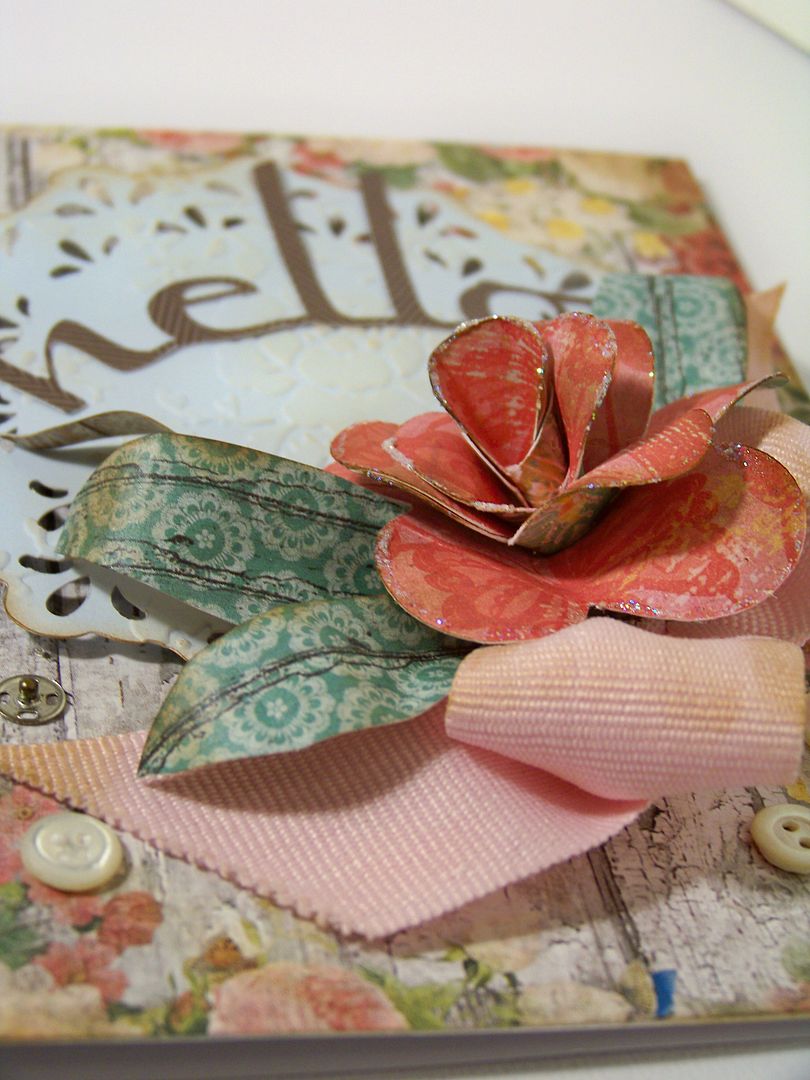
I created a dimensional flower using directions by Kathy Orta, using Cricut George, as in her tutorial, but cutting the base shapes at 2".  This is the same flower I recently used in a larger size inside an explosion box.  To see my box, click here.  To check out Kathy's video tutorial, click here.  I added a thin, fine line of glitter paint along the edges of the flowers. That felt old-fashioned, like some of my grandma's Christmas ornaments.  I hand-cut leaves, bending and folding to create a little dimension.

Text was cut from Cricut Lyrical Letters at 1-1/2" and manipulated by hand to curve.  (I cut away the butterfly that was part of the text).

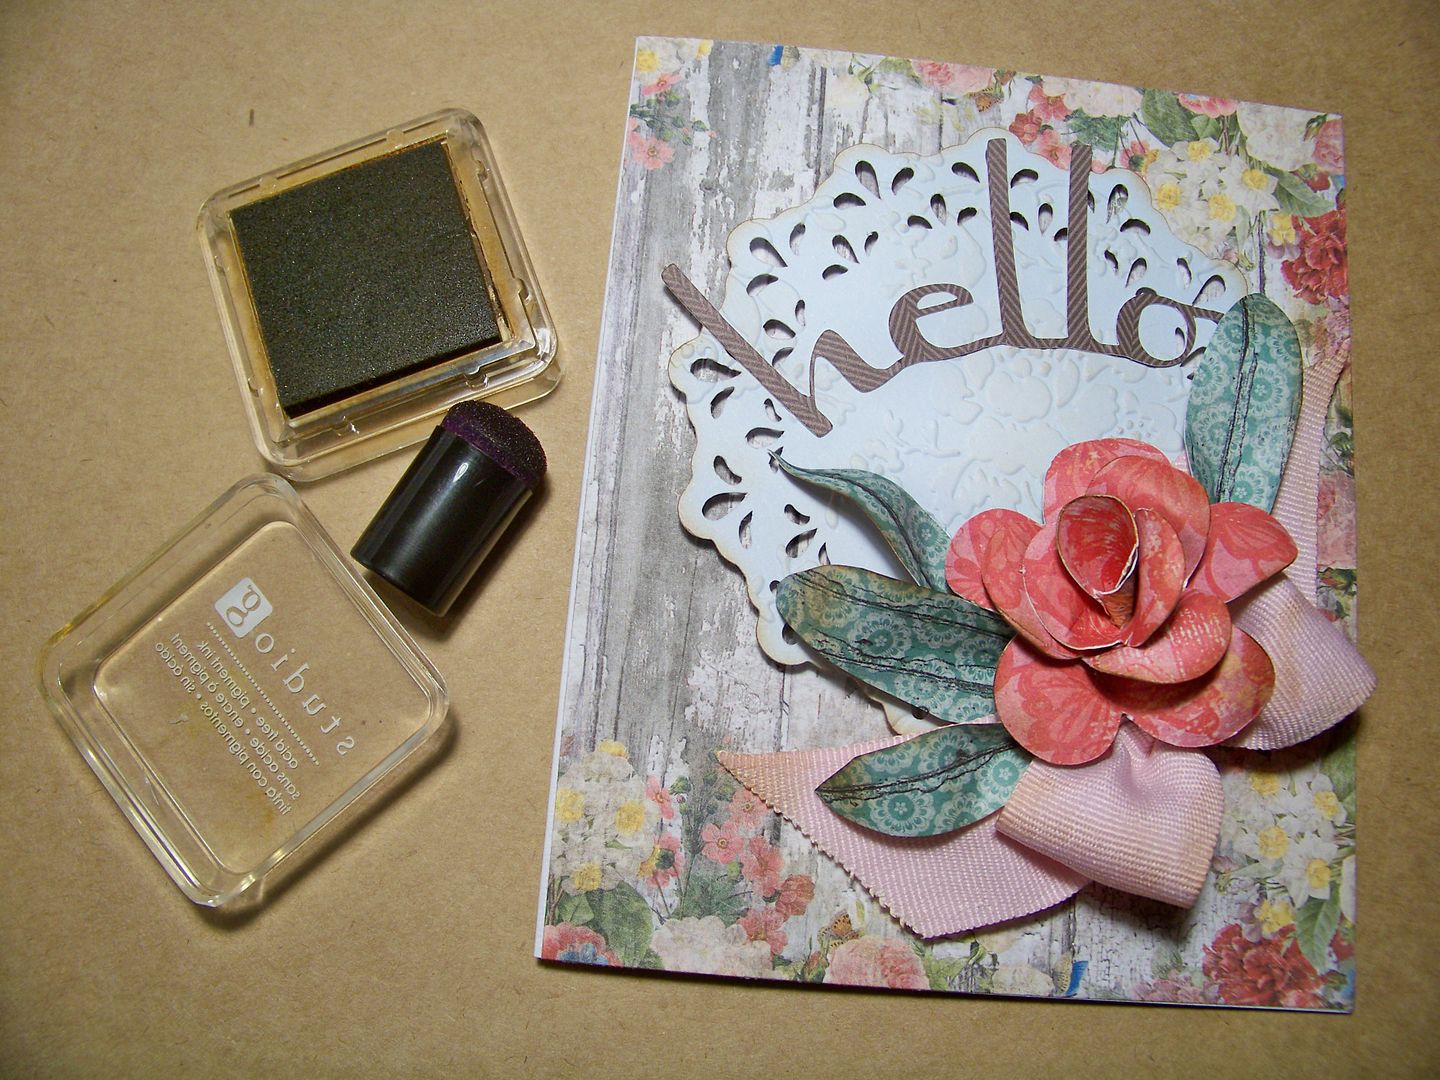
To make everything look aged, I inked with brown, including the flower and ribbon.


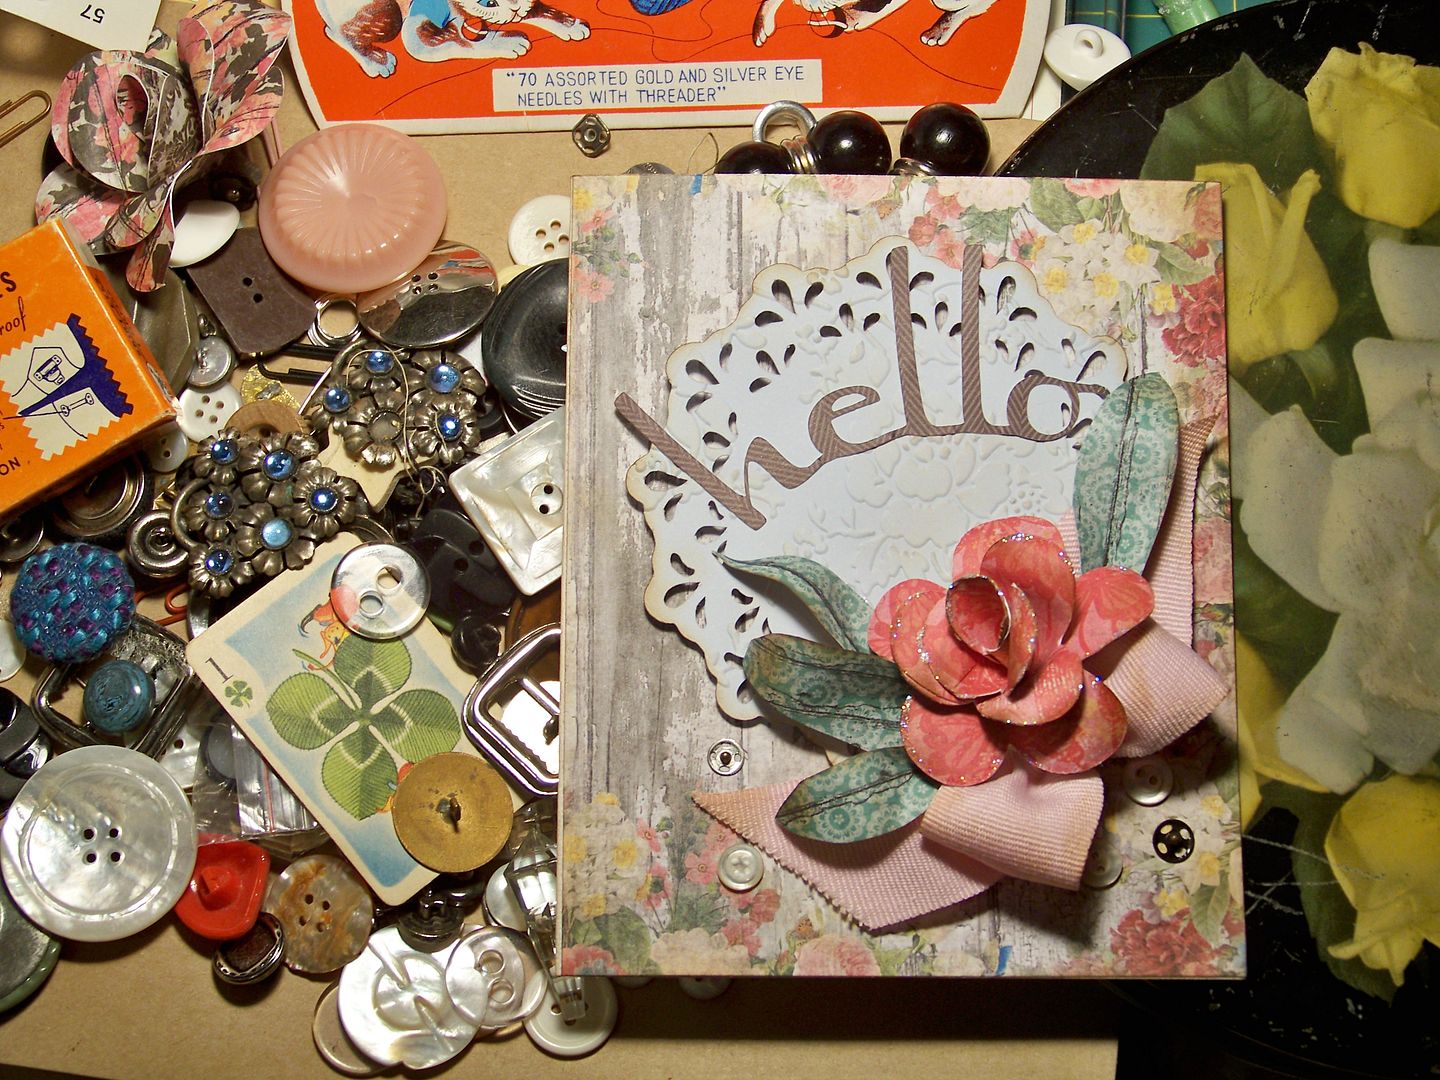
For a little inspiration, I got out some of my Great Aunt Henrietta's buttons and findings...and added a few buttons and snaps.  


I really enjoyed making this card... and making a mess, revisiting some of my treasures.  Thank you for checking my post today!  I wanted to thank Debbie and the team for allowing me to design here and wish the best for all my crafty friends who make fun things every week here!  Even though I am leaving Cricut Fanatics, you can always find me on my blog, my bloggy Facebook page, and my Pinterest boards!  


Cricut Info & Supplies Used:
Designed By: Nadia Herbst-McConnell
Cricut Machines Used: Expression
Project Type: Cards
Project Theme: Just Because
Cricut Cartridges Used:  George and Basic Shapes, Lyrical Letters, Artiste
Suppies Used: Paper, Quick Dry Glue, pop dots, buttons, snaps, ribbon, ink, scissors

Wednesday, March 20, 2013

Sketch Challenge #5

Welcome to our Sketch Challenge.  
This is Amy from Amy's Digi Scraps and welcome to the another Sketch Challenge! On the 20th of each month, I will post a sketch for you to enjoy!  I generally post a card sketch with a card that I create, but you can make it a layout as well.  Please visit the Sketch Challenge link for more information about our monthly Sketch Challenges.

Here is the sketch for today:


And here is the card I created from the Sketch:


This sketch allows the design focal point, the flower, to not be overly competitive with the sentiment.  I used a paper stack from atd called "Urban Oasis" for all the paper except the card base, which was basic ivory card stock.  The flower is from Prima and the button is SEI.  I used a sentiment stamp from Close To My Heart and covered the sentiment and the flower petals using Icicle Stickles by Ranger. 
Unfortunately, my trimmer won't cut straight lines anymore, so I will have to look for a new one.  That turned out to be a good thing though since you have to use your Cricut for the sketch challenge.  I quickly laid this out using my Gypsy and George cartridge and cut each of the blocks and the two strips using my Cricut Mini machine.  Seems like overkill, but when your trimmer gets warped and you need blocks, what's a girl to do?


We would love to see what you can do with this Sketch.  Please create a card or layout and upload the image to this post in the InLinkz!  Remember that you must use your Cricut in creating your project for the Sketch Challenge.


Tuesday, March 12, 2013

Easter Chick with Sweet Tooth Boxes

 Hi there, it's Maria again with my monthly post. Don't you love it when you get an idea in your head and the finished product actually comes out just as you imagined? Well, it doesn't happen to me very often, believe me, but today I am so thrilled to share with you one project that did. I think it may even be better than  I hoped! I was looking for a cute way to make a box to put some candy in for Easter. There have been some really creative things done with the ice cream cone on the Sweet Tooth Boxes cartridge and  I decided to try it. For the my project I used cuts <ConeLy1> which is the egg and <ConeLy2>, the chick. I cut them at 10"
The chick's comb and eyes are from the County Fair cartridge. His beak is a diamond cut from George and Basic Shapes. I scored and folded it just either side of the center so I would have a flat surface to glue to his face. His wings are paisley cuts using the shadow feature from the Paisley cartridge.
I decorated the shell by weaving three pieces of baker's twine through a piece of lace ribbon then gluing it around. I then added a button with a piece of hemp twine.
Hope you like my little Easter chick as much as I do! Thanks for stopping by today!
Maria

Cartridges used: Sweet Tooth Boxes, George and Basic Shapes, County Fair, Paisley
Machines used: Cricut Expression, Gyspy
Printed paper from The Paper Studio, White paper from Colorbok

Monday, February 18, 2013

Snapshot

Hello all!
This is Michele from Scrap-n-Dance. Today I have a layout for you as well as a cut file!

You know how certain iconic items become all the rage? I've seen things like those old rotary fans, coffee stain stamps and more. Lately I've seen the viewmaster disks around. what memories those bring back!

Just recently someone on the Cricut message board asked me where I get my ideas for layouts. I get inspiration from everywhere, but I have no problem scraplifting! Especially if I want to experiment in a style of crafting that I'm not used to doing... as is the case with this layout... I am never quite comfortable doing layouts like this... But I like how it turned out. Sometimes I just see one little thing somewhere that inspires, sometimes the whole layout inspires me. In the latter case, I often translate someone's layout into a "sketch" and go from there, using my own supplies to re-interpret the "sketch". Today's layout is definitely scraplifted! It was her viewmaster disk that caught my eye at first, but then I fell in love with the whole layout. To see my inspiration, click here.

However I did not have any viewmaster disk embellishments. So I had to create one! That meant a little research. It turned out that Capadia had made a tutorial for a cut file for a different machine. I was able to translate that to my gypsy and created my own viewmaster disk cut file for my cricut on my gypsy. You can download the Gypsy viewmaster disk file from Box.com by clicking here.

The gypsy file includes the disk in two sizes, the smaller one is based on measurements I found for the disks... close but not quite exact I am sure. The larger one was the size I wanted for my layout. The images are grouped separately so you can move them or resize them as you please. On the second layer is a blackout version of the disk, in case you want a black background for the photo holes, as I did in this layout.

By the way, this layout was made entirely with stash that I've had from 4 months to 4 years. :)  I dug out several things I'd made ages ago and stored away (grungepaper flowers, UTEE'd heart).

Thanks for coming to see my project today!

Cricut Info and supplies used:
Designed by: Michele Donner-Ramsey
Machines used:  Expression, Gypsy
Cartridges used:  Elegant Edges, viewmaster file: B is for Boy, George, Plantin
Other tools: Sizzix, Tim Holtz rosettes dies, EK notebook punch
Other supplies:  The Girls' Paperie letters, Printed cardstock from Graphic 45, Studio Calico, Simple Stories. Camera rubon from Kaiser, seam binding, Art Parts hand, grungepaper, buttons, Charlene's Button Box button (yellow square button). twine.

Monday, January 21, 2013

Smile Jar

Happy 2013 everyone. It is L.B. from Cool Beans By L.B. I hope everyone has had a good start to the new year and lots of smiles are coming your way. A friend of mine went through breast cancer in 2012 and told me that this year she was going to collect her smiles to have in bad times. I decided this was a great idea so I up-cycled a food canister to create a smile jar. (You can see lots of ideas for this on Pinterest)
I cut 2 large circles (so forgot to record the size) from George and Basic Shapes, cut one of them in half and added some fun decorative tape to create the base of my jar lid.
Next, I added the word "smile", cut with the adorable Create-a-Critter cartridge (I love the way it has a heart to dot the i). I placed the circle on a larger white base and added a bow before adding it to the top of my jar.
I added a tag cut, with the Splish Splash (these are my go to tag bases) Lite cartridge. I once again cut one layer in half and added the cute tape before using Hello Kitty Font to add 2013 to it. On the other side of the tag it gives me my basic instructions, "Write down the things that make you smile so if you need one you can pull it out and read it. Save them for New Year's Eve and read they all."
Once I had this done I wanted a place to hold the slips of paper and a pen so it would be ready whenever I wanted to add something to the jar (or anyone else does). I cut a small box of Tags, Bags, Boxes and More and put it together, adding a small circle with the word "joy" also from Create-a-Critter on front.
I have been adding thoughts ever since and even my daughter and husband have added a few. Thanks for stopping by Cricut FANatics today. Hope you find a reason to smile today.

Created by: L.B.
Machine: Cricut Expression, Gypsy
Cartridges: Create-a-Critter, Tags, Bags, Boxes and More, George and Basic Shapes, Splish Splash
Additional Materials: Martha Stewart Crafting tapes and ribbons, DCWV Citrus Stack papers, ATG gun and adhesives.


Sunday, December 2, 2012

A Little Wall Decor

Hello and Happy December.  This is Cindy from Scrap-Obsessed with a little vinyl project I did. We had Thanksgiving dinner at our house this year and Christmas will be at our house as well, so I wanted to do a little decorating. I saw this saying on Pinterest and knew right away that I wanted to put it above my stove.

 
It was a little challenging to find just the right font for the look I wanted. I ended up using three! I love the final result though.
 
For the 'S' I used Nursery Rhyme, cut at 6".
For 'eason' and 'ove' I used Quarter Note cut at 2"
The 'L' was cut by Quarter Note at 3.85".
'Everything with' was cut using George and Basic Shapes at 1".
It's a little hard to see, but the flourish underneath was cut out using the Art Philosophy cartridge at 3". I used my Gypsy to weld the letters that needed welding and cut everything out with a 12x24" mat on my Cricut Expression.
 
Thank you for having me back and Happy Holidays.
Cindy
 

Monday, November 26, 2012

Wow...A Christmas Card to Share Before December!

Hi, Liz here from http://lizziesworldofcrafting.blogspot.com/ and today I have a Christmas card that I made to share with you.

Every year I try and get them finished in time to mail out the first week of December and I finally succeeded in doing so this year.  I got the inspiration from a picture I saw online and used my cricut for the finished product.

 I used Stampin Up card stock in sand and cut it to fit the front of an A2 sized card.  I used George and Basic Shapes to cut the two squares (2") for the top of the door and a 3" rectangle for the bottom of the door.  The ribbon is ruby red stampin' up.  I used Christmas Cheer for the wreath cut at 2".  A rhinestone and viva decor pen in red completed the wreath.

I inked the edges of the door with Tim Holtz walnut distress ink and used stampin up ruby red for the sentiment.  The stamp is from the Recollection brand at Michaels.  A brad completes the door handle.

I hope every one has a joyful holiday season.

Have a sparkling day and thanks for stopping by!!!

Liz

Machine used:  Expression
Cartridges used:  George and Basic Shapes and Christmas Cheer
Other materials used:  Stampin Up Cardstock in Sand, Stampin Up Ruby Red ink and ribbon, viva decor pearl pen in red, Tim Holtz walnut distress in, brad, rhinestones.

Wednesday, October 3, 2012

A Little Halloween Decorating~

Hello, this is Sara from www.sarawandrews.com.
I thought I would do a little special Halloween decorating of Me And Ashlyn!

I have wanted to make my own paper beads for a while now, and when I flipped through the DCWV The Bewitched Stack I knew it was time.

I chose two patterned papers, a glitter polka dot paper and the gorgeous orange glitter cardstock.  Love it!
I used CCR to stretch a simple triangle from the George cartridge for my beads.
I made two different sizes one being 1.5" wide and the other .75" wide.
The length of your triangle will determine the thickness of your bead.

Wrapping the beads~

I used a kitchen skewer to wrap the paper around and glued the ends with Glossy Accents.

Finished bead~

I set them aside to dry for a few hours.

Now comes the fun part.
I dug into the wonderful collection of Blue Moon Beads that DCWV sent me to make my jewelry. Thanks DCWV!!

My orange bead necklace and bracelet~

My black bead necklaces~

A full view~


I must share that these were super easy and fun to make.
I even made all those paper beads without gluing my fingers together. Yippee!

And even better was the fact that my teenage daughter was actually a little excited to try the jewelry on.
She even smiled while wearing them. Double Yippee!!

Cricut Info & Supplies Used:
Designed by: Sara W. Andrews

Cartridges Used: George and Basic Shapes for triangles cut at 1.5 x 11.04" and .75 x 8.5"
Cricut Machine Used: Cricut Expression

Project Type: Jewelry

Project Theme: Halloween
Other Supplies Used: DCWV The Bewitched Stack and The Bewitched Cardstock Stack
Blue Moon Beads: Glass Pearls, Shell Beads and Clear Transite Cord
Glossy Accents and Jewelry Essentials Findings

Monday, September 24, 2012

Cute School Home Decor Project

Good morning everyone!  This is Julie (Hurricane Zuri on the Cricut message board) of http://mommys-playroom.blogspot.ca/. I am really happy to be a part of the Cricut FANatics.  Today I have a home décor project to share with you.
 
As I was thinking about what type of project to do, I was also dealing with my entire family being sick.  It seems that the beginning of each school year brings home new germs.  So I decided that a school themed tissue box cover would be an appropriate project.
 
 
 To make the box cover I used the Gypsy and the George and Basic Shapes Cricut cartridge.  The yellow portion of the cover measures 15“ x 4 ¼ ”.  It is scored at 5 ¼” and 9 ¾”.  The red portion is the same size with four 1” x 5 ¼ ” rectangles welded to it and scored for the tabs.  I welded an oval (cut at 1 ¼” wide and 3 ½ “ tall on the Gypsy) to both pieces for the opening on the top.


The chalkboards measure 4 ¼ “ x 5 “ with white faux stitching added using a white pigment ink gel pen.  All of the images are from the Recess Cricut cartridge and were adhered with pop dots.  The pile of books was cut at 2 ¾”.  I embossed the apple using the PC Divine Swirl embossing folder to make the apple pop a little.  I love the dimension it adds. The veins on the leaves were drawn in with a Stampin’ Up Old Olive marker.  The stem was colored using a Stampin’ Up Early Espresso marker.  I embossed the pages of the book using the Stampin’ Up  Woodgrain embossing folder. 


My favorite part of the tissue box cover is the old-fashioned school house.  It was cut at 3 ¾ “.


I always picture an old school house as brick.  I used the PC Brickyard embossing folder to create the look.  The school bus was cut at 2 “ and the ABC was cut at 2 ½ “.
I hope you enjoyed my project today.  Have a wonderful week!

Cricut Info & Supplies Used:
Designed By: Julie (Hurricane Zuri on the Cricut message board)
Cricut Machines Used: Gypsy, Expression, Cuttlebug
Cricut Cartridges Used: George and Basic Shapes, Recess
Other Supplies Used: PC Brickyard embossing folder, PC Divine Swirl embossing folder, Stampin’ Up Woodgrain embossing folder, assorted colors of cardstock, Uni-ball Signo white gel pen, Stampin’ Up markers, pop dots, adhesive
 
DON'T FORGET TO LEAVE A COMMENT THIS WEEK ON EACH DESIGNERS POST SO YOU HAVE A CHANCE TO WIN A CARTRIDGE.

Sunday, September 9, 2012

Gone Fishin'

Hi everyone, I’m Helen of Scrapbooking Fun.Biz and I’m so excited to be able to share a 12x12 scrapbooking page I created!
As you all know it's not that easy to get good photo's of older boys, so I’m only using one photo to scrap. Our kids are older now and vacation time is done whenever the opportunity arises, so this mid week mini vacation worked out perfectly for us and our older son. We planned to do some fishing, so we planned a charter boat fishing trip! We really enjoyed the chartered fishing, so we did the boat thing the next day too! We caught so many fish and just incase you're wondering who caught the biggest fish on this trip.....it was me! It was a Walleye!!

For my 12x12 scrapbooking page I didn't want to use to many embellishment, so it didn't look feminine. The photo I used is of my husband and our oldest son as we're waiting for the charter boat to leave the dock. For the base of my page I used the 12x12 School Days Multimedia Pad by Martha Stewart.

I couldn't find a bobber in any of the Cricut images by PC, so I had to create my own. I also wrapped some twine around the two "i" to make it look a little more nautical.

I used one of the Cuttlebug embossing folder from the Asian Bundle on the cloud cuts and I added some Pearl Ex to give them a little sparkle. I also use some Gum Arabic to adhere the Pearl Ex, so it wouldn't all rub off.

I used some twine to wrap around the bout and the hand writing on the boat is the date and I made it to resemble a boat license. The waves are embossed using one of the Cuttlebug Wedding Borders and I also used the Pearl Ex on them.

Cricut  Info & Supplies Used:
Designed By: Helen Hodge
Cricut Machine(s) used: Expression 2, CCR, Cuttlebug
Project Type: Scrapbook Page
Other Supplies used: Twine, Pearl Ex, Gum Arabic, Uniball Signo Black Pen, Pop Dots, Tombo Liquid Glue, ATG Adhesive
Sizes:
Title: Gone Fishin’ – 5” Relative one red and one white – Wildlife.

Boat: 4” Relative – hide control the waves – Going Places.

Fly Fisherman: 3” Relative – Fun in the Sun.

Waves: 3.5” Real – Crocs Rule.

Cloud: 2.5 Real – Create A Critter.

Cloud: 2” Real – April Showers.

Bobbers: .375” Real Circles – All Mixed Up.

Bobbers: .5” Real Circles – All Mixed Up.

Bobbersr: .375 Real Cylinders – George & Basic Shapes.

DON'T FORGET TO LEAVE A COMMENT TO BE ENTERED TO WIN OUR WEEKLY DRAWING IN SEPTEMBER.