While we are no longer making active post of Cricut projects on this blog as of 8/1/2013, we invite you to use it for continued die cut inspiration as we will leave the blog up for viewing. Happy Cricuting !

Showing posts with label Quarter Note. Show all posts

Monday, April 8, 2013

Bunny Cards and Tags

Hi Everyone.  This is Erika from http://ekittyscraps.blogspot.com/.  I am so happy to be here today and share my projects with you.  First up is the bunny card-Peter Cottontail and his Easter Basket.


                             Here are the items I added to the card.


 First I cut my Weathered Wood distress cardstock into 4 x 6 sheets.  Next I used my swirls embossing folder and my Cuttlebug.  I added the Weathered Wood swirl paper to my card and then layered with the TH Seasonal Cardstock-Easter. 
 I used my Paper Doll Dress Up cartridge to cut out the grass on Peeled Paint Distress Cardstock and adhered to my card.
I used my rabbit stamp from Stampers Anonymous and heat embossed the image.  I fussy cut out the rabbits and colored with Distress Ink pens.  I added small pieces of cotton balls for the cotton tails and adhered with glossy accents.  I used popdots and added my rabbit to the card.
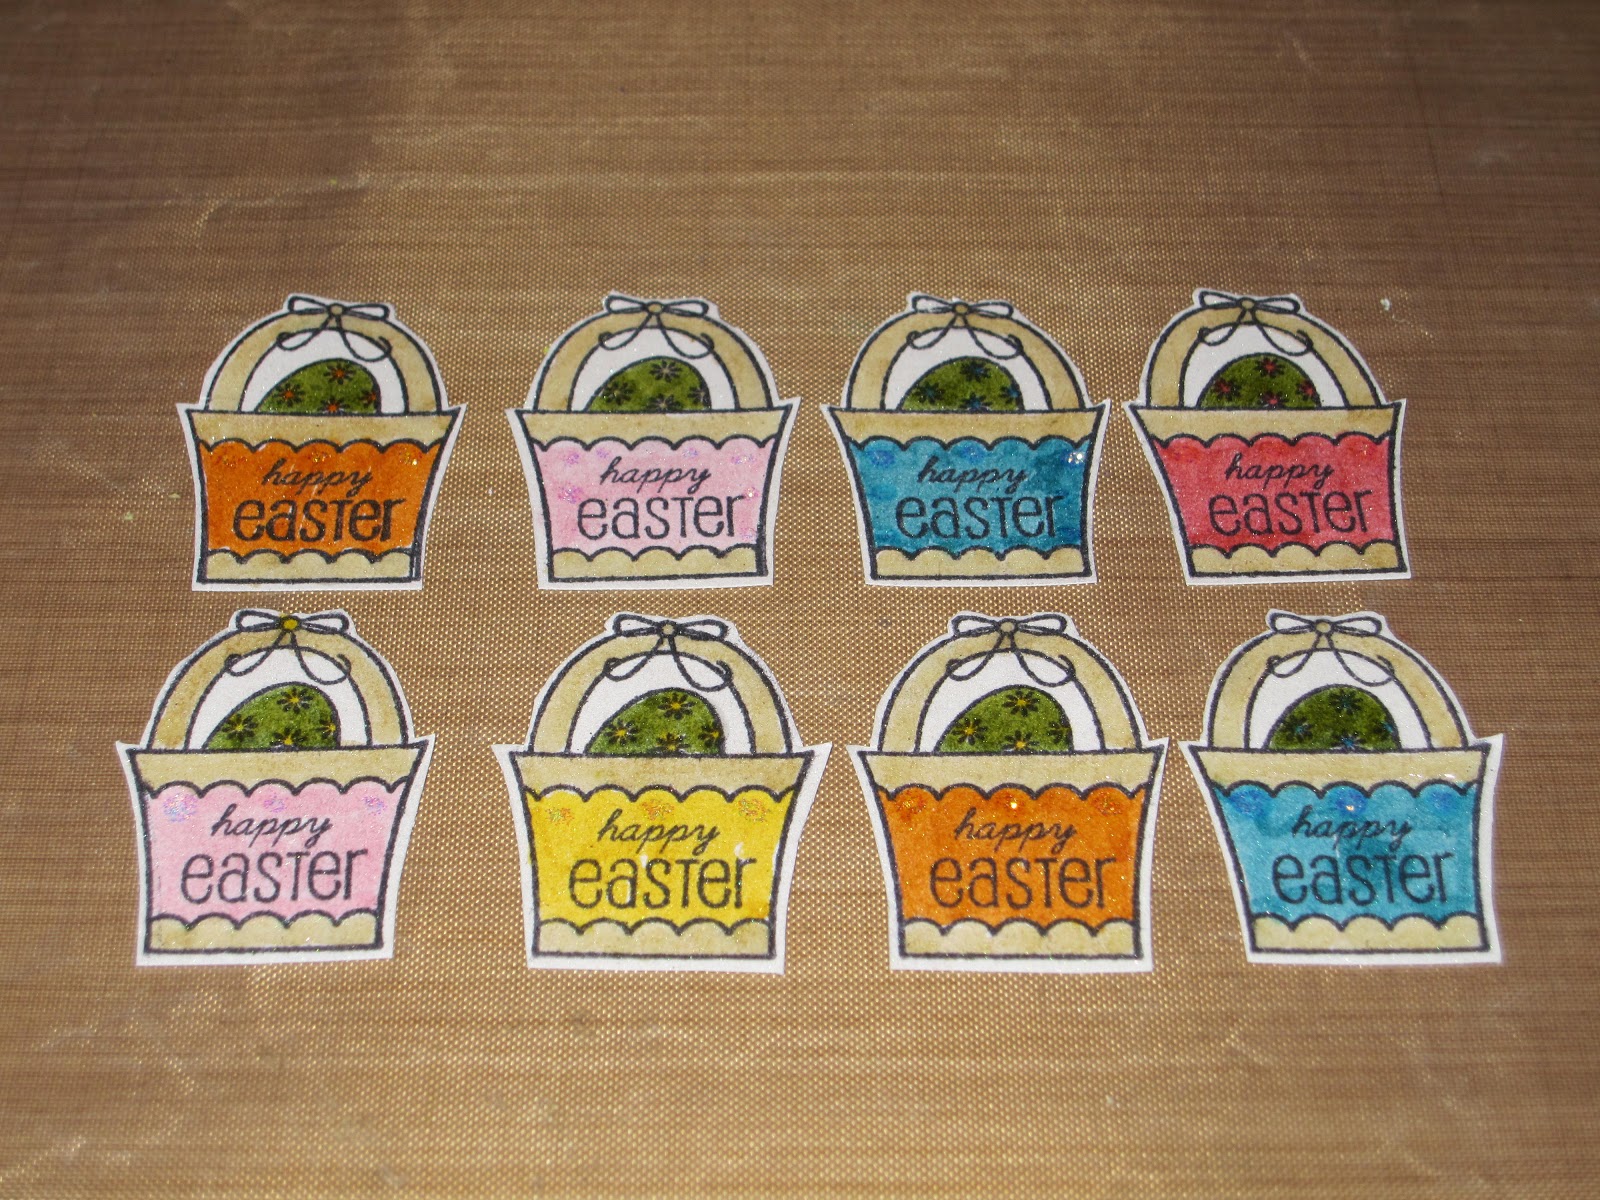
 I used the easter basket stamp from Studio G (a $1 stamp-love them) and also fussy cut and colored with Distress Ink Pens.I added glossy accents and stickles to the easter basket since they looked kind of flat or dull compared to the embossed  glittery rabbits.  I added popdots to back of the easter baskets and added to my card.  I used Vintage Photo distress Ink to outline each card.
Here are a few of the finished Bunny cards. 


Next up are the tags I created for my Easter bags.  I used both sides of the Reminisce papers.  This paper had light blue polka dots on one side which is the background paper of this tag and the bunny designs on this other side.  It also had the purple bunny and chicks border on it that I used on the bottom of the tags.  I almost missed this cute border because it was only on the backside of the paper.  I used my Artiste cartridge to cut out the names at .75 inches for 5 letter names and at 1 inch for four letter names on blue cardstock. I added a final blue ribbon to each of the guys' tags and outlined with Vintage Photo distress ink.

The girls' tags were also made from another  Easter Reminisce paper which had pink polka dots on one side with a pink and green striped border on the back.  I used the border on the top and bottom of each tag.  I used my Quarter Note Cartridge for the fancy font names.  I cut these at .75 inches for five/six letter names and 1 inch for the three letter name on fuschia cardstock. I added a orange ribbon to match their Easter bag and used Vintage Photo distress ink to outline the tag.  These tags were so easy to make since I only had to cut out the paper and names and adhere with Scotch Quickdry Adhesive.   
 Here are the Easter bags with their bunny paper tags. I purchased these cute bags from Joann's for $3.99 for 8.  Perfect for Easter but with a different paper could be used for any spring time event.
 Thanks for stopping by and have a good month!

Supplies Used:
Cricut Expression Machine
Cuttlebug
Artiste Cartridge
Paper Doll Dress Up Cartridge
Quarter Note Cartridge
Cuttlebug D'Vine Swirls Embossing Folder
Core'dinations Cardmaker Series Pearls-Pearly White cardstock for stamping on
Inkssentails #8 Manilla Tags
Stampers Anonymous-Rabbit from Spring Sprung Collection
Stampendous Marcasite Opaque embossing powder
Studio G Easter basket stamp-2012
Ribbon-blue and orange
Tim Holtz Idea-ology Paper Stash Seasonal -Easter
Tim Holtz Distress Collection Paper-Weathered Wood and Peeled Paint
Reminisce Papers-Bunny Collage
Blue and Fuschia Cardstock
Tim Holtz Distress Ink Pens-various
Tim Holtz Distress Ink-Vintage Photo


Friday, March 8, 2013

Musical Birthday Card

Hi fellow fanatics!  This is Erika from http://www.EKittyScraps.blogspot.com.  I am glad to be able to share my new project with you today.  I designed this card for my stepdaughter Kim using the Quarter Note cartridge.  Kim is a music major in college so I wanted to make a musical themed birthday card.
I started with a kraft cardstock for the card at 5 x 7 inches.  I add a piece of black cardstock at 4.75 x 6.75 inches and attached to kraft cardstock.  I cut Bazzill Basics Antique Sheet Music paper to 4.50 x 6.50 inches and adhered to black cardstock.  I added a silver treble clef embellishment that I had in my stash.

Next I stamped a birthday cake from Inkadinkaclings birthday stamp.  I wet embossed the stamp with Ranger Inkssentials tinted embossing ink and used Stampendous Marcasite Opaque embossing powder which has a nice glittery black color.  I used my Copic markers to color the stamp. 
Hint-an advantage to wet embossing and coloring is that you have raised lines when wet embossing to color in versus just stamping a flat image with regular ink and trying to color inside the lines.

  Now I used my Quarter Note cartridge and cut out Happy Birthday in music notes using font 3 and shift font 3 for capital letters B and H at .75 inches.  I also cut out two corner roses at 1 inch and adhered with Scotch quick dry adhesive.  I pop dotted the stamp and added to the card.  The stamped image above does not really show how glittery the cake stamp from the embossing power is nor the nice colors of the copic markers.  I hope you like my card.  Have a nice day and keep crafting!

List of Supplies used:
Cricut Expression Machine
Quarter Note Cartridge
Cardstock-kraft, pink, red and black (Tim Holtz Craft core)
Bazzill Basics Paper-Antique Sheet Music (has french words on it)
Inkadinkaclings-Happy Birthday Cling
Ranger Inkssentials-Emboss It Tinted ink pad
Stampendous-Marcasite Opaque embossing powder
Copic Markers-RV11-Pink,  R29-Lipstick Red, W5-Warm Gray, Y13-Lemon Yellow and YR07-Cadmium Orange
Scotch Quick Dry Glue
Silver Treble Clef embellishment


Saturday, February 16, 2013

Shades of J

Hello again, everyone!  Doreen from PolkaDotPaperPrincess here with another project.  I made this layout of my daughter.  It was an accidental photo that I just love.  The light coming in came directly across her face.  I'm not sure if you can see in this photo, but you can see both sides of her.  The portion on the right side of the photo is just darker.  


I used Quarter Note for the script writing, Printing Press for the J, Accent Essentials for the stars and Sophie for the doily under the photo.   I made the flower on the J with tulle and then added the brad.  I used some very old Glitz rub-ons and stickers.  MME journalling cards and labels, a fabric ticket from Webster's Pages, some buttons and washi tape.  

Try doing a scrapbook page of an accidental photo.  Try to also work outside of your comfort zone!  Use up some of those wonderful goodies you have!  Have a lovely, long weekend!


Sunday, December 2, 2012

A Little Wall Decor

Hello and Happy December.  This is Cindy from Scrap-Obsessed with a little vinyl project I did. We had Thanksgiving dinner at our house this year and Christmas will be at our house as well, so I wanted to do a little decorating. I saw this saying on Pinterest and knew right away that I wanted to put it above my stove.

 
It was a little challenging to find just the right font for the look I wanted. I ended up using three! I love the final result though.
 
For the 'S' I used Nursery Rhyme, cut at 6".
For 'eason' and 'ove' I used Quarter Note cut at 2"
The 'L' was cut by Quarter Note at 3.85".
'Everything with' was cut using George and Basic Shapes at 1".
It's a little hard to see, but the flourish underneath was cut out using the Art Philosophy cartridge at 3". I used my Gypsy to weld the letters that needed welding and cut everything out with a 12x24" mat on my Cricut Expression.
 
Thank you for having me back and Happy Holidays.
Cindy
 

Saturday, November 3, 2012

A Thanksgiving Celebration!

Hello, everyone!  It’s Lori from The Singing Shell and I am so happy to bring you a Thanksgiving project I have been working on.  I am happy because I know how blessed I have been these past couple of days in the aftermath of Sandy.  My family and I have a lot to be thankful for – we have our home, we are safe, but, most of all, we have each other.  An event like this really puts things into perceptive for me.  When you have a chance, hug a loved one.  To those that have suffered any losses, my thoughts and prayers go out to you.  I hope that relief comes soon.
 
I have the pleasure of hosting Thanksgiving dinner at my house this year.  Because of limited time, I needed to make something that I could mass produce without a lot of hassle.  I wanted to try something clean and simple, too.  Let me tell ya:  It is hard to leave white space alone!  I kept wanted to stick something in those areas – a diecut, a stamp, a rhinestone, a ribbon, a photo corner, anything.  It is amazing the amount of embellishments one can use.  I had to chant to myself:  Leave it alone! Leave it alone!  Eventually, I was okay with it… eventually.
 
I have been playing around with the notion of making my own embossing folder when I came across a great site: Paper, Scissors, and Ink.  She tells you how to make your images to emboss without the folder!  How cool is that?  I used to the idea to deboss my images instead, though.  I like that look, too, because I think it is elegant..
 
1.  I cut the leaves image (page 35) in Art Philosophy eight times using regular card stock.  It took less that 2 minutes. If you use thicker cardstock you can cut less images.
 
Take four of the 8 and paste.
2. I pasted four images together to get  two thick leaves diecuts.
 

3.  I arranged them on my paper and used a rubber mat on top.  I used a rubber mat from Papertrey Ink, but you can use any brand.  In fact, plumbers red rubber gasket sheets from the hardware store work just as well and are cheaper!
 
4.  The sandwich I used was A – B – rubber mat + paper – B.  No shim needed.  You may need to play around with your sandwich depending on the paper and rubber mat you use.
 
5.  Voila! A debossed image from my Cricut instead of a folder.  A lot more possibilities for the future, too!
 
 
6.  I added some Perfect Pearls to the sunken image.  Because the Perfect Pearls is so light, it is very forgiving and I was able to go over the leaves very quickly and it took no time at all to do this step.
 
First, I added a white shimmer.
Then, I added the gold shimmer.
7.  I added my Thanksgiving Celebration sentiment welded on the Gypsy using a font from Quarter Note.  That font is so pretty! 
 
8.  Lastly,  I adhered the cream cardstock onto the pattern card stock and added the invitation information in the back!

 
You can use the pieces over and over again.  Here is a modified version I made for my parents in Spanish.  I used the label from from Folk Art Festival on page 69 for the sentiment.
 

So there you have it! A clean and simple invitation using an image I wanted instead of an image I had to use from my collection of embossing folders.  I wish you all a Happy Thanksgiving.  Don’t forget to hug those loved ones!

Cricut Info & Supplies Used:
Designed By: Lori Sjogren
Cricut Machine Used: Cricut Create
Cricut Cartridges Used: Art Philosophy, Quarter Note
Other Supplies Used: SEI - Patterned paper; Bazille - Plain cardstock, Cuttlebug, Ranger - White and Gold Perfect Pearls

Tuesday, October 2, 2012

Pumpkin Place Settings and Home Sweet Home

Happy October 2nd. This is Cindy from Scrap-obsessed.blogspot.com with a couple of fall home decor projects. Before getting to my projects today I'd like to say 'Thank You' for having me back. Not only is it an honor to be able to come here and share some of my projects with you, but I also love coming here to look at all of the wonderful projects made by the other designers. They are all such an inspiration.
For my first project today I wanted to use my new Close To My Heart Artiste cartridge. I just got it in the mail a couple of days ago and I absolutely love it. There's an image for just about everything. With Thanksgiving in mind, which will most likely be at my house this year, I was looking for a way to make place settings. I found the perfect images on page 78. I cut the 3D pumpkins at 4" and 5". The patterned papers I used are from an old paper stack called Femme Fatale by Recollections.


Before assembling them I inked the edges with Pumpkin Pie ink by Stampin' Up. Once the pumpkins were put together I cut the leaves at 4" and 5". I inked the edges with Old Olive ink by Stampin' Up, added twine and a button.


I then cut some of the very cute tags on page 32 at 2". This cartridge has some of the cutest tags, not just the ones I used. Again I inked the edges and then stamped the names of family members using the Close to my Heart Type Face letter stamps.


For my other project today I would like to share an idea I found on Pinterest. (love that site)


This front porch planter was super easy to make, but was a big hit at my son's housewarming party. I used three planters stacked one on top of the other in 3 sizes (largest on the bottom). I then added the words Home Sweet Home cut out of vinyl from the Quarter Note cartridge. Each word was welded  using my Gypsy and cut at 3 1/2", 3 3/4, and 4" respectively. I then added my plants of choice and that was it. Super easy.