While we are no longer making active post of Cricut projects on this blog as of 8/1/2013, we invite you to use it for continued die cut inspiration as we will leave the blog up for viewing. Happy Cricuting !

Showing posts with label Heritage. Show all posts

Tuesday, July 30, 2013

My Last Post for Cricut Fanatics ~ A Heritage Layout

Hello everyone! It’s Angie from Angie’s Paper Passion and I’m so sad that our beloved Cricut Fanatics Blog will be closing after tomorrow, so this is my last post as a Design Team member. I have been very happy and honored to have had the chance to share my projects here along with these other very, very talented designers. I’d like to thank Debbie O’Neal for starting this blog and all of her hard work to keep it going. And this leads me to my layout today. This layout is completely scrap lifted! I first saw this LO when I first met Debbie – at Provo Craft Demo Training back in the Spring of 2010! I had always wanted to recreate it and felt this was just the right time. (Debbie, can you believe that this blog is a year old? And that we’ve known each other for over three years?!?! Boy does time fly!)

So here is my Heritage layout:

HeritageLO_AGC (4)

Since I’m a new Grandmother, I felt it was important to document my Grandson’s ancestry on both sides of his family. I had researched my family history many years ago but now I needed to find out more about my Daughter-in-law’s family. So after she gave me the names of my Grandson’s great-grand parents I created this layout for him. I am going to frame it for his bedroom wall.

I used the same cartridge, Heritage, and the same paper from DCWV. The one thing that I did change was the tree image but it still came from the Heritage cart. I typed up all of the family names in Word and placed them in the frames under the cameos and they contain my Grandson’s parent’s, all four Grandparent’s and all eight great-grand parent’s names. I know that he’ll really appreciate this when he’s older!

I hope that you will still follow me at my blog Angie’s Paper Passion where I will continue to post all of my crafting & Cricut projects and where I hope to continue to inspire others in their crafting pursuits!

Thanks again to all of you for visiting and to Debbie for bringing us all together!

Cricut Info and Other Supplies Used:

Designed by:  Angela Cromwell

Cricut Machine Used: Expression and Cricut Craft Room

Cricut Cartridge Used:  Heritage

Other Supplies Used: DCWV patterned paper, American Crafts cardstock, foam dots

Happy Crafting!

Angela

Friday, January 18, 2013

We Are Together

Hello fellow Cricut Fans!  This is Michele, from Scrap-n-Dance.blogspot.com! (Dancingarden on the MB)  I am so honored to be  your designer today, and I have a layout for you that could be used for family gatherings. 
We just came from a couple months of doing things with our families. Not all of it may have been holiday related! I design these kits for a few friends of mine and they like these more general pages sometimes.  :)  As a bonus, everything in this layout was from my stash!

I really like the "bird on a wire" imagery I found in the printed papers. I wanted a border along the bottom that mimics the print. I did a search on my Gypsy and didn't find anything like that on any cartridge I had. So, I created my own!  I am providing a link to the gypsy file below, please feel free to use it on your own pages! If you post it on your blog, let me know, I'd love to see it. :)

The images I chose are a little whimsical but kind of formal. I wanted a bird image but I also chose the chair because when we visit some of my family, we spend a lot of time sitting and watching the birds through their patio doors. The images evoke those wonderful memories of past gathers for me.

Adhesive-backed pearls add accents to the cuts.
I design on my Gypsy and sometimes I don't pay much attention to sizes. I will list the sizes here but if you don't have a Gypsy, you can always round the size to the nearest quarter inch.

The bird and birdcage are from Sophie, and were cut at 5.38"
The label behind is cut from Elegant Edges at 4.7"
"Together" is from Sophisticated and cut at 2.75"
"we are" is also cut from the Sophisticated font, cut at 1"
The chair is from Sophisticated and cut at 5.69"
The birds on a wire were welded from several cartidges: a stretched dash from Plantin and birds from Heritage, Everyday Pop-up Cards and Picturesque.


Cricut Info and supplies used:
Designed by Michele Donner-Ramsey

Cricut machines used:  Expression, Gypsy
Cartridges used: Sophie, Elegant Edges, Sophisticated, Plantin, Heritage, Everyday Pop-Up Cards, Picturesque
Other Supplies: Bazzill Cardstock, We R Memory Keepers Antique Chic printed cardstock, adhesive flat-back pearls, Distress Ink Black Soot, adhesives

Tuesday, December 18, 2012

Hot Chocolate Teapot Display Set


Hello again, it’s Freda from CannCreate Designs.  I posted a little teaser for this project on my blog a couple of weeks ago showing the unembellished teapot and got a really good response from viewers.  This is going to be a really easy posting for me today because SVGcuts does all the work, they produce excellent step by step videos telling you how to assemble the files you purchase from them, the only thing I had to do was decide on the papers and types of embellishing I wanted to use. 


These items were cut on my Expression using MTC, you can also use SCAL if you have that software.  They were not cut using Cricut Cartridges.


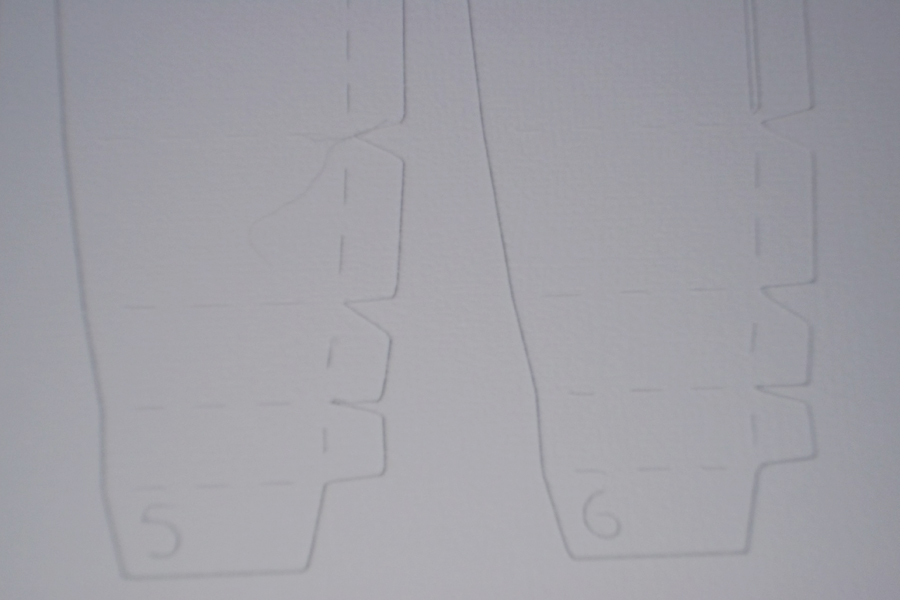
Making papers bend looks a little daunting, but if you take it step by step it is really easy.  Each piece is numbered and cut with tabs for gluing and folding so all you have to do is bend and it folds exactly as needed-no having to use a score board, assemble them together in numbered order and you’re done.  Here’s a picture of the base pieces showing the numbering of pieces, tabs and fold lines that are cut.

The Half Naked Truth-Here’s what the pot looks like before the panel pieces are attached.

 
Now presenting my Hot Chocolate Centerpiece

 
As you can see all the top panel pieces have had the edges inked with Timber Brown Ink.  The upper layer papers were from GCD Studios Ella Blue Collection by Tina Higgins.   The white base layers were cut from American Crafts White Cardstock.   I decided to use a pearl and Snug Hug Seam binding theme for embellishing.

I used two files I purchased from SVGcuts.com and the MakeTheCut software to make this set.  This should be an easy posting because they do all the work.  (disclaimer-I am not affiliated with these companies, I’m just really satisfied with the results I get when I use their products).

Tea for you and Me:


 Home for the Holidays:  (Pitcher)


There are 3 different types of pearls used on the teapot.  For the spout handle and around the top of the lid I used the small pearl “lines” made by Paper Studio (I should have checked my stash quantity first-ran out and didn’t have enough to do any of the other projects with them).  Around the the rim of the pot and the “dangly” pearls in the bow I used pearls by the yard I bought at JoAnn’s.  Around each tab on the lid and on the small dangly I used the large Queen and Company Pearls.  I’m going to make a cameo charm for this bow, the Round 25 set I used on the pitcher was too large for this spot.

 
The paper I used had a silver script writing on it, you can see a little of it in this picture.

Next we have the Pitcher from the Home for the Holidays set.  The cameo charm was made using a cut from the Cricut Heritage Cartridge at 1” and Epiphany Crafts Shape Studio Round 25 punch and the coordinating charm and bubble caps.   Pearls by the yard and Queen and Company large pearls were used on the pitcher.

 
I used the cameo and a white circle which made my cameo 2 layers of paper, when I put the bubble cap on it looked a little “milky” in spots.  I flipped the bubble cap over on a sponge (to avoid scratching the bubble) and used the cricut stylus to push the white back into the bubble cap adhesive.   After burnishing the paper to the cap, I used Glossy Accents to glue to the metal charm. 

 The Burnished Cameo

 
Doing this step makes the white back attach to the bubble cap and get’s rid of the milky appearance you get when using 2 layers of papers.
 
 
For my pearl embellishments on the teacup I used a large, medium and small pearl on each panel.  I chose a coordinating paper to do the panels on the saucer and the inside of the teacup (mostly because I didn’t have enough of the brown patterned paper-having 5 sheets would have been enough but I only had 4).  Then to top it off I threw out the scraps before assembling the spoon so I didn’t have any of the papers for the center piece of the spoon.  I also noticed that the pearl at the base of the handle had come loose and moved in this pic, it has been moved and glued back down.

Last but not least is the hot chocolate holder.  My family LOVES hot chocolate so much that I bought a Keurig for us to use last Christmas when everyone came home.  Little did I know that my son was buying me that Hot Chocolate dispensing machine too…lol

 
This piece was the only one that gave me problems, if you look close you’ll see that it’s “wavy” in spots.  This piece is a box inside of a box with trim around the top.  The space between the 2 boxes is “hollow.”  When I put the 3M quick dry adhesive on the decorative piece the base got a little distorted.  If I make another one of these I would cut some foam core to attach to the outside pieces to prevent the distorting with wet adhesive.    I used Snug Hug seam binding, a large pear and pearls by the yard for embellishments on this piece also.
 
 
I hope you enjoyed my project, it was a wee bit time consuming, but well worth it.  I’ll have a beautiful display for my counter when the kids come home for the holidays.  I just wish the sun would shine on the day I’m photographing my blog submission.  Maybe Santa will bring me a photo box for Christmas…lol
Merry Christmas to one and all, see you next year.  Freda                                                             

Cricut Info & Supplies Used:
Machine Used:  Cricut Expression

Files Used:  Cricut Heritage Cartridge for Cameo shape.  SVGcuts Home for the holidays (pitcher) and Tea for you and Me.

Paper:  GCD Studios Ella Blue Collection Pack designed by Tina Higgins.  American Crafts White Cardstock

Supplies:  3M Quick dry adhesive, Pearls-Queen & Company, By the Yard from JoAnns, Paper Studio Pearl Lines, Epiphany Crafts-Shape Studio Round 25, Bubble Caps and Charms.  Snug Hug White Seam Binding 

Wednesday, October 3, 2012

Two Cards: Enjoying Autumn & "Scare" Globe

Hi!  This is Lori from The Singing Shell blog with an autumnal card and a Halloween card for you.

I had no idea what to make for this month's post but then I got inspired to make two cards.  Here is the first:

ENJOYING AUTUMN


I love autumn for all its beautiful colors and for the cool breezes it brings.  I wanted to make something whimsical and carefree so I chose the barefooted girl riding a bike from the  Something to Celebrate cartridge.  She is on page 37.  With her hair flying behind her, she looks happy - doesn't she?  (Even though she has no facial features!  I am reading body language :)   She was cut at 3 1/2 inches. .  I also used Distress Ink Pads for the hardware on the bike.

  I used Distress Markers to outline the edges of the dress
and then added glitter to make her stand out.   

The tree [tree3] is from the Heritage cartridge and is cut at 4 1/2 inches.  I inked that up with lots of different Distress Ink Pads because I couldn't find the right paper.  I gently tapped the colors randomly onto the die cut.

Colors used: Evergreen Bough, Festive Berries,
Antique Linen, Wild Honey.  

The leaves [leaf] are from the Doodlecharms cartridge - an oldie but a goodie.  I cut those at a 1/2 and 3/4 inches.  I was nervous because I never cut anything that small on purpose.  But it worked like a charm.  I inked those up with the same Distress Pads, too.  That way they would match my tree.


Now for the background.  I used washi tape to create a kind of road across the background.  I used the Musical Flourish folder for the background and then inked the embossed parts lightly.  I only embossed the part above the washi tape to create a distinction between earth and sky.  I rounded the corners with We R Memory Keepers corner chompers.

I purposely made the tree bigger than I needed so
I had to trim it.  It took me a day to find
the courage!


The final product :)


So that's it - an auutmnal card for any occasion.


"SCARE" GLOBE

This is a snow globe with a twist.  And I know - it is not really a “scare” globe.  This little guy is too cute to scare anybody:)  I picked "scare"for strictly for its Halloween appeal. 


The snow globe aka “scare” globe is from Joy of the Season and is cut at 5.25 inches.  I added a little blue on the left side of the globe to give it a little dimension.  I used the Tumbled Glass Distress marker and then just went over it with a wet detail brush to lighten it up and spread it out a bit.  The spider web is from Chic & Scary and cut it at 3 inches.  I used only the edges and then cut off the top.


Mister Bear from Teddy Bear Parade is cut at 3 inches.  I didn’t use the trick or treat bag because it would have made the little scene too busy.  I ran the Spiced Marmalade Distress Marker over the edges of the orange part of the markers.  I used the Forest Moss Distress Marker for the green.  For the ears, I used a Rose Red Copic Marker.  For the muzzle I also used a Copic Marker – Chamois.
 
TIP: You can make your own custom color ribbon.
 The ribbon is actually plain seam binding that I colored with
 Spiced Marmalade and Forest Moss Distress Markers.
 I added some water to soften the colors. 

Although I really loved creating Mister Bear, I loved making the spiders more!  I added glitter - Glow-in-the-Dark Glitter.  First, I cut the spiders from Doodlecharms at a ½ inch.  Then, I made their eyes with Glossy Accents.  That way when I added the glow-in-the-dark glitter and turned off the lights, you would be able to see the eyes, too.

Spiders Before.
 
Spiders After
 
I hope this inspires you to make your own "scare" globes.  They might even be scarier than mine!

Thank you very much for all your compliments last time.  It made me feel great for days!

Enjoying Autumn Card
Cricut Info & Supplies Used:
Designed by: Lori Sjogren
Cricut Machine used: Create
Cricut Cartridges used: Something to Celebrate, Heritage, Doodlecharms
Other supplies: Bazzil, solid cardstock; Webster's Pages, pattern cardstock; Musical Flourish embossing folder, Cuttlebug; Ranger, Distress Markers and Distress Ink Pads; Denami Designs, Sparklets Lemon Sorbet glitter; Close to My Heart, Vanilla Cream ink pad; We R Memory Keepers, corner chomper.

 "Scare" Globe Card
Cricut Info & Supplies Used:
Designed by: Lori Sjogren
Cricut Machine used: Create
Cricut Cartridges used:  Teddy Bear Parade, Chic n Scary, Joy of the Season, Doodlecharms
Other supplies: Bazzil & Recollections, solid cardstock; Die Cuts With a View, pattern cardstock; Ranger, Distress Markers & Glossy Accents; Martha Stewart Crafts, Glow-in-the-Dark glitter;

Monday, September 10, 2012

Happy Monday Everyone.  It's Laurie from Creations by Laurie - welajo from the Cricut message boards with a fall inspired card for you.  With fall just around the corner, the nights are already getting cooler here in Colorado and I've noticed the trees starting to change.

This project is inspired by all the things I love about fall, the colors, the crisp air and the crunch of leaves under my feet.

Front of the card

Inside

I layered several leaves to create a "pile" under the tree

I found the instructions for this book card here Unique Monique Creating.  These look complicated but are really easy to make and very addicting.


Cricut Info and Supplies Used:
Designed By: Laurie
Cartridges used: Speaking of Fall, Heritage, Artiste
Cricut Machine: Expression
Project: Card
Supplies Used: Paper and stamp from Close to my Heart, Martha Stewart Flower border punch, Cocoa pigment ink from Close to my Heart, acorn from fall section at Hobby Lobby.


The tree is from the Heritage cartridge "tree 2"cut at 3 3/4 inches
The leaves are from the Speaking of Fall cartridge the "shift Z" key cut at 1 1/4 inches
The label is from the Close to my Heart Artiste cartridge the "shift accent 4" on the "N" key cut at 1 1/2 inches

Have a great day and if you have any questions, please leave me a comment.  Thanks

DON'T FORGET TO LEAVE A COMMENT TO BE ENTERED TO WIN OUR WEEKLY DRAWING IN SEPTEMBER.