While we are no longer making active post of Cricut projects on this blog as of 8/1/2013, we invite you to use it for continued die cut inspiration as we will leave the blog up for viewing. Happy Cricuting !

Showing posts with label Elegant Edges. Show all posts

Tuesday, April 30, 2013

Spread Your Wings

Hi There Crafters!

This is Yvonne from Ink-spirations. I started out with a LEVER card design that I had seen over at Splitcoaststampers.

The images and pattern paper printed using Lori's Garden cartridge and the Imagine. After I had picked the design and the paper I decided this would make a good graduation card.
Blue paper textured with Swiss Dots, inked with Tim Holtz Tumbled Glass ink and faux stitched.
The sentiment was computer generated.
Bird House - 2.4" Height
Bird - 2.15" Height
Blue Square on front - 3.4"
Thanks for visiting.
 
Yvonne
Designed by: Yvonne Balmer
Machine Used: Imagine
Cartridges Used: Lori's Garden
                            Elegant Edges
Category: Cards
Other products: Bazill cardstock, paper flowers, brads, micron pen, dimensionals, Swiss Dots
Cuttlebug, Tumbled Glass Distress Ink

Sunday, April 28, 2013

Beautiful flowers layout

Welcome to Cricut Fanatics. Diane here today from http://happyscrapperdiane.blogspot.com sharing this one page layout with you.  This is my baby granddaughter Peyton and she had this picture done for Easter and I love the colors.  I created this layout using the cartridges Elegant Edges, Art Philosophy, and Indie Art.  Below are the materials and directions for this page. 
Supplies and Materials.
Created by:  Diane Kielman
Cartridges used: Elegant Edges-leaves tag on page 29 cut at 3 inches
                         Art Philosophy-flower page 21 cut at 2 inches
                                                 flower page 29 cut at 3 inches
                                                 flower page 39 cut at 2.25 and 2.5 inches
                                                 flower page 50 cut at 1.5 and 2 inches
                                                 Date and title cut at1.25 inches(3 was cut at same height, but looks bigger)
                          Indie Art-butterfly cut at 1.75 inches
Machines used:  Cricut Expressions 2 and Gypsy
Pattern paper: Bo Bunny Jazmyne
Cardstock:  Recollections
Pearls: Recollections
ribbon in stash and stickles

Wednesday, April 3, 2013

Brotherly Love


Hello!  This is Lori Sjogren from The Singing Shell blog - stump-free and happy I got over a crafting bump in the road.

I was stumped for this month's project so I asked husband, "What should I do?"  

He answered, "Do something showing off our boys."

Easier said than done.  Do you ever feel intimidated to even try a new crafty endeavour?  That's how I feel about scrapbooking.  The funny thing is I started out a scrapbooker.  But I set out to do just as my husband suggested and picked out one off our favorite pictures to scrapbook.  That's all the inspiration I needed.

I used an image from A Child's Year but it wasn't right because I had two boys.

Before

So I did what I learned how to do from you lovely ladies in the Cricut board - I altered it. :)

After
 I noticed that the girl image had rounded edges and I just used regular crafting scissors to remove the rounded edges and the flair on the bottom of her shirt.  I lopped off her hair and Voila! Two boys!  I also removed the duck because it just didn't go with the the page.  

One of the most difficult things for me is lining up the letters - even in cardmaking.  So now I use a level with a laser.  I forget which blog I got the idea from but it is great!  I tried to take pictures of it but they are not so great.  I would love to hear how others make sure their letters are straight.  How you keep your letters from being crooked?

Do you see the red line?  That's the laser!
I turned off my Ott light so you can see it better... Oh well, I tried :)


 Lastly, I added some old fashion looking alphabet cards from October Afternoon to complete the page. 

Have a great day everyone!


Cricut Info & Supplies Used


Designer: Lori Sjogren

Machines Used: Imagine

Cartridges Used: A Child's Year (letters, image) & Elegant Edges (frame)

Other Supplies: SEI cardstock: Moravia and October Afternoon alphabet cards

Saturday, March 16, 2013

Southwest Mini

Hello everyone!  Doreen from polkadotpaperprincess, I'm here to show you the front cover of a project that I am working on.  I tried the Craft Room for the first time this week!

My project is a 50th wedding anniversary, mini album, but not your typical one!  It is one for my aunt who loves Aztec/Navajo items.  I was so pleased I happened to try the Cricut Craft Room when I did, as the Southwest cartridge is free to use until the 20th of this month!  It works perfectly for the project I need to make! I will have to scurry to finish the rest of it in the next four days before the cartridge is no longer free!  I will post the remainder of the mini on my blog when it is done. 

The book pages are made from Elegant Edges.  I love this cart for these easy-to-make minis and mats!  The eagle, "Oh happy day" and the border are all made from the Southwest cartridge.  The 50 is made from Gypsy Wanderings.  I ran it through my Zyron and then added glitter.  I took some flowers and the ribbon and sprayed then with my Copics to get better color matches.  I added some bling, lace and a feather to add a little extra kick.  I can only add a bit as my aunt tends to like this more on the plain side.  I have only partially adhered the items on so that she will be able to place her choice of photo on the mat.   

I am so grateful for the opportunity to use this free cartridge to make this album.  If you haven't done  it yet, you should scoot over to the Craft Room and try the Southwest cartridge for free while it lasts!

Thanks for stopping by!

Monday, February 18, 2013

Snapshot

Hello all!
This is Michele from Scrap-n-Dance. Today I have a layout for you as well as a cut file!

You know how certain iconic items become all the rage? I've seen things like those old rotary fans, coffee stain stamps and more. Lately I've seen the viewmaster disks around. what memories those bring back!

Just recently someone on the Cricut message board asked me where I get my ideas for layouts. I get inspiration from everywhere, but I have no problem scraplifting! Especially if I want to experiment in a style of crafting that I'm not used to doing... as is the case with this layout... I am never quite comfortable doing layouts like this... But I like how it turned out. Sometimes I just see one little thing somewhere that inspires, sometimes the whole layout inspires me. In the latter case, I often translate someone's layout into a "sketch" and go from there, using my own supplies to re-interpret the "sketch". Today's layout is definitely scraplifted! It was her viewmaster disk that caught my eye at first, but then I fell in love with the whole layout. To see my inspiration, click here.

However I did not have any viewmaster disk embellishments. So I had to create one! That meant a little research. It turned out that Capadia had made a tutorial for a cut file for a different machine. I was able to translate that to my gypsy and created my own viewmaster disk cut file for my cricut on my gypsy. You can download the Gypsy viewmaster disk file from Box.com by clicking here.

The gypsy file includes the disk in two sizes, the smaller one is based on measurements I found for the disks... close but not quite exact I am sure. The larger one was the size I wanted for my layout. The images are grouped separately so you can move them or resize them as you please. On the second layer is a blackout version of the disk, in case you want a black background for the photo holes, as I did in this layout.

By the way, this layout was made entirely with stash that I've had from 4 months to 4 years. :)  I dug out several things I'd made ages ago and stored away (grungepaper flowers, UTEE'd heart).

Thanks for coming to see my project today!

Cricut Info and supplies used:
Designed by: Michele Donner-Ramsey
Machines used:  Expression, Gypsy
Cartridges used:  Elegant Edges, viewmaster file: B is for Boy, George, Plantin
Other tools: Sizzix, Tim Holtz rosettes dies, EK notebook punch
Other supplies:  The Girls' Paperie letters, Printed cardstock from Graphic 45, Studio Calico, Simple Stories. Camera rubon from Kaiser, seam binding, Art Parts hand, grungepaper, buttons, Charlene's Button Box button (yellow square button). twine.

Friday, January 18, 2013

We Are Together

Hello fellow Cricut Fans!  This is Michele, from Scrap-n-Dance.blogspot.com! (Dancingarden on the MB)  I am so honored to be  your designer today, and I have a layout for you that could be used for family gatherings. 
We just came from a couple months of doing things with our families. Not all of it may have been holiday related! I design these kits for a few friends of mine and they like these more general pages sometimes.  :)  As a bonus, everything in this layout was from my stash!

I really like the "bird on a wire" imagery I found in the printed papers. I wanted a border along the bottom that mimics the print. I did a search on my Gypsy and didn't find anything like that on any cartridge I had. So, I created my own!  I am providing a link to the gypsy file below, please feel free to use it on your own pages! If you post it on your blog, let me know, I'd love to see it. :)

The images I chose are a little whimsical but kind of formal. I wanted a bird image but I also chose the chair because when we visit some of my family, we spend a lot of time sitting and watching the birds through their patio doors. The images evoke those wonderful memories of past gathers for me.

Adhesive-backed pearls add accents to the cuts.
I design on my Gypsy and sometimes I don't pay much attention to sizes. I will list the sizes here but if you don't have a Gypsy, you can always round the size to the nearest quarter inch.

The bird and birdcage are from Sophie, and were cut at 5.38"
The label behind is cut from Elegant Edges at 4.7"
"Together" is from Sophisticated and cut at 2.75"
"we are" is also cut from the Sophisticated font, cut at 1"
The chair is from Sophisticated and cut at 5.69"
The birds on a wire were welded from several cartidges: a stretched dash from Plantin and birds from Heritage, Everyday Pop-up Cards and Picturesque.


Cricut Info and supplies used:
Designed by Michele Donner-Ramsey

Cricut machines used:  Expression, Gypsy
Cartridges used: Sophie, Elegant Edges, Sophisticated, Plantin, Heritage, Everyday Pop-Up Cards, Picturesque
Other Supplies: Bazzill Cardstock, We R Memory Keepers Antique Chic printed cardstock, adhesive flat-back pearls, Distress Ink Black Soot, adhesives

Sunday, December 30, 2012

Let It Glow

Hi There,

This is Yvonne from Ink-spirations. Hope everyone had a wonderful Christmas. My daughter came home so everything was great. Today I'll get to skype with my son and his family while they open Christmas presents! Isn't technology wonderful.

My project I'm sharing is actually decorating the tree with my son and family in 2011. I had visited early in November so I could be part of the decorating so they purchased an artificial tree.
It was my Grandsons first Christmas that he could really help with the decorating. It was so much fun.


The pattern paper was from a Christmas pack by The Paper Studio called Holiday Wonder. Remaining cardstock Bazzill. I had lots of picture as so created an illusion of how we used to hand our Christmas cards - on a string usually hung against a wall. Now fewer people actually send cards.
Lots of glitter and bling used on the pages - after all it is Christmas!

Wishing everyone all the best for 2013!
Yvonne
Designer - Yvonne Balmer
Project - Scrapbooking
Cricut Machine - Imagine & Expression & CCR
Cartridges
Elegant Edges (scalloped square) 9.35" & 9.00"
Art Philosophy - Let It Glow - 1"
Art Philosophy - Snowflake - 3.50"
Art Philosophy - Snowflake Border - 9" length
Art Philosophy - Presents - 1.75"
Create A Critter2 - Tree - 4.25"
Celebrate With A Flourish - Lights - 1.75"

Saturday, October 27, 2012

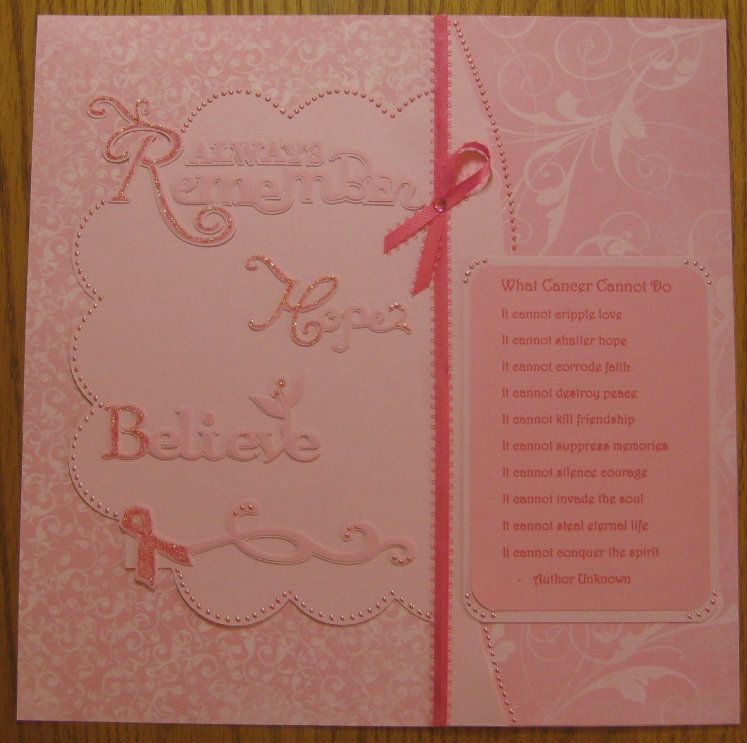
Breast Cancer Awareness Layout

Hi everyone, this is Rita from Rita's Paper Obsession.  As you know, October is Breast Cancer Awareness month.  It is also the one year anniversary of my breast cancer diagnosis.  I can't let the month go by without doing my part to promote awareness.

When talking about awareness, the emphasis is on reminding ladies to get their mammograms and the importance of self exams.  Yes, these things are important, but I want you to be aware that a lump in the breast may not be the first sign.  Five lesser known signs of breast cancer are:  1. Itchy, sore, reddened breasts; 2. Upper back pain; 3. Nipple changes; 4. Change in shape or size; 5. Pain, swelling or lump in armpit.  It was a couple of the lesser signs I chose to ignore.

So, my public service announcement - Get those mammograms, do self exams and watch for the lesser known signs.  You know your body, DO NOT ignore it.

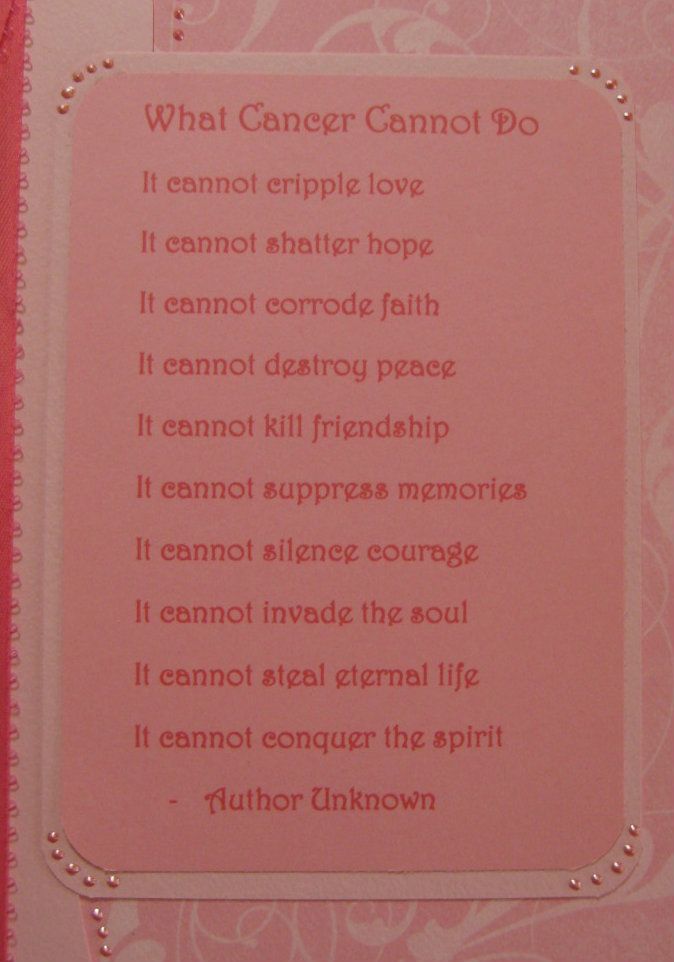
I am slowly scrapping my journey.  One of the things I wanted to remember was a poem I saw daily while I was going through radiation.  It was on a plaque hung on the waiting room wall and was a great reminder what cancer could not take from me.


The scalloped cut is from the Elegant Edges cartridge.  I used the base image and cut the Ivy (button 2) at 9 inches.

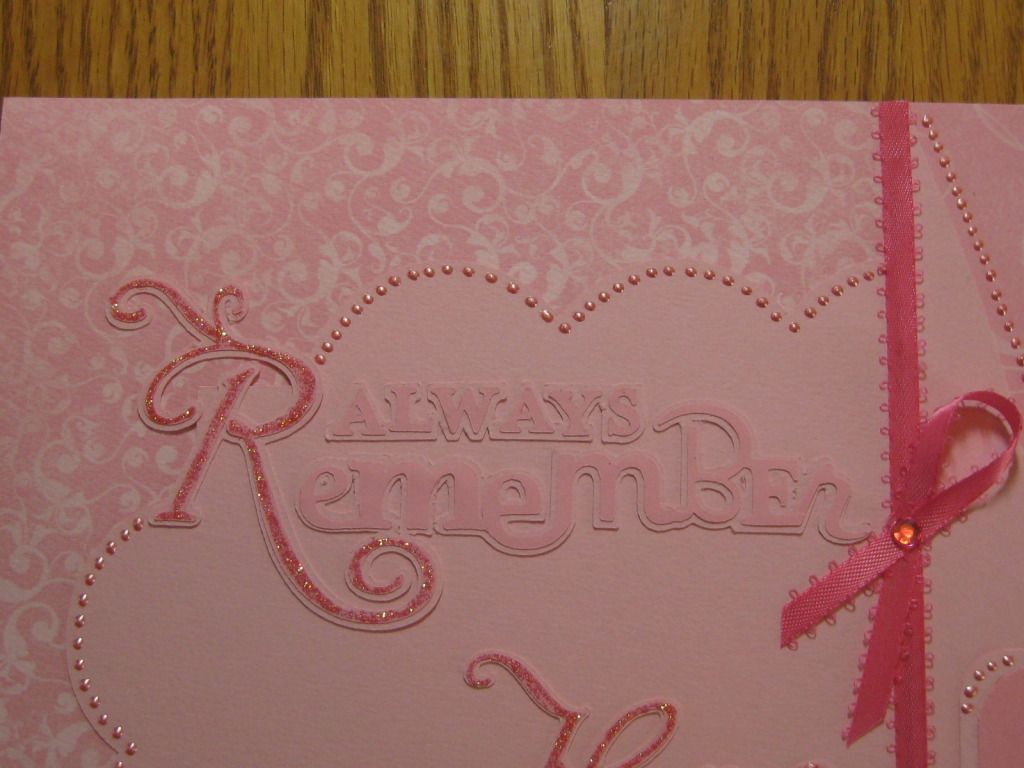
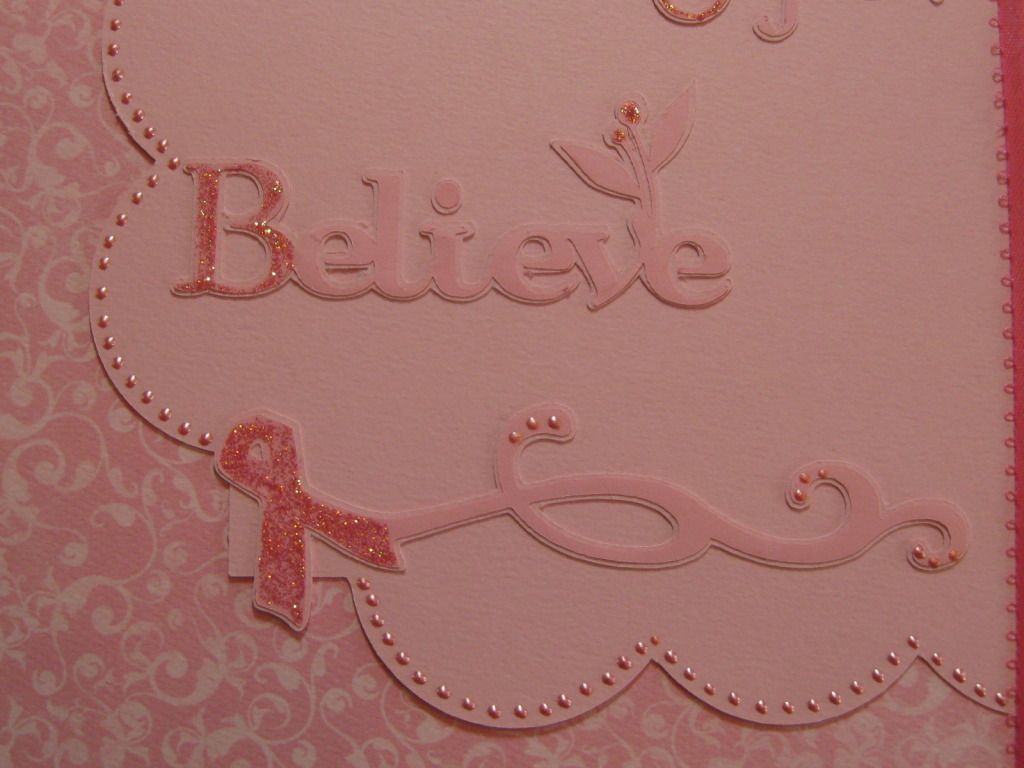
The phrases and ribbon cuts are from the Pink Journey cartridge.  "Always Remember" was cut at 2 1/2 inches.  "Hope", "Believe" and the ribbon flourish were cut at 1 1/2 inches.

I hand cut the curved edge of the solid on the poem side.


I highlighted the first letter of each phrase and the ribbon with Stickles.  I used Liquid Pearls to accent the scalloped cut, along the curved paper edge, on the corners of the poem mat and on some of the flourishes.  Ribbon was added to soften the contrast between the two sides of the layout.

Thank you for allowing me to share with you today.

Cricut Info & Other Supplies:

Designed By- Rita Poteat

Cricut Machines Used- Expression

Cricut Cartridges Used- Elegant Edges, Pink Journey

Other Supplies Used- BoBunny's Back to Backs "Passion Fruit Flourish", solid pink cardstock from my stash, ribbon, pink gem, Liquid Pearls - Petal Pink, Stickles - Fruit Punch

Friday, October 12, 2012

Halloween Card, Rattle Your Bones!

Hi Everyone! This is Maria from Stamp, Cut, Create!
I hope you are having a great Friday! For today's project I'm sharing a cute Halloween card I made for my grandson. He loves everything I create for him with the Cricut, and he especially enjoys making things with me. He calls my craft room my Making room! Anyway, on to the card.
I started with a piece of white card stock cut 5 1/4" by 4" then covered it diagonally with coordinating strips of washi tape. I left the pieces long then folded the ends over the edges of the card stock for a clean, finished look.
 I then mounted this on a piece of black 5 1/2" by 4 1/4" card stock. The green mat is from Elegant Edges and is cut at 3.75" from a scrap of Bo Bunny paper. The edges were inked with Walnut Stain Distress ink by Ranger. It was adhered to the card with liquid glue. The phrase is from the A Frightful Affair cartridge, cut at 2.96" out  of orange glitter paper from DCWV. The original image has a skull on it, but I used the Gypsy's hide contour feature to cut only the words. The little skeleton is from the Trick or Treat cartridge and is cut at 3.70". My little trick for gluing all those small pieces is to pour a little puddle of glue out (I have a small plastic lid that I use for that) then use tweezers to pick up the small piece, dip lightly in the glue, then place on the bigger piece. I finished him off by adding some google eyes. For added fun, I used an Action Wobble to attach the skeleton to the card. It was actually a little too big but I was able to trim off some of the edges so it wouldn't be seen from the front.
Here's my attempt at a shot of the Action Wobble in motion! Once the card was complete I realized that I almost completely covered the washi tape background. Oh well, I still like the look of it!
That's my project for this month, hope you enjoy it! Have a great weekend, and as always, thanks for stopping by!
Maria
Cricut Info & Supplies Used:
Designed by: Maria Jones
Cartridges Used: Trick or Treat, A Frightful Affair, Elegant Edges
Cricut Machines Used: Cricut Expression, Gypsy
Other Supplies Used: Queen and Co. Trendy Tape, printed paper by Bo Bunny, White card stock by Georgia Pacific, Ranger Distress ink, Walnut Stain, craft supply: google eyes, 6mm, Action Wobble, Scotch quick drying Tacky Glue, ATG

Saturday, September 29, 2012

Clever Paper Clip Holder

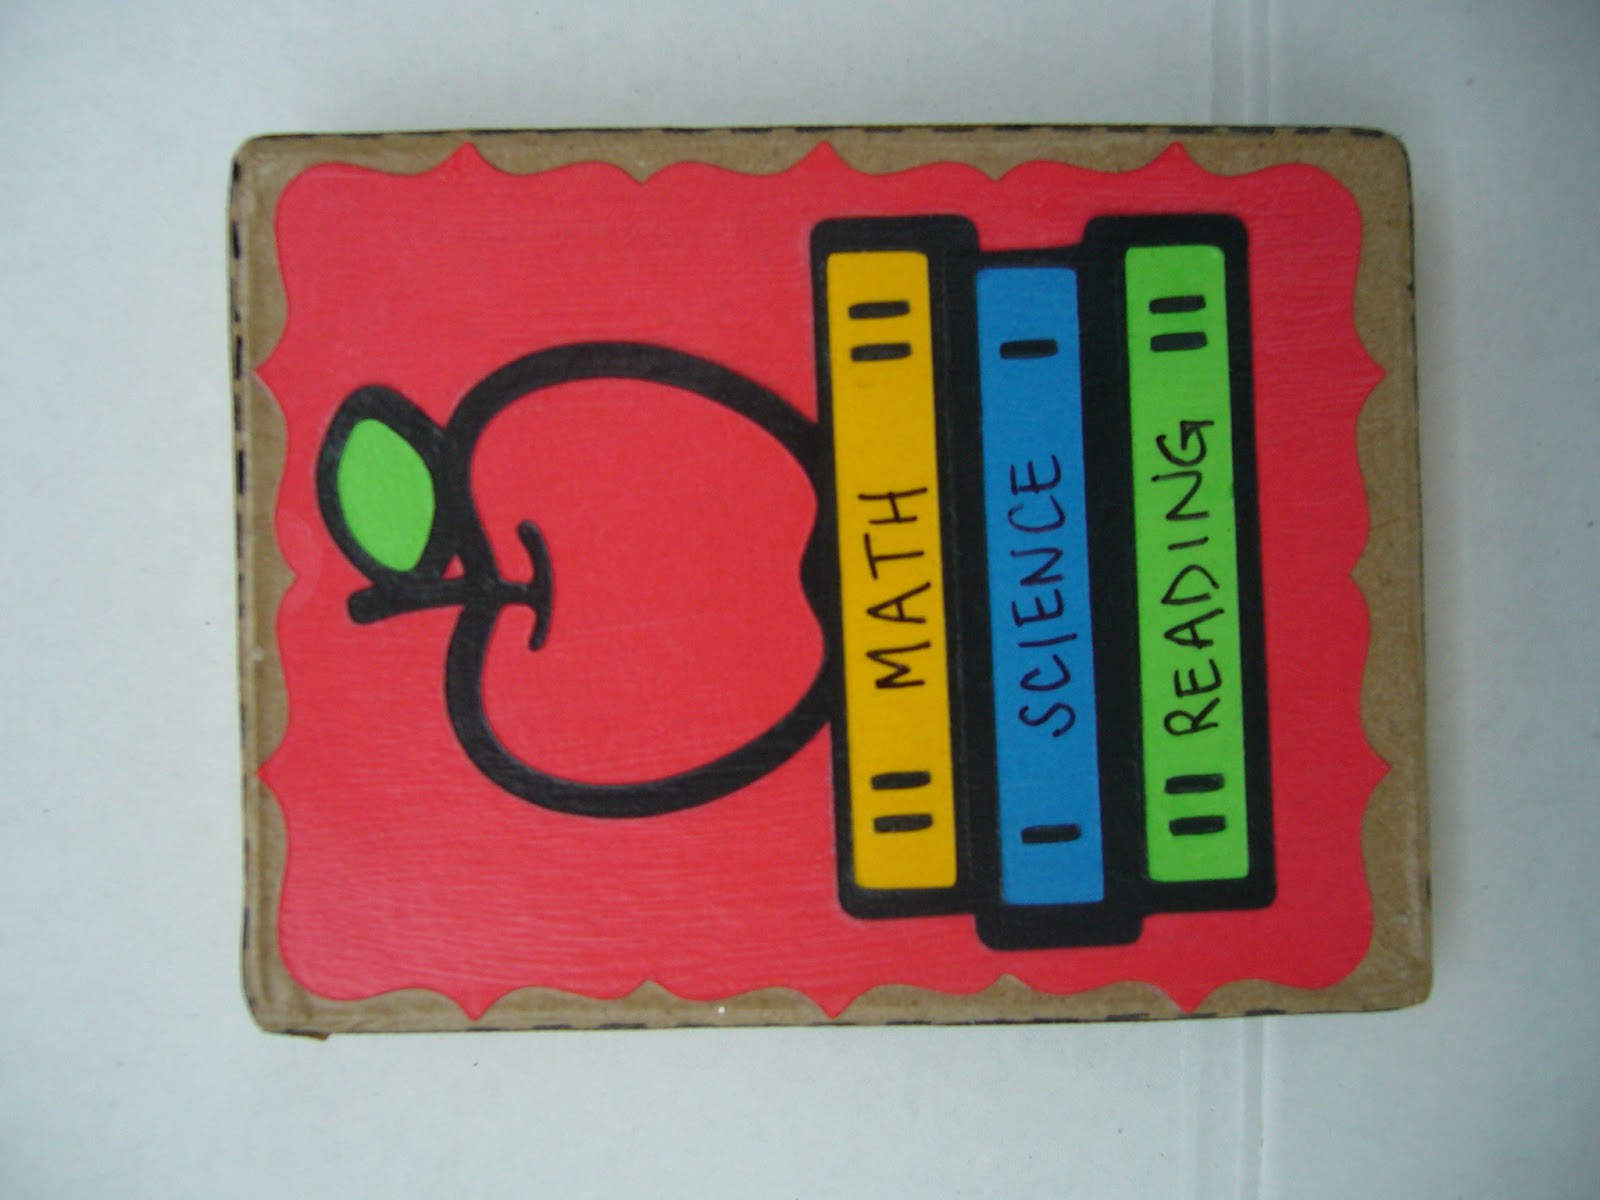
Hi Everyone, This is Stacey (StaceyM) with a back to school idea. I have been a middle school teacher for 20 years and love using my Cricut to make things for my classroom. Today, I embellished a paper mache box to make a paper clip holder. Teachers go through a lot of paper clips.


Lid Directions – I cut the apple with books (Hello Kitty Greetings) at 3.5 inches using red, green, blue and gold paper. I cut the shadow out in black. Next, I cut the oblong burst (Elegant Edges) at 4.5 inches out of the same red as the apple. I used 2-way glue to adhere the apple with books layers and then I used paper Mod Podge to adhere all pieces to the lid. I found ruler ribbon that I adhered to the outside of the lid.


Box Directions - I cut the oblong burst (Elegant Edges) four times at 4.5 inches out of the same blue as the science book. I cut eight paper clips (Locker Talk) out of silver holographic paper at 1 inch. I had some black glitter adhesive paper from DCWV that I used for the letters. I cut the word Paper Clips (Pooh Font Set) out twice at 1 inch. The blue oblong burst was trimmed to fit each side of the box. I used paper Mod Podge to adhere all pieces.


To finish the box, I put an extra coat of the paper Mod Podge over everything. I used a Sharpie black paint marker to write Math, Science, and Reading on the books and I also put stitching on the edges. I glued a piece of magnet paper to the bottom of the box to help the paper clips stay inside.
 

I hope you enjoyed today’s project and have enjoyed reading this blog everyday as much as I have.
 
Cricut Info & Supplies Used:
Designed by : Stacey M
Cricut Machine: Expression
Cricut Cartridges: Hello Kitty Greetings, Locker Talk, Elegant Edges, Pooh Font Set
Other Supplies Used: DCWV Glitter Adhesive Paper, Paper Mache Box, Various Colored Papers, Holographic Paper, Paper Mod Podge, 2-way Glue, Sharpie Black Paint Pen, Ruler Ribbon

Wednesday, September 19, 2012

Thank You!!

Hi Everyone! Happy Hump Day!

This is Kimberly Karl from imlosingitonceandforall with a thank you card created for a baby shower. I am currently expecting my first child and our shower is this Saturday so I wanted to get a jump on making my thank you notes since it's so easy to get behind on those!

I didn't get too terribly intricate on them as I had to make 30 and am trying to work on other projects as well. Here is the completed card and I'll show you how I did it.


First I used my Gypsy with the Elegant Edges cartridge for the center medallion so that I could make the most of paper space on my cutting mat. I used 3 of the layers from the Flower3 cut found on page 65 of the handbook - original layer, original layer plus shift and the Frame layer all cut at a height of 3.47 and I let the width calculate automatically. This is the cut on the bottom row, 5th cut in from the left on the keypad overlay. I used my Cricut Expression 2 to make the cuts. I choose the colors green, pink, brown and white because those are the colors we are using at the shower. Below you can see the first column are the cuts separately, the second is the white on top of the green and finally I added the frame layer.


I then stamped the center white piece with the top left stamp that says thank you from the Round Frames stamp set by Inkadinkado using the Green with Envy Powder Puff chalking ink.


The background is a piece of 5.25 inch by 4 inch brown paper from Recollections brand at Michael's. I used my Cuttlebug and embossed it using the Victoria Emboss A2 embossing folder.


I then took a 3/4 in white satin ribbon purchased at Michael's and wrapped it around the brown paper with a half inch allowance on each side so I could glue it to the back. I glued the brown cardstock to my card and then glued the medallion on top of it. At this point you could add some more sparkle if you wished to the little flowers in the stamp going all around. You also could use pop dots to add some dimension to the card.

Voila! 


Thank you so much for checking out my post today! I hope it's inspired you and shown you that we don't have to get too intricate to kick out some really nice cards. Also, if you stop by my blog you'll see I haven't put up much this year, I think my last project was from January! I'm hoping just as you all are that this blog will give me the inspiration I need to get moving on crafting and posting! Have a wonderful week and I'll see you all next month!

Cricut Info & Supplies Used:
Designed By:  Kimberly Karl
Cricut Machine Used:  Expression 2, Cuttlebug and Gypsy
Cricut Cartridges Used:  Elegant Edges
Other Supplies Used: Victoria Emboss A2 folder by Provo Craft, Recollections paper from Michael's, 3/4 inch white satin ribbon from Michael's, 4.375 x 5.5 white card from The Paper Company 25 count card pack sold at JoAnn's. Thank you stamp from the Round Frames Inkadinkado stamp set, Powder Puff chalking ink in Green with Envy