While we are no longer making active post of Cricut projects on this blog as of 8/1/2013, we invite you to use it for continued die cut inspiration as we will leave the blog up for viewing. Happy Cricuting !

Showing posts with label Forever Young. Show all posts

Monday, July 8, 2013

Gotta Wear Shades

Hello everyone!  This is Erika from http://EKittyScraps.blogspot.com  I can't believe it is July already.  I am very sad to hear the news that this is the last month for the blog.  I would wake up in the morning and read the blog daily.  I will truly miss this.  I will try to post another project or two before the month is over.  Here is my LO for the month.  This is another LO for my Stepson that got married last Summer.  This is Pre-wedding fun with the Best Man, Maid of Honor and Groom. 
All of the pictures have black backgrounds with either brown or cream colored frames.  Gotta Wear Shades was cut at 3/4 inches using the Shadow feature on the Platin SchoolBook Cartridge.  I could not cut that small without using the Shadow feature.  Too much tearing of the letters on the mat.  The shades were cut at 3/4" and 1/2" (square shades) using Paper Dolls Teen Scene on page 56 and (girly shades) Forever Young cartridge from page 47.  The lens's were cut a 1/4 inch smaller to fit the frames better.   

The banner was cut from the Artiste cartridge on page 66 on kraft paper.  I then used my Festive Berries Distress Stain to color the banner.  Only took a minute or two to dry.  I used pop dots on the banner and all of the shades on the LO to add height.

I added song lyrics about sunglasses to both layouts for fun.


I backed the song lyrics with black paper.

I inked "Gotta Wear Shades" with Vintage Photo Distress Ink to help stand out. 


You now can see the pop dotted sunglasses fron this angle.


I hope you like my LO and Thanks for stopping by. 

Materials Used:
Cricut Expression Machine
Cricut Cartridges: Artiste, Forever Young, Paper Dolls Teen Scene and Platin SchoolBook
Silver and Gray Paper from The Formal Stack by DCWX
Kraft paper
Festive Berris Distress Stain
Vintage Photo Distress Ink
Pop Dots, glue 


Tuesday, February 12, 2013

Valentine Card - I Hope You See


 Hi everyone, Maria here from Stamp, Cut, Create! Today I'm sharing another Valentine I made along with a mini tutorial on using UTEE (Ultra Thick Embossing Enamel). My card was inspired by an Inkadinkado stamp that resembled an eye chart. I don't have the stamp, but instead created the image using Word and then printing it out. The red frame is from the Art Philosophy cartridge and I used the Gypsy to tweek the size, adjusting the height and width so it would just fit around the printed image. I then added some doodling with a white Gelly Roll pen.
The glasses are from the Forever Young cartridge. I wanted them to look like shiny plastic frames, and that's where the UTEE comes in. Like any embossing powder, the first step is use a medium that will make it stick to the surface you are heat embossing. For this, I use Versamark. When I'm covering an entire image, I simply place it directly on the pad and tamp it down to completely coat it with the Versamark.
This is what the piece should look like with a good, wet covering of the Versamark.
The next step is to coat the piece with the UTEE. I store my UTEE along with a plastic spoon in a plastic container with a lid. (Not my original idea, but a good one!) I hold the piece with tweezers over the container and sprinkle the UTEE on it until it's completely covered.
 Then I tap the piece until all the excess UTEE falls off. There will be a small space where the tweezers were, but you can simply dip that corner in the tub and again tap off the excess.
The next step is to use the heat gun to melt the UTEE. I have a ZAP! by American Crafts and so far have been very happy with it. Start applying the heat and in a few seconds you will see the UTEE begin to melt, keep moving the heat source along the entire piece until it is all melted. I use long tweezers for this step, because it does get hot and I've burned my fingers on more than one occasion! Don't keep the heat on too long or the UTEE will turn white.
After the first coat your image will sometimes look bumpy like this. Not to worry though, simply repeat the process of  Versamark, UTEE, then heat and it should come out like this:
Doesn't that look like a plastic eye glass frame? I think so! You can actually continue to add coats of UTEE until the piece is your desired thickness. Another nice thing, if you end up with a blemish on it, you can simply re-apply the heat and melt it out.
Here are the completed glasses with all the layers put together. I  added some bling with Swarovski heat set crystals and adhered it to the card with foam tape.
The heart paper is from SEI's With All My Heart Collection. It's mounted on a slightly larger piece of Hollyhock paper from CTMH. I machine stitched the edges with a silver metallic thread by Sulky. Finally, I added some adhesive rhinestones to the bottom of the card.
Thanks again for stopping by today. I hope you enjoyed the card and the mini tutorial. I also hope you all have a very happy Valentine's Day!
Maria

Tuesday, August 7, 2012

New Cart Test Drive - " Movable Monster"

Hi everyone, this is Debbie of DebsEclectic Thoughts Blog here to share with you a new Cricut Craft Room Exclusive Digital Cart called  "Movable Monsters".   As you can imagine after taking one look at these Halloween images, I was more than willing to "test drive" the Movable Monsters and create one for you all to see. There are several monsters to choose from: Skeleton, Frankenstein, Bride of Frankenstein, Witch, Cat,  Scarecrow, Dracula and a Zombie.

All the monsters are made in pieces so you can add brads to make their body parts movable which is so fun.  Unfortunately, the digital cart doesn't have any instructions so putting this together was a bit of trial and error but I think it turned out okay.  You can cut the images at any size but I choose to make my monster a total of 4 ft tall.  

So... INTRODUCING ANGELINA   - She was created as a DATE for Skeleton Brad who was made by another Cricut Circle member.  I hope to post Brad here soon too.
Hanging about 4 feet tall, she was cut at 12" for each section of her
skeleton body out of white poster board. I outlined her bones with a
Spectrum Noir EB1 Alcohol marker to add a little more dimension.
The bone shapes were attached to each other by using white brads.


To make her a little more Girly, I used pink glitter paper for her "insides" and accessories. 
And of course, I had to bling her up a little bit too with some rhinestones since she was
going on a DATE ! Her crown and heart were made using Create A Critter.

Her purse was cut from Forever Young at 4" and highlighted with
Spectrum Noir BP6 Pink marker. 
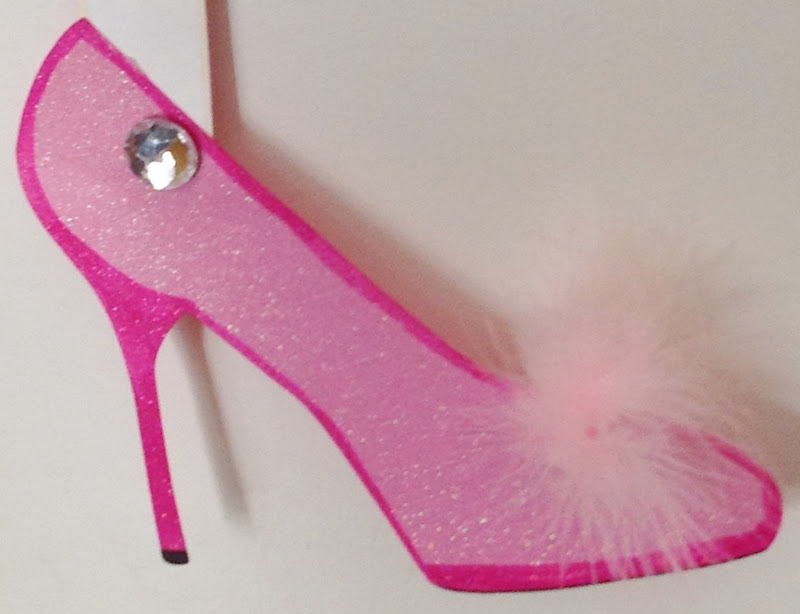
And her fab-u-lous Shoes were also cut
from Forever Young at 6". I added a little fluff to the toe
and again highlighted with Spectrum Noir BP6  marker.
And since no girl would go on a date with out getting their nails done, 
I did her nails with Spectrum Noir BP6 marker.
Plus added a bracelet with some rhinestone mesh cut to fit her wrist.

Well, Angelina is ready for her date with Skeleton Brad, I hope he shows up or she
will be crushed after all the trouble she went to get dressed up for him :)

CRICUT INFO & SUPPLIES USED: 
Designed by: Debbie O'Neal
Cricut Machine Used: E2
Cricut Cartridges Used: Movable Monsters Digital, Create A Critter, Forever Young
Other Supplies Used: White poster board, pink glitter cardstock, Spectrum Noir Markers,
Rhinestones, Brads, Googly Eyes, Feather Boa, Adhesives

Tip: To super-size the monster,  I used the 12X24 Cricut mat and cut the posterboard to fit the mat since I didn't have any of the 12X24 paper pads on hand. I bought the poster board at a local craft store. I recommend you use either a Gypsy or Cricut Craft Room to help you fit the most images on the mat to save cutting time. To maximize your space, you will need to turn and move the images around on the mat. Just don't flip the images or they will come out backwards and be hard to fit together with the other pieces. For the pink glitter pieces, I used 12X12 standard glitter cardstock and a 12X12 mat.  I did move the bones pink layer images around on the mat slightly to be able to fit the entire 12 " size.