While we are no longer making active post of Cricut projects on this blog as of 8/1/2013, we invite you to use it for continued die cut inspiration as we will leave the blog up for viewing. Happy Cricuting !

Showing posts with label Home Decor. Show all posts

Saturday, July 27, 2013

Train Picture Frame

Happy Saturday Cricut Fanatics!  This is Rita from Rita's Paper Obsession.

Today I wanted to share a picture frame I created for a picture of my husband and our nephew.  We went to the train museum and I wanted to create a keepsake for our nephew.


I selected the train from the Carousel cart and used Design Studio to layout the frame.  The train image is 8 inches.  The window was too small for my picture so I used the hide contour and placed a 3 inch square from George & Basic Shapes in its place.  I cut this out three times on blue, green and red pattern paper and twice from chipboard.


Next using the shadow function, I welded a rectangle to the bottom of the image to give me a flat surface.  I cut this out of black pattern paper and chipboard.


For the frame back, I used the welded shadow/rectangle and used the vertical frame back from the Fancy Frames cart.  Again using the hide contour function I hide the rectangle utilizing only the stand portion of the image.  I cut this from chipboard.


To assemble, I glued the red train to a chipboard cut and the blue train to the other chipboard cut.  I hand cut the smoke stack and light off the blue train.  From the green train I hand cut the top of the smoke stack, the roof of the train and the cow catcher.  I cut circles from George & Basic Shapes to match the size of the wheels and I created a window frame by cutting a 2 3/4 square inside a 3 1/2 square.  All pieces were inked with Versa Magic "Jumbo Java"


Finally assembly of the frame, layer the train on to the shadow leaving an opening to insert the picture.  Adhere to the frame back.


The frame looked a little plain so I doodled some and added a number cut from the Lovely Floral cart.  The numbers represent the date we went to the museum.


Thank you for stopping by and allowing me to share with you this weekend.  It has been a pleasure being a part of the Cricut FANatics blog.  Happy Cricuting!

Designed by: Rita Poteat
Cricut Cartridges Used: Carousel, George and Basic Shapes, Fancy Frames
Cricut Machines Used: Cricut Expression
Project type: Home Decor

Tuesday, June 11, 2013

3-D Lantern

Hello everyone! This is Angie from Angie's Paper Passion with a 3-D lantern from Cricut Exclusives, 3-D Lanterns. I absolutely love making these and they'd also be great for decorating for parties! After I made the last one, my little granddaughter wanted one for her room in her favorite color - purple.
Here's what I made for her:

I added a handle made of cardstock and strips of vellum. 
And of course she had to have bling on it!
I decided to try cutting out the rolled flowers out of vellum instead of cardstock and I really like how they turned out! These flowers were cut out with the Artiste cart at 2.5" and 2". Just remember to change your settings (pressure, blade depth, & speed) on your machine when cutting something as thin as vellum.
She turns on the little light under her lantern every night before going to sleep and thinks about her Grandma!
(OK, I just added that last part myself but I'm pretty sure she 
really does thinks about me every night!)

Thanks for visiting - I hope you like today's project!
Until next time, Happy Crafting!
Angie

Cricut Info & Supplies Used:
Designed By: Angela Cromwell
Cricut Machines Used: Expression
Project Type: 3-D, Home Decor, Party
Cricut Cartridges Used:  Artiste, CCR Exclusive 3-D Lanterns
Supplies Used: Cardstock, Vellum, Rhinestones

Wednesday, March 27, 2013

Easter Place Setting

Happy Spring Cricut FANatics!  This is Rita with Rita's Paper Obsession.  For this month's post, I have a quick home decor project.  I was inspired by a Michael's ad for their spring charger plates.  The ad showed a clear plate with a rabbit etched in the center on top of a charger plate, very festive!

My table ready for Easter brunch.


I selected the EstrBny2 image from the Martha Stewart Seasonal Cake cart.

To start, using Contact paper, I cut a circle from George Basic Shapes the diameter of the plate bottom.  The bunny image was centered in the circle and flipped so that the image faced left as shown in the handbook.  I used Design Studio to accomplish the centering and flipping.  Then using the "kiss cut" method, blade depth 3 and pressure set at low, I cut the bunny image from the vinyl.  The plates are 10" with a bottom surface area of 5 3/4", the bunny image was cut at 5 1/4".

The Contact paper image was then adhered to the underneath side of the plate and the etching solution applied according to the directions.


Wishing you a Happy Easter!


Designed by: Rita Poteat
Cricut Cartridges Used: Martha Stewart Seasonal Cake
Cricut Machines Used: Cricut Expression, Design Studio
Project type: Home decor
Project theme: Easter/Holiday
Other Supplies Used: Glass plate, vinyl shelf paper, etching solution, foam brush

Tuesday, March 19, 2013

An Eggciting Little Project to Share Today

Hey there folks, Freda from CannCreateDesigns here again to share another 3D project using MTC software and the Cricut Expression. As soon as I saw the Cotton Tail Village set from SVGcuts I knew I had to make the egg box for you.

The base of the egg was cut from white cardstock from my stash, the panels were cut from a DCWV paper pack called "The Linen Closet" that I had purchased at Joann's the day before the cut files were released. They worked out perfectly for this project. After watching the assembly video on the SVGcuts website I cut everything out and lay it out to make sure that I have everything to get started.

I just realized that I didn't take any pictures of the box bottom and lid assembly for some reason but the assembly of the box bottom and lid are pretty clear on the website video if you need assistance...Next I chalked all the edges that need embellishing with coordinating colors of VersaMagic Dew Drops. I love these chalks and have worn out more than a few of the Jumbo Java color which seems to go with everything vintage looking.

 After chalking the panels I begin assembling the egg base. These panels cut with score marks for easy folding and are numbered so you don't have to guess which one is next.

For this particular project I found it easier to glue all of the points at the top and allow them to dry first, then glue the bottom part. I used Clothes pins to help hold the pieces in place while gluing the next piece down, without the clothes pin they popped loose as soon as I moved to the next panel. This just seemed easier to me because of the small opening at the bottom and the stiffness of the cardstock I was using.

Once completed I thought it could use a little bling (of course). So I added Doodlebug Design Sugar Coating Glitter around the top of the box. Made a little welcome mat, and added a Martha Stewart Border Punched Fence (think it was the Halloween one). I found this little bunny at the TSC Farm store that was the perfect size, cut some carrots for a garden from the Create a Critter cartridge (cut at 6@ .75", 4@ .60", 2@ .5").

Inking those little carrots can be a pain...but I've figured out a way to do it a little easier with my tweezers...just pick it up and tap it onto the ink/chalk pad. When the carrots are glued together put a blob of glue on the end and hold it in place on the box until it stands on it's own.

There was still something missing...a quick glance around my scraproom and I saw some twine that I tied around the lid and the Tim Holtz Mini Fleur die I had bought on clearance the day before. I cut 4 fleurs, scored and glued them together. Attached a button and a bead to the top of the egg. After the glue in the bead/button piece dried I put glue on the end of the fleur and gently pushed the end into the hole in the bead. Wallah!!! Finished....


I hope you like this project as much as I liked doing it... Thanks for stopping by, Freda

Cricut Project & Supplies Used:
Designed By:  Freda Cannon
Cricut Machine Used: Cricut Expression
Cricut Cartridges/Other Used:  Create a Critter, Make the Cut Software, SVGCuts Cotton Tail Village
Other Supplies Used: DCWV Papers-The Linen Closet, Tim Holtz Mini Fleur Die, Martha Stewart Fence Border Punch, Doodlebug Design Sugar Coating Glitter, VersaMagic Dew Drop Liquid Chalk

Tuesday, December 18, 2012

Hot Chocolate Teapot Display Set


Hello again, it’s Freda from CannCreate Designs.  I posted a little teaser for this project on my blog a couple of weeks ago showing the unembellished teapot and got a really good response from viewers.  This is going to be a really easy posting for me today because SVGcuts does all the work, they produce excellent step by step videos telling you how to assemble the files you purchase from them, the only thing I had to do was decide on the papers and types of embellishing I wanted to use. 


These items were cut on my Expression using MTC, you can also use SCAL if you have that software.  They were not cut using Cricut Cartridges.


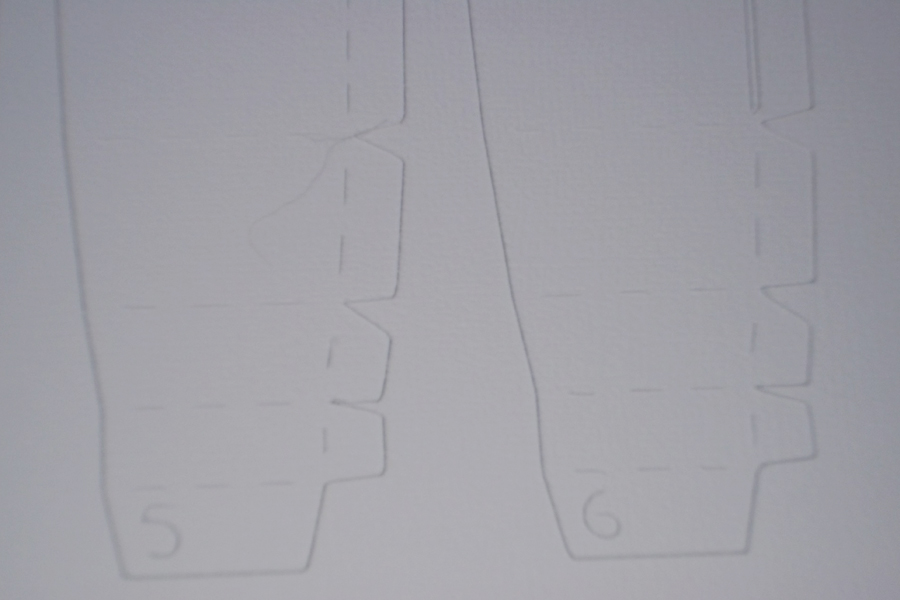
Making papers bend looks a little daunting, but if you take it step by step it is really easy.  Each piece is numbered and cut with tabs for gluing and folding so all you have to do is bend and it folds exactly as needed-no having to use a score board, assemble them together in numbered order and you’re done.  Here’s a picture of the base pieces showing the numbering of pieces, tabs and fold lines that are cut.

The Half Naked Truth-Here’s what the pot looks like before the panel pieces are attached.

 
Now presenting my Hot Chocolate Centerpiece

 
As you can see all the top panel pieces have had the edges inked with Timber Brown Ink.  The upper layer papers were from GCD Studios Ella Blue Collection by Tina Higgins.   The white base layers were cut from American Crafts White Cardstock.   I decided to use a pearl and Snug Hug Seam binding theme for embellishing.

I used two files I purchased from SVGcuts.com and the MakeTheCut software to make this set.  This should be an easy posting because they do all the work.  (disclaimer-I am not affiliated with these companies, I’m just really satisfied with the results I get when I use their products).

Tea for you and Me:


 Home for the Holidays:  (Pitcher)


There are 3 different types of pearls used on the teapot.  For the spout handle and around the top of the lid I used the small pearl “lines” made by Paper Studio (I should have checked my stash quantity first-ran out and didn’t have enough to do any of the other projects with them).  Around the the rim of the pot and the “dangly” pearls in the bow I used pearls by the yard I bought at JoAnn’s.  Around each tab on the lid and on the small dangly I used the large Queen and Company Pearls.  I’m going to make a cameo charm for this bow, the Round 25 set I used on the pitcher was too large for this spot.

 
The paper I used had a silver script writing on it, you can see a little of it in this picture.

Next we have the Pitcher from the Home for the Holidays set.  The cameo charm was made using a cut from the Cricut Heritage Cartridge at 1” and Epiphany Crafts Shape Studio Round 25 punch and the coordinating charm and bubble caps.   Pearls by the yard and Queen and Company large pearls were used on the pitcher.

 
I used the cameo and a white circle which made my cameo 2 layers of paper, when I put the bubble cap on it looked a little “milky” in spots.  I flipped the bubble cap over on a sponge (to avoid scratching the bubble) and used the cricut stylus to push the white back into the bubble cap adhesive.   After burnishing the paper to the cap, I used Glossy Accents to glue to the metal charm. 

 The Burnished Cameo

 
Doing this step makes the white back attach to the bubble cap and get’s rid of the milky appearance you get when using 2 layers of papers.
 
 
For my pearl embellishments on the teacup I used a large, medium and small pearl on each panel.  I chose a coordinating paper to do the panels on the saucer and the inside of the teacup (mostly because I didn’t have enough of the brown patterned paper-having 5 sheets would have been enough but I only had 4).  Then to top it off I threw out the scraps before assembling the spoon so I didn’t have any of the papers for the center piece of the spoon.  I also noticed that the pearl at the base of the handle had come loose and moved in this pic, it has been moved and glued back down.

Last but not least is the hot chocolate holder.  My family LOVES hot chocolate so much that I bought a Keurig for us to use last Christmas when everyone came home.  Little did I know that my son was buying me that Hot Chocolate dispensing machine too…lol

 
This piece was the only one that gave me problems, if you look close you’ll see that it’s “wavy” in spots.  This piece is a box inside of a box with trim around the top.  The space between the 2 boxes is “hollow.”  When I put the 3M quick dry adhesive on the decorative piece the base got a little distorted.  If I make another one of these I would cut some foam core to attach to the outside pieces to prevent the distorting with wet adhesive.    I used Snug Hug seam binding, a large pear and pearls by the yard for embellishments on this piece also.
 
 
I hope you enjoyed my project, it was a wee bit time consuming, but well worth it.  I’ll have a beautiful display for my counter when the kids come home for the holidays.  I just wish the sun would shine on the day I’m photographing my blog submission.  Maybe Santa will bring me a photo box for Christmas…lol
Merry Christmas to one and all, see you next year.  Freda                                                             

Cricut Info & Supplies Used:
Machine Used:  Cricut Expression

Files Used:  Cricut Heritage Cartridge for Cameo shape.  SVGcuts Home for the holidays (pitcher) and Tea for you and Me.

Paper:  GCD Studios Ella Blue Collection Pack designed by Tina Higgins.  American Crafts White Cardstock

Supplies:  3M Quick dry adhesive, Pearls-Queen & Company, By the Yard from JoAnns, Paper Studio Pearl Lines, Epiphany Crafts-Shape Studio Round 25, Bubble Caps and Charms.  Snug Hug White Seam Binding 

Monday, December 10, 2012

Folk Art Lanterns

Hello Everyone!  It's Renee from I came, I saw, I created ready to share a quick holiday project with you.  I know that many of you are looking for quick, easy and inexpensive ways to decorate for the holidays or simply to add some cheer to a small space.  How about creating some paper "gilded" lanterns?


Materials Used:
  • Cricut cartridge Folk Art Festival
  • Gold paper
  • Variety of colored vellum
  • Tea lights
CCR file:
https://www.box.com/s/52rkxuauyugy84eigs34

Gypsy file:
https://www.box.com/s/8sfh8l7qmex7ssaf1ogk

Directions:
  1. Using the files provided, cut each lantern from gold paper.  I used gold placemats from Target that I found in the holiday decor dept.  I liked the lightness and "gilded" look of the paper.
  2. When cutting the homes, remove just the house base from the mat at first.  Then use transfer paper to capture and move the house "insides" (this is optional, but easier then moving each  piece one by one) and set aside. Pull the 12x12 piece of paper from the mat.
  3. Using different colored vellum for each lantern, adhere it to the back of each gold sheet.  Take  your transfer tape and adhere the house "insides" on to the the vellum of each coordinating house.  At this point, I took an extra step and cut two of the lanterns down a bit in size (height) to create more of a trio look upon completion (optional).
  4. Using a tape runner or strip tape, bring the two ends together and adhere one end on top of the other.
  5. Now just add tea lights to the inside of each lantern to light up your "gilded" lanterns.

Tuesday, December 4, 2012

Cricut Crafty Challenge #4- Christmas/Winter Decorations

Hi Everyone
It's Becka with Creations With Becka.
YAY!! Winter is here. Are you all ready for Christmas? I just finished decorating my house and the kids were so excited to get everything ready.
Ok, so on with the show. So, I thought it would be neat to have a Christmas Decoration challenge because I always see the cutest decorations in the stores but they are so expensive. And I always think to myself "Hmmm... I could totally make that." And of course I have so much crafting stuff, I wouldn't even have to buy anything.. LOL! So I thought I would put it to the test and see what I could come up with. Plus, I wanted to see other ideas & projects so I could try those too.
So if you visit my blog a lot than you probably know by now that I love to make banners. And I love the $1 bin at Michaels. Yes I know I did it again... I make a Christmas banner out of the $1 bin coasters. Who knew these little coasters would be so handy. LOL!
Anyways here is the banner I made:


Here are some up close pictures


Items needed to make this
4x4 coasters or cardstock
DCWV Christmas Cardstack
Birthday Bash Cartridge- letters cut at 3"
Art Philosophy Cartridge- Stocking cut at 2.65"
Christmas Cartridge- Holly Berry cut at 2.41"
Winter Frolic Cartridge- Presents cut at 2.65"
Sanding paper/ I used d-stressor
Cropodile
Metal 1" rings

Now for the Challenge rules:
1. You must use at least 2 cricut cuts to create your decorations- it can be either Christmas or Winter.
2. You have until December 26th to link your project directly to this page.
3. This must be a new project.

The prize for this challenge will be super awesome and was donated by:
I can't get into my Google program at the moment- I will be back to post the prize.
Here is the link to add your project:

Monday, December 3, 2012

Creative Cricut Craftroom Sign

I made this sign for my craftroom.  I used a 11" by 13" piece of canvas board.  I used my Gypsy to add the different words and icons that mean something to me.  I used vinyl to create a mask that I would color over.  I placed my words horizontally and vertically so I could place the project portrait or landscape orientation (sometimes I just want to change things up). 


OK, now for the steps to create the project.
  1. Paint the canvas board black (this becomes the lettering color)
  2. Allow plenty of time for the paint to dry.  Here in South Texas that means a about 6 hours.
  3. Apply vinyl words/icons.  Use a brayer to create a good seal so the paint will not seep under the edges.
  4. Paint over the vinyl with green (this becomes background color)
  5. Again allow time for paint to dry.  Another 6 hours.....
  6. Carefully remove the vinyl lettering/icons.  Removing the vinyl before the paint has completely dried will result paint runs.  (ask me how I know)
  7. Add a pretty pretty pink border
  8. You can dress this up by adding ribbon and using a plate holder or just attach a picture hanger to the back
I hop this project inspires you to create something memorable for yourself or someone special.

Friday, November 23, 2012

Deck the Halls

Happy Saturday everyone!  This is Julie from Mommy's Playroom.  I hope everyone had a wonderful Thanksgiving!

We will be moving into our new house in another city only a couple of days before Christmas so I won't have much time to decorate.  I wanted to create a quick and easy home decor project  to make Christmas decorating a little faster.

I am a huge Teresa Collins fans so I decided to base my project on the reindeer silhouette on her December 25th Cricut cartridge.

I started with the reindeer silhouette using the fit to page feature to make it as large as possible.


The title was also cut from December 25th.  The paper is from Bo Bunny and is called St. Nick stocking.

 
The ornaments are from Christmas Cheer and were cut at 2.5".  The snowflake is from a Stampin' Up punch.  It was cut on setting 3.


I wanted to add a little sparkle to the project so I covered the title with Candy Cane Stickles.  Black Diamond, Green, and Candy Cane Stickles were used on the ornaments.  The snowflake is covered in Crystal Stickles. 


I wanted to decorate something other than a Christmas tree for my project so I used Stampin' Up silver elastic cord to tie the ornaments to the reindeer's antlers.  I think he looks adorable!


Designed By:  Julie K.
Cricut Machine Used:  Expression 2
Cricut Cartridges Used:  December 25th & Christmas Cheer
Other Supplies Used: MME paper - 12 Days of Christmas "Wrap It Up"; Bo Bunny paper - St. Nick Stocking; Stampin' Up cardstock - Whisper White, Read Red, Basic black; silver paper from my scraps; Stickles - Candy Cane, Green, Crystal, Black Diamond; Stampin' Up silver elastic cord; Tombow Multi Liquid Glue