While we are no longer making active post of Cricut projects on this blog as of 8/1/2013, we invite you to use it for continued die cut inspiration as we will leave the blog up for viewing. Happy Cricuting !

Showing posts with label Mini Monsters. Show all posts

Friday, October 26, 2012

Halloween Recipe Card--Witches Brew

Hi,  its Liz from http://lizziesworldofcrafting.blogspot.com/.   I can't believe the month of October has flown by and its almost Halloween!!!!  I have a recipe card to share with you today.  A group of friends and I swap recipes cards with a theme each month.  I am sharing this month's recipe card with you.
The card base is heidi swapp paper for halloween cut 6 x 6.  I covered it with vellum cut 5 1/2 by 5 1/2.  I used the mini monsters cartridge for the cauldron (cut at 3").  Witches brew was cut at 1 1/4 and is from the Happy Hauntings Cartridge.  Here is a close-up:

The lantern is from October 31st..I love the cuts on that cartridge.  It was cut at 4" and then I used yellow stickles to add depth and dimension (and a bit of sparkle).
I hope you have enjoyed my project.  Have a sparkling day!

Liz

Designed by:  Liz Vellali
Cartridges Used:  October 31, Mini Monsters and Happy Hauntings
Machines Used:  Expression 2
Theme:  Halloween
Project Type:  Recipe Card


Wednesday, October 24, 2012


Happy Halloween!!  This is Julie of http://mommys-playroom.blogspot.ca/.  I have a simple Halloween themed candy jar I made for my daughter to share with you today.

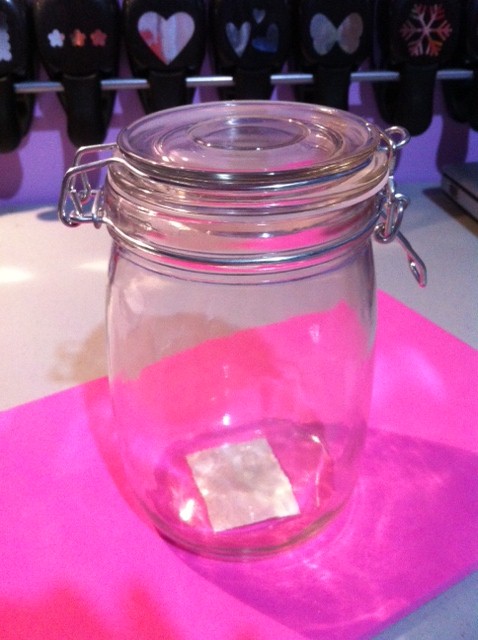
 I started with an empty canning jar and a pile of Smarties.  It was so tempting to eat them but I resisted!


 The lower portion of the jar is made from a piece of bright yellow cardstock cut at 3" x 15".  The old fence was cut at 2 1/2"  from Mini Monsters.  I cut the fence four times and adhered it to the yellow cardstock using one of my favorite adhesives, a Stampin' Up 2-way glue pen.


I used a pumpkin from Chic & Scary and cut it at 2 1/4".  The ribbon is American Crafts Premium Ribbon.


 Have a spooky Halloween!!


Cricut Info & Supplies Used:

Designed By: Julie

Cricut Machines Used: Expression

Project Type:  Home Décor

Project Theme: Halloween

Cricut Cartridges Used:  Mini Monsters, Chic & Scary

Other Supplies Used:  assorted cardstock, Stampin' Up 2-way glue pen, American Crafts Premium ribbon


Sunday, October 21, 2012

BOO!!

BOO!!  It is L.B. from Cool Beans By L.B. Halloween is so so close and it is one of my favorite holidays.  I think I love the dressing up and trick or treating part the most, but also this year I am loving the papers I have found and bought...way to many of them. I made some treats for coworkers and had a bunch of scraps leftover and did not want the paper to go to waste so I snipped and "welded" them together with some decorative tape to create a base for these cards.
The first step was picking my papers and getting them where on wanted on my cards. After I cut and layered I wanted to secure the edges, but did not feel ribbon was the answer so I used this black and white polka dot tape to do it instead.
The next step was selecting the right Cricut Cut to put on top of my card. I went with the cauldron cut on Mini Monsters because I loved the bubbles. When layered with the "Boo!" also from Mini Monsters it looked just right.
A touch of Stickles for my bubbling pot and I had 2 fun cards to send out. I hope you are all having a wonderful Spooky season and a great day as well. Thanks for visiting us at Cricut FANatics.  I am so glad to be part of this great team.


Cricut Info & Supplies Used:
Designed By: L.B.
Cricut Machine Used: Expression
Cricut Cartridges Used: Mini Monsters
Other Supplies Used: Paper from Jeepers Creepers stack by The Paper Studio, Patina colored Stickles, Smash tape from K & Company

Friday, October 19, 2012

Happy Halloween!

Hi Everyone! This is Kim from imlosingitonceandforall again. Hope you all are enjoying your October so far. It's amazing that we are already half way through the month! I was really undecided on what to do for this month's post but decided to go with the Halloween theme since this is the month and all. :o) So without further adieu here it is!


I had a lot of fun creating this and used several of my crafty items that I've either long forgot about or just recently purchased and didn't bother to use yet. Signing up for this blog was one of the best things for me because I really have been using things from my stash. The only thing I had to buy for this was the vellum  I could have swore I had some but had no luck in locating it and really wanted the effect it would bring. 

It really was super easy. I started out with a $2 unfinished frame that I purchased from Michael's some time back and painted it with an Adirondack Citrus paint dabber. I was a bit impatient for it to dry so I went ahead and used my heat gun to dry it. I actually hoped that it would age it a bit but no luck. No worries though because to get the darkened edges I just swiped my Black Soot distress stain from Tim Holtz all around.

As for the cuts I used a couple cartridges for this. The web was cut twice once in vellum and then again in black cardstock (all of the measurements are from my Gypsy so they are not in normal inch format) and are 4.93 for the width and 4.71 for the height. The bat was from Paper Doll Dress Up in purple cardstock and measured at 5.02 for width and 6.29 for the height. Lastly I cut the Boo! from Mini Monsters in orange cardstock at 3.59 for the width and 4.00 for the height.


After cutting everything out I cut the black spider from the web and glued it to the top of the vellum spider. I then found some mismatched googly eyes and glued those on. 


For the bat I really wanted him to have some dimension so I scored his wings and did a little accordion fold. He also needed some googly eyes so I found a couple more and stuck them on. I also outlined the cricut cut lines to give a mouth and define his wings.


Lastly I had the Boo! to deal with. The orange was a bit bright for my taste on this project so I wanted to rough it up a bit. I recently purchased some Faber Castell Gelatos so I snagged the purple one and outlined all of the edges. I then just took my finger and smeared it everywhere to rough it up. I really liked how it turned out. 

I then glued all my pieces on but I still felt that it could use something else so I pulled out my Goosebumps Shimmer Texture Spray and misted the entire project. Unfortunately the picture just won't turn out of the entire frame coated in it but you can see some of it in the other pictures I've posted. This was the first time that I've altered or dolled up a frame and I'm quite pleased. I do wish though that the picture I have in it printed out better but that's our home printer for you! I'll be looking to have one printed at the local store I think LOL

Hope you've enjoyed my project and I look forward to posting again for you next month! 
Happy Halloween!

Cricut Info & Supplies Used:
Designed By: Kim
Cricut Machines Used: E2, Gypsy
Cricut Cartridges Used:  Paper Trimmings, Paper Doll Dress Up, Mini Monsters
Supplies Used: Purple, Black, and Orange cardstock, vellum. Random googly eyes, wooden frame from Michael's, Goosebumps Shimmer Texture Spray, Adirondack Citrus Paint Dabber, Tim Holtz Black Soot Distress stain and Fiber Castell dark purple gelato stick.


Saturday, September 29, 2012

Hi everyone! 
This is Dana (DomesticatingDana over on the Cricut MB) and I’m so happy to be here with everyone.  September brought us an awesome 1st month here at the Cricut FANatics, but it also brought us back to school.  Back to school means back to homework, including nightly reading.  Need a little something to make reading a little more exciting for your kids?  I have  a fun little project that is quick and easy and makes a great little gift for readers of any age. 
 
I love to make these magnetic bookmarks- practical, easy, and super-FAST!   They cling around your page in your book so they dont fall out & you can locate your page easily.  They are great for kids especially because they don’t fall out of the book when they are tossed in and out of backpacks! Here is how I make mine:
Cut a strip of cardstock to 2.5” x 5”, and then score it at 2.5” (half) and fold.  This creates the base of the bookmark.  Use a bone folder on the crease to help it lie flat.   Cut 2 strips from an adhesive backed magnet sheet (found in the general crafting section of your local craft store) to approximately 2”L x 0.25”W each.   On the inside of the bookmark, adhere one strip along each of the short ends, lining them up so they magnetize.

 
Then decorate your bookmarks with your choice of cuts! 
 

Done! (Told you it was super-FAST!)  Fold it over the page in your book and it will stay in place.

The great thing about this project is the limitless possibilities!  You can make it any size and embellish it any way you want.   Like…
Monograms:
 

Shapes:

Holidays:
 

These make great birthday presents (to go with a book or a bookstore gift card), party favors, and even treats for your child’s classmates!
A few hints: 
  • When I am choosing my Cricut cuts, I use my Gypsy (or CCR) and place a square that is the same size as the finished bookmark on the mat and size up my cuts.  If I am using patterned paper, I want to make sure that my cut doesn’t cover all of it up.
  • To line up the magnets on the front and back pieces, I cut the magnetic strips and magnetize them together so the adhesive is on the outsides.  I remove the backing on one side only and adhere it to one of the short sides.  Once that is in place, I remove the backing from the other strip (now face up and magnetized to the other one, and fold the book mark closed.  This will line your strips up evenly.
  • I wanted to laminate one to see how it turned out, but my laminator is packed away due to some remodeling we are doing right now.  I have not tried it before, but would recommend the thinnest pouch in order to allow your bookmark to fold and stay together.  I would also recommend laminating and then adhere the magnets.
I hope that you get some inspiration from this project.  Thanks for stopping by!
 
Cricut Info & Supplies Used:
Designed by: Dana Bilson
Cricut Machine Used:  Cricut Mini
Cricut Cartridges Used: Create a Critter (apple, cut at 2”), Hello Kitty Font (monogram D, cut @ 1.5”), Life’s a Party (soccer shaped bookmark- used the card feature cut @ 2.5”), Mini Monsters (Jack-o-Lantern, cut at 1.75”) 
Other Supplies Used:  Cardstock, adhesive magnet strips (found in the general craft section of Joann’s), adhesive