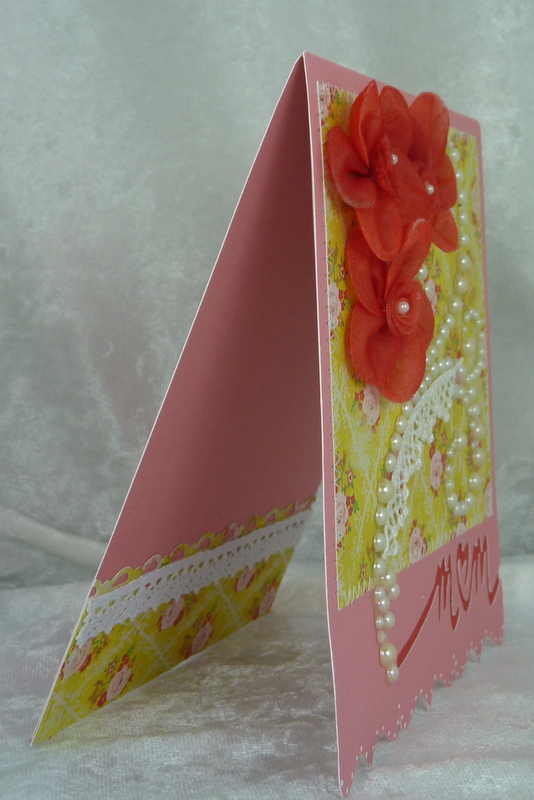
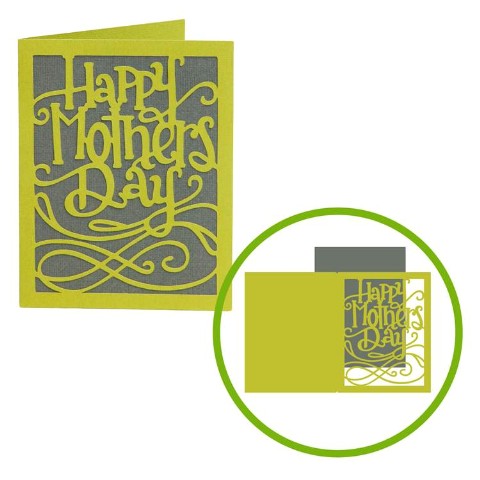
Hi fellow crafters! This is Maria from Stamp, Cut, Create! Today's project is a Mother's Day card I created using a free image from Cricut Craft Room. The basic design of the card was simple, but after some embellishment I think it turned out rather lovely.
I started by sizing the image to be an A2 card (5.5" X 4.25"). I added a 4" X 3.75" piece of printed paper to the top and machine stitched around the edges. To cover up the stitching inside and to make the Mom stand out a bit more, I added a piece of red card stock to the front inside. Adding a pearl and lace flourish, some fabric flowers and a small bit of doodling finished off the front of the card.
On the bottom of the back inside of the card I placed a strip of the same print paper that I edge punched with a scallop design. As a finishing touch I added a piece of white lace trim. All in all, this card was quite easy to create, but I love how elegant it looks.
Thanks so much for stopping by today. I hope you are having a wonderful weekend and for all you moms out there, Happy Mother's Day!
Showing posts with label Cricut Craftroom. Show all posts
Sunday, May 12, 2013
Tuesday, April 16, 2013
Charmed, I'm sure!
Hello again! Doreen from polkadotpaperprincess here to show you some of my favorite ways to use my Cricut... to make charms!
I'm just starting out with the Cricut Craft Room. Although I wish it were offline so I never had to worry about my internet connection, I am finding that when I am home, I am trying it more and more!
I love to make charms! I made these out of Cricut cuts from Flower Shoppe and Cricut Craft Room Basics.
The first one is cut from a regular piece of plastic. The second one is the same leaf cut multiple times, glued together, edges inked then glaze applied over top. The third and fourth ones are pieces of shrink plastic. The sparkly heart was shrank, then a thin layer of glaze added and glitter over that. The fourth one is dipped into my melting pot full of embossing powder. The 5th one is multiple layers of paper. You must remember to flip the last one. I found with this particular leaf, it is better to just flip a piece of paper and not the image. For some reason when it flips, it cuts smaller! The last one is a piece of shrink plastic that I colored with a sharpe and then melted with my heat gun.
There are so many different ways to make charms with our Cricuts!
Here are a couple of completed charms.
I may try to retake the photos in the day light to help you see the charms better. IRL they look really nice and will be making their way onto some projects!
Enjoy your Cricut for more than just cards!
I'm just starting out with the Cricut Craft Room. Although I wish it were offline so I never had to worry about my internet connection, I am finding that when I am home, I am trying it more and more!
I love to make charms! I made these out of Cricut cuts from Flower Shoppe and Cricut Craft Room Basics.
The first one is cut from a regular piece of plastic. The second one is the same leaf cut multiple times, glued together, edges inked then glaze applied over top. The third and fourth ones are pieces of shrink plastic. The sparkly heart was shrank, then a thin layer of glaze added and glitter over that. The fourth one is dipped into my melting pot full of embossing powder. The 5th one is multiple layers of paper. You must remember to flip the last one. I found with this particular leaf, it is better to just flip a piece of paper and not the image. For some reason when it flips, it cuts smaller! The last one is a piece of shrink plastic that I colored with a sharpe and then melted with my heat gun.
There are so many different ways to make charms with our Cricuts!
Here are a couple of completed charms.
I may try to retake the photos in the day light to help you see the charms better. IRL they look really nice and will be making their way onto some projects!
Enjoy your Cricut for more than just cards!
Thursday, April 11, 2013
Mother's Day Card
Hey everyone! It's Angie from Angie's Paper Passion with my monthly post.
Here's my problem - I procrastinate! Second, I have started taking of my soon-to-be 3 month old Grandson and although I am oh so happy that I can be with my baby all day, everyday, it really doesn't leave me a whole lotta time to create. Plus, I'm a procrastinator, did I mention that? So for these reasons, if I'm going to send any cards out this year, I need to start NOW and make it simple on myself. (Also, by the time my turn comes up again here at Cricut FANatics, it will be one day before Mother's Day so...
So I went to Cricut.com to see what my "simple" options were. I had been looking at the Craft Room Exclusives like the sets of single Mother's Day cards and I found one that I really liked:
So I bought it - cut two pieces - glue!!! Easy peasy! Plus it was 1.99 and now with the sale going on it is 1.69 (If you're a Cricut Circle member, you get an addition 10% off). No need to wait for it to be mailed to you - it will be in you Cricut Craft Room the next time you open it! Again, really simple!
I used paper from K&Company for the card and cut it a 5.5".
I just wanted to show you up close how detailed those cuts are.
All the cuts were nice and smooth for being so detailed
. But I still needed something extra on that card. I thought about it for a long time and finally can up with this (you know how I love my flowers and my bling! LOL!
And there they are! The flowers were cut on the Cricut with the CTMH Artiste cart at 3.25' and 4'. I used some seam binding that I had dyed myself with Distress Ink in Peeled Paint. Then I added some branches from a Martha Stewart hand punch and the bling is from Colorbok.
![]() |
| A Close Up of my rolled flowers, ribbon, and punched leaves. |
Okay, so even though I did add a few things, I think it a perfect card for a special Mom! And they won't take long to make. In the Cricut Craft Room make the card base as many times as you need. The next time that you have a few minutes, cut out the flowers with the Cricut and punch some leaves with a punch (or even make those with the Cricut, too). The roses can be rolled one evening while watching T.V. I use Scotch Quick Acting Glue or Glossy Accents and they both work great and they DO DRY FAST! Then all you would need to do is put them all together - assembly line style! In no time at all you will have a stack of cards just waiting to be mailed. I just wanted to share that you can take a simple card from CCR and make it extraordinary all for only a couple of bucks. But they won't look like it!
Thanks for dropping by! Until next time, Happy Crafting,
Cricut Info & Supplies Used:
Designed By: Angela Cromwell
Cricut Machines Used: Expression
Project Type: Card
Project Theme: Mother's Day
Cricut Cartridges Used: Artiste, Craft Room Exclusive - Mother's Day Card #6
Labels:
Artiste,
Cards,
Cricut Craft Room Exclusive-Mother's Day Card #6,
Cricut Craftroom,
Mother's Day
Saturday, March 16, 2013
Southwest Mini
Hello everyone! Doreen from polkadotpaperprincess, I'm here to show you the front cover of a project that I am working on. I tried the Craft Room for the first time this week!
My project is a 50th wedding anniversary, mini album, but not your typical one! It is one for my aunt who loves Aztec/Navajo items. I was so pleased I happened to try the Cricut Craft Room when I did, as the Southwest cartridge is free to use until the 20th of this month! It works perfectly for the project I need to make! I will have to scurry to finish the rest of it in the next four days before the cartridge is no longer free! I will post the remainder of the mini on my blog when it is done.
The book pages are made from Elegant Edges. I love this cart for these easy-to-make minis and mats! The eagle, "Oh happy day" and the border are all made from the Southwest cartridge. The 50 is made from Gypsy Wanderings. I ran it through my Zyron and then added glitter. I took some flowers and the ribbon and sprayed then with my Copics to get better color matches. I added some bling, lace and a feather to add a little extra kick. I can only add a bit as my aunt tends to like this more on the plain side. I have only partially adhered the items on so that she will be able to place her choice of photo on the mat.
I am so grateful for the opportunity to use this free cartridge to make this album. If you haven't done it yet, you should scoot over to the Craft Room and try the Southwest cartridge for free while it lasts!
Thanks for stopping by!
My project is a 50th wedding anniversary, mini album, but not your typical one! It is one for my aunt who loves Aztec/Navajo items. I was so pleased I happened to try the Cricut Craft Room when I did, as the Southwest cartridge is free to use until the 20th of this month! It works perfectly for the project I need to make! I will have to scurry to finish the rest of it in the next four days before the cartridge is no longer free! I will post the remainder of the mini on my blog when it is done.
The book pages are made from Elegant Edges. I love this cart for these easy-to-make minis and mats! The eagle, "Oh happy day" and the border are all made from the Southwest cartridge. The 50 is made from Gypsy Wanderings. I ran it through my Zyron and then added glitter. I took some flowers and the ribbon and sprayed then with my Copics to get better color matches. I added some bling, lace and a feather to add a little extra kick. I can only add a bit as my aunt tends to like this more on the plain side. I have only partially adhered the items on so that she will be able to place her choice of photo on the mat.
I am so grateful for the opportunity to use this free cartridge to make this album. If you haven't done it yet, you should scoot over to the Craft Room and try the Southwest cartridge for free while it lasts!
Thanks for stopping by!
Thursday, November 15, 2012
November Special Guest Designer - Kristen Swain
Please give a big welcome to our November Special Guest Designer - Kristen Swain.
Kristen was a former Circle Blog DT member and also currently designs for Northridge Publishings Cricut Magazine. We are so pleased to have her on Cricut FANatics Blog today.
Hello you all! Kristen Swain here from Blankety Blank Blank. I just have to tell you, I miss our Cricut Circle Blog so much! I was always so inspired by the other team members,we felt like a real family, and let me tell you, working with the new cartridges was so much fun! But life is full of change and I am loving working for Northridge Media on the Cricut Magazine.
I was wondering, what can I share? I have so many ideas and thoughts about using the carts. But I have been reflecting lately on using my supplies better, getting more use from papers and wasting less. Let's face it. Crafting is costly. I'll be honest. I get too overwhelmed with looking at online stores to actually buy anything. I know, I'm a shopping reject, but I start out loving everything, then I ponder, do I really need this, by then, I've spent 2 hours looking and I end up not buying anything. I'm hopeless! (or a cheapskate) I also really love certain colors of paper, and patterned paper. So when I have something I really love, I try not to hoard it, but use every last little scrap, since I'm so limited in my online buying. So that's when I decided that I would share a couple of cards made entirely of scraps.
I looked through and found two half sheets of cardstock- 6x12, and folded them in half for my card base. Then I sorted through my patterned paper and cardstock and pulled out some nice bright colors.
I was wondering, what can I share? I have so many ideas and thoughts about using the carts. But I have been reflecting lately on using my supplies better, getting more use from papers and wasting less. Let's face it. Crafting is costly. I'll be honest. I get too overwhelmed with looking at online stores to actually buy anything. I know, I'm a shopping reject, but I start out loving everything, then I ponder, do I really need this, by then, I've spent 2 hours looking and I end up not buying anything. I'm hopeless! (or a cheapskate) I also really love certain colors of paper, and patterned paper. So when I have something I really love, I try not to hoard it, but use every last little scrap, since I'm so limited in my online buying. So that's when I decided that I would share a couple of cards made entirely of scraps.
I looked through and found two half sheets of cardstock- 6x12, and folded them in half for my card base. Then I sorted through my patterned paper and cardstock and pulled out some nice bright colors.
One thing I think that helps me the most in using my scraps, is that I use Cricut Craft Room exclusively now. I love that I can see the images so much better on my laptop or computer screen. I can place cuts anywhere on the mat, and I can see exactly what size paper I will need to create a cut. So, I can add a 2x2 piece of paper and get a cut from it, using up more smaller scraps and wasting less. See what I'm saying?
Now, I know, my cards aren't seasonal. But they could be. Change the colors out to be orange, rust, brown, sage, sunflower, tans and you could change the greetings. Happy Fall, Autumn you glad I wrote, Give Thanks. They could also make great birthday cards. Change the How's life to .. Happy Birthday Chick. Change the Celebrate Life, to just Celebrate. It's all about the basic idea. Don't like apples? Use Preserves to cut a Pear, a Banana, or a Plum. Don't want to use the Chick, change it up with Create a Critter and make a snake, squirrel, or a bunny.
Thanks for having me today! I hope you enjoy my cards! Kris
Cricut Info & Supplies Used:
Designed By: Kristen Swain
Cricut Machines Used: Cricut Craft Room, Circut Expression2.
Cricut Cartridges Used: Preserves, Create A Critter
Other Supplies Used: Papers from various manufacturers like- My Mind's Eye, Echo Park, SEI, American Crafts and Imaginice. Buttons/twine are craft supplies.Foam tape, black pen, Fiskars Cloud deco scissors. Greeting stickers by SRM Press, punch ( 1.5 circle) marvy.
Cut Details:
Preserves- cut <Apple3> at 2.75 inches. <Apple3-s> at 1.98 inches and <Apple4-s> at 1 inch (2x)
Create a Critter.- <Chick> at 2.5inches, <Chick>Layer1, Layer2, Layer3 at 2.5 inches
Preserves- cut <Apple3> at 2.75 inches. <Apple3-s> at 1.98 inches and <Apple4-s> at 1 inch (2x)
Create a Critter.- <Chick> at 2.5inches, <Chick>Layer1, Layer2, Layer3 at 2.5 inches
Labels:
Cards,
Create A Critter,
Cricut Craftroom,
Expression 2,
Preserves
Friday, November 2, 2012
Go somewhere...
We are will into fall and beginning the holiday season. As I look at the past summer, I really enjoy organizing my photos and reminiscing. I picked out a few of my favorite photos for today's layout. I played around with Heidi Swapp's color shine papers and spray(gold lame, mint and turquoise). Also, I used stickles, staples, twine and an old clock face. The Cricut cartridge I used was the craftroom room basic and Gypsy font. I created old fashion Poloroid frames from squares. I welded the somewhere together and cut out the other words.
I hope you enjoy the layout. God bless and keep crafting!
Sunday, September 30, 2012
A B C's
Hello Everyone,
This is Yvonne from Ink-spirations and I'm excited to be part of this great blog. Today I'd like to share a home decor project and a some little book marks. The book marks follow the monthly theme of end of summer/back to school.
This wall hanging is for my newest Grandson for Christmas. I started with a white canvas 14x20. Painted the background a very light blue and then created a frame look with a darker blue.
The cute little characters are Page Pals from the Cricut Craftroom and are available digitally. They were quick to make. They were all cut at 4". Industrial Glow was used for the printing of the paper.
Cricut Info and Supplies Used:
Designed by- Yvonne Balmer
Cartridges Used: Plantin SchoolBook
Zooballo
Bubblegum Stripes
Page Pals - Digital
Industrial Glow
Cricut Machine: Imagine
Project Type: Home Decor
Project Theme: Baby, Child
Additional Supplies - Dew Drops, Ribbon, Black Pen, Pearls, Inks for shading Page Pals.
Don't forget to leave a comment for our weekly drawing.
This is Yvonne from Ink-spirations and I'm excited to be part of this great blog. Today I'd like to share a home decor project and a some little book marks. The book marks follow the monthly theme of end of summer/back to school.
This wall hanging is for my newest Grandson for Christmas. I started with a white canvas 14x20. Painted the background a very light blue and then created a frame look with a darker blue.
The letters are from the Planting SchoolBook cartridge and are between 1.75" and 2.5".Each letter was faux stitched with a black pen. Zooballo was used for the animals and were sized accordingly to the letter. I used CCR to design and cut everything with my Imagine and all images were printed using Bubblegum Stripes.
Black pearls were added to each animal and additional embellishments of dew drops and ribbon were added. Xyron machine used for adhesive.
The cute little characters are Page Pals from the Cricut Craftroom and are available digitally. They were quick to make. They were all cut at 4". Industrial Glow was used for the printing of the paper.
Thanks for stopping by!
Yvonne
Designed by- Yvonne Balmer
Cartridges Used: Plantin SchoolBook
Zooballo
Bubblegum Stripes
Page Pals - Digital
Industrial Glow
Cricut Machine: Imagine
Project Type: Home Decor
Project Theme: Baby, Child
Additional Supplies - Dew Drops, Ribbon, Black Pen, Pearls, Inks for shading Page Pals.
Don't forget to leave a comment for our weekly drawing.
Subscribe to:
Posts (Atom)