While we are no longer making active post of Cricut projects on this blog as of 8/1/2013, we invite you to use it for continued die cut inspiration as we will leave the blog up for viewing. Happy Cricuting !

Showing posts with label card. Show all posts

Monday, July 1, 2013

Happy Birthday on 4th of July

Greetings to my fellow Cricuteers !  It's Debbie O'Neal from Scrap Me Quick Designs to show you my final Cricut FANatics Blog project as we are closing the blog as of July 31st.  Please read the farewell details HERE.
 
My final project to show you is for my dad. His birthday is actually on the 4th of July.  When we were little kiddos, he used to tell us the fireworks were all for him !  Can you imagine our wonder that all those lovely explosions in the sky were just for him? As I got older, Dad finally had to fuss up that they were actually for 4th of July, not just his special birthday.  
 
4th of July and Dad's birthday were always special occasions with picnics and watermelon and watching the fireworks together.  It still is when we can get the family together.
 
This year I made dad an extra special card for his extra special 4th of July birthday card as this is his 75th birthday and we are glad he is still here to celebrate with us as he struggles with lung cancer.
 
Okay, now you know why I made what I did, time to show you what I actually made.
 
4th of JULY BIRTHDAY CARD:
 
Using the Independence Day Cricut Cartridge, I selected the Uncle Sam hat image, then WELDED  two of the shapes together to create a card. I cut it out at 5.24 inches.  Tip: be sure and flip one of the images before you weld it so when you close the card, the shape matches up correctly.


Next I cut out the hat layers using glitter paper to give it that special touch. I wanted to add a silver star background to the blue layer piece so I used the HIDE Feature on a second banded piece to eliminate the stars as you see on the silver glitter paper. 


Now that I had the glitter paper cut out, I needed to adhere the layers.  The best way to add glittered layers together is to use score tape.  You can see here how I did that to add the blue band to the silver under layer. 


Next, I added the red glitter paper to the front of the hat.  Then I decided I wanted to stamp a birthday sentiment to the front of the card. But since the shape was curved, I needed to do a little something special to make it look right.  Taking an acrylic block and a wax pencil, I drew the shape of the curve on the block.

 
Next I flipped over the block and added the birthday sentiment stamp letters placing them within the curved shape. I used silver ink to stamp the sentiment.  The sentiment was made using CTMH A1117 A Type Face Alpha set.

 
As you can see below, I also added the word DAD in glitter paper to front of the card. 
I just love how this turned out !

 
On the inside of the card, I stamped a sentiment which says "May this year be your Grandest year yet" which I also stamped in silver.  I used the star negative pieces from the hat band to decorate the inside.  The stamp is from CTMH D1491 Hooray Bouquet.

 
I have a feeling my dad is gonna love his special 4th of July Birthday !
 
Be sure and come follow me over at Scrap Me Quick Designs as I continue my die cutting exploration of not only the Cricut but also the Silhouette. I have lots of things planned with tutorials and tips to inspire you to keep creating !
 
Cricut Info and Other Supplies Used:
Designed by:  Debbie O'Neal
Cricut Machine Used: Expression
Cricut Cartridge Used:  Independence Day
Other Supplies Used: CTMH Stamp Sets, glitter paper, cardstock, silver ColorBox ink, acrylic block 

Friday, June 7, 2013

Humorous Card with Original Caption

Hello again to all the wonderful inspiration seekers, who come to CricutFANatics to get a  creative mojo blast.  It's Melody, aka Kauaimelody on the Cricut Messageboards and Cricut Melody on my blog, and I hope you are up for a little chuckle today. 

Here is a Sneak Peek 


Before I show you the card, I made, a little back story. When I lived in Illinois, I contributed to a small annual publication called the Lee Centenniel, which promoted community events. I was the sole cartoonist, and  so loved trying to come up with funny captions .  Last week , I thought about how much I missed doing that and wondered if I could still come up with one.  So I decided to challenge myself , and create one for all of you, and put it on a simple card.

So today's blog is about prodding you to  writing something on your card that is completely original and funny.  OK, so maybe you will be the only one who thinks it is funny, and if that is the case, just keep it for yourself for kicks and giggles when you need a little boost. 

And now for my caption:


And the image that goes with it:


 So to help you answer the question that the caption poses, a close up for you.  If you are of a delicate nature, and find a lady cow's udders in a lavender sparkly bikini offensive, please advert your eyes, and scroll quickly  past it.  :) I admit to having a silly bone in case you are wondering abut my sense of humor.


I used the Imagine More cartridge for the cow and cut the bikini out of wired ribbon.  It had a nice silver border, and I used this to "keep the bikini up" so there was no wardrobe malfunction.

I was going to design it on Cricut Craftroom, (Half circle, four cut elongated ovals) but decided to trace the cow and freehand it instead.  I made little rosettes out of narrow folded  ribbon. This is an A2 card and the backgrounds are paint cards I had left over from a project.  Very easy to do.

I typed the caption at 16 and 18, wrapped the card in sheer ribbon , a bow and another rosette. I made it very simple as I wanted the caption to stand out the most.

Hope you did get a little chuckle out of this and will try a caption card yourself.  If you have any questions, you can post in the comments and I will answer there, or you can email me at cricutmelody@hotmail.com.  It is so much fun creating for you and I am looking forward to July 7 for a very special share.

Joyful Crafting Always,

Melody


Designer:  Melody

Machines:  Cricut Imagine

Materials:  cardstock ribbon, paint cards,  handmade flowers.
                   ATG, glue gun


Tuesday, May 21, 2013

A Sweet Treat

Good morning everyone. I'm L.B. from Cool Beans By L.B. I hope everyone is having a wonderful day. I try really hard to create more masculine themed cards to share with you,but right now I am overflowing with female birthdays so I am fun wobble card I created for a good friend.
I love this old school DCWV paper from the Sweet Stack. It layered just right on the birthday girls favorite color.
Next came the cute cupcake off of Simply Charmed, of course I have a habit of cutting of the cherry topper. I embossed the icing with my Swirls folder then added gems using some Stickles and tiny gems. I also added Stickles to the cupcake wrapper.
 I had never put gems on this way before but it turned out great and they all stuck on quite well. After everything was all dry I attached my cupcake with an Action Wobble.
 I hope everyone is having a wonderful day. See you next month!

Project Details:
Made by: L.B.
Cricut Cartridges: Simply Charmed
Other Supplies: Swirls embossing folder, DCWV Sweet Stack paper, Stickles in Cotton Candy and Lavender

Thursday, May 9, 2013

Hello Baby Card

Hi fellow scrappers.  This is Erika from http://EKittyScraps.blogspot.com.  Sorry for the late post but I was very under the weather yesterday.  The card I made is for a friends' baby shower.  The baby's room is going to decorated in Hello Kitty since she is having a baby girl.  


I did not have the Hello Kitty cricut cartridge (rare- hard to find and not on cricut craftroom), I cut out the Hello Kitty image from a coloring book.  I colored the Kitty with copic markers and used distress markers on the bear.  I also added black eyelashes to the Kitty's eyes.  Next I used my Cricut Expression and cut out Hello Baby at .50 inches on fuschia paper using the Artiste Cartridge.  I used my Martha Stewart Scallop Dot Edge punch on the pink paper and assembled my card.  I added two of Mrs. Grossman's baby safety pin stickers to my card and I was finished.  (Note: please ignore fuschia paper scrap on the kitty-I noticed this in the photo after the baby shower).

Supplies Used
Cricut Expression
Artiste Cartridge for font at .50 inches
Hello Kitty image from coloring book
Copic Markers
Tim Holtz Distress Markers
Martha Stewart Scallop Dot Edge Punch
Mrs. Grossman baby safety pin stickers
Pink and Yellow Doodlebug paper
Bazzill Basics Paper-Pirouette (fuschia)

Thanks for stopping by the Cricut Fanatics blog and have a good month!


I

Saturday, April 20, 2013

Sketch Challenge #6

Welcome to our Sketch Challenge.  
This is Amy from Amy's Digi Scraps and welcome to the another Sketch Challenge! On the 20th of each month, I will post a sketch for you to enjoy!  I generally post a card sketch with a card that I create, but you can make it a layout as well.  Please visit the Sketch Challenge link for more information about our monthly Sketch Challenges.

Here is the sketch for today:
 
And here is the card I created for it:


A simple card to tell someone that I am Grateful to have them in my life.  I have been challenging myself to use up and pare down my supplies.  So I have been using a lot of my scrap papers on my cards.  I have a box of "extra" and "text" cuts that I couldn't bear to toss but has been sitting around for someday as it filled up.  Today I had some craft time so I challenged myself by pulling that box down and my stack of scraps and made cards.  If I remember correctly, the "G" is from the Cricut Cutting Up cartridge.  Using strips and squares from my scraps, two metal buttons from my embellishment stash, a touch of bling, and a "grateful" stamp, I created a quick, easy to duplicate card.  I chose this because I have needed to replenish my stash of cards on hand.  This style is perfect not just for all occasion cards, but can easily be used for birthdays as well.  It is a non- gender style, so it was easy to switch the colors out for male and female.  Plus, using the letter for  the child's name easily personalizes the card for a birthday or other special occasion.

Hope you enjoy!  Make sure to share what you create!


We would love to see what you can do with this Sketch.  Please create a card or layout and upload the image to this post in the InLinkz!  Remember that you must use your Cricut in creating your project for the Sketch Challenge.

Wednesday, March 20, 2013

Sketch Challenge #5

Welcome to our Sketch Challenge.  
This is Amy from Amy's Digi Scraps and welcome to the another Sketch Challenge! On the 20th of each month, I will post a sketch for you to enjoy!  I generally post a card sketch with a card that I create, but you can make it a layout as well.  Please visit the Sketch Challenge link for more information about our monthly Sketch Challenges.

Here is the sketch for today:


And here is the card I created from the Sketch:


This sketch allows the design focal point, the flower, to not be overly competitive with the sentiment.  I used a paper stack from atd called "Urban Oasis" for all the paper except the card base, which was basic ivory card stock.  The flower is from Prima and the button is SEI.  I used a sentiment stamp from Close To My Heart and covered the sentiment and the flower petals using Icicle Stickles by Ranger. 
Unfortunately, my trimmer won't cut straight lines anymore, so I will have to look for a new one.  That turned out to be a good thing though since you have to use your Cricut for the sketch challenge.  I quickly laid this out using my Gypsy and George cartridge and cut each of the blocks and the two strips using my Cricut Mini machine.  Seems like overkill, but when your trimmer gets warped and you need blocks, what's a girl to do?


We would love to see what you can do with this Sketch.  Please create a card or layout and upload the image to this post in the InLinkz!  Remember that you must use your Cricut in creating your project for the Sketch Challenge.


Friday, March 8, 2013

Musical Birthday Card

Hi fellow fanatics!  This is Erika from http://www.EKittyScraps.blogspot.com.  I am glad to be able to share my new project with you today.  I designed this card for my stepdaughter Kim using the Quarter Note cartridge.  Kim is a music major in college so I wanted to make a musical themed birthday card.
I started with a kraft cardstock for the card at 5 x 7 inches.  I add a piece of black cardstock at 4.75 x 6.75 inches and attached to kraft cardstock.  I cut Bazzill Basics Antique Sheet Music paper to 4.50 x 6.50 inches and adhered to black cardstock.  I added a silver treble clef embellishment that I had in my stash.

Next I stamped a birthday cake from Inkadinkaclings birthday stamp.  I wet embossed the stamp with Ranger Inkssentials tinted embossing ink and used Stampendous Marcasite Opaque embossing powder which has a nice glittery black color.  I used my Copic markers to color the stamp. 
Hint-an advantage to wet embossing and coloring is that you have raised lines when wet embossing to color in versus just stamping a flat image with regular ink and trying to color inside the lines.

  Now I used my Quarter Note cartridge and cut out Happy Birthday in music notes using font 3 and shift font 3 for capital letters B and H at .75 inches.  I also cut out two corner roses at 1 inch and adhered with Scotch quick dry adhesive.  I pop dotted the stamp and added to the card.  The stamped image above does not really show how glittery the cake stamp from the embossing power is nor the nice colors of the copic markers.  I hope you like my card.  Have a nice day and keep crafting!

List of Supplies used:
Cricut Expression Machine
Quarter Note Cartridge
Cardstock-kraft, pink, red and black (Tim Holtz Craft core)
Bazzill Basics Paper-Antique Sheet Music (has french words on it)
Inkadinkaclings-Happy Birthday Cling
Ranger Inkssentials-Emboss It Tinted ink pad
Stampendous-Marcasite Opaque embossing powder
Copic Markers-RV11-Pink,  R29-Lipstick Red, W5-Warm Gray, Y13-Lemon Yellow and YR07-Cadmium Orange
Scotch Quick Dry Glue
Silver Treble Clef embellishment


Sunday, March 3, 2013

"The Great Gatsby" Inspiration


Hi! Lori here from The Singing Shell blog with a decorative easel card inspired by The Great Gatsby movie coming up in May.  I love the simple but opulent look of the fashion and especially the architecture in that era.  I also  remember reading this book in high school and I have to admit that reading it again as an adult makes me appreciate it more than I did as a teenager.  I guess you have to live a little to understand certain things.

So, guess what cartridge was perfect for this card?  You got it!  The Art Deco Cricut cartridge.  It is filled with a lot of the images can used for that Roaring Twenties look and for masculine cards or projects.

First, I made the circle easel card base.   To make the circle easle base, I used the directions from the Fresh & Fun Blog.  This video is great, too.  If you do no have circle cutter templates, you can easily make it the card base on the Gypsy, CCR, or Design Studio.

1.  I cut the Sugrddy (p43) image at 4 inches.  Love him!  He looks very dapper.


2.  Next, I used a circle edge punch on the black cardstock.  (It reminds me of the Chrysler Building for some reason.)  

3.  I attached it to the front of my card base and added the die cut.
4.  I stamped a clock image with a watermark ink and then the sentiment "what is possible in art becomes thinkable in life" in a light brown color. 


The sentiment is stamped on top of the clock watermark image.

5.  I added some metals gears.
6.  To hold the card up, I used a ticket and pop dots.


 Here is another version of the card in a regular 5 x7 card:


Happy Crafting!!

Designer: Lori Sjogren
Machines: Cricut Create
Supplies: Cardstock - Recollections, Tim Holtz Kraft Resist, SEI; Ticket - Tim Holtz; Buttons - Melissa Frances; sentiments - Unity Stamps & Tori Spelling; Gears - Lisa Pavelka; Circle Edge Punch - Martha Stewart Diamond Lake; Stamp


Monday, February 11, 2013

A Quick Valentine's Note and Gift

Hey everyone! It's Angie from AngiesPaperPassion with a couple of quick projects for those last minute Valentine's Day gifts. The first one is a simple note card:


I cut the cardstock at 3x6 to make this into a 3x3 card and added a 3x3 piece of patterned paper to the front. The scalloped border is from my 'old faithful' cart - Plantin Schoolbook! Even with all of the newer carts around this one still is a wonderful cart with so many great images. I cut out about 10 borders in cardstock at 0.5". I also used Accent Essentials to cut out the heart in glitter paper at 2.25". After inking the edges of the scallops, I adhered them to the card by staggering the borders, added a piece of ribbon with glue dots, and the heart with small pop dots. Once finished I decided that it needed one more thing so I punched out a tag shape and stamped a Valentine's sentiment on it and adhered it to the heart with a tiny red brad. Then I was satisfied that it was finally finished!

Next is a Tag Treat Holder:

Again, I used Plantin Schoolbook. This image is on page 71 (shift/Italic). It's one of those images that I often don't pay attention to and skip over but it makes a cute little treat holder by scoring it in the middle and folding in half. It was cut at 8" with the Fit to Length feature turned on with my Expression and scored at 3.75" and again at 4.5". I added two little hearts cut with the shift/Tall Ball feature (found on the same page) at 2.5", adhered them on to the tag, and tied it together with some twine. This would be great to give to someone with a piece of chocolate inside (think Ghirardelli chocolate squares! Yum!)

I think I will put both of these little gifts into this gift bag that was made with Plantin Schoolbook (see, I told you it was still a great cart!):

Whatever you give (and receive) this Thursday, I hope that all of you have a sweet and happy Valentine's Day! Thanks for visiting and until next time, Happy Crafting!
Angela

Info and Supplies Used
Designed By: Angela Cromwell
Project Type: Gifts
Project Theme: Valentine's
Cricut Cartridges: Plantin Schoolbook, Accent Essentials
Cricut Machines: Expression

Thursday, February 7, 2013

Valentine Riddle

Hello to all the fantastic Cricut FANatics.  It's Melody your designer for today, aka kauaimelody on the cricut board and cricutmelody on my blog.  Can you believe it is almost time for Valentine's day? Time to put all things frosty away and dream of  romance, love, and Valentine Crafts of course. 

Well, I decided to put you in the mood, by sharing pics with you today, of lots of little details that will hopefully inspire you to get all lovey dovey and make something romantic for a loved one. Do I see you blushing???  Well let's get started with a  riddle. . .

VALENTINE RIDDLE:

WHAT DO YOU GET WHEN YOU PUT RIBBONS, BLING, HEARTS, DESIGNER PAPER,CALLIGRAPHY, EMBELLISHMENTS, LOTS OF LOVE
 AND A BOX, A TAG AND A CARD TOGETHER?

Here are a whole kaboodle of details you can check out in the picture gallery to help you solve the riddle.  If you are a Serial Lookie Loo, who likes to see a bunch of pics, rather than read a bunch of words, than this blog could be just perfect for you.

CLUES TO VALENTINE RIDDLE/A PICTURE GALLERY WITH LOTS OF DETAIL


VALENTINE RIDDLE SOLVED: Here is what you get. You get a . . .


A Valentine Box to tuck a surprise inside to show you care-


A Valentine Card for sharing loving sentiments-


And a Valentine Tag to Place on your Valentine Box after it is all wrapped up


The coordinated Valentine Set -


HAVE A HAPPY VALENTINE'S DAY EVERYONE AND THINK OF THIS BLOG TODAY , AS MY CRAFT VALENTINE TO YOU. . .

Joyful Crafting Always,
Melody

Designer:   Melody
Machines:  Cuttlebug  (hearts)
Materials:   Ribbon, gems, lace, embellishments, designer paper, smart phone box, ranger tag


Thursday, January 10, 2013

Working Girl

Hi.  It's Renee from I came, I saw, I created...ummm late!  So sorry.  I was having Blogger issues with posting pictures and had to research how to get around the issue.

Today I am sharing with you an office collection I created for my hubby's admin.  When the Cricut cartridge Suburbia first came out, I knew it would coordinate perfectly with October Afternoon's 9 to 5 collection.

This is the cover to a notepad.


Materials Used:
  • Cricut cartridge Suburbia
  • October Afternoon's 9 to 5 collection
  • Stampin' Up! cardstock in Night of Navy, Old Olive, Daffodil Delight and Groovy Guava
  • Seam binding ribbon in black and white
CCR file:  https://www.box.com/s/599uzmrlslvvh3rv8kz7

Thank you for joining me today!  See ya next month!  =)

Thursday, January 3, 2013

Circut + Pier 1 = Inspiration


Hi, Lori from The Singing Shell.  Sometimes I get inspiration for my cards from the strangest places.  This time I got my inspiration from the Pier 1 Imports Christmas Penguin.  The little penguin with his foot in the cupcake was just too cute to pass up.  I thought it would make a great birthday card for winter if I could find the perfect penguin from one of my cartridges and alter it.  To give the card a more vintage look as opposed to the bright, Christmas original: I chose some soft and feminine colors.  Even the penguin is not solid black.  I used distress inks, lace, distress file for the paper edges to complete the look.

1.  I needed a chubby little gal like the one in the Pier 1 penguin so I got her from Jolly Holidays.  So that just goes to show ya that Jolly Holidays ain't just for Christmas! :)
2.  I hid the face using the Gypsy and drew eyes and eyebrows like the Pier 1 penguin.
3.  Unfortunately, I had to perform minor surgery on my gal.  The little feet were attached right at the tummy so I cut them off (ouch!).  I cut thin pieces of cardstock to make legs and attached the feet.
4.  The bow is from Paper Pups.  I added glitter to add a little texture and fun.
5.  The cupcake is from From My Kitchen.  I added glitter to layer because the frosting layers were white on white and wanted it stand out a bit.
6.  The pennants are hand cut and were added onto the twine with Glossy Accents.
7.  I added the crochet ribbon and distressed the edges of my paper.


Designed by ~ Lori Sjogren
Machines Used ~ Cricut Create
Supplies used ~ Cricut: Jolly Holidays, From My Kitchen, Paper Pups. Paper:  Prima and Webster Pages.  Other: Tim Holtz Antique Linen & Black Soot Distress Pads, Tim Holtz Antique Linen Distress Marker, Webster Pages Crochet Ribbon, Donna Salazar Pralines & Cream Fairy Dust Glitter, other glitter and twine from my stash.


Sunday, October 14, 2012

Boxed Birthday Card

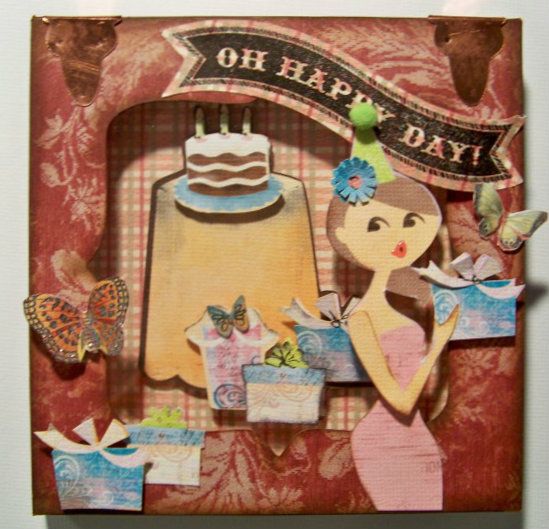
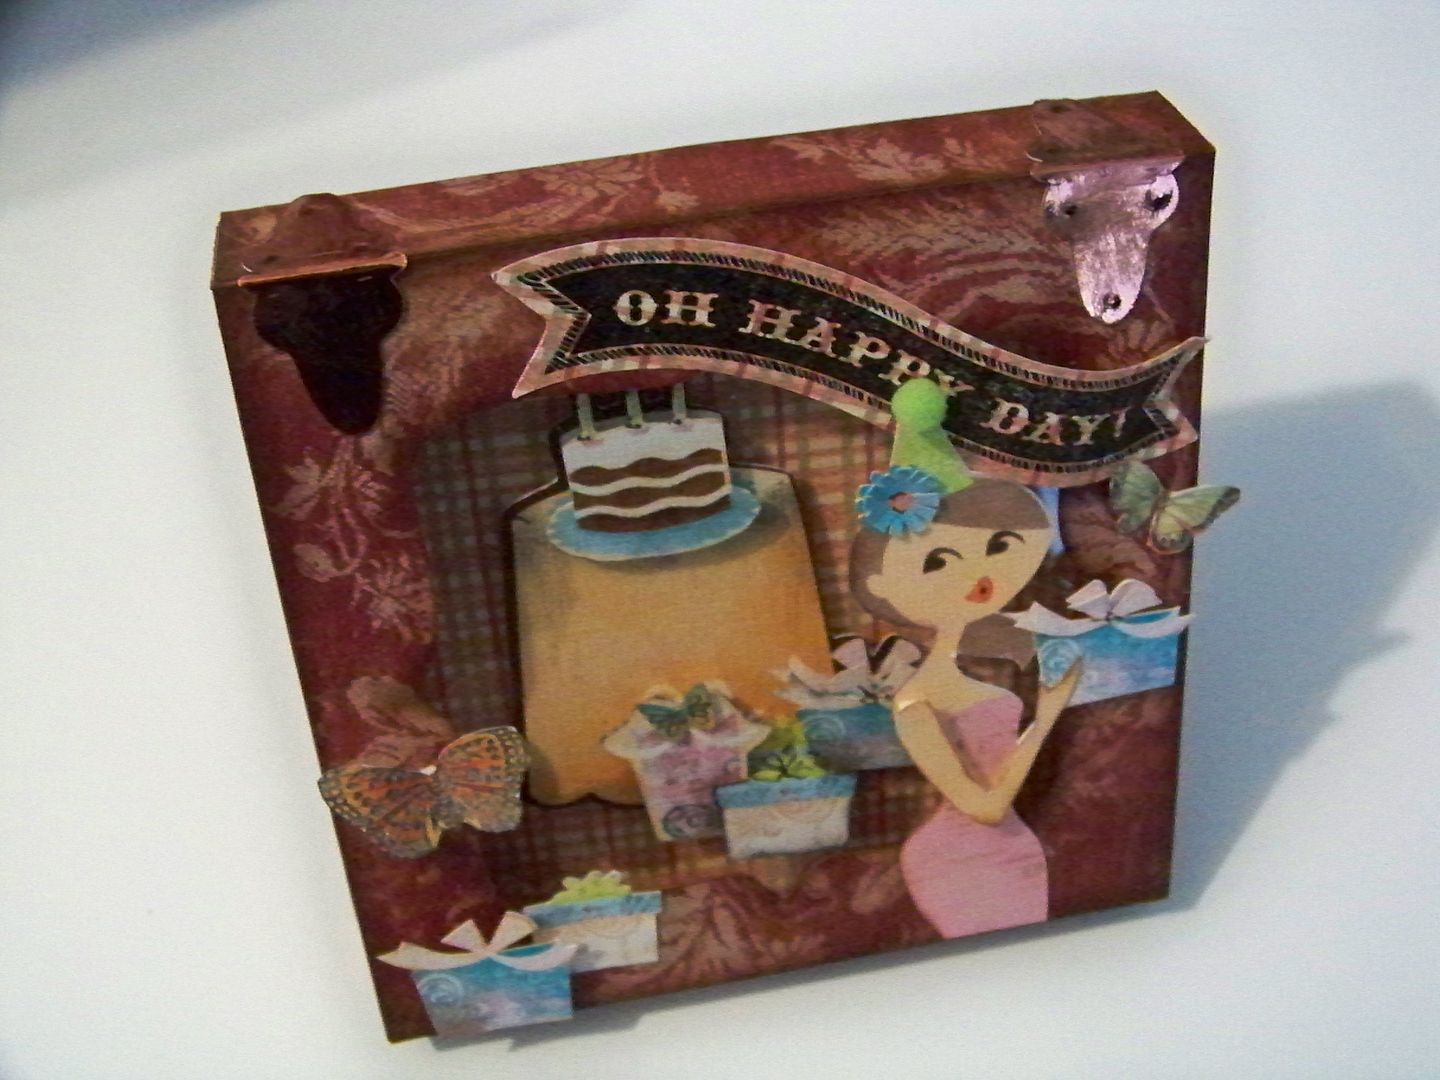
Hello!  This is Nadia from the my blog, With Glittering Eyes.  Today, I have a boxed birthday card to share!

Sometimes the card we make is the gift we give.  To make it more gift-like, I have been thinking about creating boxes for cards that are part of the design, where the card peeks through a window.  With this idea in mind, I decided to make a boxed birthday card for my message board friend, Sherry (Octoberbeauty), who is having a milestone birthday this year (yesterday actually).  We share a day as designers on this blog!  


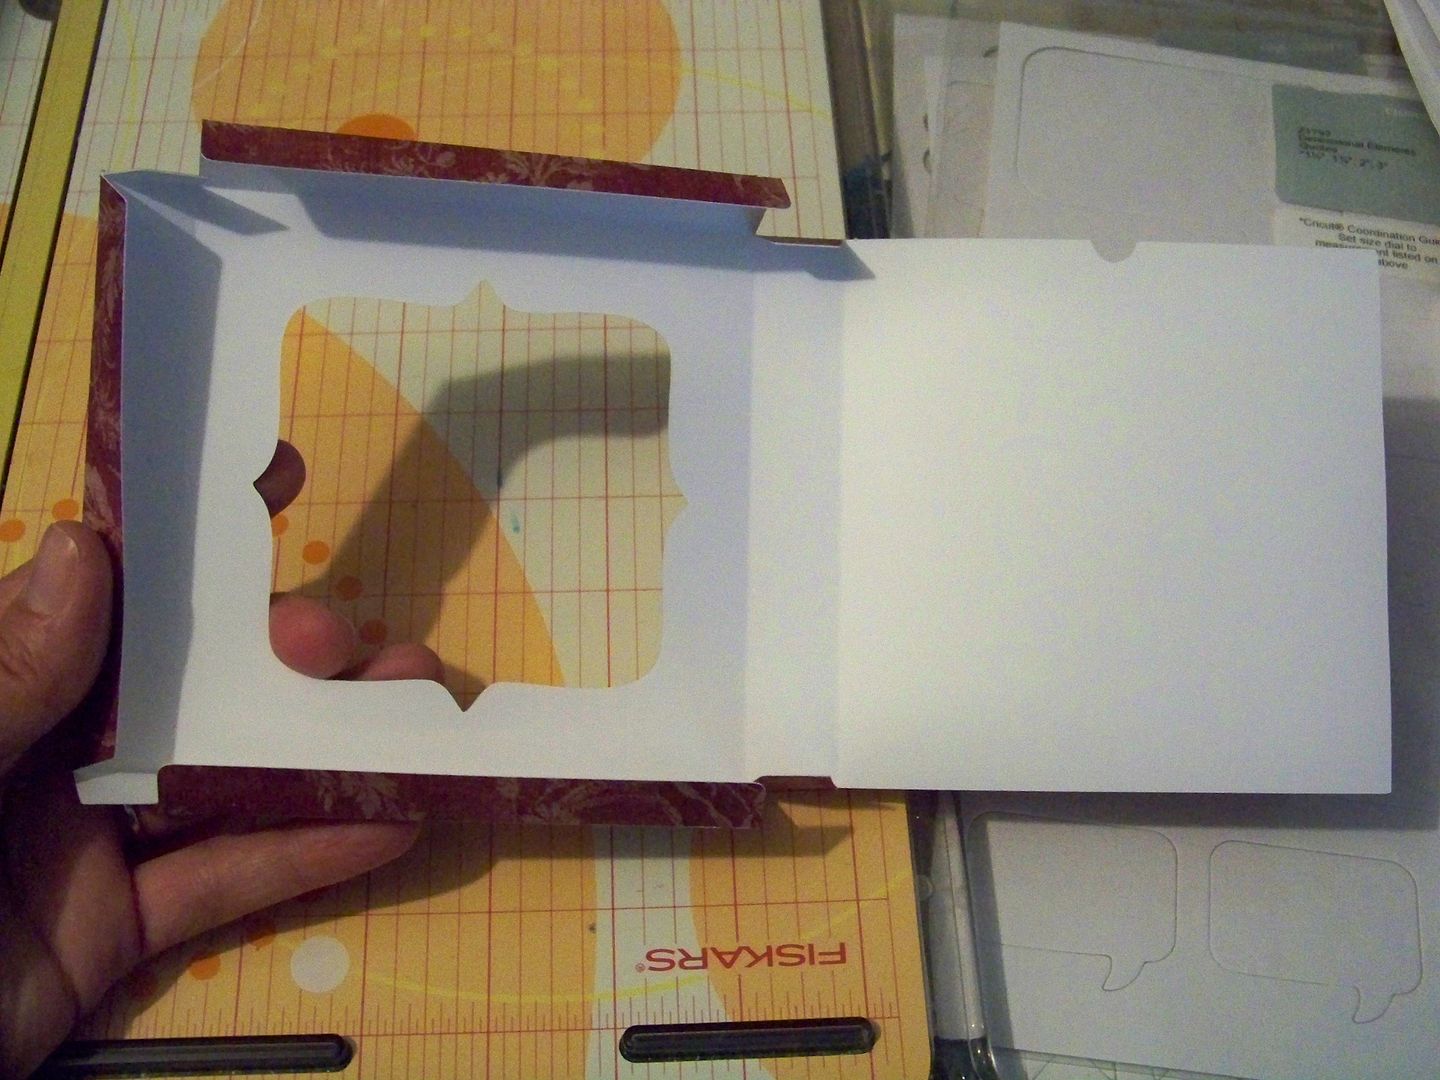
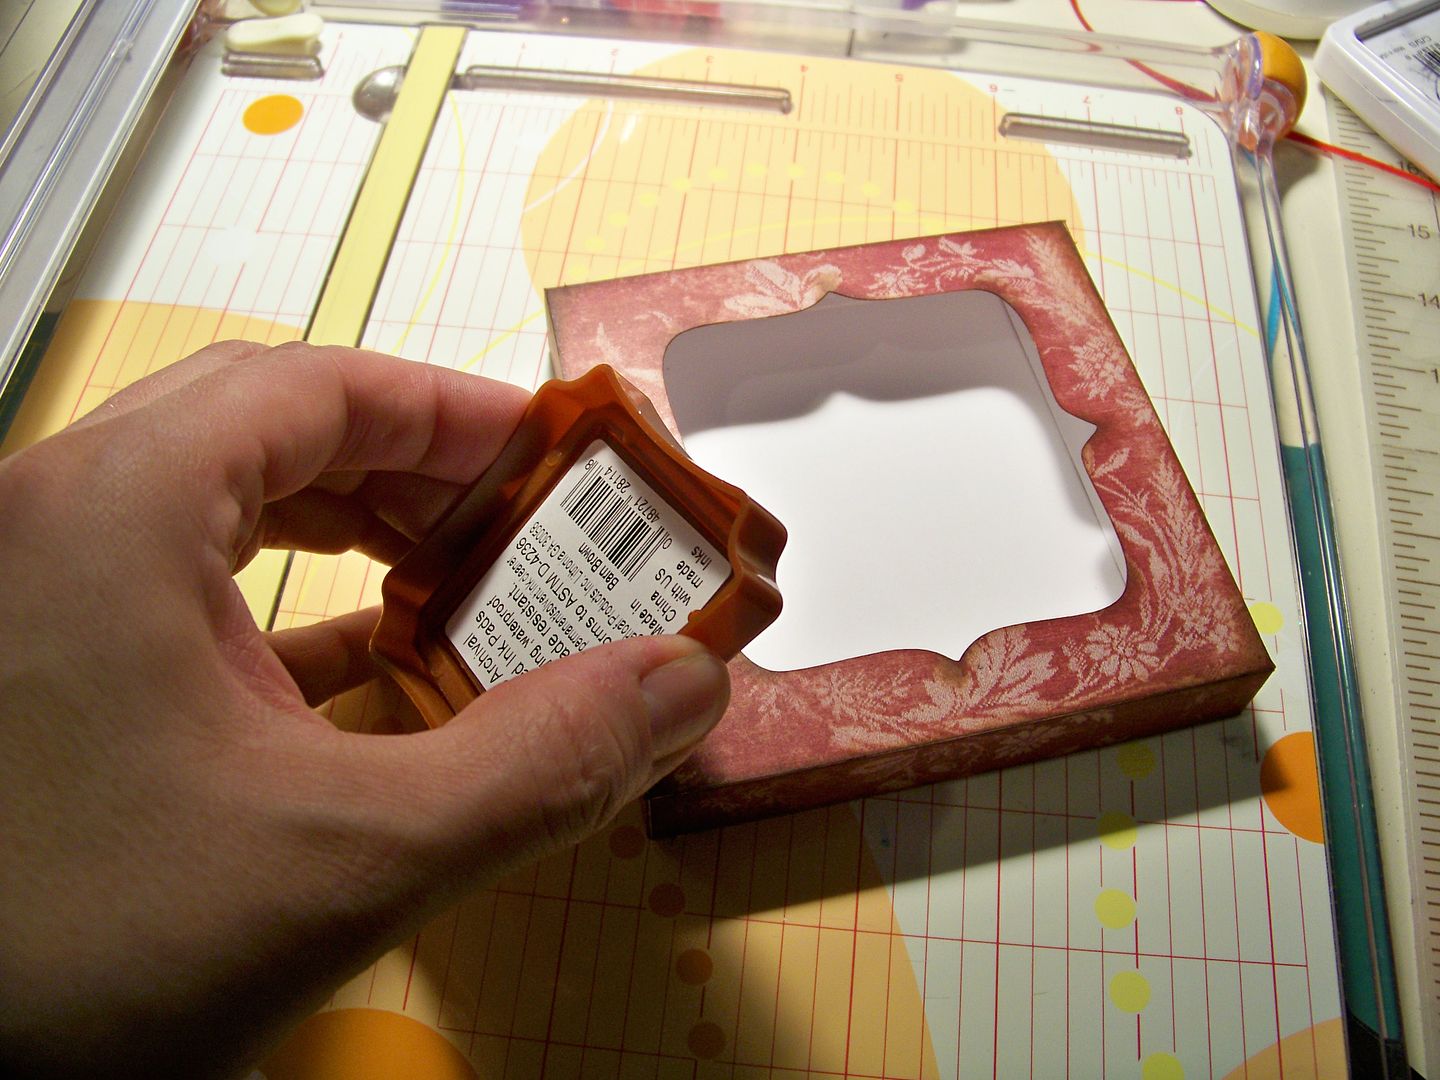
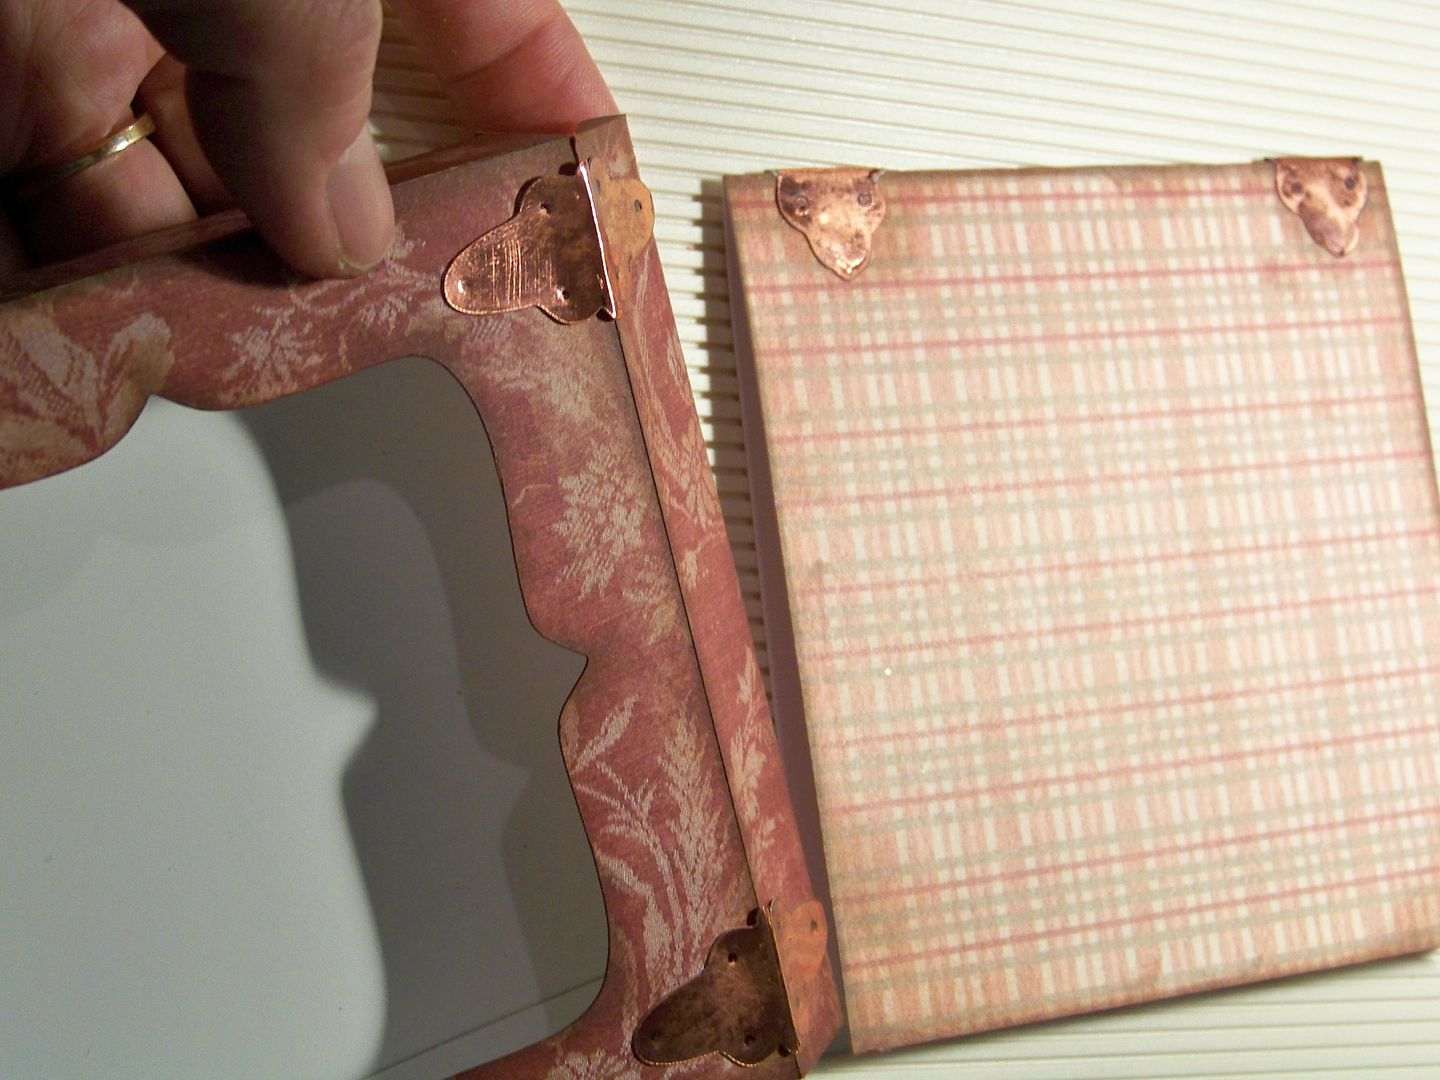
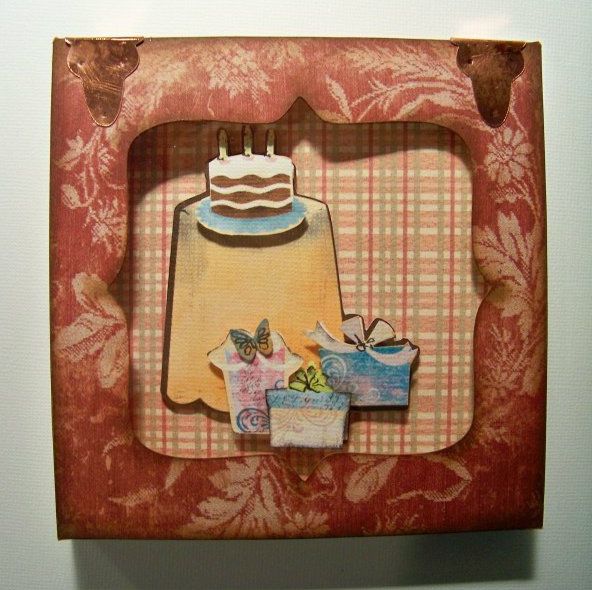
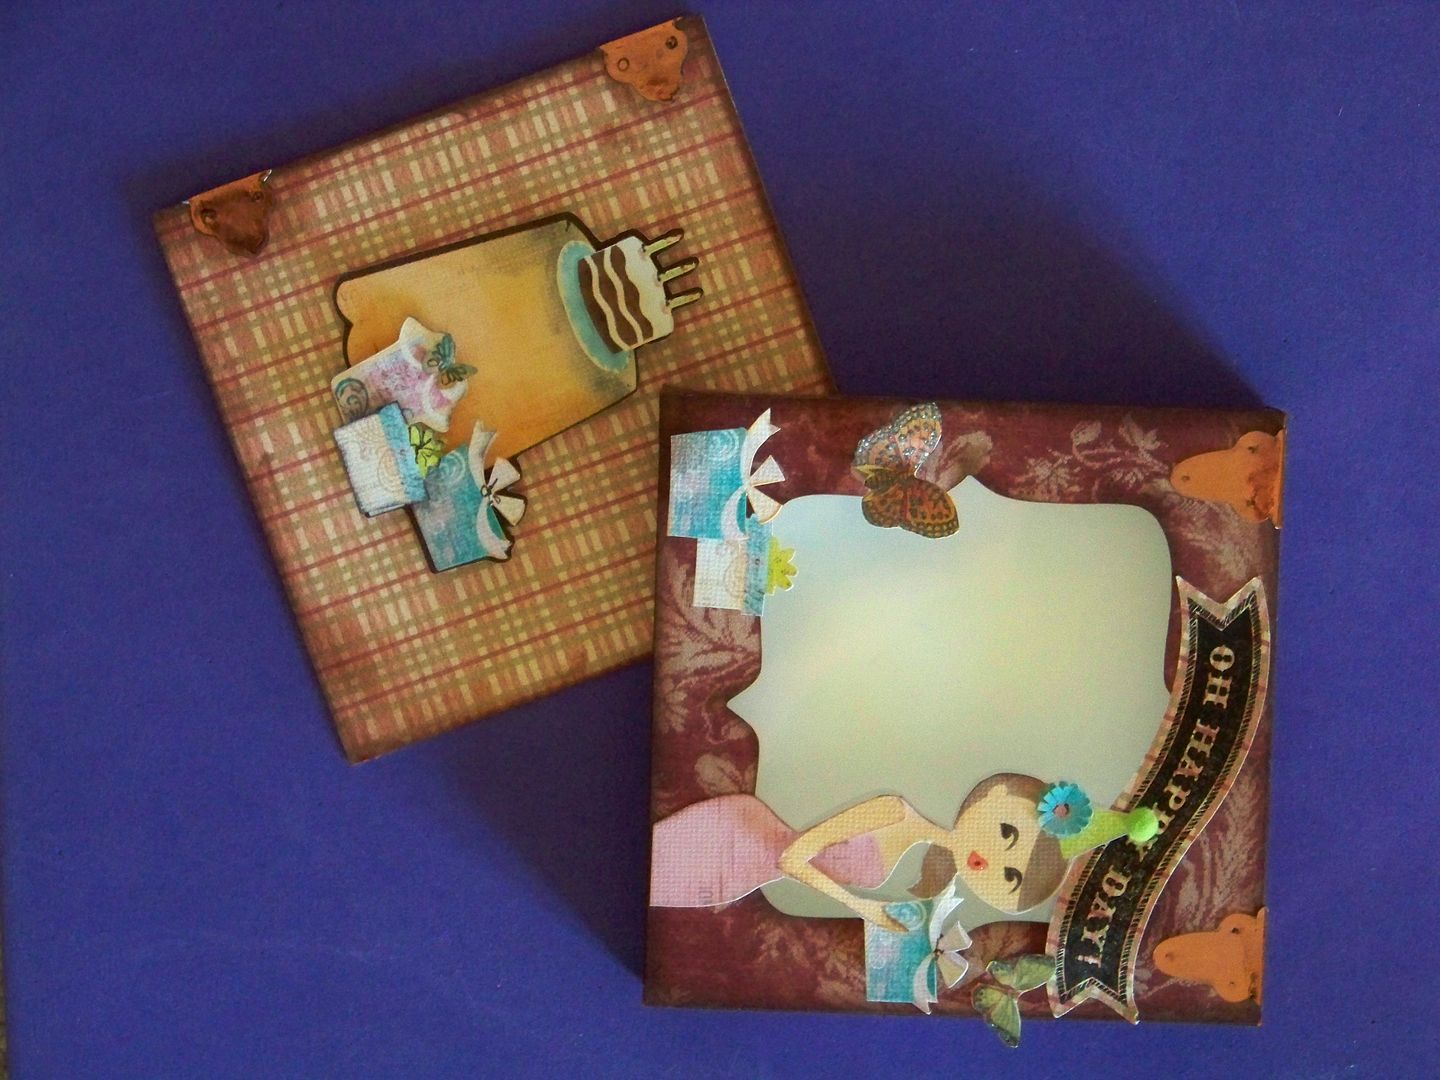
First, I created a box using Cricut Wild Card (page 80), cut at 7".  I used a print and positioned the paper on my mat for cutting with the Expression by placing the top of the print on the right of the mat. I later cut a piece of recycled clamshell for a window at 4-7/16" square.  (Packaging from Cuttlebug folders works great for this!)


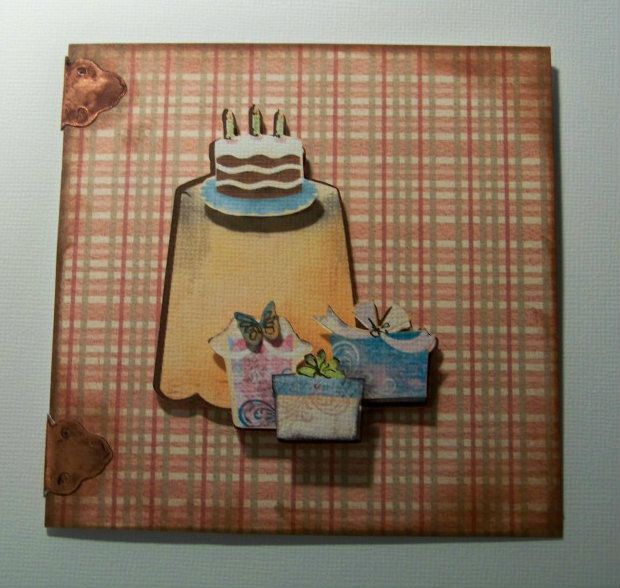
Next, I cut a card to insert by cutting an 8-7/8" x 4-7/16" rectangle on the paper trimmer.  I scored at the middle with an Xacto knife to have a card that finishes at 4-7/16" square.  I cut a decorative paper at 4-7/16" and applied to the top.  


I used a brown ink pad and rubbed it over the edges of the box and card to give it a little character... you know, the way aging gives character.  (Get used to the aging jabs, you whippersnapper, you!  Just another service I provide as a person who is older than you, Sherry.)


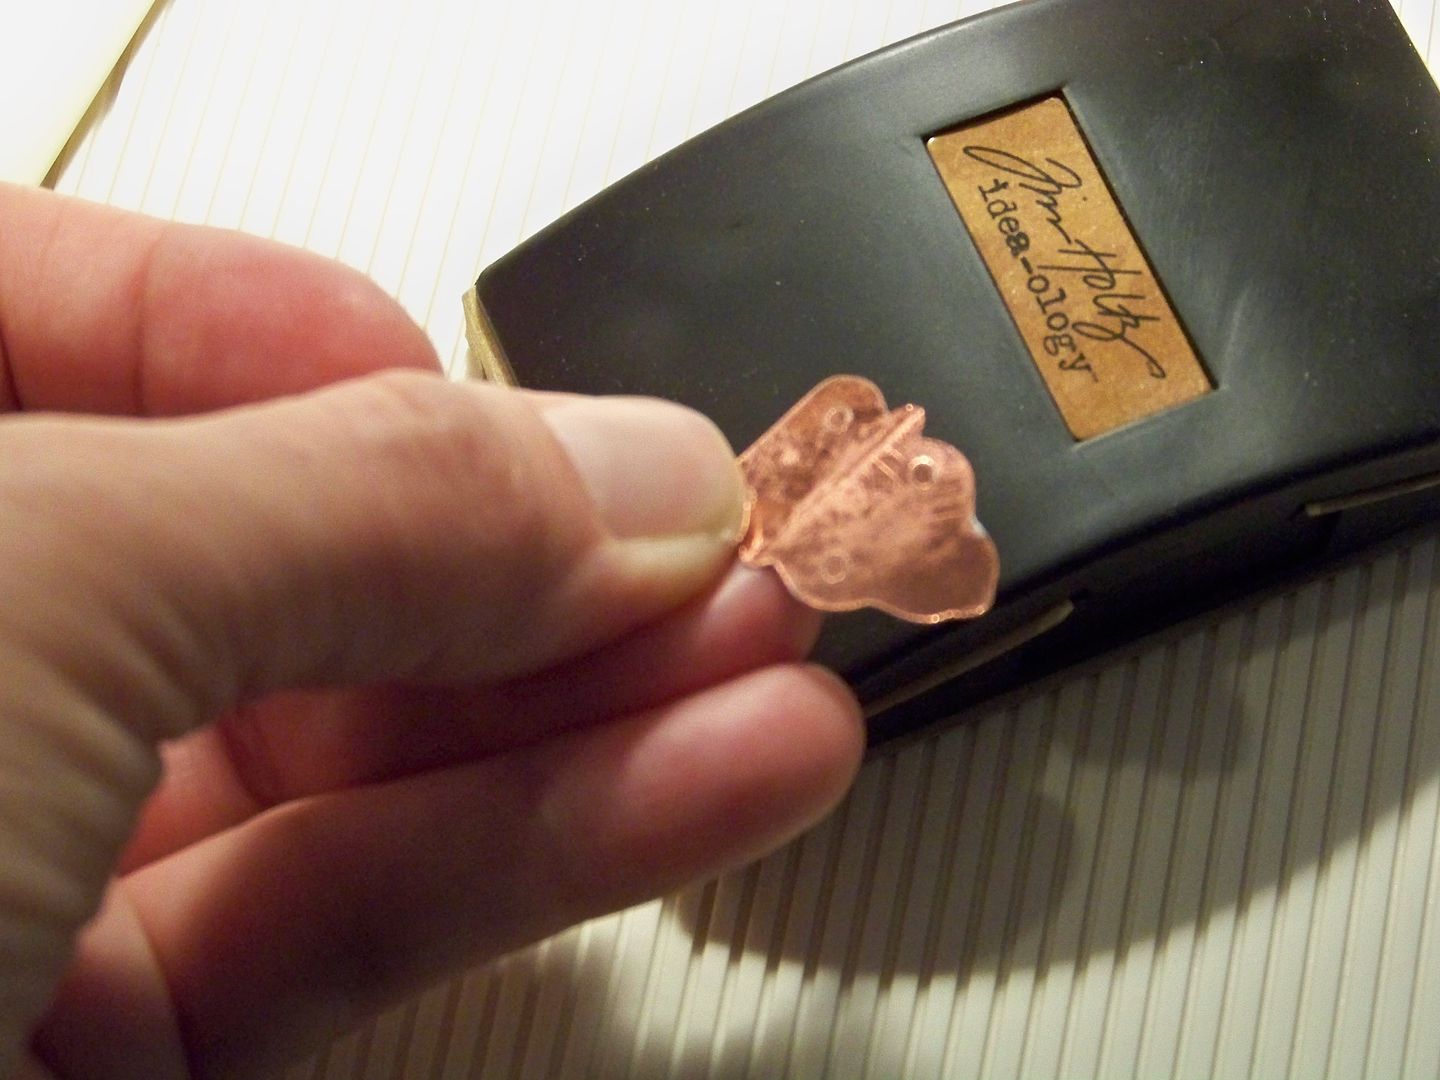
I created hinges-- more character-- by cutting them from Fabulous Finds (page 118) at 3/4".  I sanded the metallic paper to scuff it up and make it more authentic-looking. I scored the centers with a bone folder to help them bend smoothly.  I attached the hinges to the fold of the card and the top of the box at the opening with Scotch Quick Dry Glue and used a burnishing tool to indent them where screws would be inserted on a real hinge.


For the card insert, I added artwork from the Imagine Yummy cartridge, cutting extra layers to pop up for dimension.  I kept it simple because the box design elements had to work with it. I added a tiny hand-colored butterfly.  These elements were popped up 1/8" to 3/8".


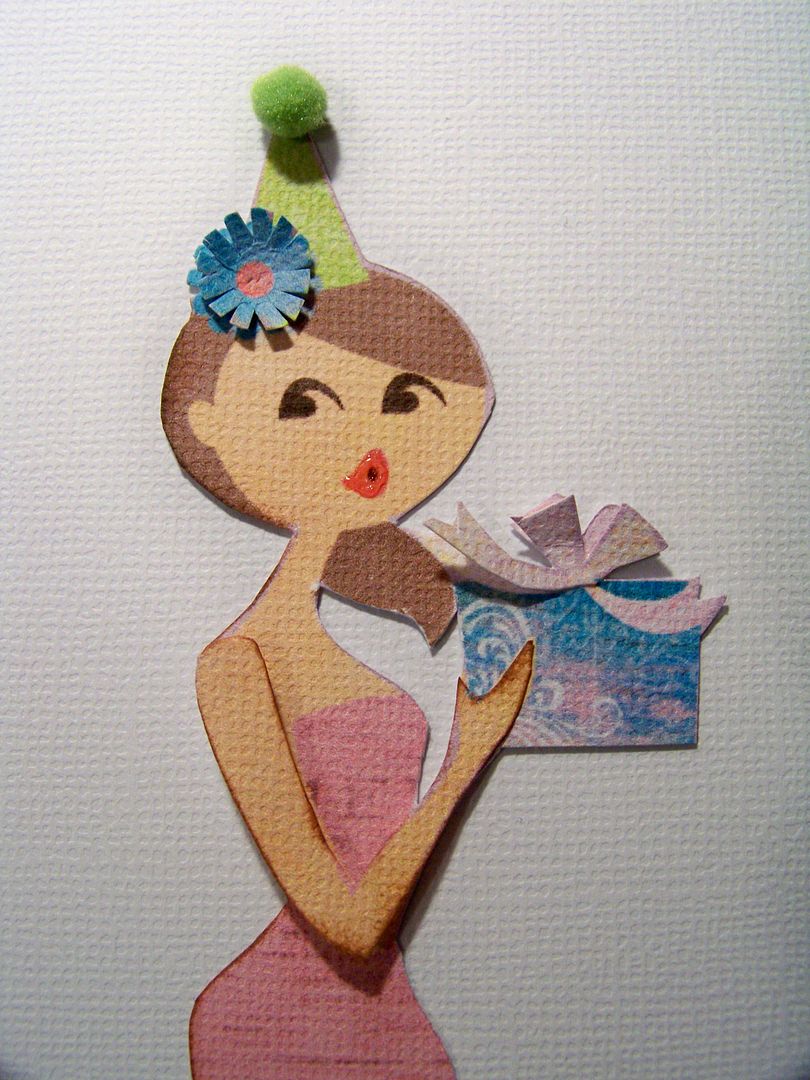
For the front of the box, I printed and cut a 6" figure from the Yummy cartridge twice.  I cropped off her legs, hand-cut off one arm from the second figure and popped it up and inked it for dimension.  I added an extra popped up bow and flower on her hat.  I added a pompom for her party hat and Glossy Accents to her lips.


I applied her to the box with 1/8" pop dots on her upper body and box, but adhered her flush at the bottom.

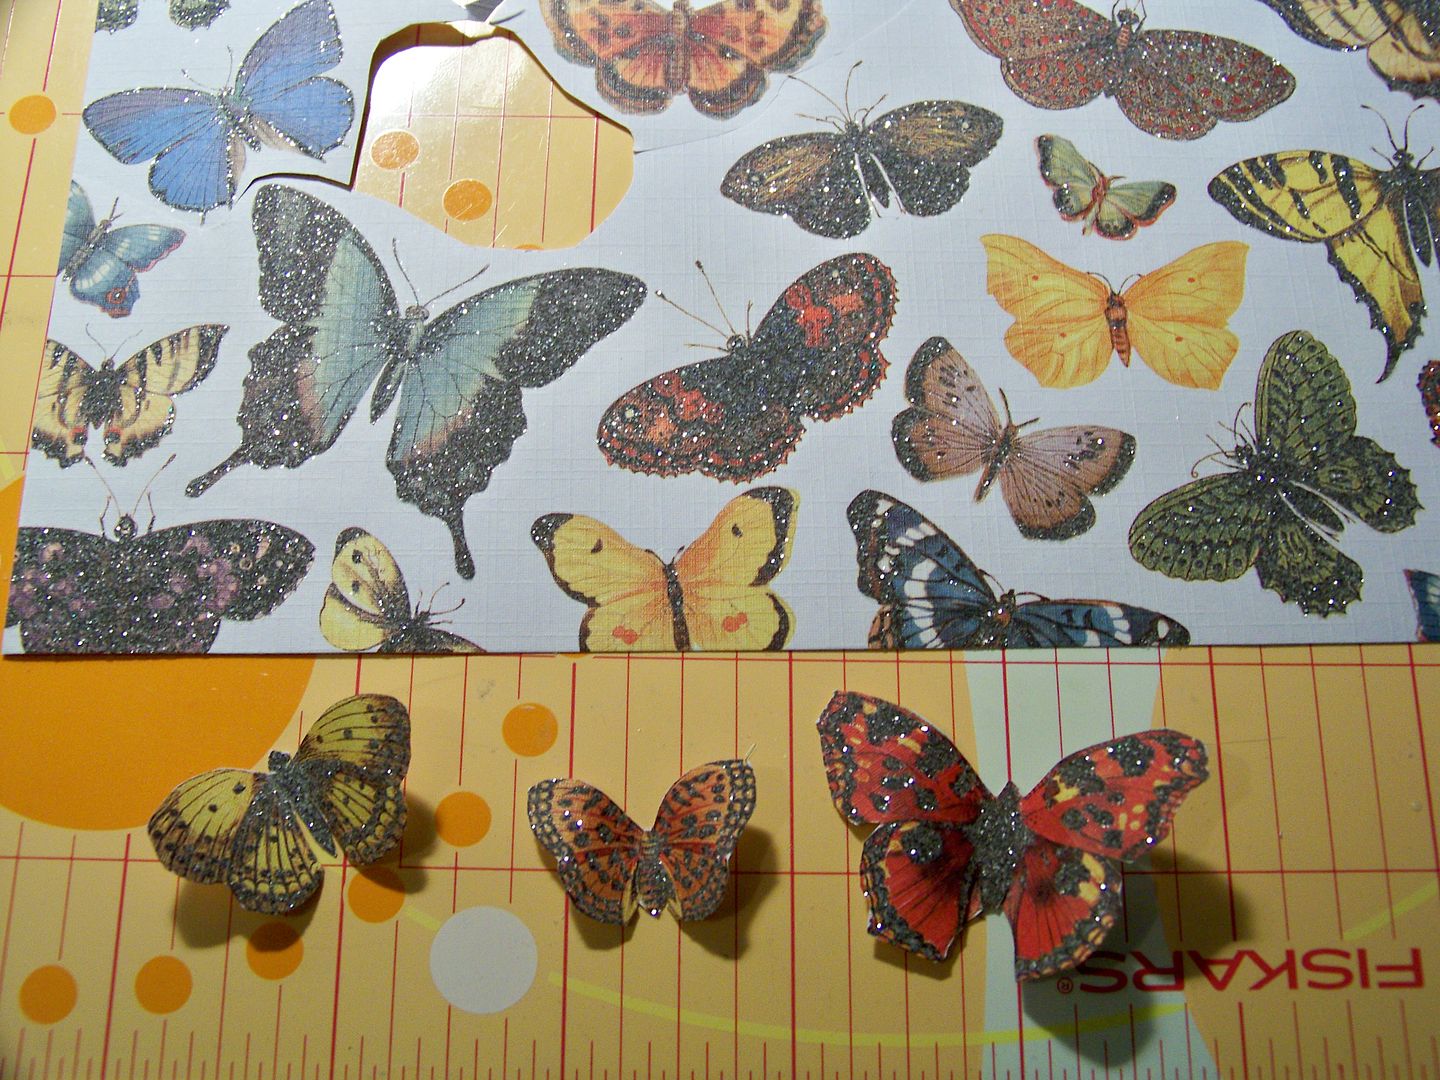
I hand-cut butterflies from a glittery printed paper for the box front embellishments.


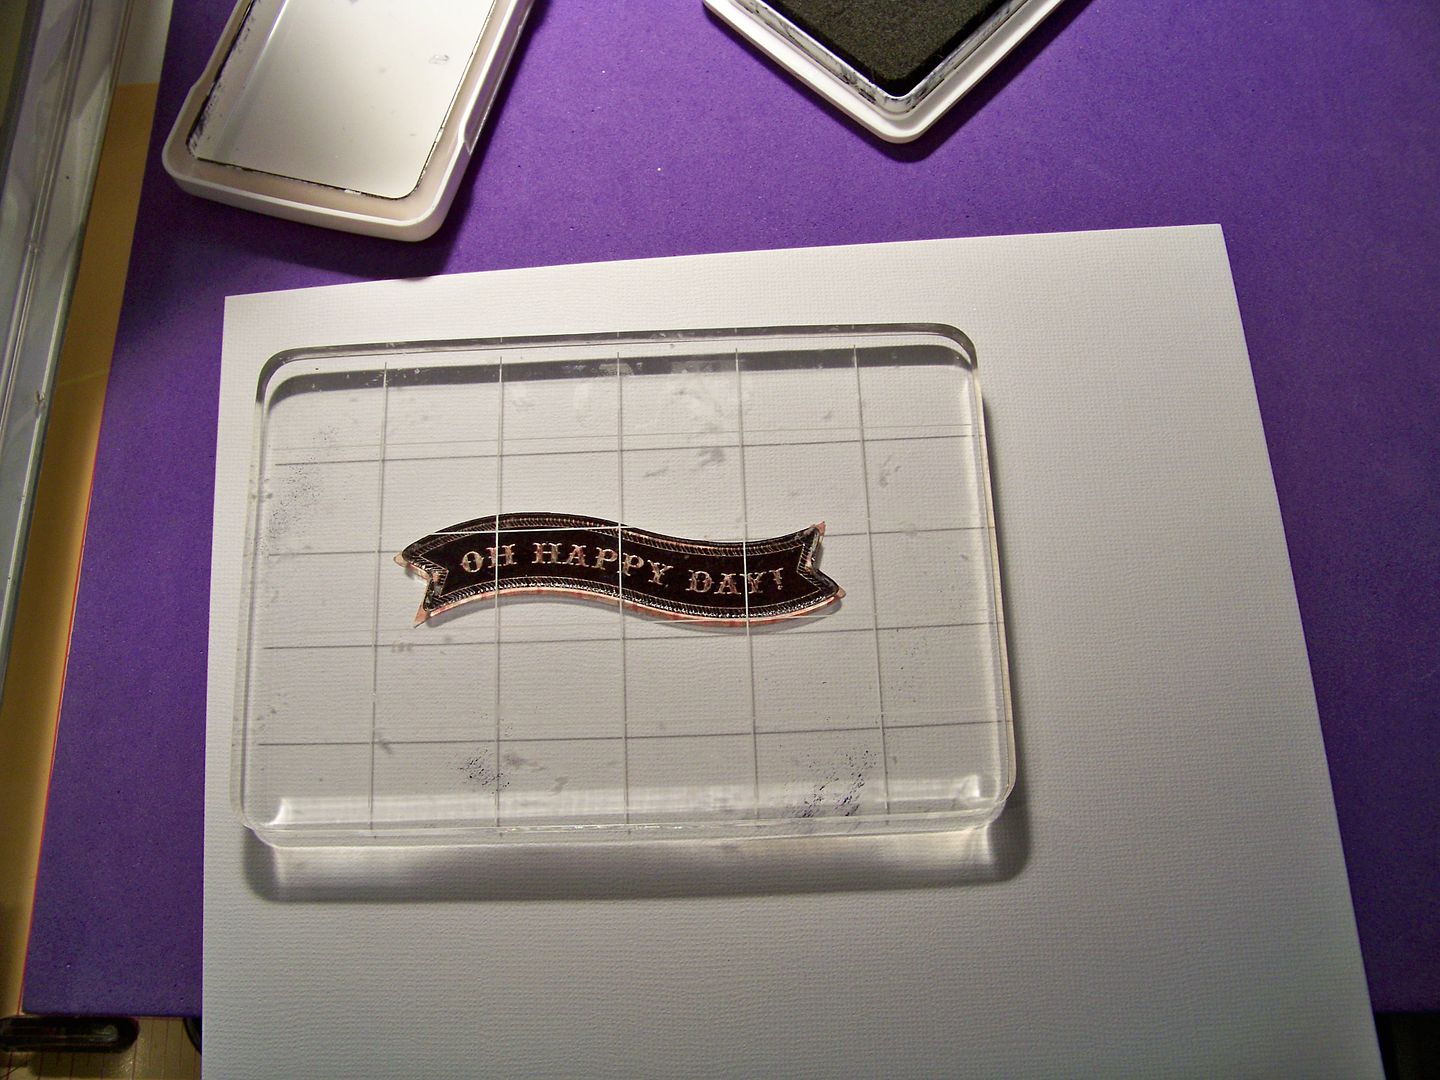
I cut a banner from Artiste (page 58) at 1" in the same plaid used on the card insert and stamped it with the coordinating CTMH stamp.


I adhered the banner after bowing it out.  The butterflies were adhered with pop dots and Scotch Quick Dry Glue.  I added extra packages, popping up one.


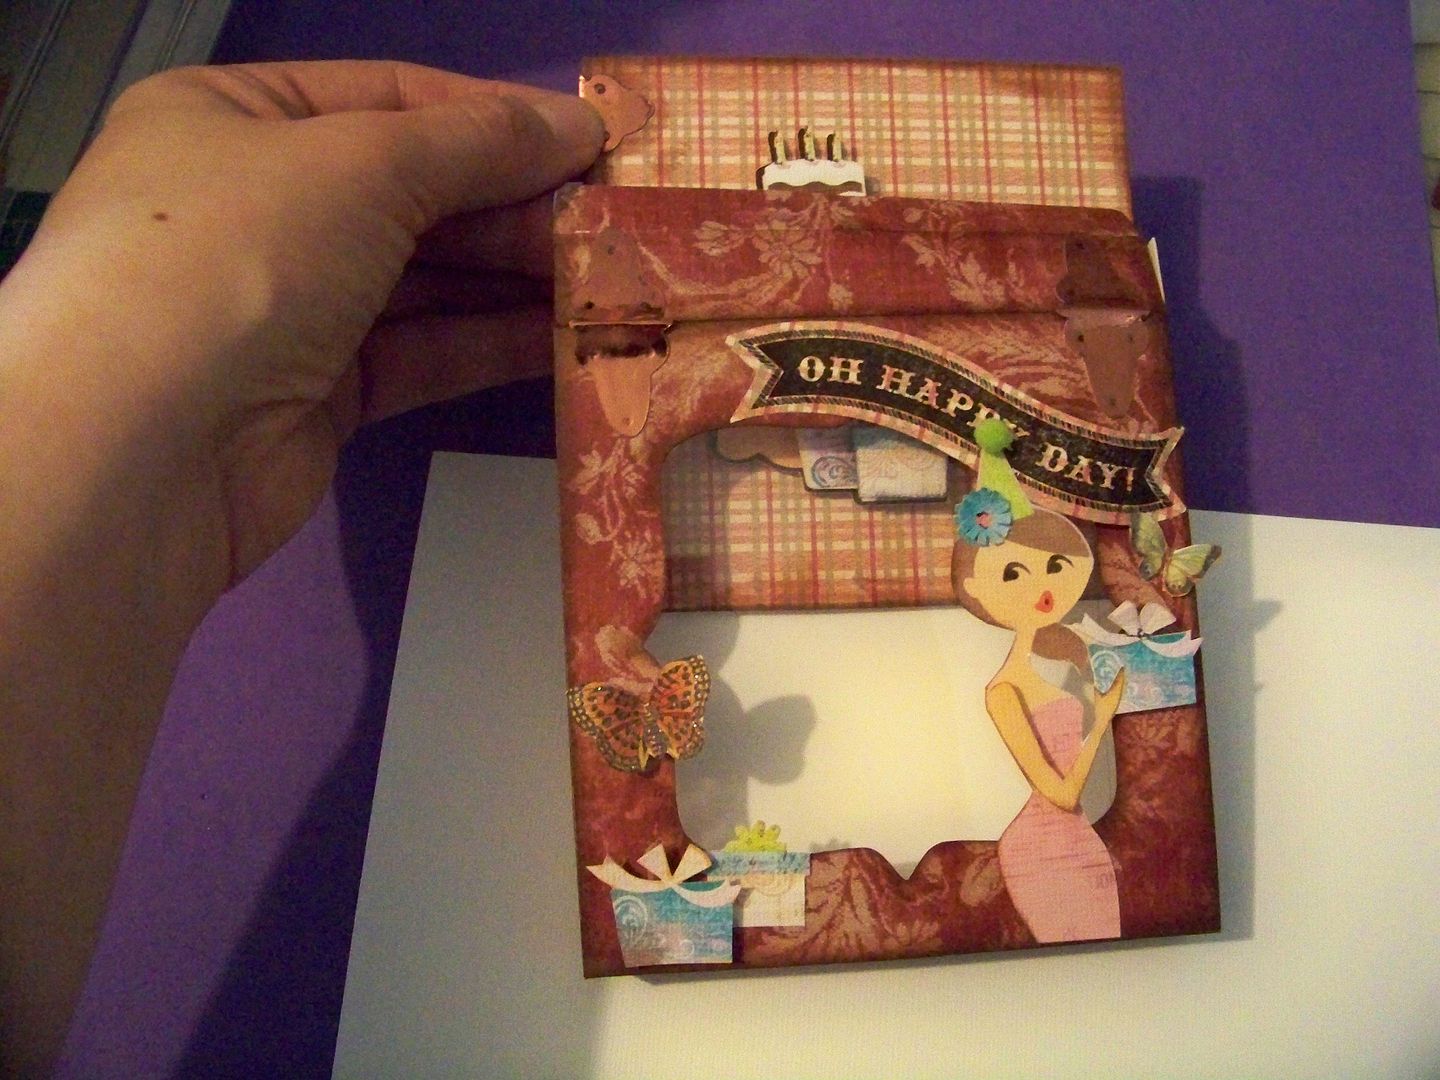
When the card is inserted...


It becomes a fun, boxed gift card!


To Sherry:  I hope you had a Happy Birthday yesterday!  (And I hope my card got to you before you saw this post... if not, well, surprises are over-rated anyway and hard on the aged... hahaha)  And I am looking forward to your project later today on this blog!

For everyone else, thank you for checking out my project today!  You can see many of my previous projects by visiting My Project Gallery on my blog.....And be sure you visit my blog November 10 when I will be part of the Holly Jolly Blog Hop!


Cricut Info & Supplies Used:
Designed By: Nadia Herbst-McConnell
Cricut Machines Used: Expression and Imagine
Project Type: card
Project Theme: Birthday
Cricut Cartridges Used: Wild Card, Fabulous Finds, Yummy, Artiste
Suppies Used: Card stock and metallic paper from my scrap bin, ATG tape, Scotch Scrapbookers glue, 1/8" foam squares (pop dots), white and black gel pens, brown and black ink pads, recycled clamshell plastic, Terrifically Tacky Tape, sanding block, Artiste Stamp from CTMH