While we are no longer making active post of Cricut projects on this blog as of 8/1/2013, we invite you to use it for continued die cut inspiration as we will leave the blog up for viewing. Happy Cricuting !

Showing posts with label Create A Critter. Show all posts

Monday, June 17, 2013

Swimming By to Say Hi!

Hi Everyone!
Susie Craft Happy here with a fishy hello card to share with you.
I used Cricut's Create A Critter cartridge for my image, cutting it at 3".  I also used papers from DCWV's Fiesta Forever stack.  For the sand I used Paper Studio Kraft cardstock.
I thought this stamp from Joy's Life Pun in the Sun stamp set was perfect for my little fishy hello card. 
I hope you enjoyed my card today and will come back tomorrow for more Cricut inspiration.
Cricut Info & Supplies Used
Designed By:  Susie Craft Happy
Machine:  Cricut Expression, Gypsy
Cricut Cartridge:  Create A Critter
Other Supplies Used:
Stamps: Joy's Life - Pun in the Sun
Paper: DCWV, Paper Studio, Papertrey Ink
Embellishments:  The Twinery, Buttons-my stash

Tuesday, March 19, 2013

An Eggciting Little Project to Share Today

Hey there folks, Freda from CannCreateDesigns here again to share another 3D project using MTC software and the Cricut Expression. As soon as I saw the Cotton Tail Village set from SVGcuts I knew I had to make the egg box for you.

The base of the egg was cut from white cardstock from my stash, the panels were cut from a DCWV paper pack called "The Linen Closet" that I had purchased at Joann's the day before the cut files were released. They worked out perfectly for this project. After watching the assembly video on the SVGcuts website I cut everything out and lay it out to make sure that I have everything to get started.

I just realized that I didn't take any pictures of the box bottom and lid assembly for some reason but the assembly of the box bottom and lid are pretty clear on the website video if you need assistance...Next I chalked all the edges that need embellishing with coordinating colors of VersaMagic Dew Drops. I love these chalks and have worn out more than a few of the Jumbo Java color which seems to go with everything vintage looking.

 After chalking the panels I begin assembling the egg base. These panels cut with score marks for easy folding and are numbered so you don't have to guess which one is next.

For this particular project I found it easier to glue all of the points at the top and allow them to dry first, then glue the bottom part. I used Clothes pins to help hold the pieces in place while gluing the next piece down, without the clothes pin they popped loose as soon as I moved to the next panel. This just seemed easier to me because of the small opening at the bottom and the stiffness of the cardstock I was using.

Once completed I thought it could use a little bling (of course). So I added Doodlebug Design Sugar Coating Glitter around the top of the box. Made a little welcome mat, and added a Martha Stewart Border Punched Fence (think it was the Halloween one). I found this little bunny at the TSC Farm store that was the perfect size, cut some carrots for a garden from the Create a Critter cartridge (cut at 6@ .75", 4@ .60", 2@ .5").

Inking those little carrots can be a pain...but I've figured out a way to do it a little easier with my tweezers...just pick it up and tap it onto the ink/chalk pad. When the carrots are glued together put a blob of glue on the end and hold it in place on the box until it stands on it's own.

There was still something missing...a quick glance around my scraproom and I saw some twine that I tied around the lid and the Tim Holtz Mini Fleur die I had bought on clearance the day before. I cut 4 fleurs, scored and glued them together. Attached a button and a bead to the top of the egg. After the glue in the bead/button piece dried I put glue on the end of the fleur and gently pushed the end into the hole in the bead. Wallah!!! Finished....


I hope you like this project as much as I liked doing it... Thanks for stopping by, Freda

Cricut Project & Supplies Used:
Designed By:  Freda Cannon
Cricut Machine Used: Cricut Expression
Cricut Cartridges/Other Used:  Create a Critter, Make the Cut Software, SVGCuts Cotton Tail Village
Other Supplies Used: DCWV Papers-The Linen Closet, Tim Holtz Mini Fleur Die, Martha Stewart Fence Border Punch, Doodlebug Design Sugar Coating Glitter, VersaMagic Dew Drop Liquid Chalk

Wednesday, February 13, 2013

Cricut Saint Patrick's Day Card

Sis from Paper, Craft & Scissors with a Saint Patrick's Day Card (or any other Irish or coffee occasion) to share as I shared my Valentine's card previously on my blog. 


I will share a few Cricut Craft Room tips that I used to make this card.  If you are interested in learning more, there is a terrific resource available at the Cricut Craft Room Blog (by Narelle and Scrapalette).

I used the "Love You a Latte" card and selected frappucino 2 as the base of my Irish coffee.  As designed, there is some greenery peaking out from the whipped cream, but it isn't a shamrock.  Because the second base layer is the same as the first minus the greenery,  I copied the shift layer and simply welded two small shamrocks from Paper Doll Dress Up.  


As Irish coffee does not include sprinkles, I used the "Edit Contour" feature to hide the sprinkles cuts.  I needed some eyes to smile, so I used the "pinwheel face" from Create a Critter, edited the contours, and welded the eyes and smile on the "coffee layer."  To ensure the eyes and smile were visible, I also cut the "coffee layer" from black card stock (without the smile and eyes).  Assembling the Irish coffee mug was a breeze and I used foam squares to attach the coffee to the label.

I selected a blue background for the label in order to highlight the coffee.  The label is from Twinkle Toes (Dance Team).  I also cut a label from lightweight cardstock and adhered to the blue label to add some dimension.  To further highlight the featured cut, I added some copper-colored brads in the corner of the frame.  The banner behind the label is from B is for Boys (once again I used Cricut Craft Room to remove the "slits" in the cut).

I like to use a variety of prints and colors to add interest and depth.  I printed the sentiment and trimmed it by hand.  The sentiment is also attached to a small piece of lightweight chipboard.

And there you have it, a smiling cup of Irish coffee without a bow or glitter accent in sight.


Friday, February 1, 2013

Pennants!

I am in love with pennants! One, two, ten! They are so versatile and easy to layer. The pennant can be fun or elegant. I think this is a trend that will stay for a while.

For my first layout, I used muted colors from the My Mind'sEye Lost and Found II collection. I used various pennant shapes and sizes. I picked out several papers that complemented each other. Next, I adhered the paper to my mat. Using CCR, I picked out different pennants using the Pretty Pennants cartridge. I cut about 20 pennants. Once I was finished with cutting. I took the pennants and layered until I achieved the look I wanted.

The second layout, I used Create a Critter cartridge for the giraffe. For the pennants, I used PP cart again. I used the same procedure. I just played around with the page until, I liked it. I might have went a little crazy colorful on this one. Thanks for looking! God bless-Christel aka scrapworm


Monday, January 21, 2013

Smile Jar

Happy 2013 everyone. It is L.B. from Cool Beans By L.B. I hope everyone has had a good start to the new year and lots of smiles are coming your way. A friend of mine went through breast cancer in 2012 and told me that this year she was going to collect her smiles to have in bad times. I decided this was a great idea so I up-cycled a food canister to create a smile jar. (You can see lots of ideas for this on Pinterest)
I cut 2 large circles (so forgot to record the size) from George and Basic Shapes, cut one of them in half and added some fun decorative tape to create the base of my jar lid.
Next, I added the word "smile", cut with the adorable Create-a-Critter cartridge (I love the way it has a heart to dot the i). I placed the circle on a larger white base and added a bow before adding it to the top of my jar.
I added a tag cut, with the Splish Splash (these are my go to tag bases) Lite cartridge. I once again cut one layer in half and added the cute tape before using Hello Kitty Font to add 2013 to it. On the other side of the tag it gives me my basic instructions, "Write down the things that make you smile so if you need one you can pull it out and read it. Save them for New Year's Eve and read they all."
Once I had this done I wanted a place to hold the slips of paper and a pen so it would be ready whenever I wanted to add something to the jar (or anyone else does). I cut a small box of Tags, Bags, Boxes and More and put it together, adding a small circle with the word "joy" also from Create-a-Critter on front.
I have been adding thoughts ever since and even my daughter and husband have added a few. Thanks for stopping by Cricut FANatics today. Hope you find a reason to smile today.

Created by: L.B.
Machine: Cricut Expression, Gypsy
Cartridges: Create-a-Critter, Tags, Bags, Boxes and More, George and Basic Shapes, Splish Splash
Additional Materials: Martha Stewart Crafting tapes and ribbons, DCWV Citrus Stack papers, ATG gun and adhesives.


Thursday, November 22, 2012

Happy Thanksgiving!

Hi Everyone!  This is Alex from www.cardsinthetree.blogspot.com.
I hope everyone is enjoying the day with their families and stuffing their faces with great food!


In the spirit of the Thanksgiving I had to create a traditional type turkey.  He is layered from several cuts from the Create a Critter cartridge.  His body was distress inked and embossed using the alligator skin embossing folder.  The feathers are cut from the feather page from the WeR paper pack.  You can actually see the full paper of this patten on the front and inside of the card.  His eyes are small hot set gems with bronze sharpie eye lashes.  The layer that the turkey is glued to is raised above the base of the card layers with foam tape.


The base of the card is layered again with papers from the WeR pack.  The "Thanksgiving" stamp is stamped in chocolate ink at the base of a layer.  Three colored twine strands were braided together and wrapped around 3 times at the top of the layer.


On the inside of the card a few more layers were glued into place.  The "Happy Thanksgiving" was cut out with M.S. Seasonal Cake Art Cartridge and glued into place.


Here is the full front view.  


Happy Turkey Day!
Gobble til you Wobble! 

Cricut Info & Supplies Used:
Designed By:  Alex B.
Cricut Machine Used:  Cricut Mini, Gypsy, & Cuttlebug
Cricut Cartridges Used:  Create a Critter & M.S. Seasonal Cake Art
Other Supplies Used: Close to My Heart Paper in Colonial White, Chocolate, & Sunflower, & Cranberry; Tulip Hot Set Brown Gems and Setter; Close to My Heart Ink in Chocolate; Close to My Heart Stamp Set "So Grateful"; Tim Holtz Distress Ink in Gathered Twigs, Aged Mahogany, & Rusted Hinge; Alligator Embossing Plate; Assorted We R Memory Keepers Autumn Splendor Papers; American Crafts Twine in Cream, Green, and Brown; Foam Tape and Assorted Adhesives; & Sharpie Marker in Bronze.

Thursday, November 15, 2012

November Special Guest Designer - Kristen Swain

Please give a big welcome to our November Special Guest Designer - Kristen Swain. 
Kristen was a former Circle Blog DT member and also currently designs for Northridge Publishings Cricut Magazine.  We are so pleased to have her on Cricut FANatics Blog today.

Hello you all! Kristen Swain here from Blankety Blank Blank. I just have to tell you, I miss our Cricut Circle Blog so much! I was always so inspired by the other team members,we felt like a real family,  and let me tell you, working with the new cartridges was so much fun! But life is full of change and I am loving working for Northridge Media on the Cricut Magazine.

I was wondering, what can I share? I have so many ideas and thoughts about using the carts. But I have been reflecting lately on using my supplies better, getting more use from papers and wasting less. Let's face it. Crafting is costly. I'll be honest. I get too overwhelmed with looking at online stores to actually buy anything. I know, I'm a shopping reject, but I start out loving everything, then I ponder, do I really need this, by then, I've spent 2 hours looking and I end up not buying anything. I'm hopeless! (or a cheapskate) I also really love certain colors of paper, and patterned paper. So when I have something I really love, I try not to hoard it, but use every last little scrap, since I'm so limited in my online buying. So that's when I decided that I would share a couple of cards made entirely of scraps.

I looked through and found two half sheets of cardstock- 6x12, and folded them in half for my card base. Then I sorted through my patterned paper and cardstock and pulled out some nice bright colors.
                                              
One thing I think that helps me the most in using my scraps, is that I use Cricut Craft Room exclusively now. I love that I can see the images so much better on my laptop or computer screen. I can place cuts anywhere on the mat, and I can see exactly what size paper I will need to create a cut. So, I can add a 2x2 piece of paper and get a cut from it, using up more smaller scraps and wasting less. See what I'm saying?

Now, I know, my cards aren't seasonal. But they could be. Change the colors out to be orange, rust, brown, sage, sunflower, tans and you could change the greetings. Happy Fall, Autumn you glad I wrote, Give Thanks. They could also make great birthday cards. Change the How's life to .. Happy Birthday Chick. Change the Celebrate Life, to just Celebrate. It's all about the basic idea. Don't like apples? Use Preserves to cut a Pear, a Banana, or a Plum. Don't want to use the Chick, change it up with Create a Critter and make a snake, squirrel, or a  bunny.
 

Thanks for having me today! I hope you enjoy my cards!  Kris
 
Cricut Info & Supplies Used:
Designed By:  Kristen Swain
Cricut Machines Used: Cricut Craft Room, Circut Expression2.
Cricut Cartridges Used: Preserves, Create A Critter
Other Supplies Used: Papers from various manufacturers like- My Mind's Eye, Echo Park, SEI, American Crafts and Imaginice. Buttons/twine are craft supplies.Foam tape, black pen, Fiskars Cloud deco scissors. Greeting stickers by SRM Press, punch ( 1.5 circle) marvy.
 
Cut Details:
Preserves- cut <Apple3> at 2.75 inches. <Apple3-s> at 1.98 inches and <Apple4-s> at 1 inch (2x)
Create a Critter.- <Chick> at 2.5inches, <Chick>Layer1, Layer2, Layer3 at 2.5 inches

Thursday, October 18, 2012

Nuts About You

Greetings fellow Cricut FANatics! This is Michele from Scrap-n-Dance.blogspot.com! I have created a fall themed two page layout for you!

I have a few friends that have asked me to create kits for them, and this is one that I finished up not too long ago. I really like how this one turned out. Let me tell you how I created it!

I used my Gypsy to do this, so if you want to copy it exactly, you'll need a Gypsy or Design Studio, mainly because the tree is sized so big that it's trunk is off the mat, and only the Gypsy or Design Studio can cut something sized bigger than the mat.

I loved the title, but I worried that the words might get lost on the busy background paper, and there was no shadow option for it. But, you don't always have to use a shadow of the shape, all you need is something to set it off... and I thought two acorns welded together as a background for the title was perfect. In fact, I liked it more because it was different from the usual phrase shadow.

If you like, before you put all the pieces together, ink the edges of them. "Cutesy" pages like this can seem more "grown up" after inking the edges of everything with dark brown ink. I found this out when one friend, who'd seen these pages in their initial stages before ink, and then saw it later when it was completely done... She didn't want a kit at first, it was too cutesy for her. But the inking changed her mind completely.

The ribbon is seam binding that I had dyed using Distress Stain in Fired Brick color. I laid down a strip of tacky tape adhesive, then as I laid down the ribbon, I pinched pleats in it. This gives the layout texture and dimension, more than even pop dots can! 

Tree:  Create A Critter 2 @ 13.85 inches (with the lower trunk hanging off the mat)
Squirrel:  Create A Critter @ 4 inches (I hid the mouth on my Gypsy, as I don't care for those weird smiles sometimes)
Title:  Just Because Cards @ 13.50 inches
Leaves:  Doodlecharms @ 2 inches
Acorn title background: Create A Critter @ 6.53 inches, TWO welded together
Small Acorns:  Create A Critter @ 2.25 inches

Cricut Info & Supplies used:
Designed by Michele Donner-Ramsey
Cricut Machines used:  Gypsy, Expression
Cricut Cartridges used:  Create A Critter 2, Create A Critter, Just Because Cards, Doodlecharms
Other Supplies:  Bazzill Cardstock, DCWV Autumn Melody Stack, Seam Binding ribbon, Ranger Distress Fired Brick Stain, Ranger Distress Ink Walnut Stain, adhesives

Saturday, September 29, 2012

Hi everyone! 
This is Dana (DomesticatingDana over on the Cricut MB) and I’m so happy to be here with everyone.  September brought us an awesome 1st month here at the Cricut FANatics, but it also brought us back to school.  Back to school means back to homework, including nightly reading.  Need a little something to make reading a little more exciting for your kids?  I have  a fun little project that is quick and easy and makes a great little gift for readers of any age. 
 
I love to make these magnetic bookmarks- practical, easy, and super-FAST!   They cling around your page in your book so they dont fall out & you can locate your page easily.  They are great for kids especially because they don’t fall out of the book when they are tossed in and out of backpacks! Here is how I make mine:
Cut a strip of cardstock to 2.5” x 5”, and then score it at 2.5” (half) and fold.  This creates the base of the bookmark.  Use a bone folder on the crease to help it lie flat.   Cut 2 strips from an adhesive backed magnet sheet (found in the general crafting section of your local craft store) to approximately 2”L x 0.25”W each.   On the inside of the bookmark, adhere one strip along each of the short ends, lining them up so they magnetize.

 
Then decorate your bookmarks with your choice of cuts! 
 

Done! (Told you it was super-FAST!)  Fold it over the page in your book and it will stay in place.

The great thing about this project is the limitless possibilities!  You can make it any size and embellish it any way you want.   Like…
Monograms:
 

Shapes:

Holidays:
 

These make great birthday presents (to go with a book or a bookstore gift card), party favors, and even treats for your child’s classmates!
A few hints: 
  • When I am choosing my Cricut cuts, I use my Gypsy (or CCR) and place a square that is the same size as the finished bookmark on the mat and size up my cuts.  If I am using patterned paper, I want to make sure that my cut doesn’t cover all of it up.
  • To line up the magnets on the front and back pieces, I cut the magnetic strips and magnetize them together so the adhesive is on the outsides.  I remove the backing on one side only and adhere it to one of the short sides.  Once that is in place, I remove the backing from the other strip (now face up and magnetized to the other one, and fold the book mark closed.  This will line your strips up evenly.
  • I wanted to laminate one to see how it turned out, but my laminator is packed away due to some remodeling we are doing right now.  I have not tried it before, but would recommend the thinnest pouch in order to allow your bookmark to fold and stay together.  I would also recommend laminating and then adhere the magnets.
I hope that you get some inspiration from this project.  Thanks for stopping by!
 
Cricut Info & Supplies Used:
Designed by: Dana Bilson
Cricut Machine Used:  Cricut Mini
Cricut Cartridges Used: Create a Critter (apple, cut at 2”), Hello Kitty Font (monogram D, cut @ 1.5”), Life’s a Party (soccer shaped bookmark- used the card feature cut @ 2.5”), Mini Monsters (Jack-o-Lantern, cut at 1.75”) 
Other Supplies Used:  Cardstock, adhesive magnet strips (found in the general craft section of Joann’s), adhesive


Tuesday, September 25, 2012

An apple a day....

ʺHello, this is Terri of http://www.scrappinwiththebug.blogspot.com/. Today, I have an Apple Mini photo album to show you.ʺ I made these cute little apple albums for my daughter's pre-school teacher and assistant. I made these so they could put a small 3x3 photo inside. This album will hold 24 total photos, however, I only matted the one side.

Apple mini photo album
Finished Apple Mini Album
 
I used only 3cartridges for this project.
Create A Critter - 2 Apples and worms with shadows function I hid the faces of the apples w/ the gypsy
Mini Book - Cut 6 of the Square  L2 cut for inside pages

Cricut Craft Room Basics - Rounded Squares (photo mats)

Scored all pages

Once cut I then scored the pages on the tick marks using a score board. Glue 3 of them together end to end. I simply glued the tab to the bottom of the next page. If you need more area for photos then cut out another page.


Mountain/Valley fold the pages after glued together
 I folded each of the pages in Mountain/Valley style or fan fold.
Glue pages to apples

 Once folded then I glued the pages tot he inside of the apples. I glued some twine under the 1st page to make a pretty little bow. Hold down the album and carefully glue the back page on.
Add photo mats and tie
 
 Once the inside pages were glued down I added a red photo mat cut with Craft Room Basics for the mats. I find I like to use my machines to make the photo mats.
I then decorated the Apple shadow cut. I added the brown layer, then the green leafs, and the red apple layer. I added the cut little worm to the side with foam dots.

Cartridge Cut w/ Measurements:

Create a Critter Apples: 5 1/2" - cut 2 of them - one for each album w/shadow function & layers 
Create a Critter Worms: 2" - cut 2 of them one for each album w/ shadow function and layers
Mini Books - 3 1/2" Square L2 - cut 6 of them 3 for each album (unless you need more space for photos).

** A little tip - if you try to cut the L2 squares at 3 1/2" on the expression it will beep at you and say that it won't fit. That is because it is very close to the edge of the 12x12 mats. Here is a little trick - select the Mat Size 24 function  and still use the 12x12 mat. It will really cut almost to each edge so make sure the paper is 12x12. ***

Cricut Info & Supplies Used:
Designed by: Terri S.
Cricut Cartridges Used: Create a Critter, Mini Book and Cricut Craft room basics
Cricut Machines Used: Cricut Expression and Gypsy (to hide the face on the apple
Project type: Mini Album
Project theme: Teacher
Other Supplies Used: Paper from Michael's, scotch liquid glue, ATG tape, white gel pen


Sunday, September 23, 2012

 
Hello There,  this is Jami Larson (Cricut Farmer) from http://thepaperfarm.blogspot.com/ with a project that I did awhile back but wasn't allowed to share it, as it was selected for The Ultimate Creative Series DVD set.  This fun project is a backpack made out of a box of graham crackers with a pocket that holds the chocolate bars in an acetate pocket on the front and a cellophane bag filled with marshmallows.

I covered the top, bottom and back with craft paper leaving the sides open so you could see it was graham crackers.  I attached ribbons to the back to look like the straps on a backpack as well as a loop at the top for the hanging piece.  I welded the letters and inked the top edge to look like toasted marshmallows.  The characters are cut from the Create a Critter cartridge and added to the front pocket.

The marshmallows on the sticks were made by using a corner rounder on a couple of squares with the top edge being inked and attached to a stick from the yard.  I don't have the exact dimensions of everything but it is all stored in my Gypsy.  I know that I can post the project but am not really sure about posting all of the exact dimensions since it was featured on the DVD set.   It's a pretty simple project so am hoping you will be able to adjust it to whatever size you decide to go with.

Cricut Info & Other Supplies:
Designed By- Jami Larson
Cricut Machines Used-Original Cricut, Cricut Gypsy
Cricut Cartridges Used- Create a Critter, Doodletype
Other Supplies Used-Tim Holtz Distress Ink-Vintage Photo, Red Ink, Ribbon, Raffia, Paper by Bo Bunny-Camps-A-Lot
 

Sunday, September 9, 2012

Gone Fishin'

Hi everyone, I’m Helen of Scrapbooking Fun.Biz and I’m so excited to be able to share a 12x12 scrapbooking page I created!
As you all know it's not that easy to get good photo's of older boys, so I’m only using one photo to scrap. Our kids are older now and vacation time is done whenever the opportunity arises, so this mid week mini vacation worked out perfectly for us and our older son. We planned to do some fishing, so we planned a charter boat fishing trip! We really enjoyed the chartered fishing, so we did the boat thing the next day too! We caught so many fish and just incase you're wondering who caught the biggest fish on this trip.....it was me! It was a Walleye!!

For my 12x12 scrapbooking page I didn't want to use to many embellishment, so it didn't look feminine. The photo I used is of my husband and our oldest son as we're waiting for the charter boat to leave the dock. For the base of my page I used the 12x12 School Days Multimedia Pad by Martha Stewart.

I couldn't find a bobber in any of the Cricut images by PC, so I had to create my own. I also wrapped some twine around the two "i" to make it look a little more nautical.

I used one of the Cuttlebug embossing folder from the Asian Bundle on the cloud cuts and I added some Pearl Ex to give them a little sparkle. I also use some Gum Arabic to adhere the Pearl Ex, so it wouldn't all rub off.

I used some twine to wrap around the bout and the hand writing on the boat is the date and I made it to resemble a boat license. The waves are embossed using one of the Cuttlebug Wedding Borders and I also used the Pearl Ex on them.

Cricut  Info & Supplies Used:
Designed By: Helen Hodge
Cricut Machine(s) used: Expression 2, CCR, Cuttlebug
Project Type: Scrapbook Page
Other Supplies used: Twine, Pearl Ex, Gum Arabic, Uniball Signo Black Pen, Pop Dots, Tombo Liquid Glue, ATG Adhesive
Sizes:
Title: Gone Fishin’ – 5” Relative one red and one white – Wildlife.

Boat: 4” Relative – hide control the waves – Going Places.

Fly Fisherman: 3” Relative – Fun in the Sun.

Waves: 3.5” Real – Crocs Rule.

Cloud: 2.5 Real – Create A Critter.

Cloud: 2” Real – April Showers.

Bobbers: .375” Real Circles – All Mixed Up.

Bobbers: .5” Real Circles – All Mixed Up.

Bobbersr: .375 Real Cylinders – George & Basic Shapes.

DON'T FORGET TO LEAVE A COMMENT TO BE ENTERED TO WIN OUR WEEKLY DRAWING IN SEPTEMBER.

Wednesday, September 5, 2012

Cricut Crafty Challenge #1- Back to School


Welcome Everyone to the Cricut Crafty Challenge day!
This is Becka from Creations With Becka and I am so excited to share the very first Cricut Crafty Challenge with you all today.
This time of year is all about getting the kids back to school, so this month's challenge is to make a Back to School gift, layout, card etc.
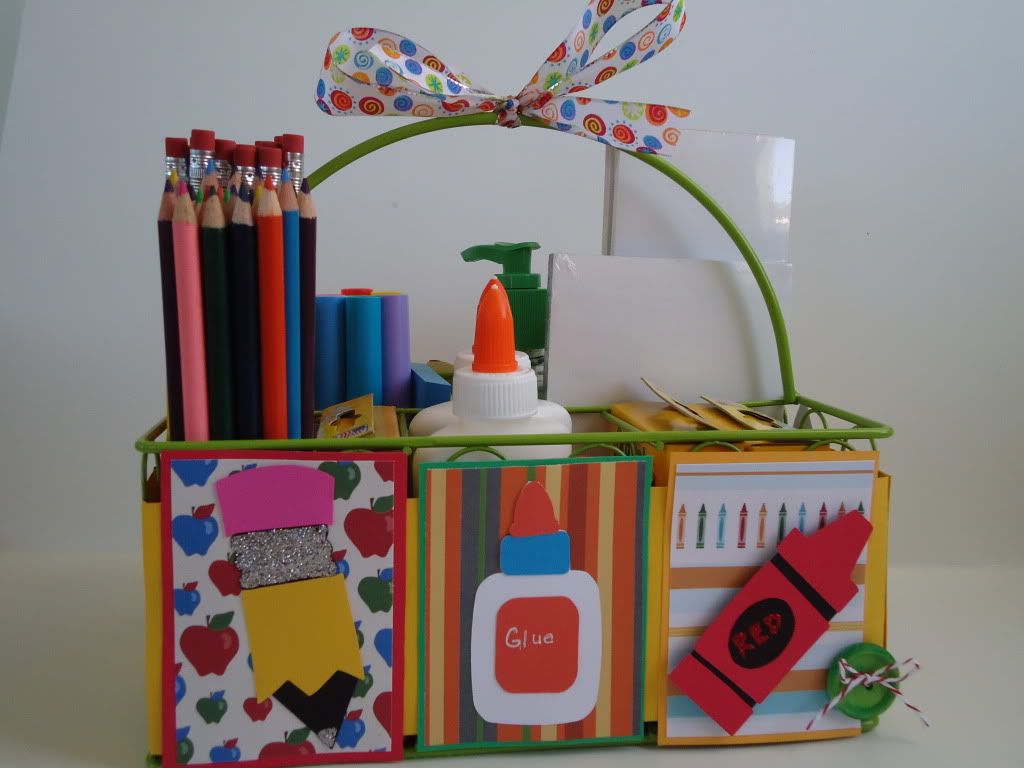
I made this awesome supply basket to give to my son's teacher on the first day of school. He started 3rd grade this year and has two new teachers. So I thought we would welcome them with this gift


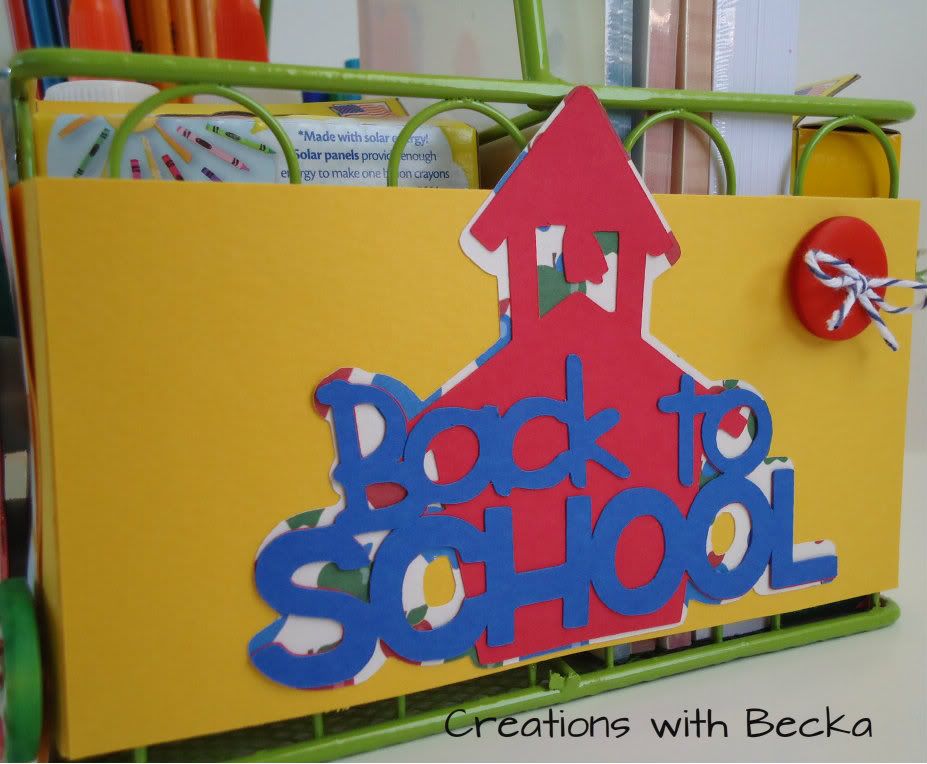
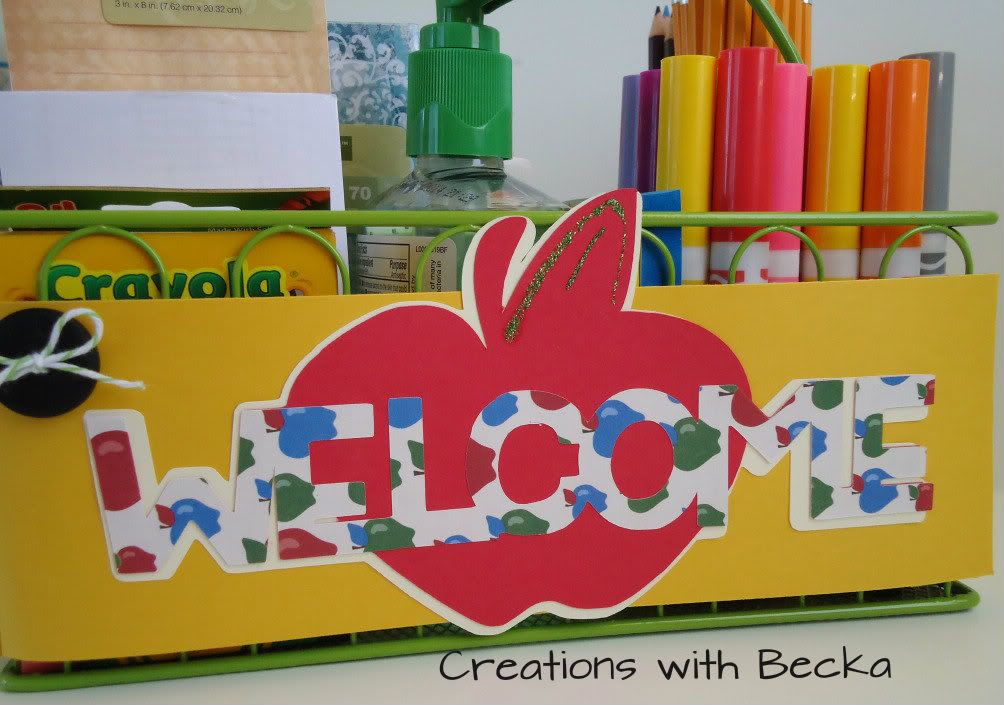
 For my project, I  first wrapped the basket with yellow paper. I cut and added "photo mats" for the backgrounds of the glue, pencil and crayon. Then I pieced together and added all of the cricut cuts. The finishing touches were the ribbon and the buttons and of course some stickles.
 
Cricut Info & Supplies Used:
Designed By: Rebecca Maddux
Cricut Machine Used: Expression 2, Gypsy, CCR
Cricut Cartridges Used: Simply Charmed, Create A Critter, Cursive 101, Classroom August & September
Other Supplies Used:Cardstock, DCWV patterned paper, stickles, ribbon, twine, buttons
Cricut Crafty Challenge #1 - Back to School 
Ok, so now it is your turn! The Cricut Crafty Challenge is to  Make a Back to School project, this can be anything and if you don't have kids you can still play along, make a project that reminds you of school.
Here is what your project has to incorporate.
1. Must use at least 3 cricut cuts.
2. Must use ribbon and buttons.
3. Must be a new project for this challenge. Please link your project with the link below.
Now RUN don't walk you only have until the 26th to link up your project to eligible for this month's prize and you don't want to miss out! RockinRobin1  from www.robingoens.stampinup.net has generously donated a $35.00 gift certificate to her Stampin Up Store. So please stop by her site and give her some love.