While we are no longer making active post of Cricut projects on this blog as of 8/1/2013, we invite you to use it for continued die cut inspiration as we will leave the blog up for viewing. Happy Cricuting !

Showing posts with label Carousel. Show all posts

Saturday, July 27, 2013

Train Picture Frame

Happy Saturday Cricut Fanatics!  This is Rita from Rita's Paper Obsession.

Today I wanted to share a picture frame I created for a picture of my husband and our nephew.  We went to the train museum and I wanted to create a keepsake for our nephew.


I selected the train from the Carousel cart and used Design Studio to layout the frame.  The train image is 8 inches.  The window was too small for my picture so I used the hide contour and placed a 3 inch square from George & Basic Shapes in its place.  I cut this out three times on blue, green and red pattern paper and twice from chipboard.


Next using the shadow function, I welded a rectangle to the bottom of the image to give me a flat surface.  I cut this out of black pattern paper and chipboard.


For the frame back, I used the welded shadow/rectangle and used the vertical frame back from the Fancy Frames cart.  Again using the hide contour function I hide the rectangle utilizing only the stand portion of the image.  I cut this from chipboard.


To assemble, I glued the red train to a chipboard cut and the blue train to the other chipboard cut.  I hand cut the smoke stack and light off the blue train.  From the green train I hand cut the top of the smoke stack, the roof of the train and the cow catcher.  I cut circles from George & Basic Shapes to match the size of the wheels and I created a window frame by cutting a 2 3/4 square inside a 3 1/2 square.  All pieces were inked with Versa Magic "Jumbo Java"


Finally assembly of the frame, layer the train on to the shadow leaving an opening to insert the picture.  Adhere to the frame back.


The frame looked a little plain so I doodled some and added a number cut from the Lovely Floral cart.  The numbers represent the date we went to the museum.


Thank you for stopping by and allowing me to share with you this weekend.  It has been a pleasure being a part of the Cricut FANatics blog.  Happy Cricuting!

Designed by: Rita Poteat
Cricut Cartridges Used: Carousel, George and Basic Shapes, Fancy Frames
Cricut Machines Used: Cricut Expression
Project type: Home Decor

Sunday, February 3, 2013

Chalk Board Technique with the Cricut


Hi, this is Lori from the Singing Shell blog.  My husband is a no frills kind of guy so I needed a Valentine's Day card that was simple.  Enter the chalkboard technique.  I had been seeing this trend all over the internet and thought: Hey!  I bet I could do that with the Cricut!  The added bonus is that my husband is teacher so the chalkboard technique is something I have been itching to try.  This video by Tammy White was really helpful in teaching how to do the chalkboard technique.  I just adapted it for use with the Cricut instead of stamps.


1.  For this card, I used Carousel for the ticket diecut and Martha Stewart Elegant Cakes for the Dinner at 8 Uppercase font.

2.  The ticket diecut was cut at 3.5 x 5.75.  The letters were cut at 1.5.

3.  Before laying the letters on the ticket, I used a white pencil to create a border.  Then, I pasted the letter onto the ticket.


4.  Next,  I added the hearts and numbers with a white pencil.  One heart is done with a pink pencil for the color chalk effect.


5.  I added some talcum powder randomly on the ticket and shook off the excess.  The video shows the Embossing Buddy. With a new baby in the house, baby powder is much more accessible :)


6.  Finally, I added some more little hearts and 021413 on the sides of the ticket to represent Valentine's Day.


Here is close-up so you can see the chalkboard effect:


So there it is!  It is not just for stampers.  You can do the chalkboard technique with the Cricut, too!

Have a great day :)


Designer: Lori Sjogren
Machines: Cricut Create
Supplies: Black cardstock - Recollections

               Pencils - Reeves
               Heart paper clip - American Crafts With Love Collection

Friday, September 28, 2012

Summer Memories.....

Hello, Diane of  http://happyscrapperdiane.blogspot.com with a layout to share with you.  Summer has ended, but those Summer memories still need to be put on the pages.  I am sharing two pages I created for my grandson Cameron's album of a trip to an amusement park called Coney Island not far from where we live.  I wanted to create pages that were fun just like the day we spent at the park!    
I decided to use several items that he visited to display in the layout.  
 I used my Scrap n' Easel to layout and align the letting that I cut from Carousel using the shadow feature of the font cut at 1.25 inches.  To make sure it was correct, I placed the ruler to help get it straight too!
 I decided not to use the letter part because they were small and decided to use my Uniball pen to make some accent lines on the letter to make it stand out a little bit more on the paper.
 I cut the Ferris Wheel from Carousel at 5 inches and used the shadow and cut 4 different colors of the top of the ferris wheel in teal, gray, white and red.  I used the gray as the main and then cut the cars from the other colors and glued them in a pattern and stickled the gray area in silver to make it shine.
The roller coaster was cut from the Summer Celebrations cartridge at 4.5 inches and I cut every layer in a different color and cut pieces to make it different.  After I finished I did stickle the gray in silver which does not show in this picture, but in my final pages.  I cut the bumper car  at 3 inches and the ticket booth at 5.75 inches and both were from Carousel as well.  I used the ticket booth as a journal tag. Thanks for taking the time to look at my project.

Details
Designed By-Diane Kielman
Cartridges Used-Carousel and Summer Celebrations
Machines Used-Cricut Expression 2 and Gypsy
Project-2 page layout
Other Supplies-Pattern paper from Stampin Up, Cardstock from Recollections, stickles by Ranger and Uniball white pen

Thursday, September 27, 2012

State Fair Layout

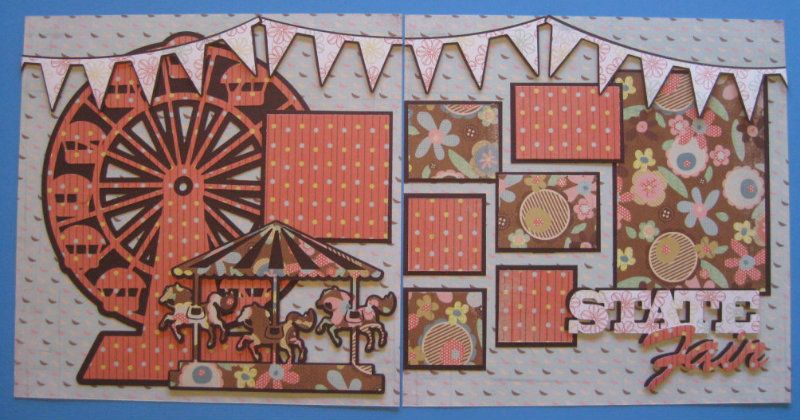
Hi Cricut Fans!  This is Rita of Rita's Paper Obsession.  Some of the fun memories of summer include going to an amusement park, carnival or fair.  Today I have a layout to share with you.


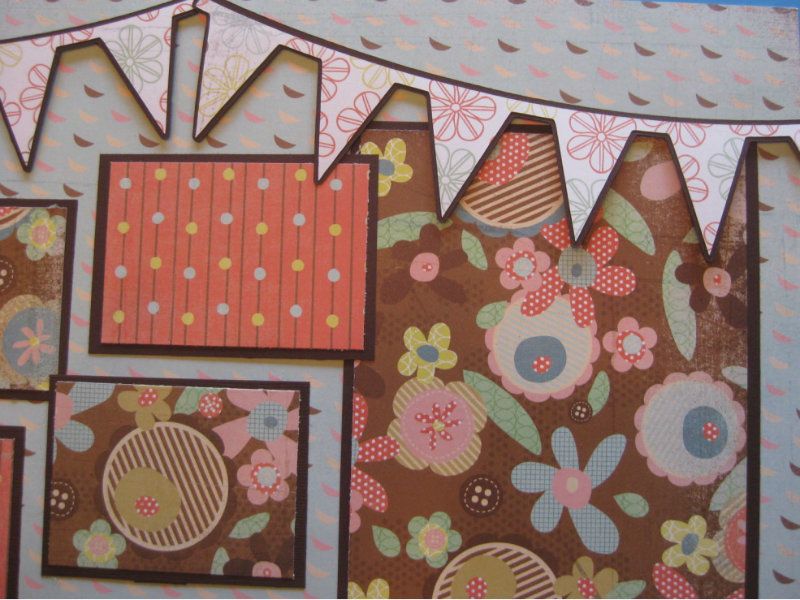
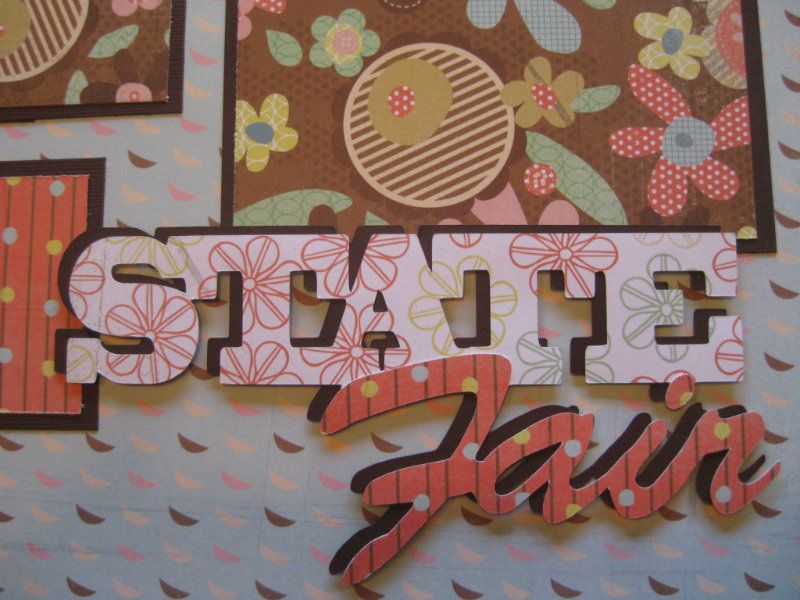
For this layout I used sheets of solid card stock and three different coordinating patterned papers.  Cuts are from the Carousel cartridge as follows:  Ferris Wheel (Ride5) 10.5 inches; Merry-go-round (Ride4) 5 inches; "State Fair" 3 inches cut in pattern paper and solid; and three Banners 3.5 inches.  Photo mats are cut to fit the photos I selected for the layout.

Merry-go-round, banners and title are secured with dimensional tape to add some depth.


The title does not have a shadow cut so I cut the base cut from the solid to create the shadow and off set the pattern cut to make it stand out.


Thanks for letting me share today.  Check out the Carousel cartridge, it has a lot of great cuts for your amusement park, carnival, fair and even circus photos.  Happy scrapping!

Cricut Info & Other Supplies:
Designed By- Rita Poteat
Cricut Machines Used- Expression
Cricut Cartridges Used- Carousel
Other Supplies Used- Bazzill "Mud Pie" and Hopscotch patterns "Jump Rope" "Hoppy Taw" and "First Dance", foam tape