While we are no longer making active post of Cricut projects on this blog as of 8/1/2013, we invite you to use it for continued die cut inspiration as we will leave the blog up for viewing. Happy Cricuting !

Showing posts with label SVGCuts. Show all posts

Saturday, May 18, 2013

FATHER'S DAY GIFT BOX

Sorry about the delay... I picked the wrong date so it didn't post at midnight...lol

Hi, it's Freda from CannCreate Designs, I'm back with a quickie 3D Father's Day gift box project using SVG files, MTC and my Expression. 

I was looking for a gift box for my hubby's father's day gift.  He has been wanting a new wallet so I though the size of this box would be perfect...


This project comes from "The Green Room" set at SVGCuts.com.  I was really amazed at how easy and quickly this project came together.

For the top I found this great green velvety specialty paper from HOTP called Forest Suede at my local LSS that cuts like butter.  Just to be certain I taped it down all the way around so I didn't waste an ounce......


I assembled the top before I decided the "balls" looked a little flat.  So I would advise that you assemble the rack of balls and embellish before attaching to the table....I was a little worried that I was going to mess up the suede.  Draw stripes and dots on the ball pieces, assembled rack base and frame then glued the balls in place on the rack base piece.  Place rounded blobs of Glossy Accents on each ball to make them look a little more realistic....let dry...


Use a tape runner adhesive to attach the velvet to the table top base. Next put the table top frame in place and embellish as desired.  (I put Queen & Co. black gems in the holes around the edges).  Draw the embellish lines (gold and black stripes) and color the chalk tip white on the stick, allow inks to dry then color the white tip with a little bit of blue on the end. Fold the stick along the scored lines and glue (it will be a square shaped tube). There are 2 holes in the suede to help with placement of the ball and stick, I placed a pearl on one and glued the stick to cover the other one...

Fold the sides of the table top under and glue in place.  Glue the "fringe" pieces along the long side (there aren't any pieces for the short sides of the top).  I put Queen & Co. large black pearls just above the holes cut in the fringe pieces.


For the bottom of the table fold the "Box" pieces and glue to form the table base, they are pretty self-explanatory.  Glue the 3 straight and scalloped trim layers together and glue in place on the leg pieces.  Attach the leg pieces to the long sides of the box.


Wallah....you're done....What Fella wouldn't enjoy getting a gift in something this special.....I thought this project was pretty special as a gift box...but last week someone made the bottom of the table and filled it with flowers to look like a planter-I thought it was even more amazing....check it out here...
  

Thanks for stopping by, 

Freda


Designed by:  Freda Cannon 
Machine Used:  Cricut Expression
Project Type:  3-D Gift Box
Products Used:  MTC Software; The Green Room SVG Files from SVGCuts.com, Glossy Accents, Queen & Co Pearls and Black Gems, Ink Gel Pens.


Friday, April 19, 2013

WESTERN HOME DECOR PROJECT & GIVEAWAY!!!


Hey there, it's Freda from CannCreate Designs with another 3D project
from SVGCuts and MTC using my Expression.
This project has was made for the top shelf area of my scraproom desk...
makes me smile every time I look at it.


As soon as I saw the Happy Trails set of designs I knew I had to make it using a picture taken at Sears years ago of my grandson in a hat.  The wanted poster was originally intended to be a card, but I wanted it on a 12 x 12 canvas so I enlarged the file to fit the canvas. I purchased the Sasparilla Collection papers by October Afternoon to use because I LOVE the comic strip cowboy paper included in it.
 
Paint the sides and a little on the front of the canvas black and let dry. Trim the background paper to 11 3/4" and apply to the canvas with Mod Podge and let dry*.  Use Black StazOn to ink the edges of the paper once dry. 
 
*NOTE:  In a previous project years ago where I used Mod Podge and didn't allow each layer to completely dry before adding next layer I wound up with bubbles and buckling of the papers once the final project was completely dry.  I flip the project over and brayer the open area of the canvas and use the Cricut spatula to rub under the wooden frame area.  I haven't had any bubble issues since using this technique.
 
Enlarge the Paper, Text and Frame files from the Wanted Poster Card folder to fit on the 12 x 12 Mat angled slightly then cut it out.  (Be sure to cut your frame and text out before printing your photo, you will need to measure the area of the frame you cut to get the correct size for your final picture...speaking from experience....lol.  Ink the edges of the Paper file and mod podge to the canvas and allow to dry.

I'm so glad I bought the digital files so that I could tinker with it.  I had the photo reprinted on matte paper but found it was to "new" looking for this project.  So I opened it in Photoshop and ran the wanted poster action from Panos Effects Old Papers Action Set which I had purchased years ago, you could also use the built in Sepia tone action since the final product you're looking for is the photo.  I used the Wanted poster action because you can try out different items like bullet holes, stains, nails and cracks etc. for cool effects on your picture, if you don't like them you just hide or delete them.  When the photo looked "right" to me I cropped the file down to just the photo approximately 1/2" larger than the size needed for the area on the frame where it will be placed which you cut previously.  I printed the photo on cardstock and used a pair of decorative scissors to trim the picture down to approx. 6" squarish , distressed the edges then inked with StazOn.

Assemble the frame, text and picture layers then mod podge it to the "Paper" layer.

I thought the frame still needed a little something extra so I braided 9 strands of jute into a large flat braid and placed it around the sides of the frame, and a small braid for the hanger.

 
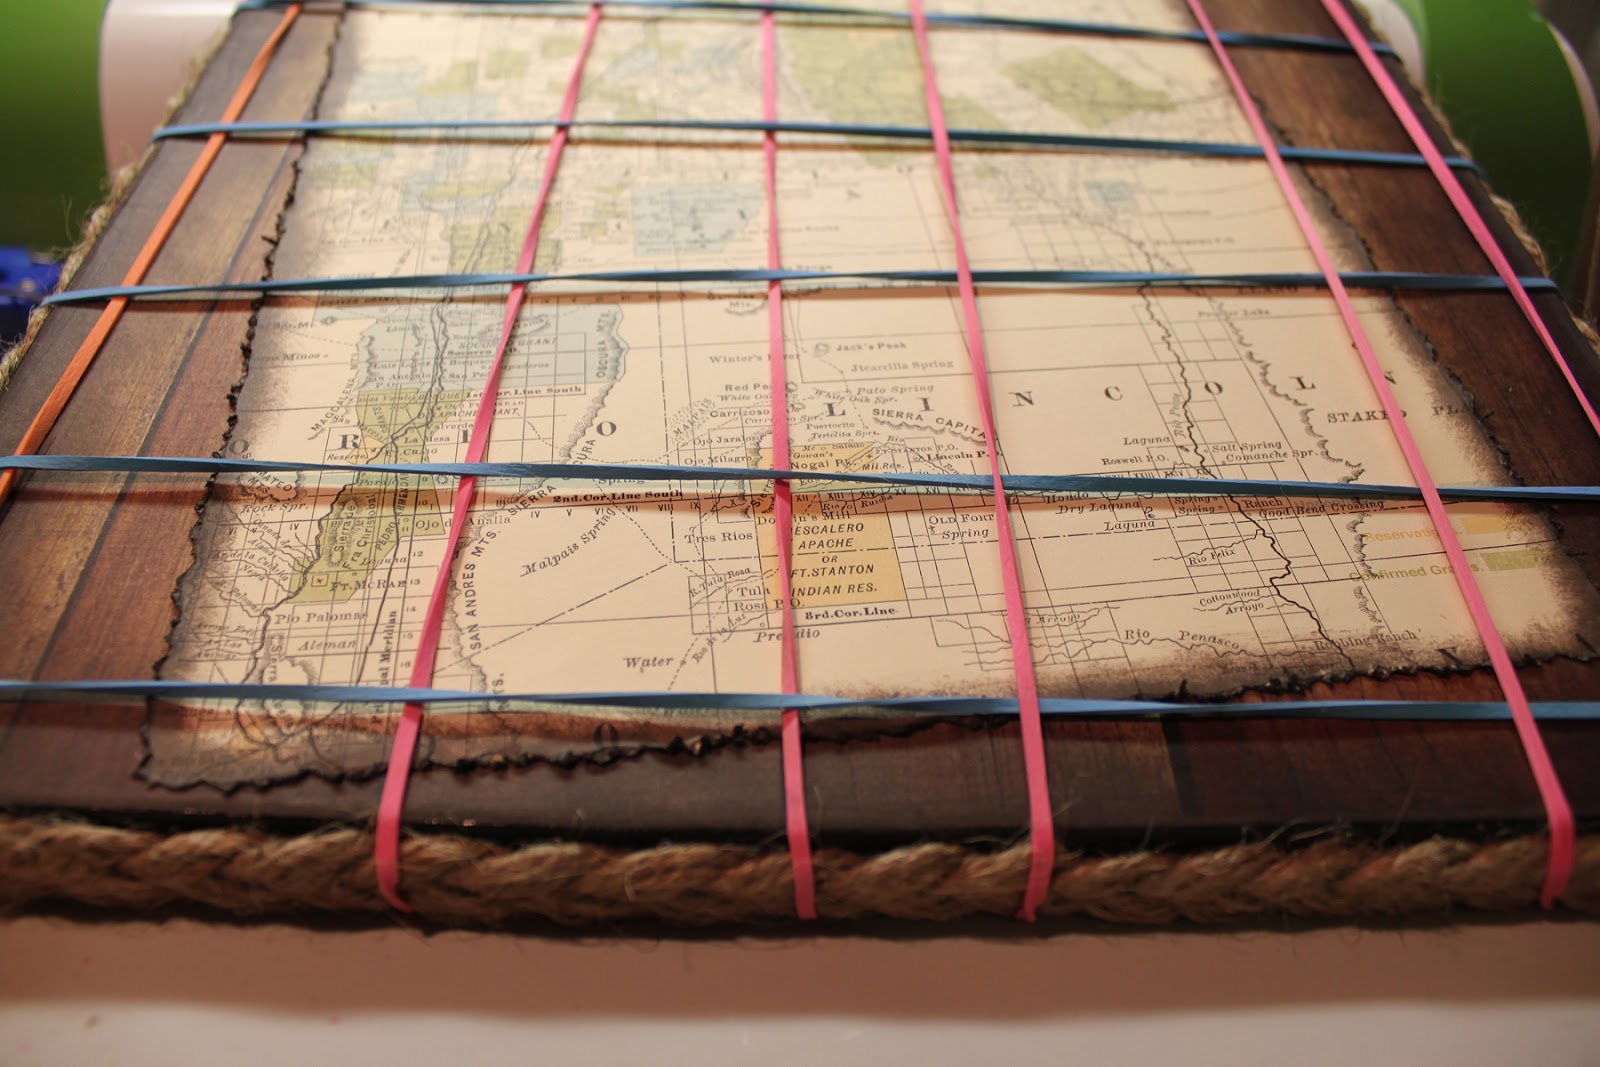
I stapled the start of the braid at the top of the frame and glued it around the sides with Zip Dry adhesive.  I trimmed the excess and stapled the other end where they met. I didn't like the appearance of the staples so I cut some jute to create a "fuzz", spread Zip Dry over the stapled area and pressed the fuzz into it...now you can't see the seam or staples.  I also did this to cover the staples on the hanger so they wouldn't scratch the wall when I hung it up...  I used large rubber bands around the outside to hold the braid in place while the glue dried.


The tag was made using Tim Holtz Distress Inks on a manila tag from the office supply store.  The lettering & banner came from Sizzlits dies Typeset and Tattered Banners.  The heart was a grunge board shape that I inked and fiddled with for 2 days to get it just right then couldn't wait for it to dry naturally.  I used my heat gun and wound up getting to close and suddenly had volcanic like eruption of paint and ink-My beautiful heart was broken.  I thought about it for a minute then covered the entire thing with red glitter, then drew lines of glue across the heart and applied gold glitter....let it dry without the heat gun.  The next night I applied Glossy Accents thickly and let it dry for a couple days.  Add a jute string and "fray" the ends and your tag is ready to be added using pop dots.

The boot and the pot were assembled using the video instructions on the SVGCuts.com website.  The boot itself was a little tricky on the front area, but they explain it quite well in the video...I couldn't even begin to explain.  Unfortunately I assembled the boot & pot at a crop and didn't take to many pictures of the assembly process.


You might notice that I changed the orientation of the horseshoe before cutting it out.  My grandma always said if you turn a horseshoe up side down all your good luck falls out...lol...I'm superstitious so I used the software to move the assembly tabs to the bottom of the shoe so my good luck doesn't get poured out...
 
 
Now for the Good Stuff-The Give Away:
 
If you would like to try your hand at assembling the boot but don't have the ability to cut one, I cut an extra boot to give away.  This will come unassembled, it has been inked and embossed you just add the glue...lol....
 
Embossing folder not included....it's in the picture so I can remember which one I used

 
Mary has a really detailed video tutorial that you can watch to help you with the steps of assembly and of course I will gladly answer any questions you may have just click the link to see it on Youtube: 
 
 
To win all you have to do is leave a comment on this posting. Don't forget to put your email addy in the comment section so I can contact you for mailing details....I will put the names in a hat, draw and post the winner Friday, April 26th.  Everyone is welcome to enter.
 
Thanks for stopping by and good luck!!!!!
 
Freda
 
Designed by:  Freda Cannon 
Machine Used:  Cricut Expression
Project Type:  Home Decor 
Products Used:  MTC Software; Happy Trails Svg files; Sasparilla Collection Paper by October Afternoon; Mod Podge; StazOn Ink; Photoshop Software; Panos FX actions for Photoshop; Tim Holtz Products: Typeset Alphabet, Tattered Banners and Grungeboard Heart, Martha Stewart Red & Gold Glitters, Glossy Accents, Twine and Jute. 

Tuesday, December 18, 2012

Hot Chocolate Teapot Display Set


Hello again, it’s Freda from CannCreate Designs.  I posted a little teaser for this project on my blog a couple of weeks ago showing the unembellished teapot and got a really good response from viewers.  This is going to be a really easy posting for me today because SVGcuts does all the work, they produce excellent step by step videos telling you how to assemble the files you purchase from them, the only thing I had to do was decide on the papers and types of embellishing I wanted to use. 


These items were cut on my Expression using MTC, you can also use SCAL if you have that software.  They were not cut using Cricut Cartridges.


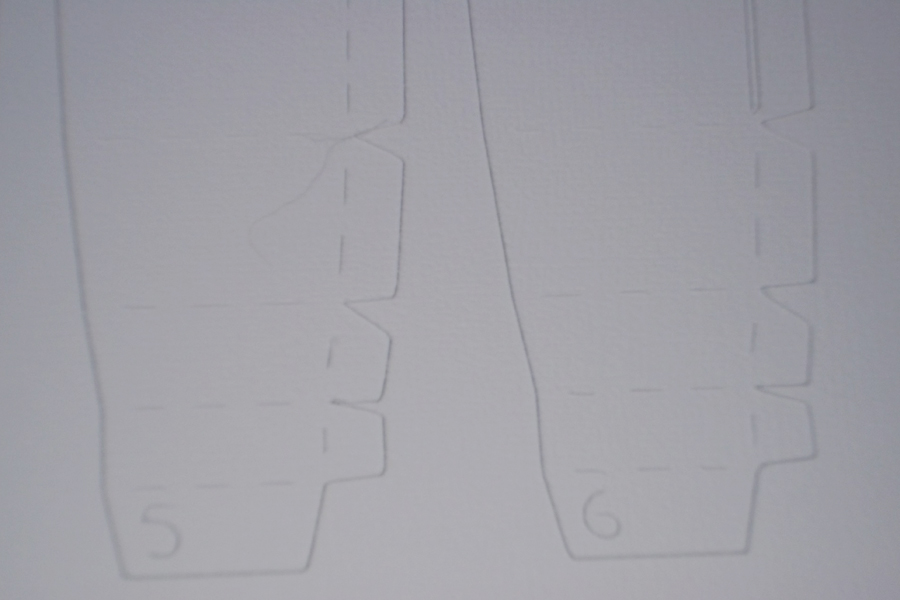
Making papers bend looks a little daunting, but if you take it step by step it is really easy.  Each piece is numbered and cut with tabs for gluing and folding so all you have to do is bend and it folds exactly as needed-no having to use a score board, assemble them together in numbered order and you’re done.  Here’s a picture of the base pieces showing the numbering of pieces, tabs and fold lines that are cut.

The Half Naked Truth-Here’s what the pot looks like before the panel pieces are attached.

 
Now presenting my Hot Chocolate Centerpiece

 
As you can see all the top panel pieces have had the edges inked with Timber Brown Ink.  The upper layer papers were from GCD Studios Ella Blue Collection by Tina Higgins.   The white base layers were cut from American Crafts White Cardstock.   I decided to use a pearl and Snug Hug Seam binding theme for embellishing.

I used two files I purchased from SVGcuts.com and the MakeTheCut software to make this set.  This should be an easy posting because they do all the work.  (disclaimer-I am not affiliated with these companies, I’m just really satisfied with the results I get when I use their products).

Tea for you and Me:


 Home for the Holidays:  (Pitcher)


There are 3 different types of pearls used on the teapot.  For the spout handle and around the top of the lid I used the small pearl “lines” made by Paper Studio (I should have checked my stash quantity first-ran out and didn’t have enough to do any of the other projects with them).  Around the the rim of the pot and the “dangly” pearls in the bow I used pearls by the yard I bought at JoAnn’s.  Around each tab on the lid and on the small dangly I used the large Queen and Company Pearls.  I’m going to make a cameo charm for this bow, the Round 25 set I used on the pitcher was too large for this spot.

 
The paper I used had a silver script writing on it, you can see a little of it in this picture.

Next we have the Pitcher from the Home for the Holidays set.  The cameo charm was made using a cut from the Cricut Heritage Cartridge at 1” and Epiphany Crafts Shape Studio Round 25 punch and the coordinating charm and bubble caps.   Pearls by the yard and Queen and Company large pearls were used on the pitcher.

 
I used the cameo and a white circle which made my cameo 2 layers of paper, when I put the bubble cap on it looked a little “milky” in spots.  I flipped the bubble cap over on a sponge (to avoid scratching the bubble) and used the cricut stylus to push the white back into the bubble cap adhesive.   After burnishing the paper to the cap, I used Glossy Accents to glue to the metal charm. 

 The Burnished Cameo

 
Doing this step makes the white back attach to the bubble cap and get’s rid of the milky appearance you get when using 2 layers of papers.
 
 
For my pearl embellishments on the teacup I used a large, medium and small pearl on each panel.  I chose a coordinating paper to do the panels on the saucer and the inside of the teacup (mostly because I didn’t have enough of the brown patterned paper-having 5 sheets would have been enough but I only had 4).  Then to top it off I threw out the scraps before assembling the spoon so I didn’t have any of the papers for the center piece of the spoon.  I also noticed that the pearl at the base of the handle had come loose and moved in this pic, it has been moved and glued back down.

Last but not least is the hot chocolate holder.  My family LOVES hot chocolate so much that I bought a Keurig for us to use last Christmas when everyone came home.  Little did I know that my son was buying me that Hot Chocolate dispensing machine too…lol

 
This piece was the only one that gave me problems, if you look close you’ll see that it’s “wavy” in spots.  This piece is a box inside of a box with trim around the top.  The space between the 2 boxes is “hollow.”  When I put the 3M quick dry adhesive on the decorative piece the base got a little distorted.  If I make another one of these I would cut some foam core to attach to the outside pieces to prevent the distorting with wet adhesive.    I used Snug Hug seam binding, a large pear and pearls by the yard for embellishments on this piece also.
 
 
I hope you enjoyed my project, it was a wee bit time consuming, but well worth it.  I’ll have a beautiful display for my counter when the kids come home for the holidays.  I just wish the sun would shine on the day I’m photographing my blog submission.  Maybe Santa will bring me a photo box for Christmas…lol
Merry Christmas to one and all, see you next year.  Freda                                                             

Cricut Info & Supplies Used:
Machine Used:  Cricut Expression

Files Used:  Cricut Heritage Cartridge for Cameo shape.  SVGcuts Home for the holidays (pitcher) and Tea for you and Me.

Paper:  GCD Studios Ella Blue Collection Pack designed by Tina Higgins.  American Crafts White Cardstock

Supplies:  3M Quick dry adhesive, Pearls-Queen & Company, By the Yard from JoAnns, Paper Studio Pearl Lines, Epiphany Crafts-Shape Studio Round 25, Bubble Caps and Charms.  Snug Hug White Seam Binding