While we are no longer making active post of Cricut projects on this blog as of 8/1/2013, we invite you to use it for continued die cut inspiration as we will leave the blog up for viewing. Happy Cricuting !

Showing posts with label Mother's Day. Show all posts

Saturday, May 11, 2013

Here’s a Mother’s Day Card for all of you!

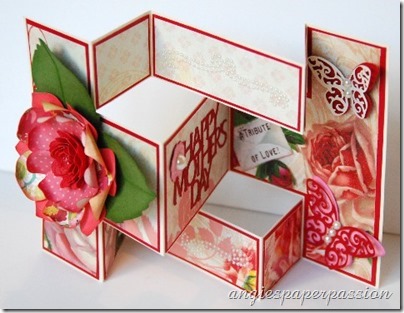
Good morning crafty friends! This is Angie from Angie’s Paper Passion! I was inspired to create a card from Split Coast Stampers with some Cricut cuts thrown in! It is called a Tri-Fold card. It looks difficult to make but I was surprised by just how easy it was. I can’t wait to make some more of this type of card!
Tri-Fold-Mothers-Day-Card-2_thumb
I made this card for my Mom and red is her favorite color. I think she’ll be very happy with it!
Below is looking at the card from a slightly left angle…
Tri-Fold-Mothers-Day-Card-3_thumb1
And this next photo is looking at it from the right side…
Tri-Fold-Mothers-Day-Card-6_thumb1
I started with paper from DCWV called The Four Seasons stack (beautiful papers in this stack for each of the seasons with texture and some glitter!). After hand cutting my card in a cream cardstock, the patterned paper, and the mats in red cardstock I then decided which Cricut cuts to use to dress up my card. I used three different Cricut cartridges for the embellishments: Florals Embellished, CTMH Art Philosophy, and Flower Shoppe.
The “Happy Mother’s Day” sentiment, was cut from Florals Embellished @ 1.88”. I added some Stickles to the little pink flower and adhered a flat-backed pearl to the center. This cart has some wonderful Mother’s Day sentiments!
Tri-Fold-Mothers-Day-Card-7_thumb1
The two butterflies were cut from Art Philosophy @ 1.5” and 1.25”. I adhered the two layers together just between the wings–not the wings themselves – to give the butterflies a little more dimension. Then I placed two pearls in the center of the smaller one and three in the center of the larger one.
Tri-Fold-Mothers-Day-Card-9_thumb1Tri-Fold-Mothers-Day-Card-10_thumb1
This next part was really an afterthought. While I was waiting for my bug to cut something out, I started playing around with the DCWV paper that was left over. One of the motifs had this envelope surrounded by roses and had “A Tribute of Love” printed on it. How perfect for my Mom’s card! So I did some ‘fussy cutting’ around it on three sides. The left side of it already had a straight edge because it was on the edge of the 12x12 sheet of paper so I just aligned that side up against the edge of that card panel and adhered it. I added a small pop dot under the right side of it so pops off the card a little bit.
Tri-Fold-Mothers-Day-Card-11_thumb1
The middle top and bottom sections were a little too plain so I added some pearl flourishes.Tri-Fold-Mothers-Day-Card-13_thumb1Tri-Fold-Mothers-Day-Card-12_thumb1
Now for the card front! I made the flower from the Flower Shoppe cart and I LOVED how it came out! I used paper from a 6x6 pad by Echo Park called This & That and cut it out @ 3”. The flower I used from the cart was the <FUN> shapes on page 16 in the handbook. I’ve been on a flower making kick lately (can’t you tell by my previous posts? lol) and this flower was so much fun to make! It was inked and rolled before I adhered it together and added a large pearl to the center.Tri-Fold-Mothers-Day-Card-14_thumb1
And there you have it! This years Mother’s Day card for my Mom! I think that it’s safe to show it here because Mom is 93 and not very interested in surfing the web, lol! It wasn’t that long ago that she asked me to explain what “that word I keep hearing about means?” The word was “Google”! I cracked up! But can you just imagine all the things that she has seen and has lived through? I’ll be so lucky and blessed to live as long and still be able to tell you who I am!Smile with tongue outTri-Fold-Mothers-Day-Card-8_thumb1
Thank you for visiting today and have a very Happy Crafty Mother’s Day tomorrow!
Until next time, Happy Crafting,
Angie
Cricut Info & Supplies Used:
Designed By: Angela Cromwell
Cricut Machines Used: Expression
Project Type: Cards
Project Theme: Mother’s Day
Cricut Cartridges Used:  Art Philosophy, Florals Embellished, Flower Shoppe
Supplies Used: Cardstock, Patterned Paper, Pearls, Stickles, Adhesive, Pop Dots

Wednesday, May 1, 2013

Technique Tutorial: Adding Multiple Dimension


This is Debbie O'Neal of Scrap Me Quick DesignsHappy MAY DAY to you all !  Hard to believe it is Spring already and Mother's Day is just around the corner.   I do have a couple of ANNOUNCEMENTS to make before I get to my project post today so please bear with me.  
 1) SAY FAREWELL:  I would like you to all join me in thanking ScrapperBecka for contributing her time to host our Monthly Cricut Challenges since we started the blog.  She has done an amazing job coming up with some really fun challenges. Unfortunately, Becky's life has gotten so busy she can longer continue hosting the challenge effective this month. If anyone else is interested in taking over the Monthly Cricut Challenge hosting, please contact me. As much as I love the Monthly Cricut Challenges, I just don't have time to do this myself. 

2) OTHER NEWS:  The reason why I am unable to take on more responsiblity with Cricut FANatics is actually kind of exciting news. I am now a monthly Contributing Editor for Die Cut Crazy, a digital only magazine about all types of die cutting available through the iTunes App Store for the iPAD (only).


I am writing a monthly article titled “LETS TALK DIE CUTS”. My first article appeared in the April issue and the May issue is coming out soon. To find out more about the magazine, check out my blog post HERE.  

As you can imagine, writing the article is taking up a lot of my time. Not to mention, managing Cricut FANatics Blog, starting up my business at Scrap Me Quick Designs and hosting Crafty Cut Ups Facebook Group, PLUS  most importantly helping with my dad's hospital visits for his progessing lung cancer treatments,  I just don't have time for much else. I do miss hanging out on the Circle MB chatting with you all. I try and stop by when I can.  I just wanted to take this time to let you know why I haven't been around much lately. Rest assured I am still using my Cricut.

Speaking of using my Cricut, lets move on to today's featured post: 
TECHNIQUE TUTORIAL: Adding Multiple Dimension 

With Mother's Day coming up, I needed to get started on my gift packaging for my Mother-In-Law's gift.  She really appreciates it when I create something special for her and  she loves dimension so I was inspired to create something fun for her. 

Flowers are so appropriate for Mothers Day so I started out by selecting a 5 petal flower because they are great for layering on projects. There are several Cricut cartridges to choose from with this type of flower such as All Mixed Up, Autumn Celebrations, Mothers Day Bouquet, Serenada, etc.  But I used the flower from the Sophie Cricut cartridge.

1.  I cut multiple flowers at 2" from a variety of small patterned papers. Selecting two flowers from two different patterns, I used a foam pop dot to add the two layers together
      
Tip: 6X6 paper pads are great for this since they have smaller scaled patterns to choose from.

      That created our 1st flower dimension step.

2.  Using my fingers to manipulate the flower petals of the flower shapes, I bent each one slightly in towards itself.

      That created the 2nd flower dimension step.

3.  I added some twine to colorful button and you guessed it, added it to the center of the flower with a pop dot. 

     This created the 3rd flower dimension step.

4.  Here is the final dimensional flower. I repeated the above steps and created multiple flowers.


5.  I cut some butterfly shapes from the Artiste cartridge at 1" out of another small patterned paper. I folded the wings on each side of the center of the body so the wings stood up.


Once I created these dimensional elements, I put together a gift bag, a tag and a card.
 
As you can see, I used a plain white gift bag, and added the dimensional elements I created to the front of the bag.  The grass for the flowers I used my scissors to create fringe to make it dimensional as well. The gift bag is going to hold a cookbook signed by her favorite author. But shhhh, dont tell.
 
 
I made a coordinating Mothers Day Card using more dimensional elements I created.
 
 
And since we are giving her a gift card to her favorite store, I even made her
a matching gift card holder using another dimensional flower on an A2 envelop.  
 
To help all of you get ready for Mother's Day too, drop by the MADE FOR MOM WITH LOVE BLOG HOP  for more inspiration AND you can pick up the FREE WORD PRINTABLE I made with all kinds of appropriate Mothers Day words I used on my projects. You could even print it out and give your kids to help make your Mothers Day gifts this year more special ! 


Happy Mothers Day to all !
 
Cricut Info and Other Supplies:
Designed By:  Debbie O'Neal
Cricut Machine:  Expression
Cricut Cartridges: Sophie, Artiste
Other Supplies: Patterned paper, buttons, twine, foam dots, word printable

Thursday, April 11, 2013

Mother's Day Card

Hey everyone! It's Angie from Angie's Paper Passion with my monthly post. 
Here's my problem - I procrastinate! Second, I have started taking of my soon-to-be 3 month old Grandson and although I am oh so happy that I can be with my baby all day, everyday, it really doesn't leave me a whole lotta time to create. Plus, I'm a procrastinator, did I mention that? So for these reasons, if I'm going to send any cards out this year, I need to start NOW and make it simple on myself. (Also, by the time my turn comes up again here at Cricut FANatics, it will be one day before Mother's Day so...
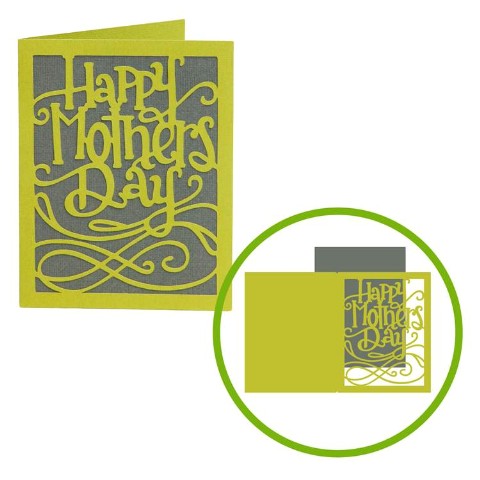
So I went to Cricut.com to see what my "simple" options were. I had been looking at the Craft Room Exclusives like the sets of single Mother's Day cards and I found one that I really liked:

So I bought it - cut two pieces - glue!!! Easy peasy! Plus it was 1.99 and now with the sale going on it is 1.69 (If you're a Cricut Circle member, you get an addition 10% off). No need to wait for it to be mailed to you - it will be in you Cricut Craft Room the next time you open it! Again, really simple!
I used paper from K&Company for the card and cut it a 5.5".

I just wanted to show you up close how detailed those cuts are. 
All the cuts were nice and smooth for being so detailed
. But I still needed something extra on that card. I thought about it for a long time and finally can up with this (you know how I love my flowers and my bling! LOL!

And there they are! The flowers were cut on the Cricut with the CTMH Artiste cart at 3.25' and 4'. I used some seam binding that I had dyed myself with Distress Ink in Peeled Paint. Then I added some branches from a Martha Stewart hand punch and the bling is from Colorbok.
A Close Up of my rolled flowers, ribbon, and punched leaves.

Okay, so even though I did add a few things, I think it a perfect card for a special Mom! And they won't take long to make. In the Cricut Craft Room make the card base as many times as you need. The next time that you have a few minutes, cut out the flowers with the Cricut and punch some leaves with a punch (or even make those with the Cricut, too). The roses can be rolled one evening while watching T.V. I use Scotch Quick Acting Glue or Glossy Accents and they both work great and they DO DRY FAST! Then all you would need to do is put them all together - assembly line style! In no time at all you will have a stack of cards just waiting to be mailed. I just wanted to share that you can take a simple card from CCR and make it extraordinary all for only a couple of bucks. But they won't look like it! 

Thanks for dropping by! Until next time, Happy Crafting,

Signature


Cricut Info & Supplies Used:
Designed By: Angela Cromwell
Cricut Machines Used: Expression
Project Type: Card
Project Theme: Mother's Day
Cricut Cartridges Used:  Artiste, Craft Room Exclusive - Mother's Day Card #6

Friday, April 5, 2013

Cricut Crafty Challenge #7- Mother's Day

Hi Everyone,
Welcome to the Cricut Crafty Challenge for April! This month's challenge is to make a gift for Mother's Day or a special person in your life.

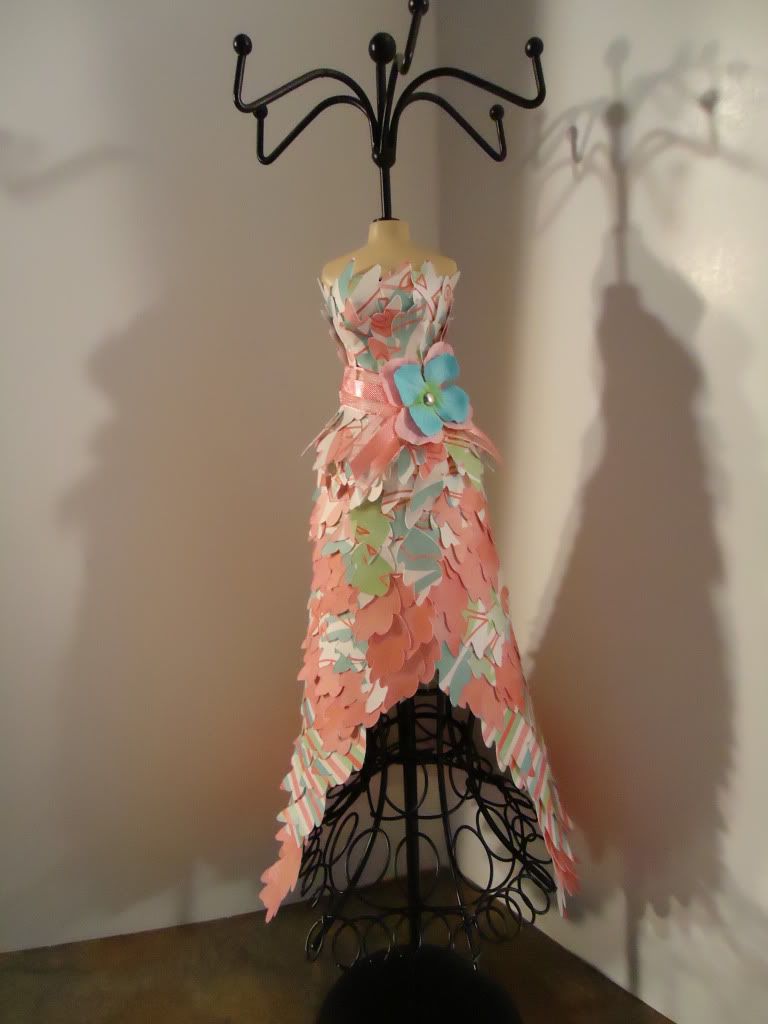
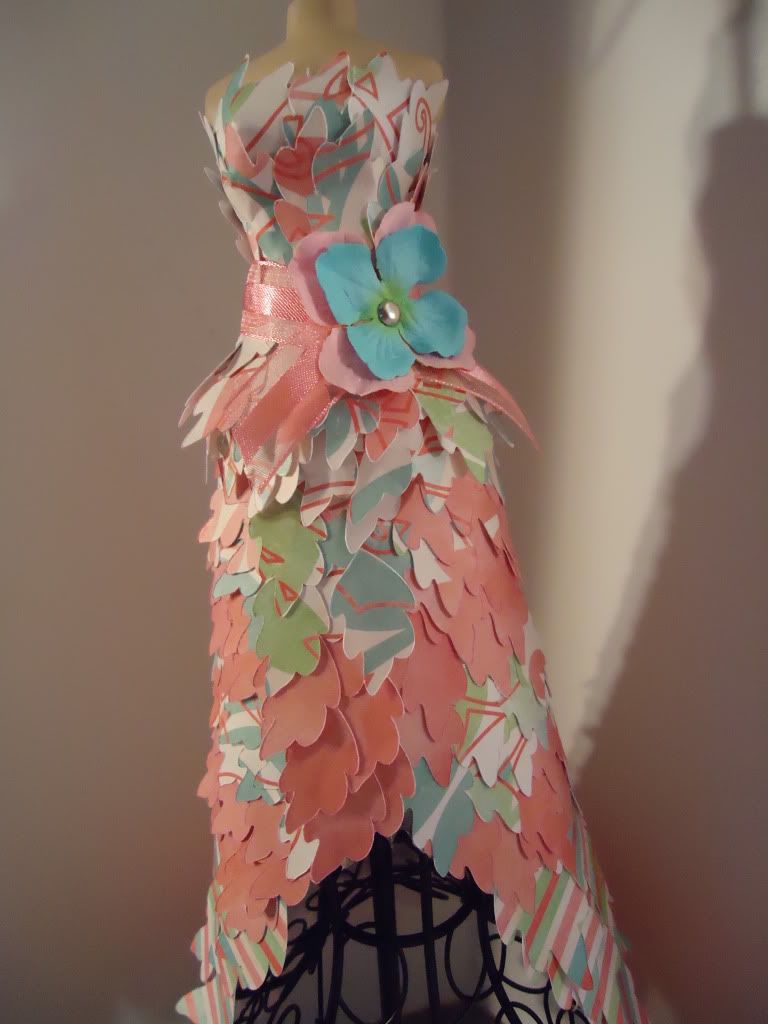
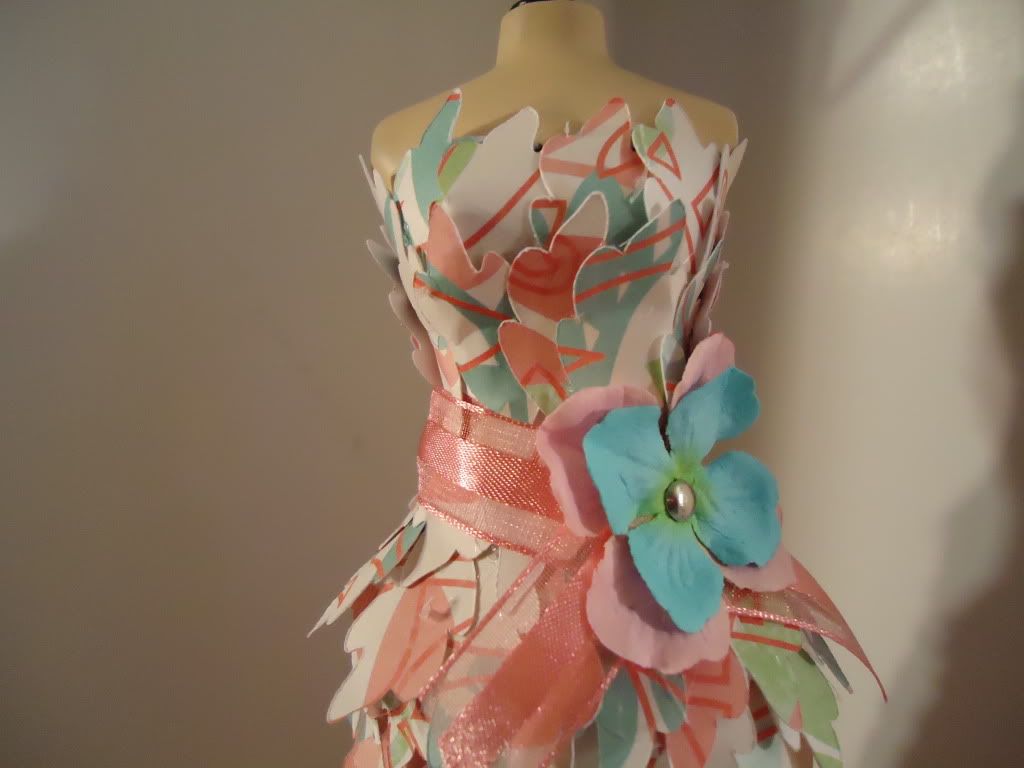
 I made this dress form for my mom for Mother's Day.
I found a form at Burlington Coat Factory. I think it is a necklace holder. And then I covered it with a dress I made from leaves. I got this idea from the DCWV both at CHA a couple of years ago.


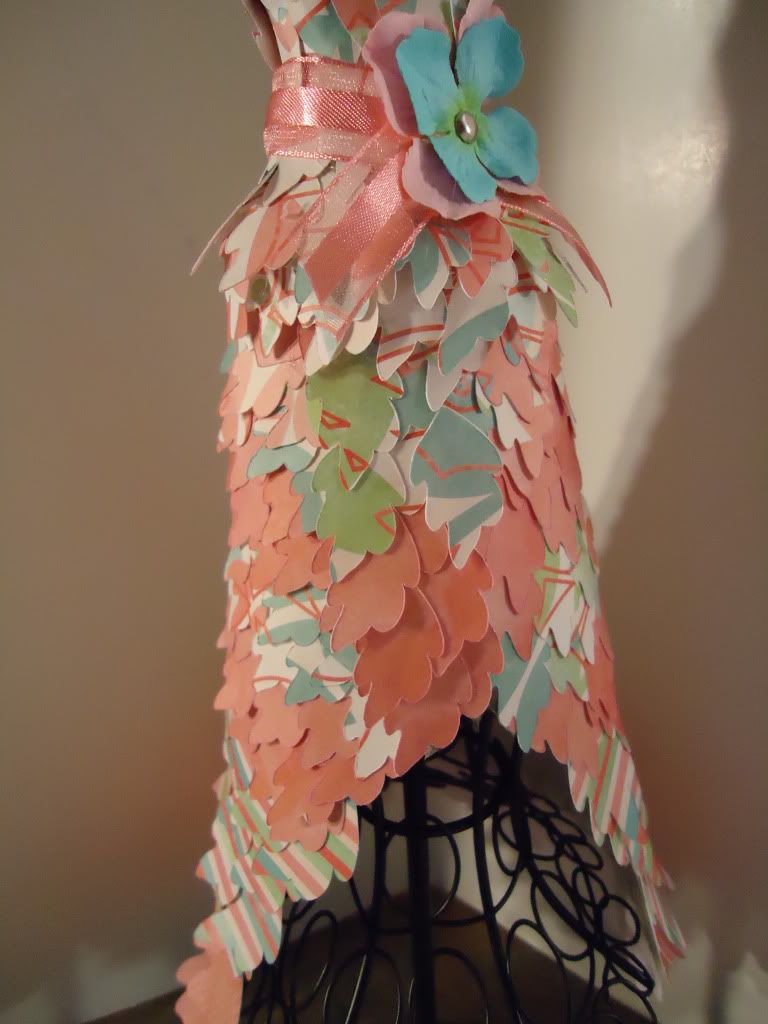
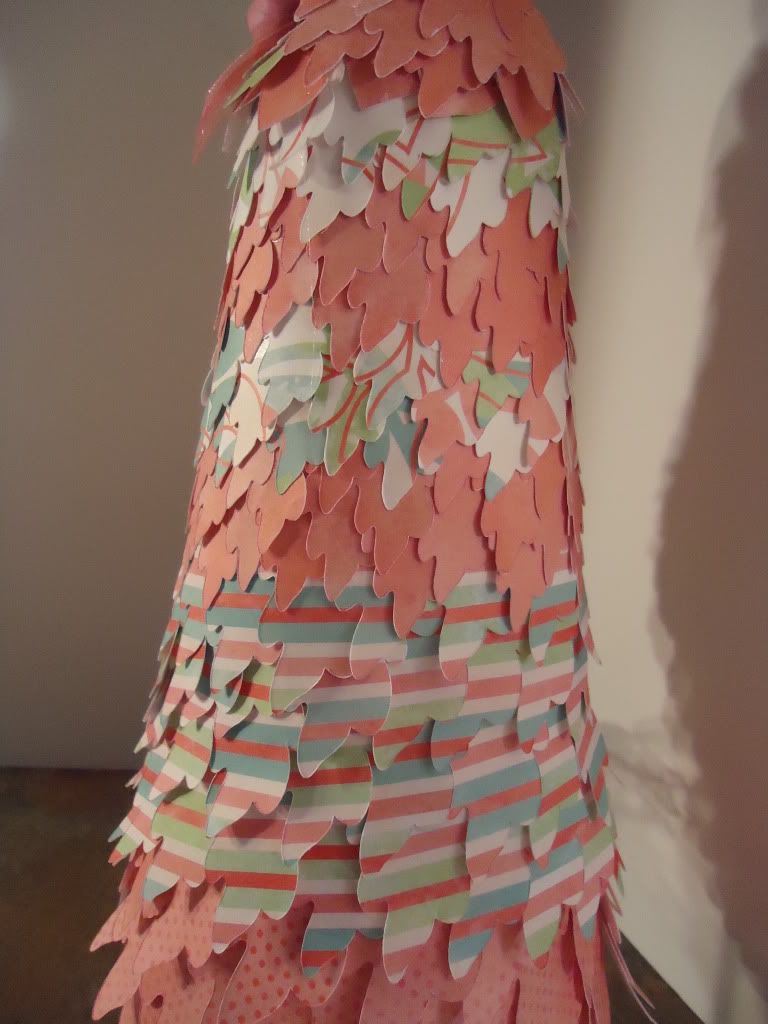
This is the back of the dress.


How to make it:
1. Pick a leaf from the Mother's Day Cartridge and what I did was on each page I used filled page with the leaves 1 at 2 inches, 1 @ 1.5" and 2 @ 1".


2. Next I took the thin piece of 8.5x8.5 paper and covered it with adhesive.

3. Take the 2" leaves and start covering/ layering them on the bottom of the paper, I did about 4 layers. Repeat with the 1.5" leaves and then with the 1" ones up to the top of the page this makes the bottom half of the dress (skirt)

4. Next take the skirt and wrap it around the wire form. I have to add some flowers to the edges of the skirt to get it to fit around the wire. Then I used the glue gun to glue the skirt together at the edges.

5. Then I used the glue gun to add more of the 1" leaves to the top of the form to make the dress top.

6. I added some bling as a necklace with my i-rock.

Here is your Challenge:
Please make a gift, card etc for the special person in your life who has influenced you. The project must have at least 2 Cricut cuts and you must post/link your project here by April 26th. We will draw a winner on April 5th when we post the next Challenge.

The winner of the March challenge is:
Maidi at http://marg0006.blogspot.com/2013/03/easter-sweets.html  please contact Becka at creationswithbecka at yahoo dot com to claim your prize. You have until April 15th. Link up your project here: