While we are no longer making active post of Cricut projects on this blog as of 8/1/2013, we invite you to use it for continued die cut inspiration as we will leave the blog up for viewing. Happy Cricuting !

Showing posts with label Gifts. Show all posts

Wednesday, May 1, 2013

Technique Tutorial: Adding Multiple Dimension


This is Debbie O'Neal of Scrap Me Quick DesignsHappy MAY DAY to you all !  Hard to believe it is Spring already and Mother's Day is just around the corner.   I do have a couple of ANNOUNCEMENTS to make before I get to my project post today so please bear with me.  
 1) SAY FAREWELL:  I would like you to all join me in thanking ScrapperBecka for contributing her time to host our Monthly Cricut Challenges since we started the blog.  She has done an amazing job coming up with some really fun challenges. Unfortunately, Becky's life has gotten so busy she can longer continue hosting the challenge effective this month. If anyone else is interested in taking over the Monthly Cricut Challenge hosting, please contact me. As much as I love the Monthly Cricut Challenges, I just don't have time to do this myself. 

2) OTHER NEWS:  The reason why I am unable to take on more responsiblity with Cricut FANatics is actually kind of exciting news. I am now a monthly Contributing Editor for Die Cut Crazy, a digital only magazine about all types of die cutting available through the iTunes App Store for the iPAD (only).


I am writing a monthly article titled “LETS TALK DIE CUTS”. My first article appeared in the April issue and the May issue is coming out soon. To find out more about the magazine, check out my blog post HERE.  

As you can imagine, writing the article is taking up a lot of my time. Not to mention, managing Cricut FANatics Blog, starting up my business at Scrap Me Quick Designs and hosting Crafty Cut Ups Facebook Group, PLUS  most importantly helping with my dad's hospital visits for his progessing lung cancer treatments,  I just don't have time for much else. I do miss hanging out on the Circle MB chatting with you all. I try and stop by when I can.  I just wanted to take this time to let you know why I haven't been around much lately. Rest assured I am still using my Cricut.

Speaking of using my Cricut, lets move on to today's featured post: 
TECHNIQUE TUTORIAL: Adding Multiple Dimension 

With Mother's Day coming up, I needed to get started on my gift packaging for my Mother-In-Law's gift.  She really appreciates it when I create something special for her and  she loves dimension so I was inspired to create something fun for her. 

Flowers are so appropriate for Mothers Day so I started out by selecting a 5 petal flower because they are great for layering on projects. There are several Cricut cartridges to choose from with this type of flower such as All Mixed Up, Autumn Celebrations, Mothers Day Bouquet, Serenada, etc.  But I used the flower from the Sophie Cricut cartridge.

1.  I cut multiple flowers at 2" from a variety of small patterned papers. Selecting two flowers from two different patterns, I used a foam pop dot to add the two layers together
      
Tip: 6X6 paper pads are great for this since they have smaller scaled patterns to choose from.

      That created our 1st flower dimension step.

2.  Using my fingers to manipulate the flower petals of the flower shapes, I bent each one slightly in towards itself.

      That created the 2nd flower dimension step.

3.  I added some twine to colorful button and you guessed it, added it to the center of the flower with a pop dot. 

     This created the 3rd flower dimension step.

4.  Here is the final dimensional flower. I repeated the above steps and created multiple flowers.


5.  I cut some butterfly shapes from the Artiste cartridge at 1" out of another small patterned paper. I folded the wings on each side of the center of the body so the wings stood up.


Once I created these dimensional elements, I put together a gift bag, a tag and a card.
 
As you can see, I used a plain white gift bag, and added the dimensional elements I created to the front of the bag.  The grass for the flowers I used my scissors to create fringe to make it dimensional as well. The gift bag is going to hold a cookbook signed by her favorite author. But shhhh, dont tell.
 
 
I made a coordinating Mothers Day Card using more dimensional elements I created.
 
 
And since we are giving her a gift card to her favorite store, I even made her
a matching gift card holder using another dimensional flower on an A2 envelop.  
 
To help all of you get ready for Mother's Day too, drop by the MADE FOR MOM WITH LOVE BLOG HOP  for more inspiration AND you can pick up the FREE WORD PRINTABLE I made with all kinds of appropriate Mothers Day words I used on my projects. You could even print it out and give your kids to help make your Mothers Day gifts this year more special ! 


Happy Mothers Day to all !
 
Cricut Info and Other Supplies:
Designed By:  Debbie O'Neal
Cricut Machine:  Expression
Cricut Cartridges: Sophie, Artiste
Other Supplies: Patterned paper, buttons, twine, foam dots, word printable

Friday, April 5, 2013

Cricut Crafty Challenge #7- Mother's Day

Hi Everyone,
Welcome to the Cricut Crafty Challenge for April! This month's challenge is to make a gift for Mother's Day or a special person in your life.

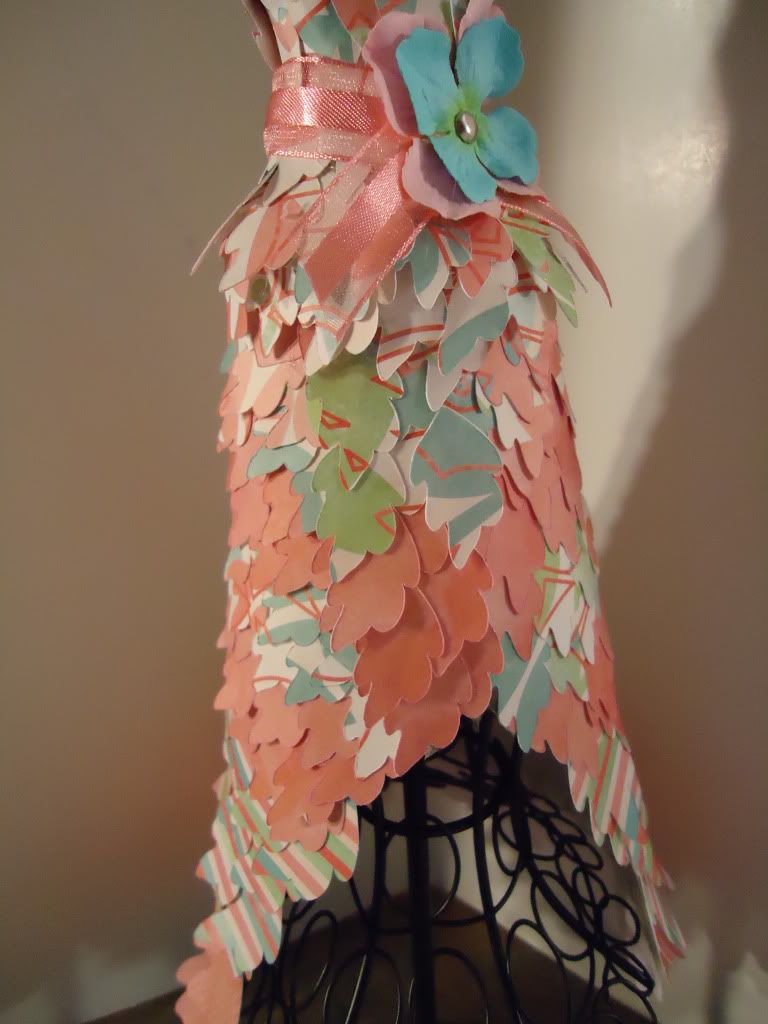
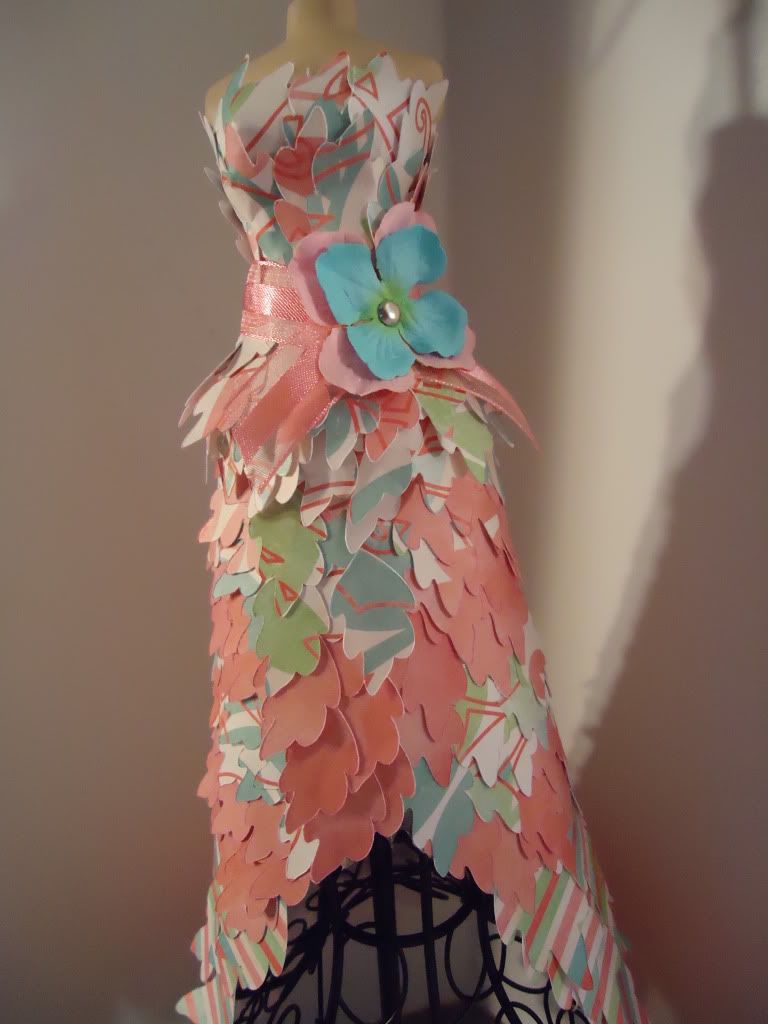
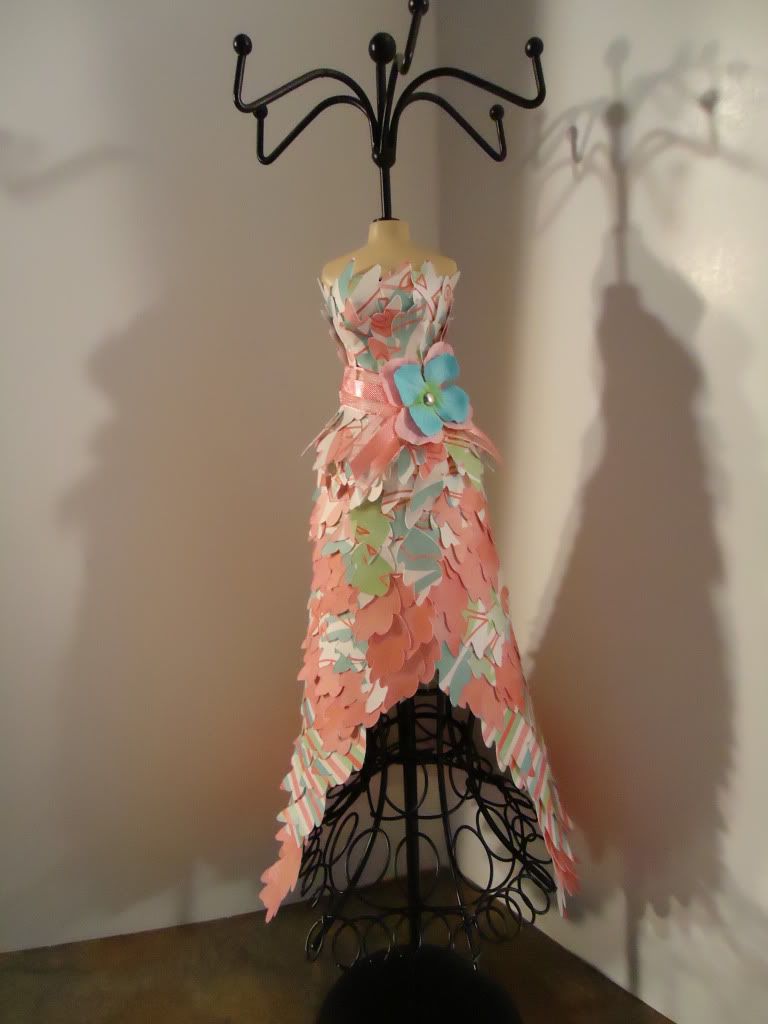
 I made this dress form for my mom for Mother's Day.
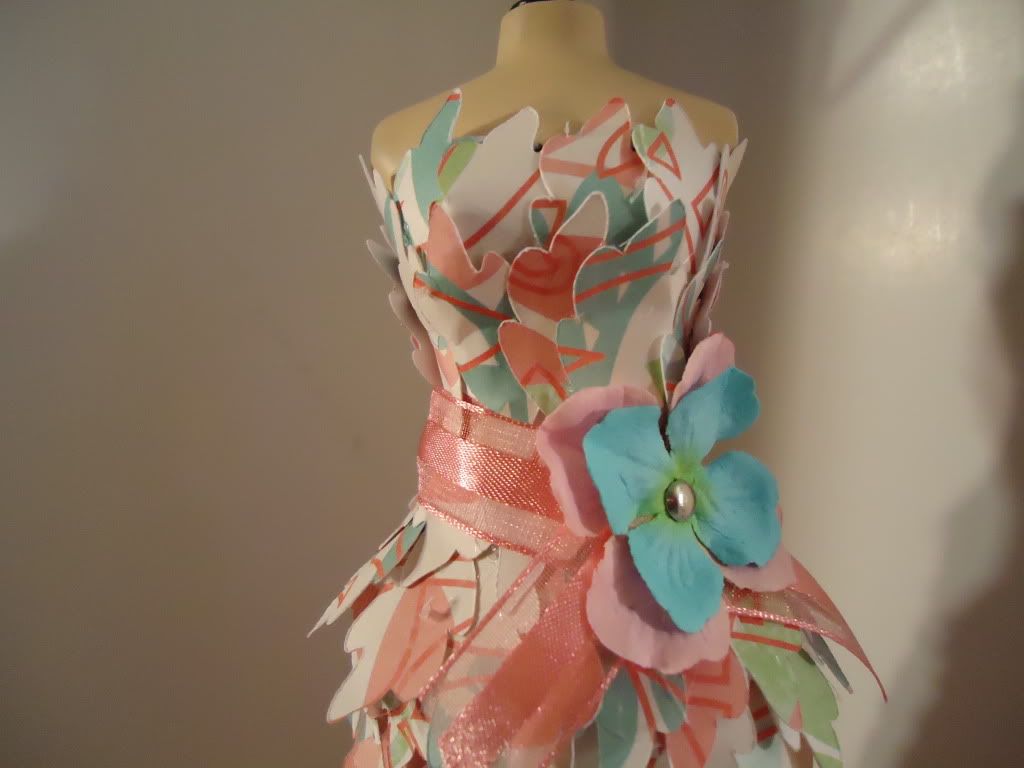
I found a form at Burlington Coat Factory. I think it is a necklace holder. And then I covered it with a dress I made from leaves. I got this idea from the DCWV both at CHA a couple of years ago.


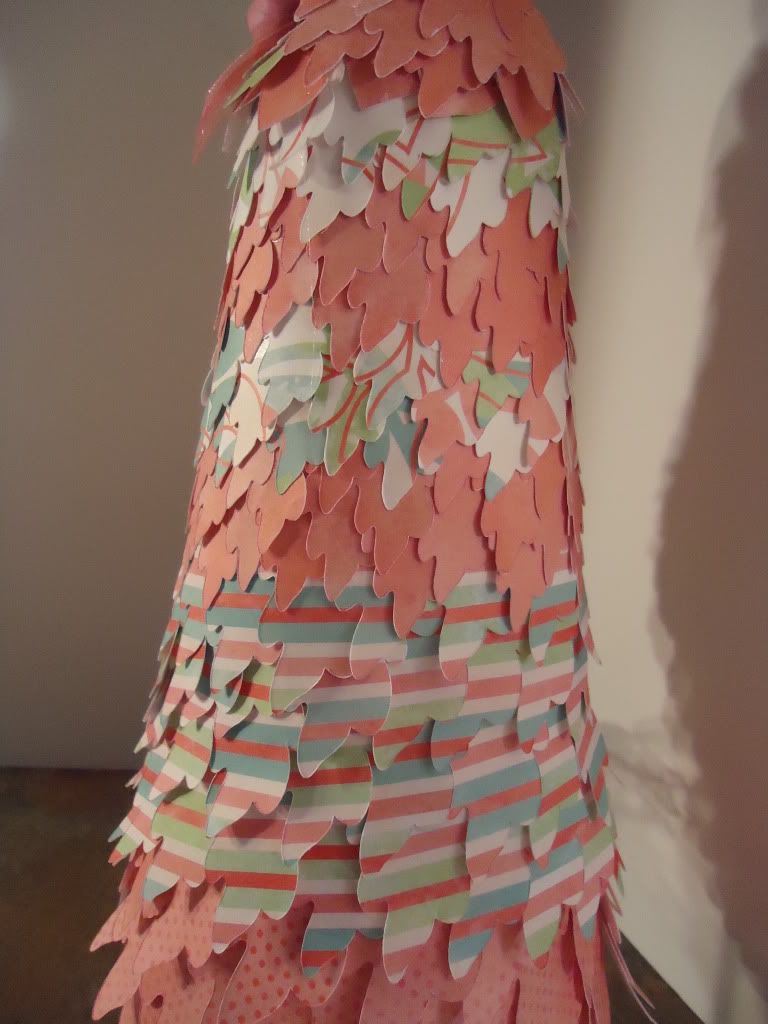
This is the back of the dress.


How to make it:
1. Pick a leaf from the Mother's Day Cartridge and what I did was on each page I used filled page with the leaves 1 at 2 inches, 1 @ 1.5" and 2 @ 1".


2. Next I took the thin piece of 8.5x8.5 paper and covered it with adhesive.

3. Take the 2" leaves and start covering/ layering them on the bottom of the paper, I did about 4 layers. Repeat with the 1.5" leaves and then with the 1" ones up to the top of the page this makes the bottom half of the dress (skirt)

4. Next take the skirt and wrap it around the wire form. I have to add some flowers to the edges of the skirt to get it to fit around the wire. Then I used the glue gun to glue the skirt together at the edges.

5. Then I used the glue gun to add more of the 1" leaves to the top of the form to make the dress top.

6. I added some bling as a necklace with my i-rock.

Here is your Challenge:
Please make a gift, card etc for the special person in your life who has influenced you. The project must have at least 2 Cricut cuts and you must post/link your project here by April 26th. We will draw a winner on April 5th when we post the next Challenge.

The winner of the March challenge is:
Maidi at http://marg0006.blogspot.com/2013/03/easter-sweets.html  please contact Becka at creationswithbecka at yahoo dot com to claim your prize. You have until April 15th. Link up your project here:

Thursday, March 14, 2013

A Birthday on Saint Patrick's Day!

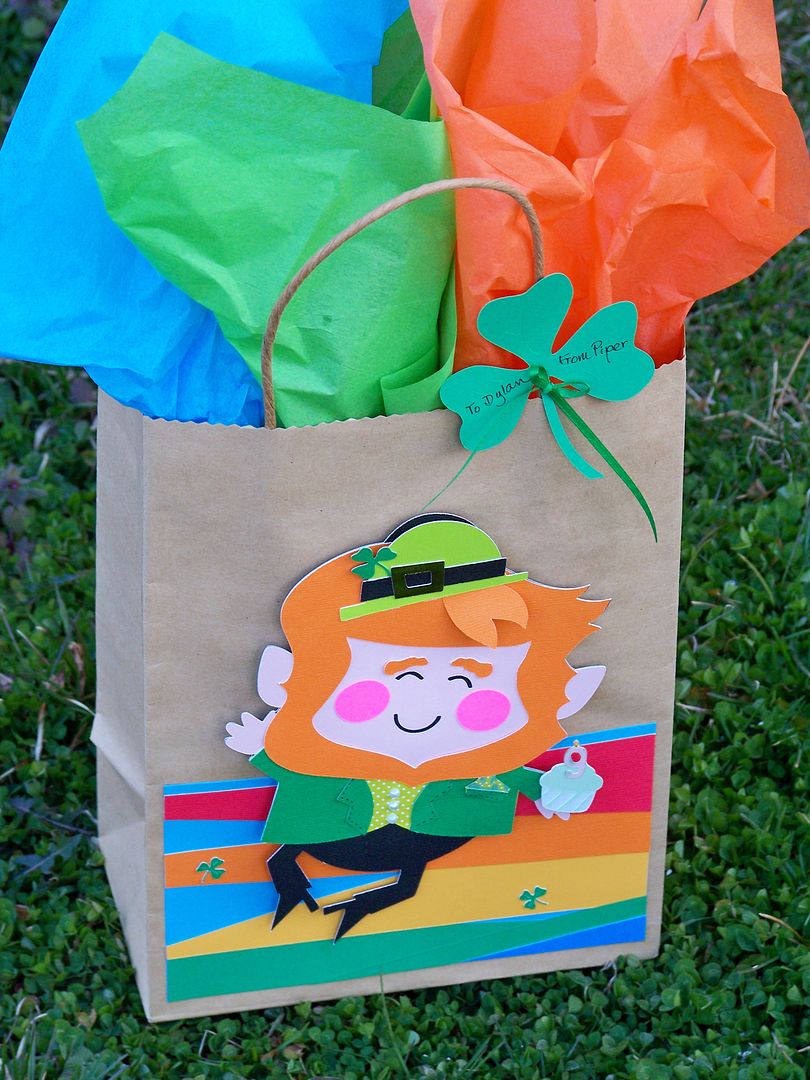
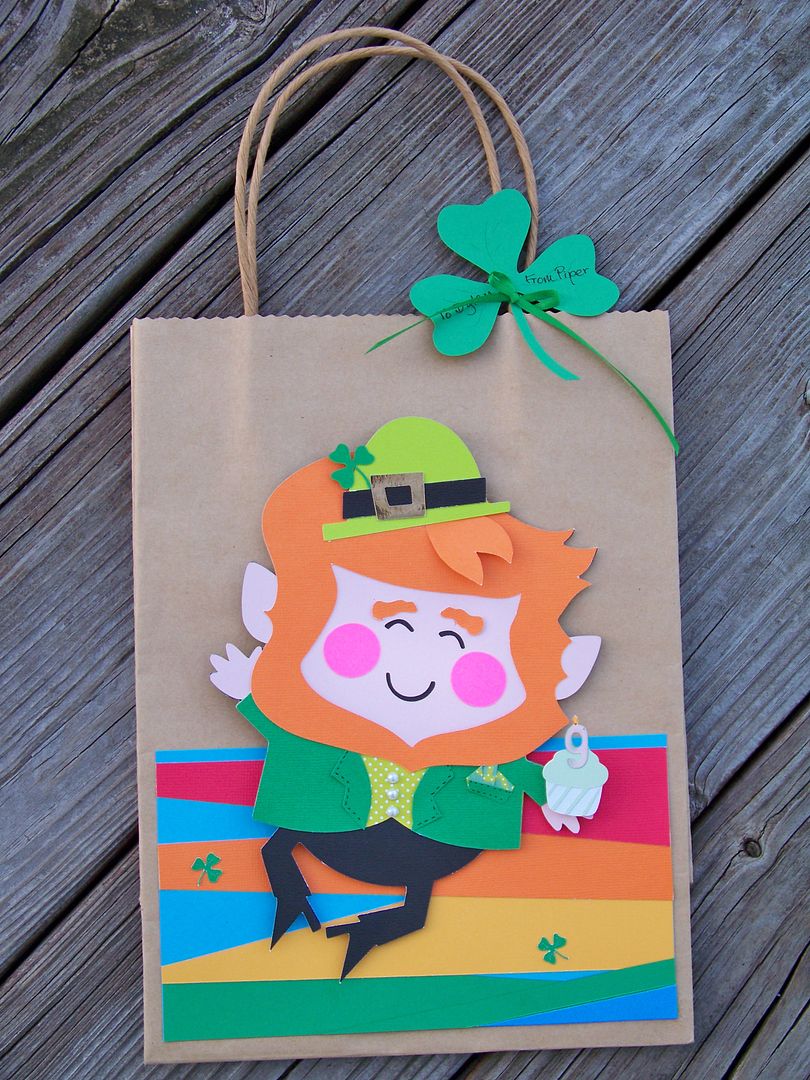
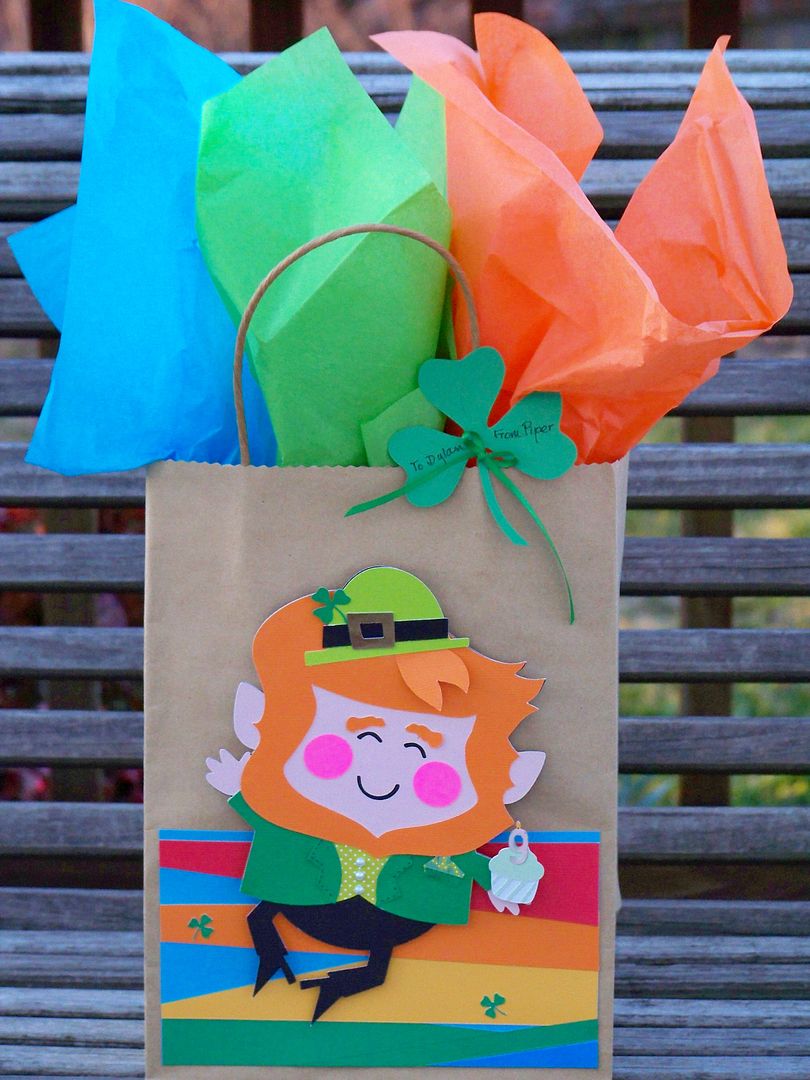
This is Nadia from my blog, With Glittering Eyes.  (If you have visited me before, please note that I have a new blog address:  www.withglitteringeyes.blogspot.com.)  Today I have a project to share that I made for one of my daughter's little BFFs.  Her birthday is on St. Patty's Day so I came up with a little gift bag for her with a birthday leprechaun.


I keep on-hand 7-1/2" x 10-1/2" kraft paper gift bags-- that was my base.  (That is the measurement minus the handles.)  I cut the jumping leprechaun from Simply Charmed (page 32) at 7".


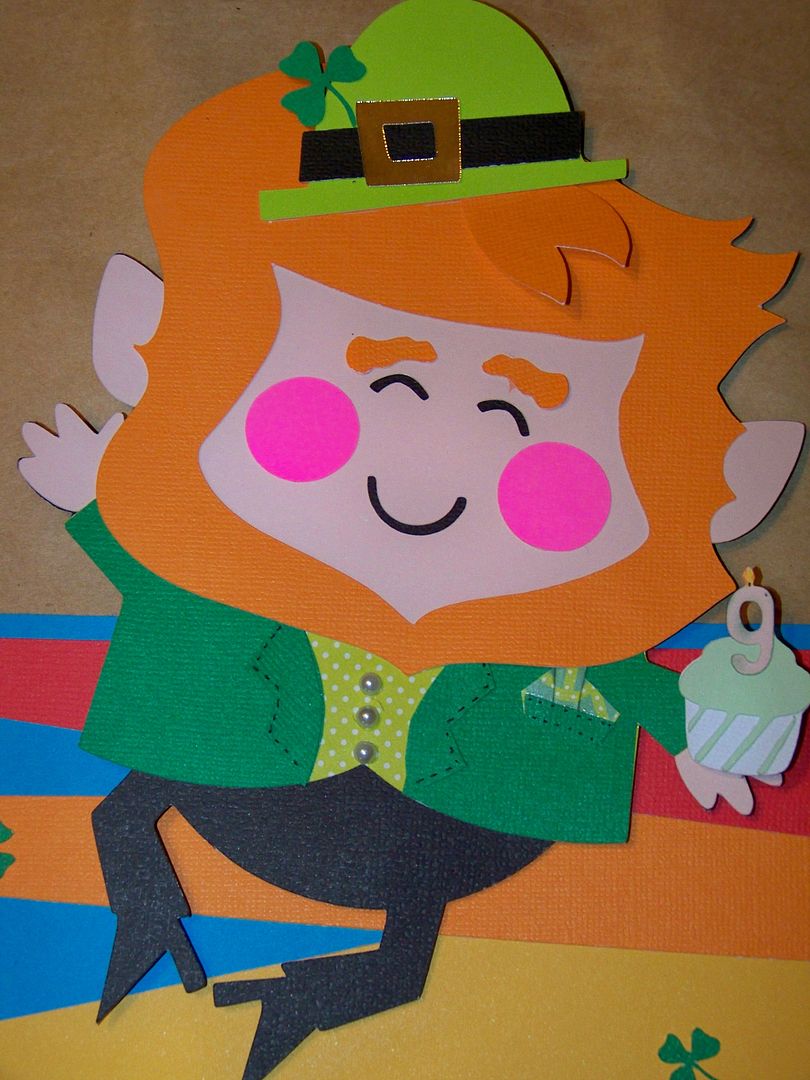
The thing with a big cut is that you kind of have to add extra details and pop up some elements to keep the die cut from flattening out.  For this little guy, I hand-cut an extra lock of hair.  I glued it flush on the 'scalp end' and popped it up with 1/8" pop dots on the 'curl end'.  I also popped up his little hat and added a shamrock to the hat band cut from A Child's Year (page 31), cut at 3/4".  I added a vest layer to his outfit but cutting two jackets and cutting one away so that I could layer them and see the second layer, like a vest.  I added adhesive pearls for vest buttons.  I hand-cut lapels for the top layer, the jacket, and added a breast pocket and pocket square.  


To make him a 'birthday' leprechaun, I cut a little cupcake from Something to Celebrate (page 22) at 1".  I only cut the first two layers since it was so tiny.  I cut a "9" candle from the same cart (page 30) at 3/4".  I hand-colored (with pencils) the flame and wick.

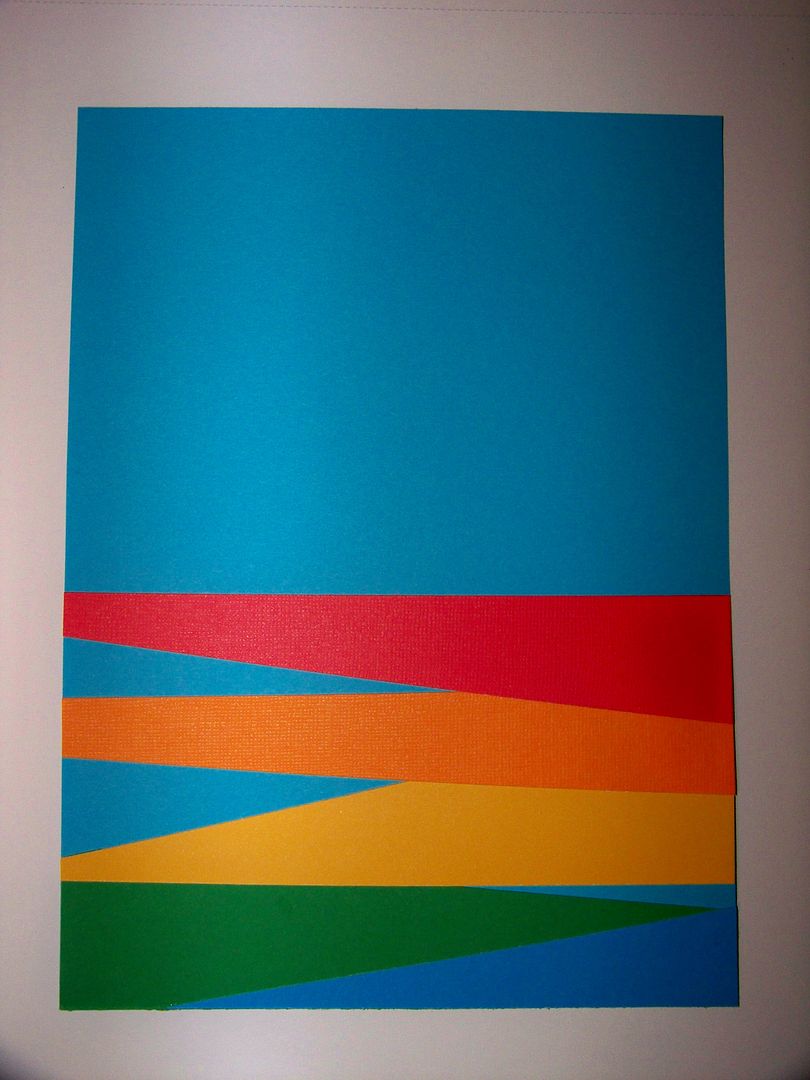
To give him a "place" to exist, I trimmer-cut rainbow-colored solids and layered them to create a ground and horizon line.  I placed a couple of tiny shamrocks, cut from A Child's Year at 1/2".


Lastly, for a tag, I cut a last shamrock, also from A Child's Year, at 3-1/4", and tied it on with 1/8" ribbon.


Lately, I have taken a little inventory of my Cricut cartridges and, as you have also probably figured out, there are many repeating icons among them!  I used to 'need' all the cartridges and came pretty close to getting them all before last autumn.  The good thing about this economy, hopefully there is a silver lining, is that many of us have gotten a chance to re-prioritize and to be more creative!  So... if you don't have the cartridges listed above, you can find shamrocks on the following cartridges that you may have:

  • Create-A-Critter 2
  • Designer's Calendar
  • Elmo and Friends Holiday
  • Give A Hoot
  • Imagine More Cards
  • Celebrate with a Flourish
  • Paper Doll Dress Up
  • Phrases 
  • Spring Fever
  • Holiday Cards
You can find leprechauns on the following cartridges that you may have:
  • CCR Exclusive:  St. Patrick's Day
  • Teddy Bear Parade
  • Paper Doll Dress Up
A cupcake image can be found on dozens of cartridges.  This is just a sampling:
  • A Child's Year
  • American Alphabet
  • Best Images of 2006 and 2009
  • Birthday Bash
  • Create-A-Critter 1 and 2
  • Storks Delivery
  • Divine Wedding
  • Doodlecharms
  • Elmo's Party
  • Every Day Paper Dolls
  • Hello Kitty Greetings... and the list goes on and on!!!!
Numbers can be found on any cartridge with font of course.

Thank you for checking my post today!  I hope you will visit my blog in the future.  You can always find my blog on Facebook at facebook.com/WithGlitteringEyesBlog and on Pinterest at pinterest.com/nadiahm/withglitteringeyes-blogspot-com-my-crafts/.  


Cricut Info & Supplies Used:
Designed By: Nadia Herbst-McConnell
Cricut Machines Used: Expression
Project Type: Gifts
Project Theme: Birthday, St. Patrick's Day
Cricut Cartridges Used:  Simply Charmed, A Child's Year, Something to Celebrate
Suppies Used: Paper, Quick Dry Glue, pop dots, adhesive pearls, microfine pen, ribbon

Thursday, February 14, 2013

Blooming Candy Boxes for Your Valentine!

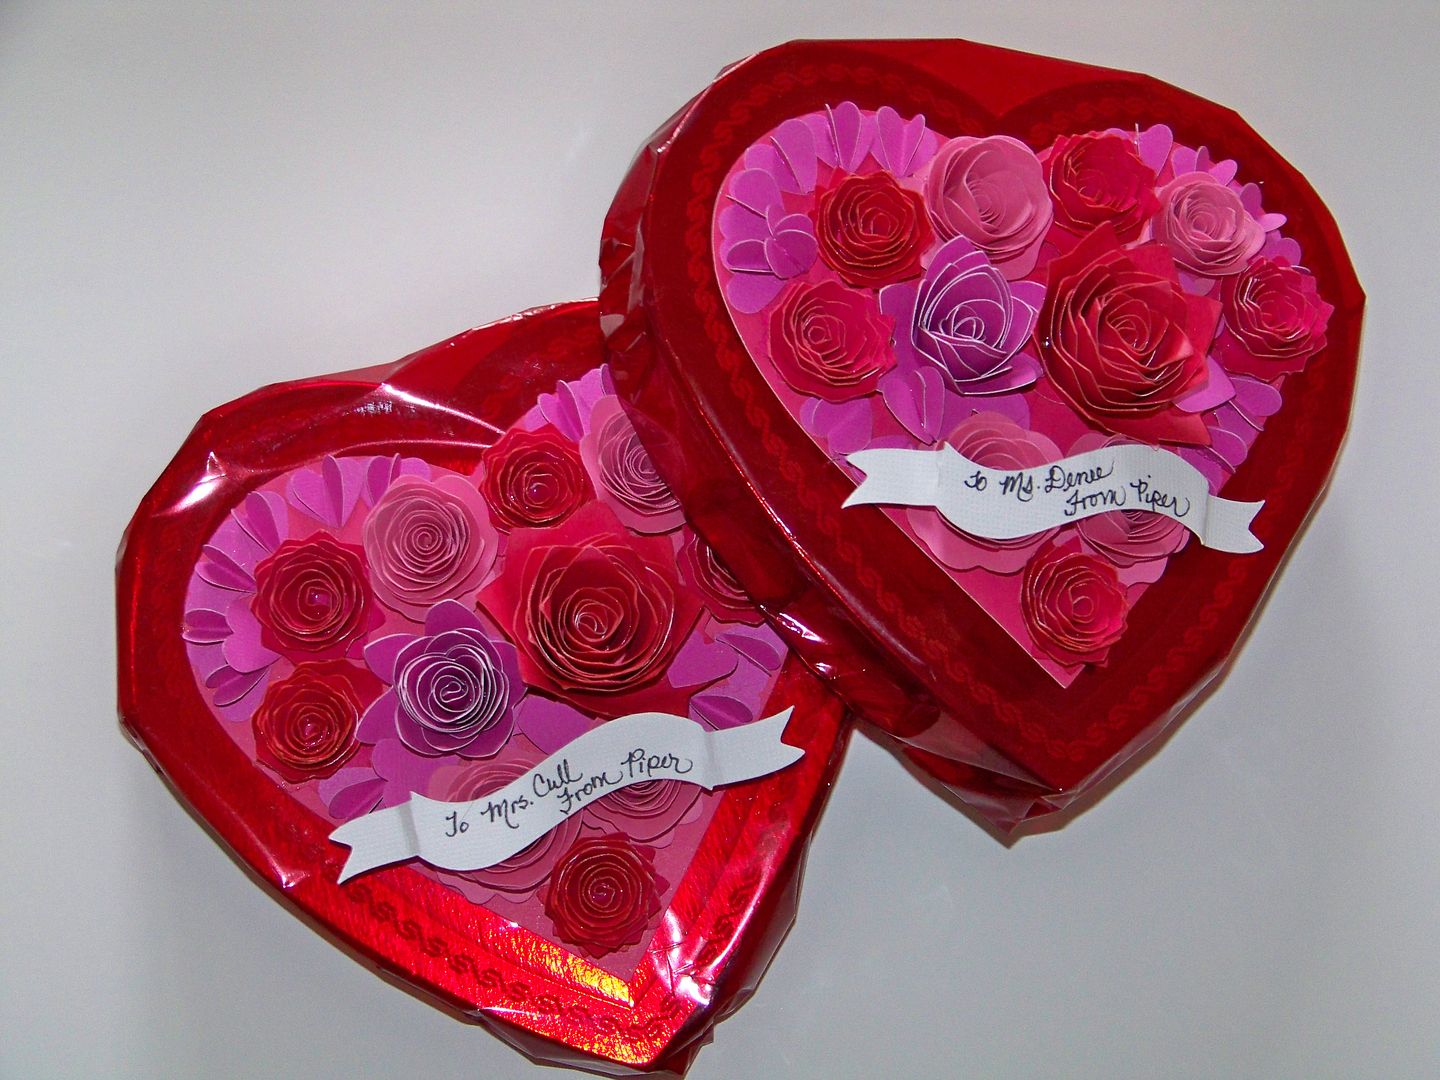
Happy Valentine's Day!  This is Nadia from my blog, With Glittering Eyes.  I picked one of my Valentine projects to share here today--a quick and easy one since today is THE BIG DAY!  I picked up a couple of little heart-shaped boxes of candy and created a dimensional tag for the tops using paper flowers, hearts, and a banner.  These are teacher gifts, but they would be fun to give to neighbors or any chocolate-lovin' friends!


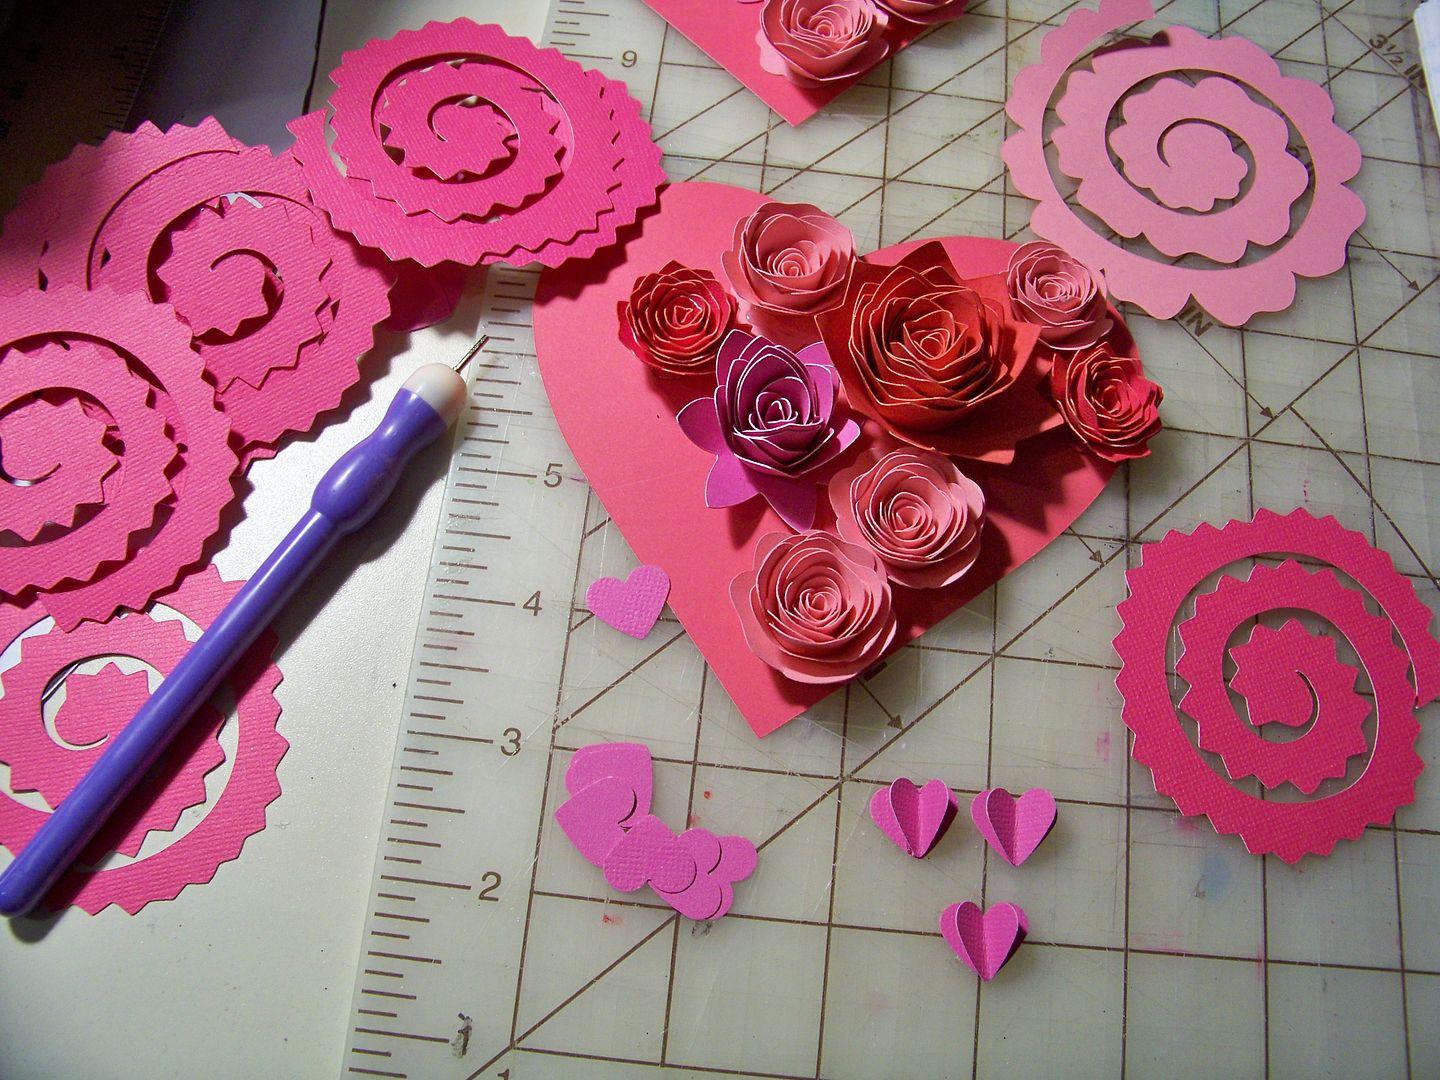
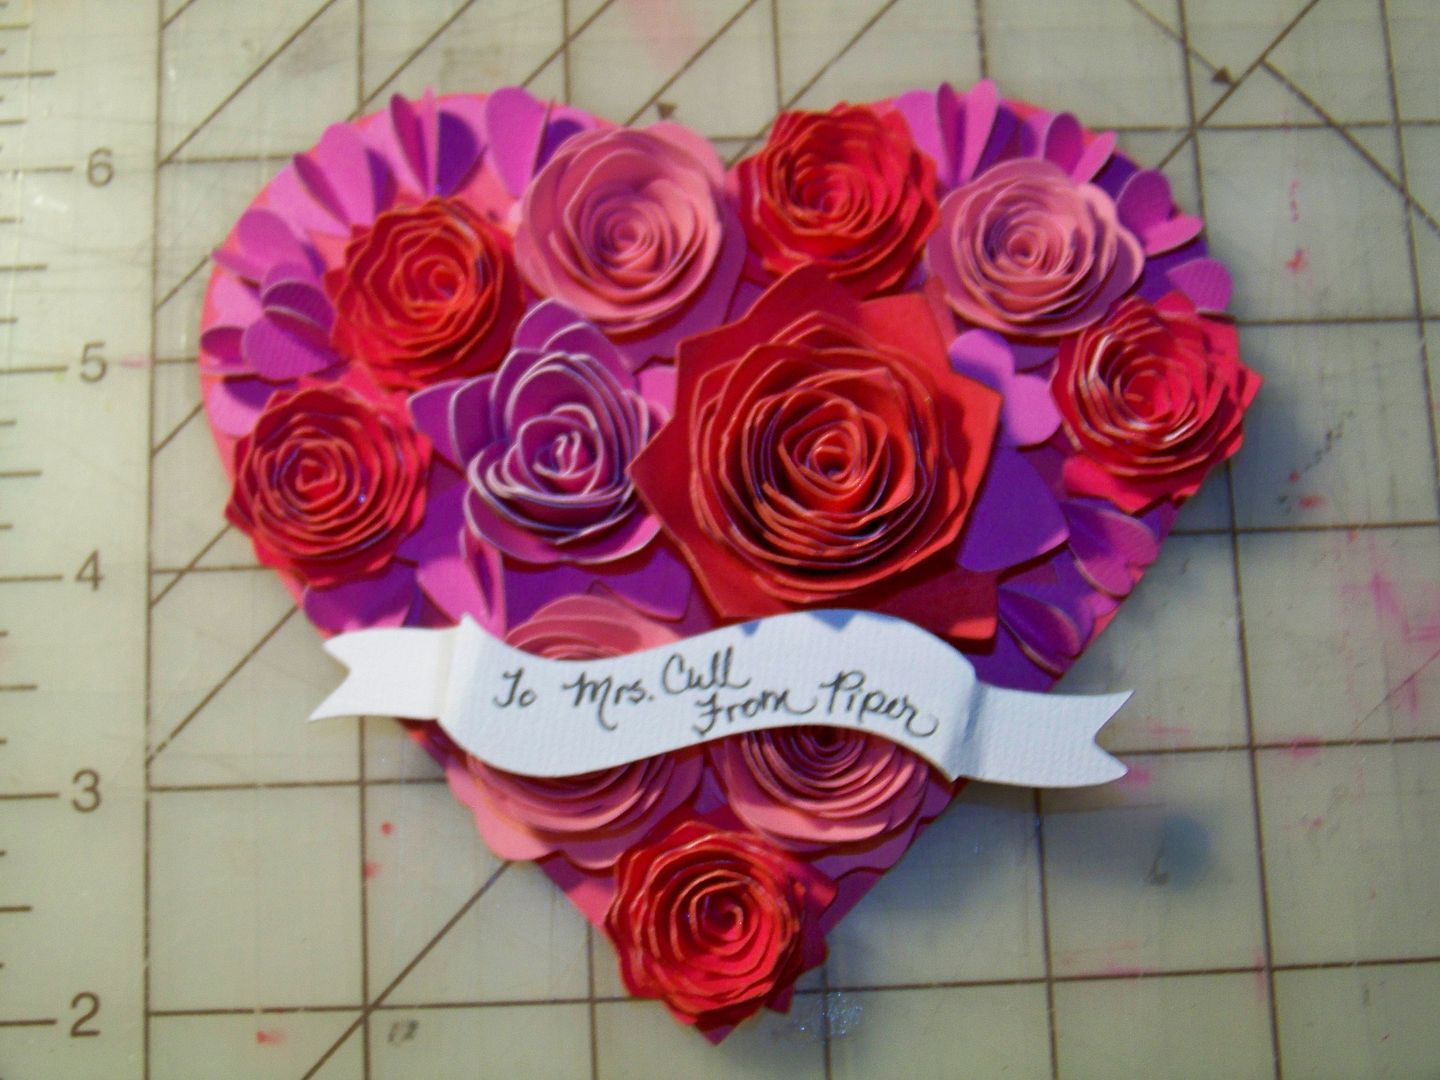
The heart-shaped base was cut from Artiste, page 51, at 4-3/4".  

The flowers were cut from Artiste, page 54, at 2-3/4" (Accent1-shift), 3-1/4" (Accent2), 4" (Accent 2-shift), and 5-3/4" (Accent1-shift).


The hearts were cut with a punch.  Some were combined to make dimensional by folding one in half and gluing to a flat one.

The banner was cut from Holiday Frames and Tags, page 48, at 1".  I bent it at the perforations to make it dimensional.  It was hot glued to the tops of the flowers.

All the flowers were hot glued to the base.  The base was attached with Terrifically Tacky double-sided tape.


Best wishes for a Happy Valentine's Day with the people you love the most!  To see my other Valentine crafts and gifts, check out my blog today!


Cricut Info & Supplies Used:
Designed By: Nadia Herbst-McConnell
Cricut Machines Used: Expression
Project Type: Gifts
Project Theme: Valentines
Cricut Cartridges Used:  Artiste, Holiday Frames and Tags
Suppies Used: Paper, hot glue

Monday, February 11, 2013

A Quick Valentine's Note and Gift

Hey everyone! It's Angie from AngiesPaperPassion with a couple of quick projects for those last minute Valentine's Day gifts. The first one is a simple note card:


I cut the cardstock at 3x6 to make this into a 3x3 card and added a 3x3 piece of patterned paper to the front. The scalloped border is from my 'old faithful' cart - Plantin Schoolbook! Even with all of the newer carts around this one still is a wonderful cart with so many great images. I cut out about 10 borders in cardstock at 0.5". I also used Accent Essentials to cut out the heart in glitter paper at 2.25". After inking the edges of the scallops, I adhered them to the card by staggering the borders, added a piece of ribbon with glue dots, and the heart with small pop dots. Once finished I decided that it needed one more thing so I punched out a tag shape and stamped a Valentine's sentiment on it and adhered it to the heart with a tiny red brad. Then I was satisfied that it was finally finished!

Next is a Tag Treat Holder:

Again, I used Plantin Schoolbook. This image is on page 71 (shift/Italic). It's one of those images that I often don't pay attention to and skip over but it makes a cute little treat holder by scoring it in the middle and folding in half. It was cut at 8" with the Fit to Length feature turned on with my Expression and scored at 3.75" and again at 4.5". I added two little hearts cut with the shift/Tall Ball feature (found on the same page) at 2.5", adhered them on to the tag, and tied it together with some twine. This would be great to give to someone with a piece of chocolate inside (think Ghirardelli chocolate squares! Yum!)

I think I will put both of these little gifts into this gift bag that was made with Plantin Schoolbook (see, I told you it was still a great cart!):

Whatever you give (and receive) this Thursday, I hope that all of you have a sweet and happy Valentine's Day! Thanks for visiting and until next time, Happy Crafting!
Angela

Info and Supplies Used
Designed By: Angela Cromwell
Project Type: Gifts
Project Theme: Valentine's
Cricut Cartridges: Plantin Schoolbook, Accent Essentials
Cricut Machines: Expression

Tuesday, October 9, 2012

Halloween Treats

Hello everyone, this is Maura aka Happy GrannyFor my grandchildren this Halloween I am making Halloween survival kits. At this point I have only 2 of the components completed.


For the Vampire Stakes package I used the French Fry Box from TBBM2 cut at 7.25 in. The Vampire is from Autumn Celebrations and is cut at 3.5 in. The scallop circles are from Cricut Essentials and are cut at 1.7 and 2 in. The center phrase I created on my computer and cut out with a 1 in Circle punch. The stakes are chocolate coated pretzel rods.
 
 
For the Silver Bullets Box I used the Matchbox from TBBM and cut it at 4 in. The Werewolf is from A Frightful Affair and is cut at 3.5 in. I added "Stickles" to his eyes to make them sparkle. The silver bullet phrase was created on my computer and cut out with a punch. I used ribbon for the  pull. I used a circle from Cricut Essentials cut at 1.5 for the moon and then trimmed it to fit into the corner then stamped and embossed it for the clouds. I will be filling it with chocolate bullets coated in silver pearl dust. 
 
Happy Halloween everyone !
 
Cricut Info and Other Supplies Used: 
Designed By:  Maura aka Happy Granny
Cricut Cartridges: TBB&M, TBB&M2, Autumn Celebrations, A Frightful Affair, Cricut Essentials
Other Supplies Used: 1 inch circle punch, stickles, ribbon, stamps, embossing powder, food items 

Thursday, October 4, 2012

Getting Ready for Christmas

Hi everyone! This is Beth from SeaSwan's Thoughts. Can you believe, Christmas is only 82 days away?  I know, we are suppose to be making Halloween things but at my house your Christmas Wish List is due the first weekend in October.  I have all ready started making gifts for friends and dds teachers.  I am giving this cup to my mom.  She drinks a lot of Kool Aid and coffee flavored drinks. 

I used the Mixed Drinks cart. and my Gypsy to design the cuts.  They are cut at about 5 inches.  I used vinyl from printonit.com.  They put together a 20 piece sample package for about $20.00.  The mocha drink has a red base with a tan dink and white whipped topping.  The very berry Kool Aid has a white base with a red drink and strawberry, and a bright yellow straw. The lemonade has a green base, yellow drink and a red straw and umbrella.  I cut all pieces from 6inch by 12 inch vinyl.  I used 1 piece each of red,  yellow, and  green 1/2 sheet of tan and white.

It's time for you to start making your own Christmas crafts!


Lovely Lemonade

 
Very Berry Kool Aid
Marvelous Mocha


Saturday, September 29, 2012

Hi everyone! 
This is Dana (DomesticatingDana over on the Cricut MB) and I’m so happy to be here with everyone.  September brought us an awesome 1st month here at the Cricut FANatics, but it also brought us back to school.  Back to school means back to homework, including nightly reading.  Need a little something to make reading a little more exciting for your kids?  I have  a fun little project that is quick and easy and makes a great little gift for readers of any age. 
 
I love to make these magnetic bookmarks- practical, easy, and super-FAST!   They cling around your page in your book so they dont fall out & you can locate your page easily.  They are great for kids especially because they don’t fall out of the book when they are tossed in and out of backpacks! Here is how I make mine:
Cut a strip of cardstock to 2.5” x 5”, and then score it at 2.5” (half) and fold.  This creates the base of the bookmark.  Use a bone folder on the crease to help it lie flat.   Cut 2 strips from an adhesive backed magnet sheet (found in the general crafting section of your local craft store) to approximately 2”L x 0.25”W each.   On the inside of the bookmark, adhere one strip along each of the short ends, lining them up so they magnetize.

 
Then decorate your bookmarks with your choice of cuts! 
 

Done! (Told you it was super-FAST!)  Fold it over the page in your book and it will stay in place.

The great thing about this project is the limitless possibilities!  You can make it any size and embellish it any way you want.   Like…
Monograms:
 

Shapes:

Holidays:
 

These make great birthday presents (to go with a book or a bookstore gift card), party favors, and even treats for your child’s classmates!
A few hints: 
  • When I am choosing my Cricut cuts, I use my Gypsy (or CCR) and place a square that is the same size as the finished bookmark on the mat and size up my cuts.  If I am using patterned paper, I want to make sure that my cut doesn’t cover all of it up.
  • To line up the magnets on the front and back pieces, I cut the magnetic strips and magnetize them together so the adhesive is on the outsides.  I remove the backing on one side only and adhere it to one of the short sides.  Once that is in place, I remove the backing from the other strip (now face up and magnetized to the other one, and fold the book mark closed.  This will line your strips up evenly.
  • I wanted to laminate one to see how it turned out, but my laminator is packed away due to some remodeling we are doing right now.  I have not tried it before, but would recommend the thinnest pouch in order to allow your bookmark to fold and stay together.  I would also recommend laminating and then adhere the magnets.
I hope that you get some inspiration from this project.  Thanks for stopping by!
 
Cricut Info & Supplies Used:
Designed by: Dana Bilson
Cricut Machine Used:  Cricut Mini
Cricut Cartridges Used: Create a Critter (apple, cut at 2”), Hello Kitty Font (monogram D, cut @ 1.5”), Life’s a Party (soccer shaped bookmark- used the card feature cut @ 2.5”), Mini Monsters (Jack-o-Lantern, cut at 1.75”) 
Other Supplies Used:  Cardstock, adhesive magnet strips (found in the general craft section of Joann’s), adhesive


Saturday, September 22, 2012

ROAR!!!!!


Hi Everyone!  This is Alex from www.cardsinthetree.blogspot.com with a card/gift card holder for a friend’s baby shower.  Her nursery is a jungle themed room for her little guy.  I love lions so this was perfect to make something I have had rolling in my head.  To start I made a miniature mock up of what I wanted.

I used some scrap papers and free hand cut some of the basic shapes and pieces for the base.


I started with one of the best animal cartridges, Create a Critter.  I really liked the lion's face but I wasn't crazy on the direction of the body for this project.


So with the help of my Gypsy I used the bottom half of the koala (also from CaC) for the legs of my lion and then just the head from the actual lion cut.  With the Gypsy I can do partial image cuts and then just make sure that what I want is in the actual cutting area of the mat.  I used scissors to cut the "margin" area that was not cut to free the images. 


The head of the lion has four layers.  The blank back that I hid the contours of the face cut in the bamboo color, another of the same cut in black, the face cut in bamboo, and the mane in gold rush.  Above are all the layers together with out any glue, ink, or embellishments.


With this being a gift card holder I wanted the tail to hold the gift card and be pulled to reveal it.  I used my grocery card to fold over a strip of paper and then with what was left of the strip I free cut a tail minus the tuft of hair part.


Above are the body pieces without any embellishing.  The top left is the tail, then the face, the front legs, the back legs with the card placement, and the back of the head.  The piece in the middle is to attach to the back legs to form the pocket for the tail and gift card.  I actually cut a third set of the koala legs and cut off the excess so it fit the card area only.


And here are the same pieces with some distress inking.  The tail tufts pictured left center are another free hand cut but just think a flamed shape.  The tail tufts and mane were also distress inked and glimmer spayed.  


This is the body glued together, the pocket attached, and the tail inserted.


With all the weight and upcoming embellishments the lion needed some help standing upright.  I made a box lid from Tags, Bags, Boxes, and More 2.  I always use some hair clips to hold things while they glue.  They are perfect for paper and ribbon because they do not have the teeth and are pretty wide.  I used some fun scissors and clipped the edges of the box and inked the outside to darken and distress it a little.  I used some green grass clippings and ink sprayed it to darken it as well (actually the green stuff is what came in the box from the Cricut Circle Year 1 welcome box).


Here He Is!!!  I cut another face with Cotton Candy paper but hide all the contours except for his little nose.  And even though the card is for a little boy I did manage to put some bling on it.  There are two black gems on his eyes.  I also used glossy accents over the black whiskers and mouth.


His head is attached with two springs so that it would wobble.  It's so stinking cute!


The back view with the card partially in.


Finally it is a card, so I lined the inside with a champagne paper to clear up all the ink marks and make it cleaner for the group to sign.  The Congrats is cut from Wild Card on plain black paper.


Cricut Info & Supplies Used:
Designed By:  Alex B.
Cricut Machine Used:  Expression 2 and Gypsy
Cricut Cartridges Used:  Create a Critter, Wild Card, and Tags, Bags, Boxes & More 2
Other Supplies Used: Close to My Heart Papers in Bamboo, Black, Cotton Candy, Pear, Champagne, and Gold Rush; Tulip Hot Set Black gems and setter; Tim Holtz distress inks in Wild Honey, Antique Linen, Scattered Straw, Mowed Lawn; Inkssentials Glossy Accents; CTMH Adhesive Springs; Tattered Angels Sunflower Glimmer Mist; and some random green basket grass. :)