While we are no longer making active post of Cricut projects on this blog as of 8/1/2013, we invite you to use it for continued die cut inspiration as we will leave the blog up for viewing. Happy Cricuting !

Wednesday, April 17, 2013

Friendship is the Sweetest Flower

Hello Everyone!
Susie Craft Happy here to share a card with you.  I love sending cards to my friends, most of which are non-crafty but excellent cooks...but then, that's a craft in itself! My card today was created using Cricut's Country Life cartridge and papers from Stampin Up.
I cut the pitcher and flowers at 3.75" using my Gypsy.  The card base is a standard A2 size card with two layering mats.  I used Stampin Up's Beautiful Wings embosslit to cut out the butterflies and used glue dots to adhere them to the card.


The stamp is from The Scrapbooking Queen's Royal Friend's stamp set.  I added a little faux stitching to the flowers for added interest. :-)

I hope you enjoyed seeing my friendship card today and will join us tomorrow for more Cricut FANatics inspiration.   Thank you for stopping by today!

Susie

Cricut Info and Supplies Used:
Designed by ~ Susie Craft Happy
Cricut Cartridge:  Country Life - Image cut at 3.75"
Machine(s):  Cricut Expression, Gypsy
Paper: Stampin Up
Stamp:  The Scrapbooking Queen-Royal Friend
Ribbon: Stampin Up
Punch:  EK Success
Embossing:  Cuttlebug, Butterflies: Stampin Up-Beautiful Wings Embosslit

Tuesday, April 16, 2013

Charmed, I'm sure!

Hello again!  Doreen from polkadotpaperprincess here to show you some of my favorite ways to use my Cricut... to make charms!

I'm just starting out with the Cricut Craft Room.  Although I wish it were offline so I never had to worry about my internet connection, I am finding that when I am home, I am trying it more and more!

I love to make charms!  I made these out of Cricut cuts from Flower Shoppe and Cricut Craft Room Basics.

The first one is cut from a regular piece of plastic.  The second one is the same leaf cut multiple times, glued together, edges inked then glaze applied over top.  The third and fourth ones are  pieces of shrink plastic.  The sparkly heart was shrank, then a thin layer of glaze added and glitter over that.  The fourth one is dipped into my melting pot full of embossing powder.  The 5th one is multiple layers of paper.  You must remember to flip the last one.  I found with this particular leaf, it is better to just flip a piece of paper and not the image.  For some reason when it flips, it cuts smaller!  The last one is a piece of shrink plastic that I colored with a sharpe and then melted with my heat gun.

There are so many different ways to make charms with our Cricuts!

Here are a couple of completed charms.

I may try to retake the photos in the day light to help you see the charms better.  IRL they look really nice and will be making their way onto some projects! 

Enjoy your Cricut for more than just cards!


Monday, April 15, 2013

Thank You Card

Hi everyone. It's Sherry from Macybella Designs. Today I want to share with you a Thank You card that I made. Some of you know that I do a yearly card drive for Arkansas Children's Hospital in memory of my daughter, Macy. Last year I collected a little over 100 cards. This year I already have well over 500 cards and they are still coming. I couldn't be more pleased! :) I want to take this event and turn it into a non profit organization or charity that I can do all the time, working with other children's hospitals as well as taking special requests. You can learn more about this event at Cards for ACH

Anyway, I want to make it a habit to send out Thank You cards to everyone that contributes to my organization. So I have started working on some Thank You cards. I'm sharing with you a simple, dressed up Cricut card today. I found this butterfly card on the CTMH Art Philosophy cartridge and knew I had to use it. I cut the card at 5" and lined behind the butterflies with some pretty floral paper from the Heidi Swapp Sugar Chic stack. One of my favorite collections ever!

Next I cut Thank You from Birthday Basics at 1" and the butterfly, also from Birthday Basics, at 3/4". I layered both of them and added them to the card. That's it. Super easy, right? So why did it take me several hours? LOL I am such a slow paper crafter!!

Sunday, April 14, 2013

Happy Spring!

This is Nadia, from my blog, With Glittering Eyes.  


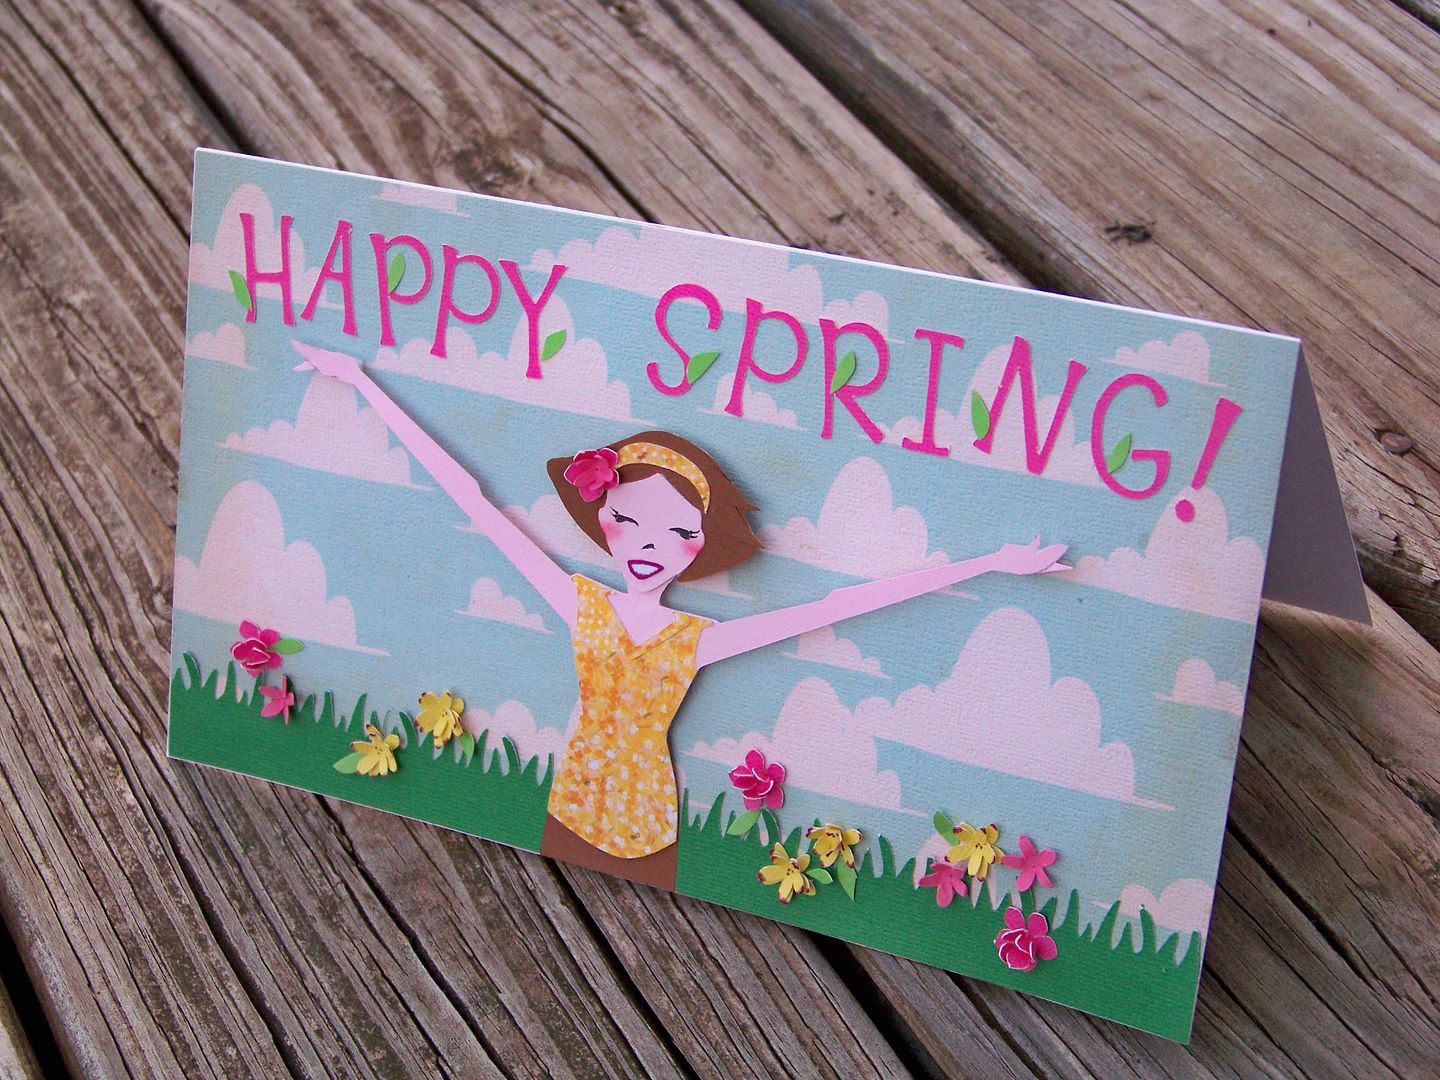
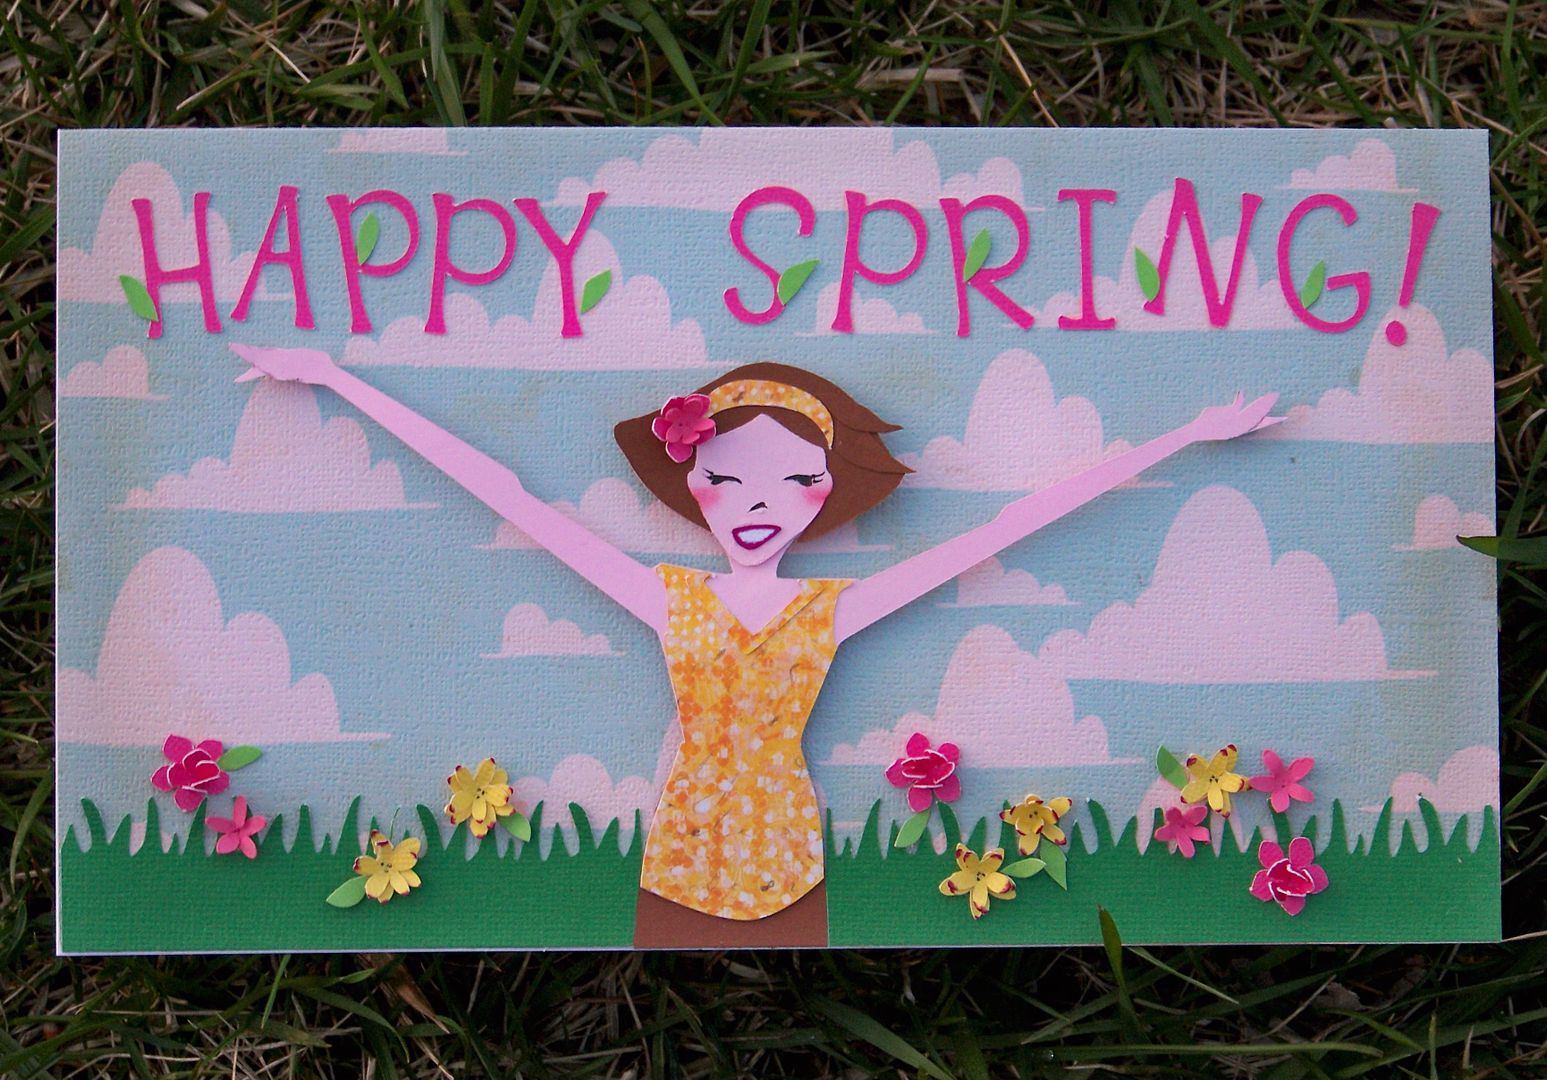
Finally, the snow and cold are gone (I hope!!) and the flowers are in bloom around here!  The day I made this card, it was 81° (ok, a little warmer than spring-like temps, but welcome nonetheless) and all the ornamental pear trees in my neighborhood bloomed all at once on that day!  The sky was blue and the breeze was perfect.  Between my errands and walks, I was stuck in the office... but I stole away a bit of time in my crafty space to make a quick card for a friend.

For this card, I started with the cheerleader image on Cricut cartridge All Sports and cut it at 6" on my Expression.  I cut away her legs and pompoms.


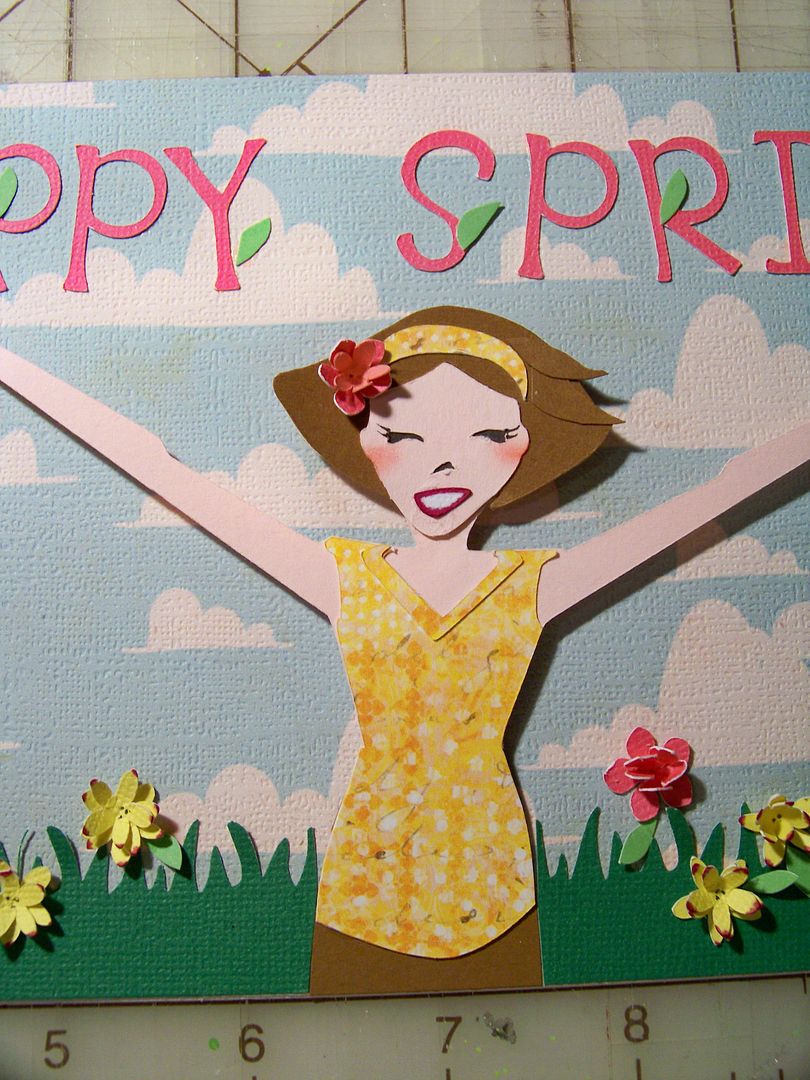
I trimmed down her hair and hand-cut a couple of extra locks.  I cut  an extra "hair do" from flesh colored paper, and created an extra face from the waste, backed it in black and added a little hand-drawn detail to her eyelashes, instead of trying to glue on those teeny, tiny features!  Doing this, she also gained a chin and her head tilt changed.


That GINORMOUS mouth was cut from the cartridge at the 6" relative size (like the body) but my 9-year-old daughter told me it was ridiculous.  Kids tell you honestly what you already know!  I peeled that crazy, big ole mouth off and re-cut only the white layer at 5-1/2" relative size and edged it with hot pink marker.


Much better, don't you think?  I added the collar detail from the cartridge cut and hand-cut a skirt.

The background was printed from the Imagine cartridge Best Friends.  I trimmed it to 5-1/8" x 9".  The figure was popped up on all edges except for the bottom which was adhered flush to the page.

The text was cut from Alphalicious at 1".  The flowers were cut from Mother's Day Bouquet at 1/2" using keys #5 and #27 and layered for dimension.  The grass was edge-punch-cut and the leaves were hand-cut.


Thank you for checking my post today.

I hope you are having a bit of spring wherever you are today!

To see many of my previous paper projects, check out My Project Gallery (click here) on my blog.

With Glittering Eyes is on Facebook (click here
and on Pinterest (click here)!  
Of course, you can always find me at withglitteringeyes.blogspot.com!


Cricut Info & Supplies Used:
Designed By: Nadia Herbst-McConnell
Cricut Machines Used: Expression
Project Type: Cards
Project Theme: Spring
Cricut Cartridges Used:  All Sports, Best Friends, Alphalicious, Mother's Day Bouquet
Suppies Used: Paper, Quick Dry Glue, pop dots, edger punch, microfine pen, ink, scissors


Thursday, April 11, 2013

Birthday Invitation

Ladies - Here is Maura's project for April that she sent me to post.  Unfortunately I have been very sick and was unable to get it posted earlier.  Please enjoy it today.  It is really cute !
 
 
Hello and happy spring everyone. Maura here with a birthday invitation that I created for my granddaughter.

 I used the cricut craft room to weld and cut the strawberry and all it's layers from the "Preserves" cartridge at 6 inches. With the red layer I used craft room basics to create the window frame for Straberry Shortcake by placing one circle inside the other with the outside circle at 1.5 inches.

The red layer I ran through my "Cuttlebug" using the Swiss dots folder I then used Tim Holtz walnut distress ink to ink up the edges and the raised dots. I found the Strawberry Shortcake image on line and then just cut it to fit the window.
 
For the inside I printed all the info using my computer and then used a negative cut of the strawberry front sized just a quarter inch smaller to place the info inside just how I wanted it and cut it out by hand.
 
I had to make the envelopes which was a new experience for me. Lol. I thought they would fit an A2 size but was mistaken. To seal the flap once again I found the image on line and the just used punches for the layers and glue dots to seal them.
 
 
Next my daughter wanted some bags for all the goodies that the kids would collect from the piñata.
 
For the bags I cut the strawberry at 5 inches wound a little twine and added a place for each child's name using a ticket punch.
 
 
For the flap on the back I used a Martha Stewart border punch and cut circles at 1 in and 1.5 inches from craft room basics, then used a stamp for the treats sentiment and inked and layered them together. To keep the bags closed I used small Velcro circles.
 
I am also working on a banner that I would have liked to share but it is not quite completed. Hope everyone has a great month.   Maura
 
Cricut Info & Other Supplies
Designed by:  Maura
Cricut Info : Preserves, Cuttlebug, CCR
Other Info: Paper bags, cardstock, velcro, border bunch, twin, ink


Mother's Day Card

Hey everyone! It's Angie from Angie's Paper Passion with my monthly post. 
Here's my problem - I procrastinate! Second, I have started taking of my soon-to-be 3 month old Grandson and although I am oh so happy that I can be with my baby all day, everyday, it really doesn't leave me a whole lotta time to create. Plus, I'm a procrastinator, did I mention that? So for these reasons, if I'm going to send any cards out this year, I need to start NOW and make it simple on myself. (Also, by the time my turn comes up again here at Cricut FANatics, it will be one day before Mother's Day so...
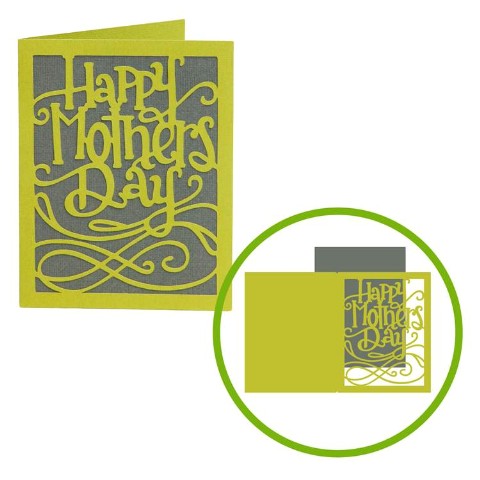
So I went to Cricut.com to see what my "simple" options were. I had been looking at the Craft Room Exclusives like the sets of single Mother's Day cards and I found one that I really liked:

So I bought it - cut two pieces - glue!!! Easy peasy! Plus it was 1.99 and now with the sale going on it is 1.69 (If you're a Cricut Circle member, you get an addition 10% off). No need to wait for it to be mailed to you - it will be in you Cricut Craft Room the next time you open it! Again, really simple!
I used paper from K&Company for the card and cut it a 5.5".

I just wanted to show you up close how detailed those cuts are. 
All the cuts were nice and smooth for being so detailed
. But I still needed something extra on that card. I thought about it for a long time and finally can up with this (you know how I love my flowers and my bling! LOL!

And there they are! The flowers were cut on the Cricut with the CTMH Artiste cart at 3.25' and 4'. I used some seam binding that I had dyed myself with Distress Ink in Peeled Paint. Then I added some branches from a Martha Stewart hand punch and the bling is from Colorbok.
A Close Up of my rolled flowers, ribbon, and punched leaves.

Okay, so even though I did add a few things, I think it a perfect card for a special Mom! And they won't take long to make. In the Cricut Craft Room make the card base as many times as you need. The next time that you have a few minutes, cut out the flowers with the Cricut and punch some leaves with a punch (or even make those with the Cricut, too). The roses can be rolled one evening while watching T.V. I use Scotch Quick Acting Glue or Glossy Accents and they both work great and they DO DRY FAST! Then all you would need to do is put them all together - assembly line style! In no time at all you will have a stack of cards just waiting to be mailed. I just wanted to share that you can take a simple card from CCR and make it extraordinary all for only a couple of bucks. But they won't look like it! 

Thanks for dropping by! Until next time, Happy Crafting,

Signature


Cricut Info & Supplies Used:
Designed By: Angela Cromwell
Cricut Machines Used: Expression
Project Type: Card
Project Theme: Mother's Day
Cricut Cartridges Used:  Artiste, Craft Room Exclusive - Mother's Day Card #6

Monday, April 8, 2013

Bunny Cards and Tags

Hi Everyone.  This is Erika from http://ekittyscraps.blogspot.com/.  I am so happy to be here today and share my projects with you.  First up is the bunny card-Peter Cottontail and his Easter Basket.


                             Here are the items I added to the card.


 First I cut my Weathered Wood distress cardstock into 4 x 6 sheets.  Next I used my swirls embossing folder and my Cuttlebug.  I added the Weathered Wood swirl paper to my card and then layered with the TH Seasonal Cardstock-Easter. 
 I used my Paper Doll Dress Up cartridge to cut out the grass on Peeled Paint Distress Cardstock and adhered to my card.
I used my rabbit stamp from Stampers Anonymous and heat embossed the image.  I fussy cut out the rabbits and colored with Distress Ink pens.  I added small pieces of cotton balls for the cotton tails and adhered with glossy accents.  I used popdots and added my rabbit to the card.
 I used the easter basket stamp from Studio G (a $1 stamp-love them) and also fussy cut and colored with Distress Ink Pens.I added glossy accents and stickles to the easter basket since they looked kind of flat or dull compared to the embossed  glittery rabbits.  I added popdots to back of the easter baskets and added to my card.  I used Vintage Photo distress Ink to outline each card.
Here are a few of the finished Bunny cards. 


Next up are the tags I created for my Easter bags.  I used both sides of the Reminisce papers.  This paper had light blue polka dots on one side which is the background paper of this tag and the bunny designs on this other side.  It also had the purple bunny and chicks border on it that I used on the bottom of the tags.  I almost missed this cute border because it was only on the backside of the paper.  I used my Artiste cartridge to cut out the names at .75 inches for 5 letter names and at 1 inch for four letter names on blue cardstock. I added a final blue ribbon to each of the guys' tags and outlined with Vintage Photo distress ink.

The girls' tags were also made from another  Easter Reminisce paper which had pink polka dots on one side with a pink and green striped border on the back.  I used the border on the top and bottom of each tag.  I used my Quarter Note Cartridge for the fancy font names.  I cut these at .75 inches for five/six letter names and 1 inch for the three letter name on fuschia cardstock. I added a orange ribbon to match their Easter bag and used Vintage Photo distress ink to outline the tag.  These tags were so easy to make since I only had to cut out the paper and names and adhere with Scotch Quickdry Adhesive.   
 Here are the Easter bags with their bunny paper tags. I purchased these cute bags from Joann's for $3.99 for 8.  Perfect for Easter but with a different paper could be used for any spring time event.
 Thanks for stopping by and have a good month!

Supplies Used:
Cricut Expression Machine
Cuttlebug
Artiste Cartridge
Paper Doll Dress Up Cartridge
Quarter Note Cartridge
Cuttlebug D'Vine Swirls Embossing Folder
Core'dinations Cardmaker Series Pearls-Pearly White cardstock for stamping on
Inkssentails #8 Manilla Tags
Stampers Anonymous-Rabbit from Spring Sprung Collection
Stampendous Marcasite Opaque embossing powder
Studio G Easter basket stamp-2012
Ribbon-blue and orange
Tim Holtz Idea-ology Paper Stash Seasonal -Easter
Tim Holtz Distress Collection Paper-Weathered Wood and Peeled Paint
Reminisce Papers-Bunny Collage
Blue and Fuschia Cardstock
Tim Holtz Distress Ink Pens-various
Tim Holtz Distress Ink-Vintage Photo


Sunday, April 7, 2013

Altered Silverware/Dragonfly

Hello to all of the wonderful Cricut FANatics who come here for inspiration, new projects, to check up on friends and make new ones   Designer Melody here, AKA KauaiMelody on the boards and CricutMelody on my blog.  I am so ready to share with you today.  I would never have done this, were it not for a wonderful swap I found on the Swap Forum.  I will show you what I made and also what I received.


I thought it would be hard to bend silverware, and so I think I unconsciously avoided doing these.  But with simple jewelry tools, you can easily bend the prongs of a fork, and turn it into something fabulous.  I made a dragonfly, one of my favs.

Materials:
chain
Fork
bling/beads
glue gun
jewelry tools
copic markers to color bling
cuttlebug heart from provocraft die

I rolled the antennae by letting 2 prongs in the middle break off, and bent the two outside ones down for legs . I added a chain with a little Cuttlebugged heart.  This was so easy I could hardly believe it.  You can experiment with different bends and visit YouTube for altered silverware videos.  I am taking pictures with my Canon 7D and a Macro lens. Hope you enjoy.


Photo Gallery


Above is the card I sent to my Swap Partner with her dragonfly fork.
 
And speaking of Swap partners, this is what I received - an altered spoon, with handles incorporated into a necklace , with matching earrings on a wonderful tag, and a beautiful card.


So grab your silverware and turn it into something creatively unique and simply marvelous.
I will respond to all of your comments if you have any questions or just want to say hi.


Joyful Crafting Always,
 
Melody 


Saturday, April 6, 2013

Basketball Birthday

Hello!  I am Michele Green from www.michelegreen.com, here today to share a birthday card with you.  We have a basketball fanatic in our family who just celebrated a birthday.


The basketball hoop is from the All Sports cart at 3".


The inside was printed from my computer. 

I hope you enjoy this boy birthday card!


Cricut Info & Supplies Used
Designer: Michele Green

Machines Used: Expression

Cartridges Used: All Sports

Other Supplies: Cardstock, adhesive, pop dots, printer, birthday stamp

Friday, April 5, 2013

Cricut Crafty Challenge #7- Mother's Day

Hi Everyone,
Welcome to the Cricut Crafty Challenge for April! This month's challenge is to make a gift for Mother's Day or a special person in your life.

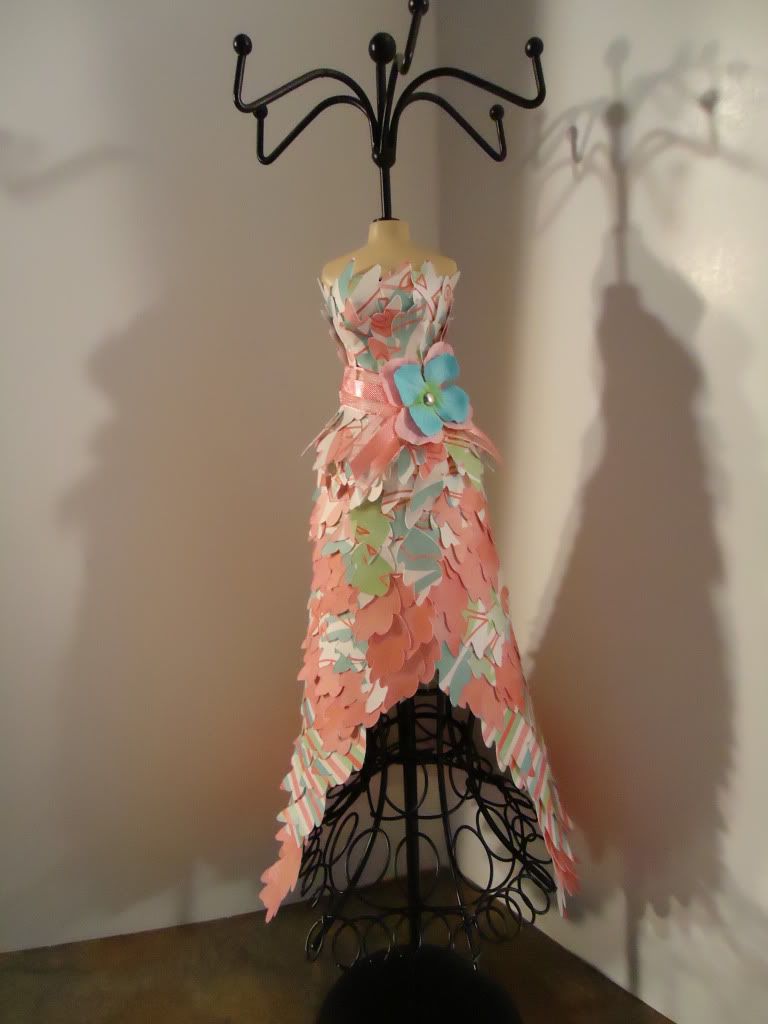
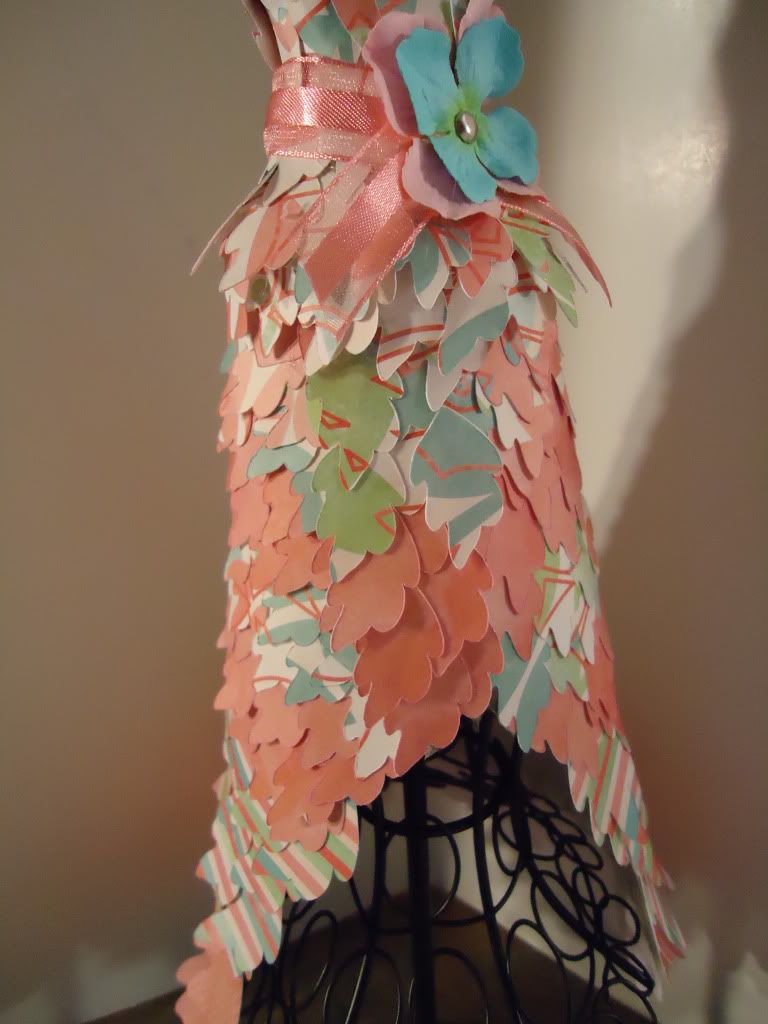
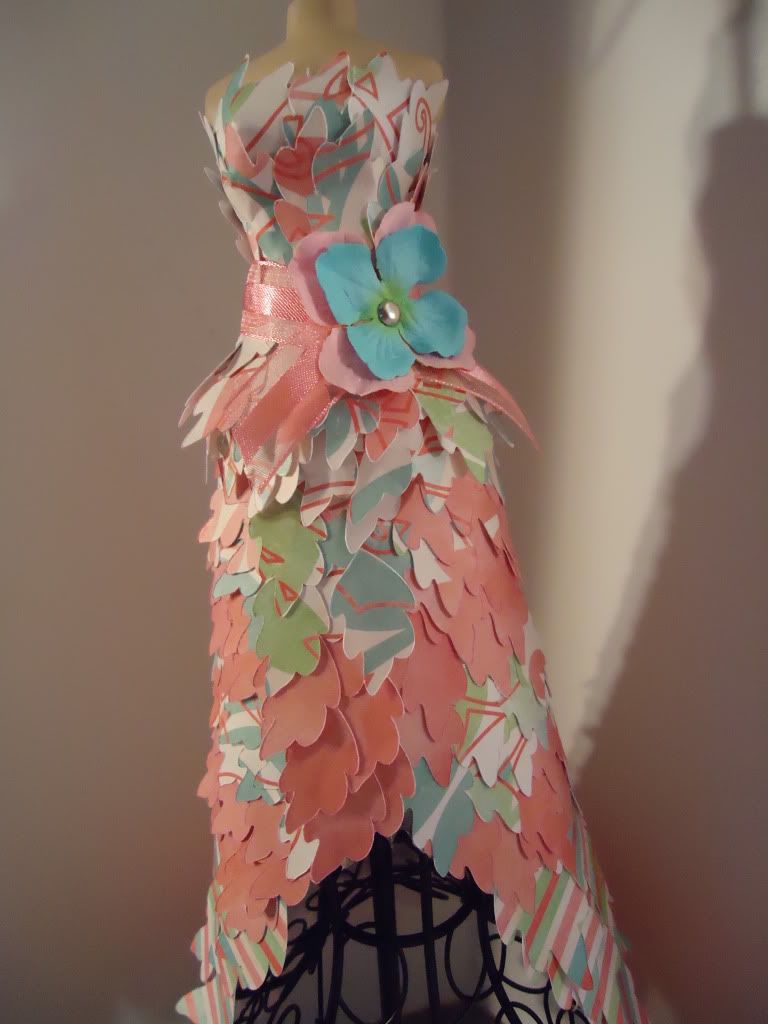
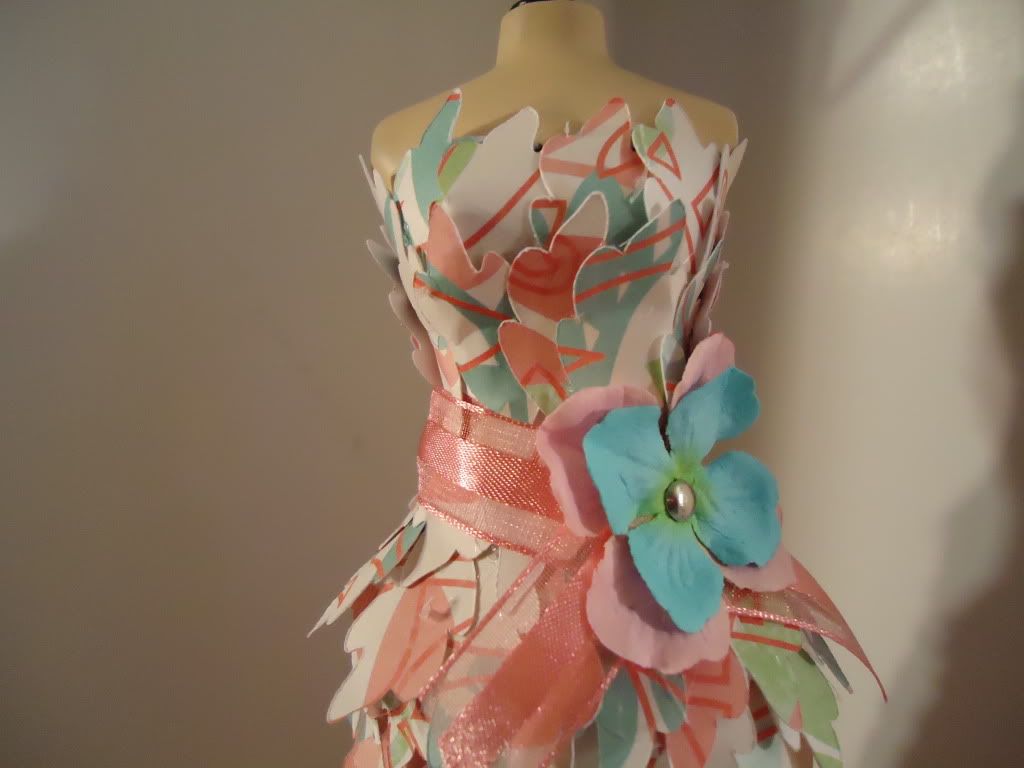
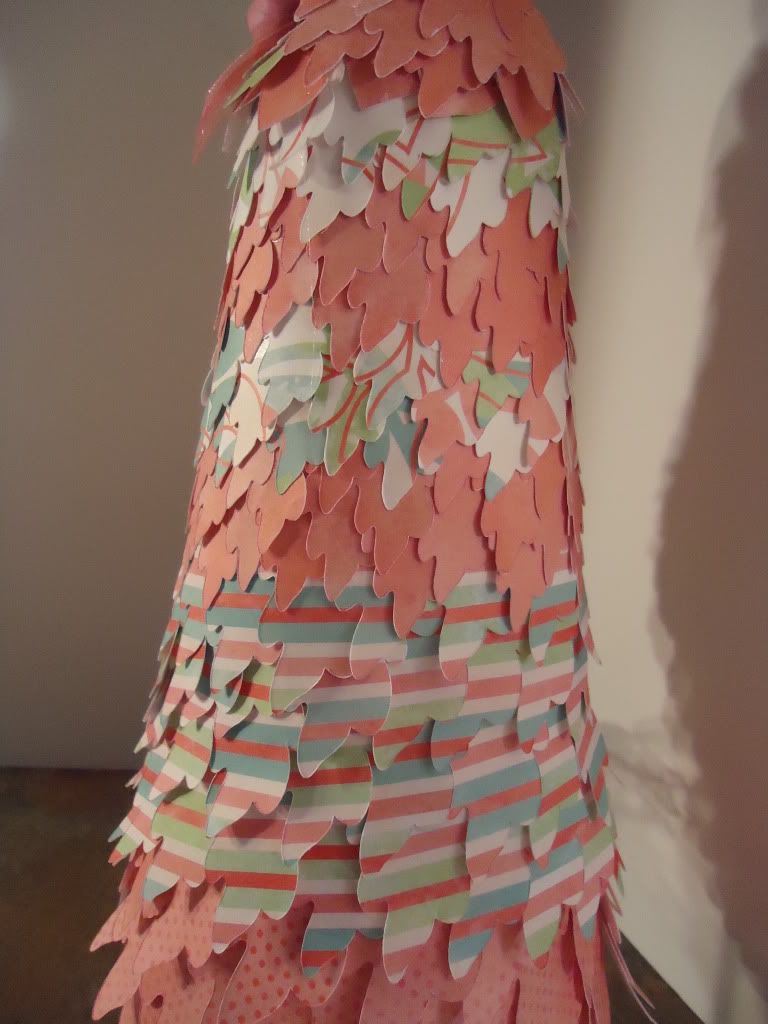
 I made this dress form for my mom for Mother's Day.
I found a form at Burlington Coat Factory. I think it is a necklace holder. And then I covered it with a dress I made from leaves. I got this idea from the DCWV both at CHA a couple of years ago.


This is the back of the dress.


How to make it:
1. Pick a leaf from the Mother's Day Cartridge and what I did was on each page I used filled page with the leaves 1 at 2 inches, 1 @ 1.5" and 2 @ 1".


2. Next I took the thin piece of 8.5x8.5 paper and covered it with adhesive.

3. Take the 2" leaves and start covering/ layering them on the bottom of the paper, I did about 4 layers. Repeat with the 1.5" leaves and then with the 1" ones up to the top of the page this makes the bottom half of the dress (skirt)

4. Next take the skirt and wrap it around the wire form. I have to add some flowers to the edges of the skirt to get it to fit around the wire. Then I used the glue gun to glue the skirt together at the edges.

5. Then I used the glue gun to add more of the 1" leaves to the top of the form to make the dress top.

6. I added some bling as a necklace with my i-rock.

Here is your Challenge:
Please make a gift, card etc for the special person in your life who has influenced you. The project must have at least 2 Cricut cuts and you must post/link your project here by April 26th. We will draw a winner on April 5th when we post the next Challenge.

The winner of the March challenge is:
Maidi at http://marg0006.blogspot.com/2013/03/easter-sweets.html  please contact Becka at creationswithbecka at yahoo dot com to claim your prize. You have until April 15th. Link up your project here: