Here is the one I made this week. I wanted to add a little Asian Pizzaz to my wall fixture.
I painted the switch cover gold and traced the front side down onto designer paper. ( I used Modge Podge to glue it down and give it a sheen that looks like it's part of the plastic).
I used Martha Stewart's Specialty Finish on the Gold.
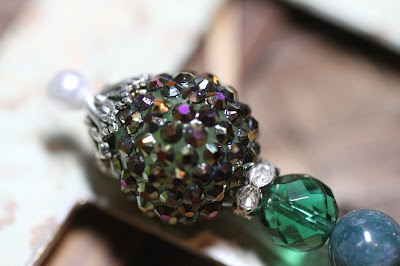
This is a detail of the stickpins I added down the center.
Another look at the lovely beads I received from my stickpin swap buddy Evelyn.
I blinged up some Chinese Coins I received from Gail as a fun little gift. I so enjoy incorporating embellishments from our talented crafters on the Cricut Boards. (Sorry Michael's, but you gotta admit, these are a little less commercial and have a whole lot more soul)
I included a Tim Holtz clasp on the lower right side. I tucked the chain under the coin as I hot glued them down together.
This would be a could place to add a Cricut die cut or Cuttlebugged imagel The chain hangs down away from the switch, and shouldn't see much action. I am going to leave it plain for now, as it is pretty blinged up and my muse is telling me to stop. Maybe your muse will say, "Go for It".
If you have any questions, leave one in the comment section, and I will answer there. Love hearing from my fellow/lady crafters.
Joyful Crafting Always,
Melody
Designer: Melody
Materials: light switch cover, glue gun, gold paint, modge podge, designer paper, bling,Tim Holtz Clasp, pencil, ruler
Machines : Optional/ Cuttlebug or Cricut Expression2 (If you add an image to TH metal "base"


Wowsers!! This is fantastic! Also, you photography skills are really awesome in this post!
ReplyDeleteMichelle, you really made my day. I have been working hard on learning how to use my new camera. It is a Canon 7D and I have been experimenting with the Macro Lens. Are you a photographer? So pleased you enjoyed the photographs. Thank you for stopping by and sending some love.
ReplyDeleteWhat a fantastic idea!!! I don't think I will look at a light cover in the same way ever again! Will definately try this one! Thanks for sharing!!1
ReplyDeleteJulie
Julie, these are easy and enjoyable to make and you can coordinate themes and colors in a snap. Hope you make one for your home décor as well. Glad you stopped by and shared. :)
ReplyDeleteWhat a great idea! I love altered projects. I really like how you added the stick pin and the TH clip to have items hanging from the light switch. I may have to try this! TFS.
ReplyDeleteThat is just adorable! I love to alter things around the house, too. TFS!
ReplyDeleteWhat a beautiful project...may have to replace that washi tape covering I have on mine.
ReplyDelete