
Hello everyone! Doreen here from Polkadotpaperprincess.blogspot.com. Hope you are having a spooktacular October!
I have made a Halloween mini for you from one folded piece of 12x12 paper!
Here is the front of the book.

The tag is made from Chic & Scary and the Rosette is made from Ribbons and Rosettes.
Here are the inside pages. The side without the embellishments were left plain to allow placement for pictures. I intentionally made it look rough to add the the "spookiness".


There is lots of glitter and washi tape applied to the album. I also love the ribbon flowers!!!

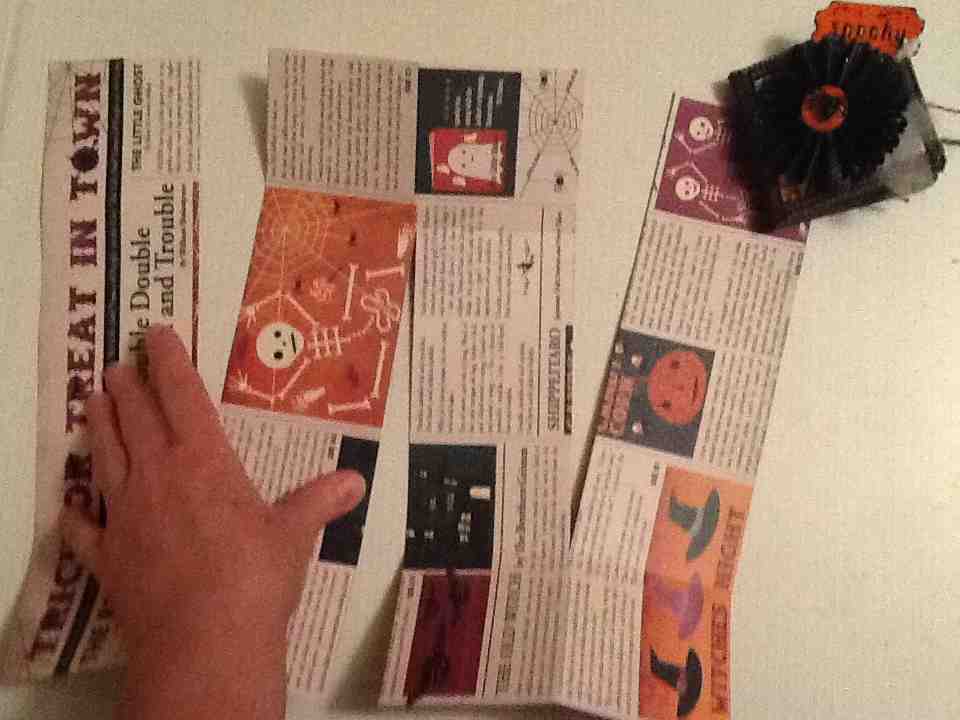
The image on this page would have been upside down. So to avoid that look, I painted it with white paint, then orange. The circle is a large rub-on to which I added a black ribbon flower. I also added a matt to the opposite page. The black "spot" is the flower. I couldn't get it to photo better. It looks a little spooky! See the cute little kitty bling in the corner!

This back page has a chipboard sticker added to it.
Here are the tags for the inside. They are made from Wrap it Up! The kitty on the fence is a stamp I added to the tag. I think it's a Technique Tuesday stamp.

Here's how the album was made:
If I have not made the directions clear enough, let me know. I can easily do a short video or answer questions!
Score at 3, 6 and 9 inches from the top to the bottom of the 12x12 piece of paper.

Rotate paper 90 degrees and score again at 3, 6 & 9 inches.

Now cut at the 3" score line starting at the top and going all the way down to the last score mark. (3" from the bottom - horizontal line.) Do the same at the 9" score line.

Flip the paper in the opposite direction (180degrees) and cut on the 6" score line from the top down to the 3" horizontal score line. You will note the paper is sideways. This is because the design I want to use is the "A" side which has a directional look. That is to say a "top" and a "bottom". If it doesn't matter to you which way the design faces, it doesn't matter what way you put the paper. If you want part of the paper to face upwards (like mine does) you must turn the paper so the design starts sideways!

You will end up with something that looks like a "W" or "M" depending on which way you look.
Fan fold the paper. You will then need to either tape, sew, bind or glue the edges. You will end up with pockets if you like. I alternated them so I had one pocket on the top followed by a side pocket. This can be achieved by where you put your adhesive. You can have no pockets if you choose, just tape all of the edges!

Practice folding the paper to see which direction you want your favorite image to show up. If you don't have any directional images (like card stock) it's even faster!

Enjoy!
Designed by: Doreen
Machines used: Expression & Gypsy
Project type: Mini Album
Cartridges used: Chic & Scary, Wrap it Up, Ribbons & Rosettes
Supplies: Ribbon flowers, washi tape, glue, glitter, ATG tape, rub-ons, twine, 7Gypsies tape, tulle, bling, scissors or cutting board

Very cute - love all the details!
ReplyDeleteWho would think that is just a 12x12 piece of cardstock! What a cool idea for a quick gift or stocking stuffer, I love all the details you included and the tags are perfect!
ReplyDeleteWonderful project - it is just so complete and well thought out! Genius idea to cover the type going the wrong direction.
ReplyDeleteThanks for the great info and once again, super job! Great details, great colors, great fun!
I LOVE this! Your album and directions are just wonderful. I now have this added to my To Do List!!
ReplyDeleteAnd can we talk about that flower?? Fantastic!!
Very cute! Loved the paper that you chose for your project
ReplyDeleteWonderful tutorial and fun, Halloween mini! Your tags are perfect and I love the way this all works together! Great project!
ReplyDeleteOh that is gorgeous!! Great tags, paper and design!
ReplyDeleteReally great Mini! I will have to try it; thanks for the inspirations!
ReplyDeleteThis is awesome and looks so easy. Thanks for the great directions.
ReplyDeleteI love this, your directions are great too.
ReplyDeleteCute mini! Lee-Ann :)
ReplyDeleteLove this!! Now I'll be the 1st to tell you that I'm "directionally challenged" (ok, I'll be the 2nd if my DHs anywhere around!), so I will probably still get lost at least once the 1st time I try this (even with your great directions!), but, I WILL try it!! Thanks for the inspiration!
ReplyDeleteWhat a cool mini-album! Thank you!!
ReplyDeleteI love this! Thank you for the clear instructions. I am so going to try this.
ReplyDeleteWonderful mini, love all the details! Thanks for the great tutorial also.
ReplyDeleteSuper cool! Thanks for the great step by step directions too. I'm definitely going to give this a try.
ReplyDeleteLove your mini and your tutorial! It was very clear! I really love those tags that you made to go in your wonderful mini!
ReplyDeleteI have seen many wonderful mini-albums on this blog and this one is no exception. Your tags went really well with your mini-album.
ReplyDeleteSo adorable and your directions were perfect!! You did a wonderful job! Your tags are perfect too!
ReplyDeleteThat mini is way too cute. I just might have to scraplift...LOL
ReplyDeleteDoreen, what an awesome mini! Thanks for the tutorial.
ReplyDeleteAdorable love the mini album so fun. Thanks for sharing.
ReplyDeleteDoreen this is absolutely adorbale mini ! And great directions on how we can make our very own.
ReplyDeleteThis is really cute. Thank you for sharing how to make it.
ReplyDeleteThis little mini is just FABULOUS!!! Your instructions are superb and I cannot wait to try this one! Thanks so much for sharing!!
ReplyDeleteFabulous Halloween mini album! Thanks for the tut on how to build it from a sheet of 12 x 12 paper. I need to try this. I'm going to pin this so I can find it later :-) Thanks! Cindy
ReplyDeleteLove this project!
ReplyDeleteThis is so cute -- thanks for the instructions!!
ReplyDelete
ReplyDeleteFolding and gluing machine
Hi,
i gone through your website about Folding and gluing machine its really wonderful.
you want additional about Folding and gluing machine please visit:http://www.boxtech.in
Thanks for sharing your instructions. This is a great mini album and yours is fantastic!
ReplyDeleteThis comment has been removed by the author.
ReplyDelete