While we are no longer making active post of Cricut projects on this blog as of 8/1/2013, we invite you to use it for continued die cut inspiration as we will leave the blog up for viewing. Happy Cricuting !

Showing posts with label Cards. Show all posts

Monday, July 29, 2013

Butterfly Theme

 Hello There,

I'm sad to say this will be my last post on this blog. I've really enjoyed sharing my cricut creations with all of you. I invite you to visit me over at Ink-spirations. Butterflies make me think we are always changing and evolving....

The base of the card is 4 1/4 x 5 1/2 folded. Butterfly image cut at 2.5" and then glittered. There are dimensions between the green background and the navy blue background. Pearls on the butterflies and the half fans at top of card.
Pattern paper cut using Imagine and All Wrapped Up.

Butterfly bookmark cut at 5.5" and laminated. Butterfly on gift bag cut from Home Accents at 6".

The Hersey Kiss butterflies cut from Stampin' Up double-sided pattern paper. No glueing needed for assembley. Directions can be found at Qbees Quest. Really easy to make.

 
Yvonne
 
Designed by: Yvonne Balmer - Ink-spirations

Machines Used:
Expression 2, Cricut Imagine

Cartridges Used:
Sophie - card (Feature key card 2)
Sophie - bookmark (Feature key bookmark)
All Wrapped Up. Green cardstock and pattern paper.
Home Accents - Butterfly on gift bag

Other Supplies:
pearls, Stampin' Up designer paper, white gift bag, glitter, dimensionals, laminator, Hersey Kisses

Sunday, July 28, 2013

Divine Wedding Card

Hi fellow FANatics!  This is Erika from http://ekittyscraps.blogspot.com/.  I have another cricut project to show you today and here it is!
I used a 5 x 7" ivory card that I already had.  To cut the oval out of the gold cardstock, I used the Easter 2010 cartridge.  I cut out the regular easter egg at 5 inches.  The trick to this cut was to set the blade on your mat at 3/4 inches over and 3/4 inches down.  This is so you have enough cardstock to make the frame.  (I did see this trick on another site but I am not sure who it was-they made an Easter card with a cross and lillies on it).  I left two inches on each side of the egg and cut down my 12 x 12" paper to match my card.  Sorry I didn't use measurements. I have about an inch on each side of the egg.

  I embossed my gold mat with a 5 x 7 folder from Darice called Argyle Diamonds.   

I used Divine Wedding to cut the Bride and Groom image on page 38.  I used orange for the background color, the tie and on the bouquet since this is the main wedding color.

I embossed the skirt using the Cuttlebug D'vine Swirls folder and added some bling. I pop dotted the skirt onto the bride image.


The flower trim was sprayed with Heirloom Gold-several coats and dryed with a heat dryer.  I sprayed one coat of pumpkin spice/perfect pearls gold spray/water mix on my craft mat and pushed the trim through it and dryed again.  There are You Tube vidoes on how to make distress inker sprays if you are interested.


I glued gold rings and silver bling on my card.  I added my wedding rubon to some vellum and distress inked the edges of the vellum, frame and bride and groom image.  I also pop dotted the Bride and Groom image.
I hope you like my card and Thanks for stopping by.

Supplies used:
Cricut Expression
Cricut Cartridges: Divine Wedding and Easter 2010
Cuttlebug & D'vine Swirls folder
Darice Argyle Diamonds 5 x 7" folder
Tim Holtz Trims (flowers/roses)
Tim Holtz- Vintage Photo Distress Ink and Pumpkin Spice Distress Reinker
Ranger: Heirloom Gold Spray and Perfect Pearls Gold Powder
Kaisercraft Forever Rubons
Gold Rings and Silver bling
Vellum
Paper: Gold, Silver, Orange, White and Black 
pop dots and glue

Thursday, June 20, 2013

Happy 21st Birthday Card

Hi Everyone! Melody Lane here to share a card I made for a coworker. He went to a Casino on his Birthday so I thought this card would fit.

I used the Las Vegas CCR Exclusive to make the roulette wheel. The font is from Feeling Groovy, I welded everything together in Cricut Craft Room, I also made a CCR tutorial and show how I created this whole card on 4 videos. I used the Cuttlebug on the red paper and used a Martha Stewart corner punch in the corners.

I used Recollections cardstock and raised the roulette wheel up on foam squares.

Thanks for looking and don't forget to check out my blog and Youtube Channel
Come back here tomorrow for more!

Cricut Info & Supplies Used
Designed By:  Melody Lane
Machine:  Cricut Expression2, Cricut Craft Room, Cuttlebug
Cricut Cartridge:  Feeling Groovy, Las Vegas
Other Supplies Used:
Paper:Recollections
Punch:  Martha Stewart corner punch-star

Sketch Challenge #8

Welcome to our Sketch Challenge.  
This is Amy from Amy's Digi Scraps and welcome to the another Sketch Challenge! On the 20th of each month, I will post a sketch for you to enjoy!  I generally post a card sketch with a card that I create, but you can make it a layout as well.  Please visit the Sketch Challenge link for more information about our monthly Sketch Challenges.

Here is the sketch for today:


And here is the card I created for it:


This sketch was created as part of a class I will be teaching locally.  It is similar to what is known as a One Sheet Wonder, where you create several cards from one sheet of printed paper.  This class will allow the participants to create 17+ cards using very minimal supplies, adhesive, inks and stamps.  I will have the entire class and patterns available on my blog after the class has finished.  My purpose for these cards and the class is to encourage new card makers who want some creativity without having a lot of bulk or "extras" on their cards.  To show that simplicity can be beautiful.
 In addition, I am asking those who take the class to consider donating one or two of the cards they create in class to Operation Write Home (OWH).  This is a wonderful organization that sends blank cards overseas to our military so they have cards to send home to their loved ones.  Stationery supplies are not a priority there, so the cards really do fill a need.
I used paper that I bought in bulk from Tuesday Morning for both the printed paper and the solid color paper.  The stamps and ink are from Close To My Heart.
Now - what makes this class - and card - so fun for the Cricut Fanatics blog is that all the cuts are done by the Cricut Expression machine and George Cartridge!  Again, once the class is finished, I will share the information, but I drew out the cuts I wanted and then designed it on my Gypsy machine to cut with my Cricut.  The cricut doesn't cut all the way to the edges of the paper, but this is a simple cut with my scissors to finish separating and this saves a lot of time, measuring, and errors!!
If you've ever been in a class that requires a lot of cutting, you know how easy it is to get lost and make the wrong cuts, even with the diagram in front of you.  Having taught these classes before, I know how it can slow down the class, as well as create problems with paper waste.
By using my Cricut to cut these multiple, simple cuts, I am able to keep the class moving forward, plus promote the Cricut machine and Gypsy.
Some edge inking, a little bit of stamping, and glue everything down and presto! 17 different cards (or more) in under an hour.


We would love to see what you can do with this Sketch.  Please create a card or layout and upload the image to this post in the InLinkz!  Remember that you must use your Cricut in creating your project for the Sketch Challenge.

Saturday, June 8, 2013

Happy Anniversary card

Hello everyone and happy Saturday!  This is Erika from www.EKittyscraps.blogspot.com.  I wanted to share with you the card I made for my Stepson's 1st Anniversary which is today.  The wedding colors were champagne and red so I used these colors in my card.

I actually cut this card from the Sweethearts cartridge at 5 inches using the card function key with the shift key on.  This card is located on page 70.  The cricut machine cut out the words "Happy Anniversary" from the card  so I used red paper that I glued onto the inside of the card.  (See below). 


 I cut the "1st" at one inch from the Artiste cartridge and glued to the front of the card.  I cut out the champagne glasses at 1.50 inches also on p. 70 of the Sweethearts cartridge.  Next I used my punch for the red heart and added silver bling. 


I added champagne flutes on the inside of the card and printed out my verse for the card on silver 8.5" cardstock.  I did originally print on vellum but liked the silver cardstock better. 

Here is the finished card with an added surprise-Graycie Kitty decided to pose with her pink tongue sticking out!  Lol!
What I liked about the Sweetheart cartridge is that it is so versatile for weddings, anniversaries or love themed projects.  This cartridge contains card, tag and envelope functions on every page in the booklet so you can make several projects in a short amount of time.  There are also many other cartridges with the card feature so you can stock up on cards.  Thanks for stopping by and have a good month!

Supplies Used:
Cricut Expression Machine
Sweethearts Cartridge
Artiste Cartridge
Gold, silver and red cardstock
heart punch
silver bling

Friday, May 17, 2013

Flip Flopping Fabulous

Hi Everyone!
Susie Craft Happy here today with a flip flop fabulous card!  I like when the weather starts getting warmer.  It gives me more inspiration for my cards and craft projects.
Using Cricut's Pack Your Bags cartridge I cut the flip flop and sunglass image at 3".  The sentiment stamp is from Joy's Life Stamps, Pun in the Sun. 

I hope you enjoyed my easy, breezy, flip flopping card today.  Be sure to come back tomorrow for more Cricut inspiration. Thanks for stopping by!


Cricut Info & Supplies Used:
Designed By: Susie Craft Happy
Cricut Machines Used: Cricut Expression
Cricut Cartridge Used:  Pack Your Bags
Paper:  Stampin Up, Colorbok-Caribbean Coral
Project Type: Cards
Supplies Used: Adhesive, Ranger Stickles-Picket Fence, Yellow, Ribbon,

Tuesday, May 14, 2013

Hello and Good-bye!


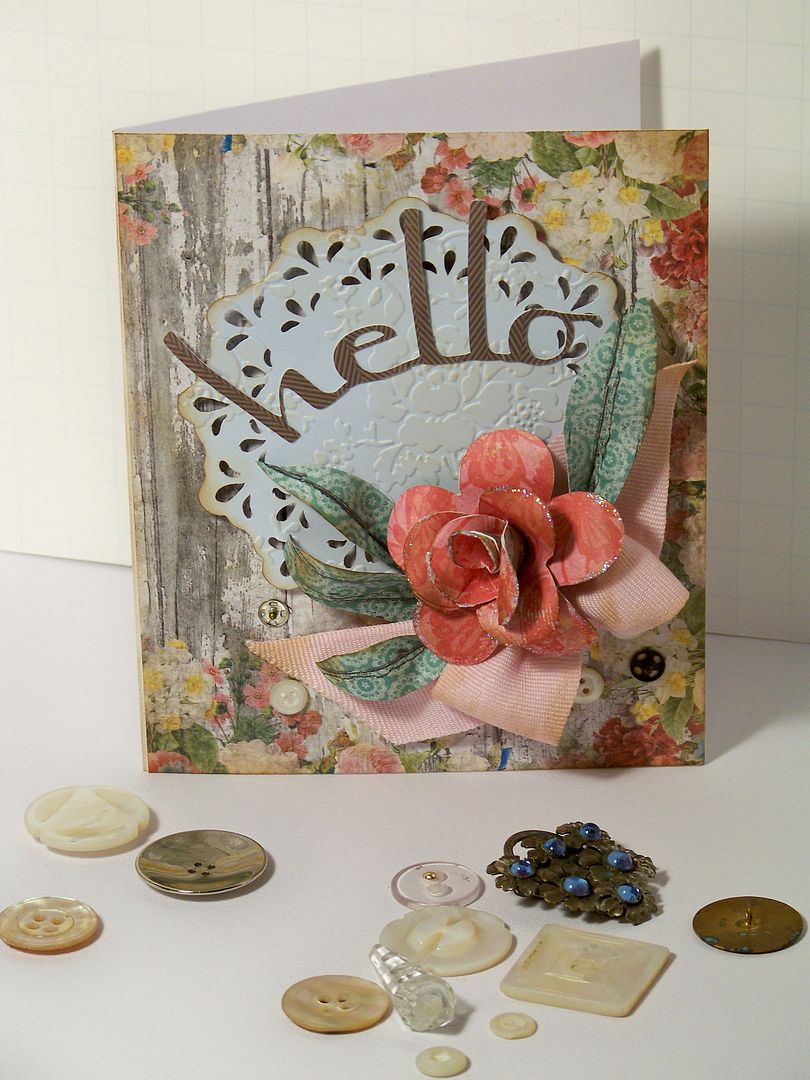
Hello!  This is Nadia from my blog, With Glittering Eyes.  I have been so inspired lately by the beautiful cards created by Michele Kovak on her blog, Thoughts of a Cardmaking Scrapbooker.  I love her style and have learned so much from her since finding her on the old Circle Design Team.  I thought it would be fun to get out my 'Michele sponge' and make a card inspired by some things I have been seeing on her blog.  I love her recent Mother's Day card tutorial,  mini album, and Easter card.  I also wanted to make something that looked vintage.  I thought this would be a fun card for my last project here as a designer on the Cricut Fanatics blog.

I started with a paper pack from My Mind's Eye with lots of weathered wood and shabby chic florals.

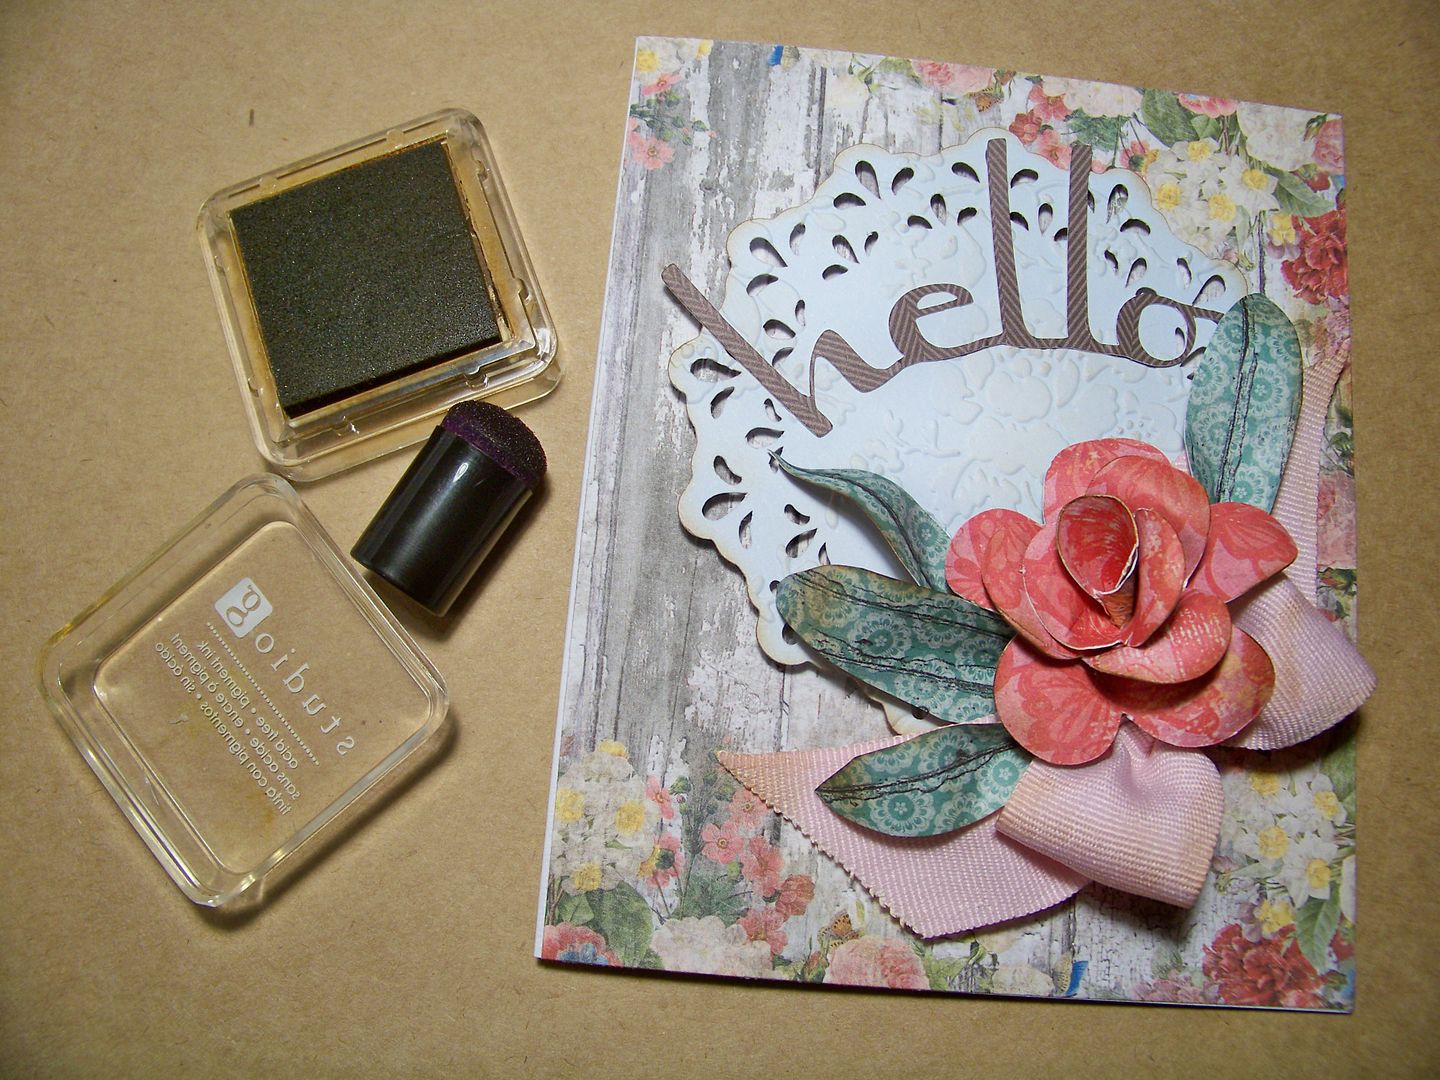
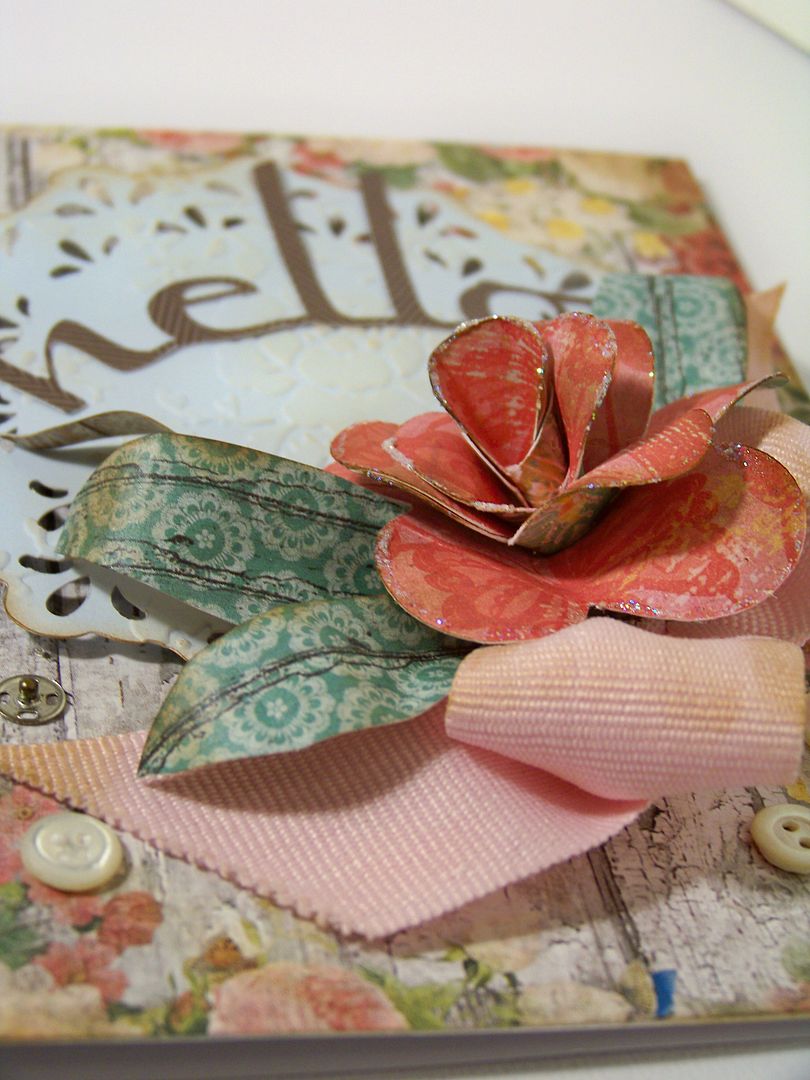
I cut a doily from Artiste (page 31) at 4".  After inking it and embossing it, I popped it up 1/4" so that a natural shadow would separtate it from the card surface.  I added my ribbon.


I created a dimensional flower using directions by Kathy Orta, using Cricut George, as in her tutorial, but cutting the base shapes at 2".  This is the same flower I recently used in a larger size inside an explosion box.  To see my box, click here.  To check out Kathy's video tutorial, click here.  I added a thin, fine line of glitter paint along the edges of the flowers. That felt old-fashioned, like some of my grandma's Christmas ornaments.  I hand-cut leaves, bending and folding to create a little dimension.

Text was cut from Cricut Lyrical Letters at 1-1/2" and manipulated by hand to curve.  (I cut away the butterfly that was part of the text).

To make everything look aged, I inked with brown, including the flower and ribbon.


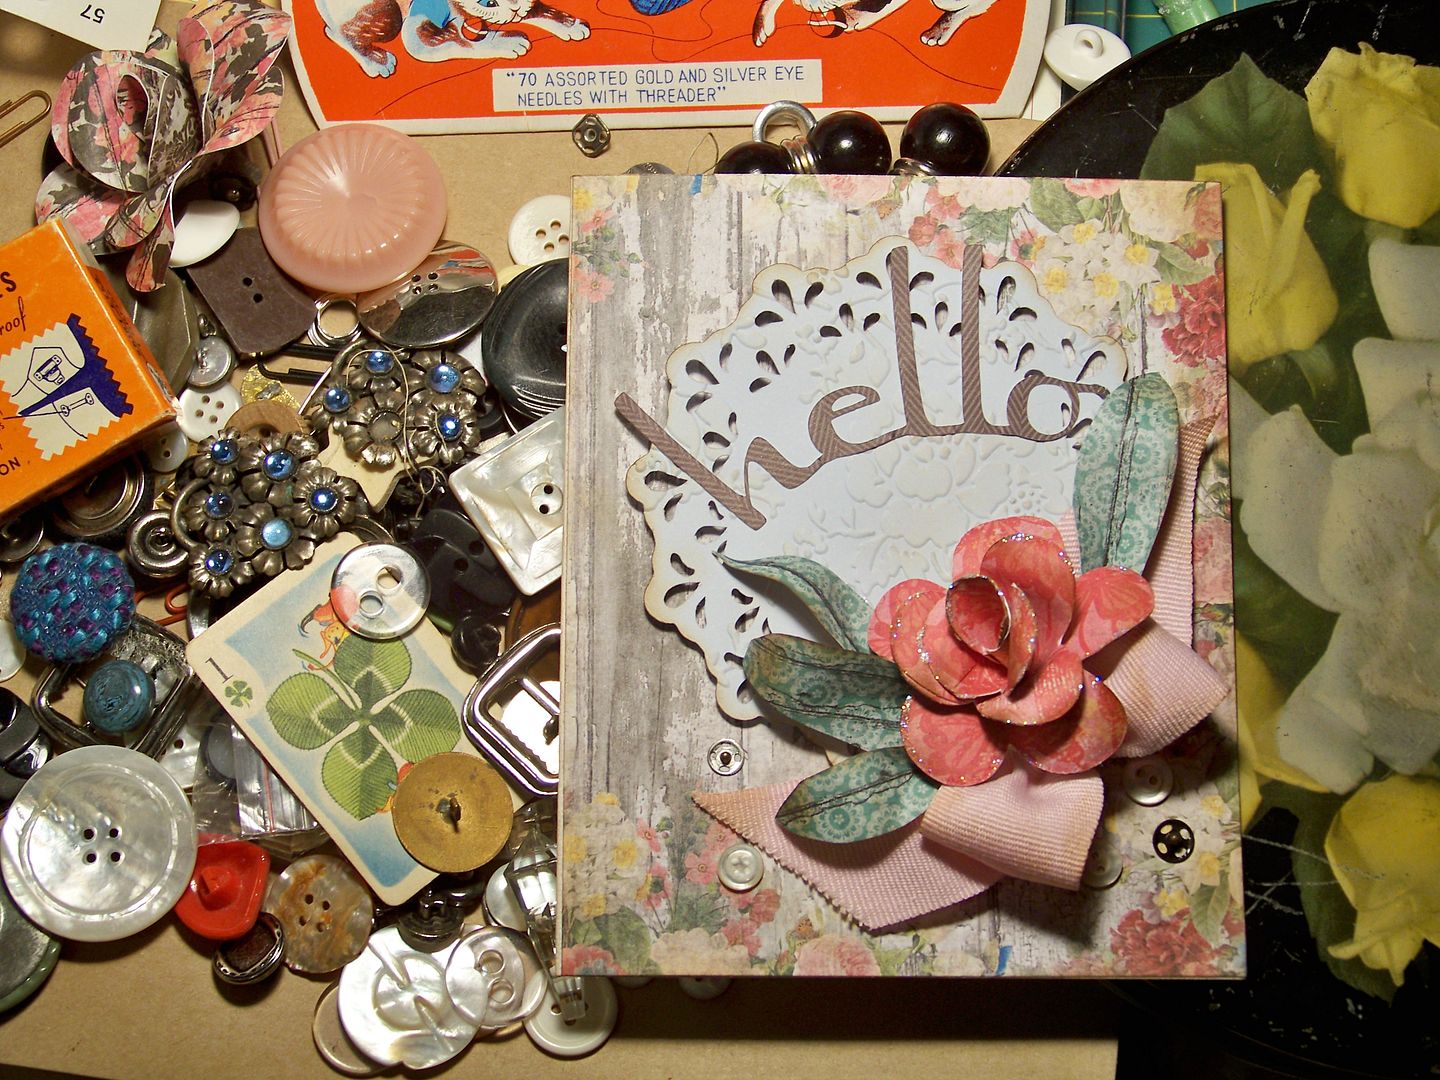
For a little inspiration, I got out some of my Great Aunt Henrietta's buttons and findings...and added a few buttons and snaps.  


I really enjoyed making this card... and making a mess, revisiting some of my treasures.  Thank you for checking my post today!  I wanted to thank Debbie and the team for allowing me to design here and wish the best for all my crafty friends who make fun things every week here!  Even though I am leaving Cricut Fanatics, you can always find me on my blog, my bloggy Facebook page, and my Pinterest boards!  


Cricut Info & Supplies Used:
Designed By: Nadia Herbst-McConnell
Cricut Machines Used: Expression
Project Type: Cards
Project Theme: Just Because
Cricut Cartridges Used:  George and Basic Shapes, Lyrical Letters, Artiste
Suppies Used: Paper, Quick Dry Glue, pop dots, buttons, snaps, ribbon, ink, scissors

Saturday, May 11, 2013

Here’s a Mother’s Day Card for all of you!

Good morning crafty friends! This is Angie from Angie’s Paper Passion! I was inspired to create a card from Split Coast Stampers with some Cricut cuts thrown in! It is called a Tri-Fold card. It looks difficult to make but I was surprised by just how easy it was. I can’t wait to make some more of this type of card!
Tri-Fold-Mothers-Day-Card-2_thumb
I made this card for my Mom and red is her favorite color. I think she’ll be very happy with it!
Below is looking at the card from a slightly left angle…
Tri-Fold-Mothers-Day-Card-3_thumb1
And this next photo is looking at it from the right side…
Tri-Fold-Mothers-Day-Card-6_thumb1
I started with paper from DCWV called The Four Seasons stack (beautiful papers in this stack for each of the seasons with texture and some glitter!). After hand cutting my card in a cream cardstock, the patterned paper, and the mats in red cardstock I then decided which Cricut cuts to use to dress up my card. I used three different Cricut cartridges for the embellishments: Florals Embellished, CTMH Art Philosophy, and Flower Shoppe.
The “Happy Mother’s Day” sentiment, was cut from Florals Embellished @ 1.88”. I added some Stickles to the little pink flower and adhered a flat-backed pearl to the center. This cart has some wonderful Mother’s Day sentiments!
Tri-Fold-Mothers-Day-Card-7_thumb1
The two butterflies were cut from Art Philosophy @ 1.5” and 1.25”. I adhered the two layers together just between the wings–not the wings themselves – to give the butterflies a little more dimension. Then I placed two pearls in the center of the smaller one and three in the center of the larger one.
Tri-Fold-Mothers-Day-Card-9_thumb1Tri-Fold-Mothers-Day-Card-10_thumb1
This next part was really an afterthought. While I was waiting for my bug to cut something out, I started playing around with the DCWV paper that was left over. One of the motifs had this envelope surrounded by roses and had “A Tribute of Love” printed on it. How perfect for my Mom’s card! So I did some ‘fussy cutting’ around it on three sides. The left side of it already had a straight edge because it was on the edge of the 12x12 sheet of paper so I just aligned that side up against the edge of that card panel and adhered it. I added a small pop dot under the right side of it so pops off the card a little bit.
Tri-Fold-Mothers-Day-Card-11_thumb1
The middle top and bottom sections were a little too plain so I added some pearl flourishes.Tri-Fold-Mothers-Day-Card-13_thumb1Tri-Fold-Mothers-Day-Card-12_thumb1
Now for the card front! I made the flower from the Flower Shoppe cart and I LOVED how it came out! I used paper from a 6x6 pad by Echo Park called This & That and cut it out @ 3”. The flower I used from the cart was the <FUN> shapes on page 16 in the handbook. I’ve been on a flower making kick lately (can’t you tell by my previous posts? lol) and this flower was so much fun to make! It was inked and rolled before I adhered it together and added a large pearl to the center.Tri-Fold-Mothers-Day-Card-14_thumb1
And there you have it! This years Mother’s Day card for my Mom! I think that it’s safe to show it here because Mom is 93 and not very interested in surfing the web, lol! It wasn’t that long ago that she asked me to explain what “that word I keep hearing about means?” The word was “Google”! I cracked up! But can you just imagine all the things that she has seen and has lived through? I’ll be so lucky and blessed to live as long and still be able to tell you who I am!Smile with tongue outTri-Fold-Mothers-Day-Card-8_thumb1
Thank you for visiting today and have a very Happy Crafty Mother’s Day tomorrow!
Until next time, Happy Crafting,
Angie
Cricut Info & Supplies Used:
Designed By: Angela Cromwell
Cricut Machines Used: Expression
Project Type: Cards
Project Theme: Mother’s Day
Cricut Cartridges Used:  Art Philosophy, Florals Embellished, Flower Shoppe
Supplies Used: Cardstock, Patterned Paper, Pearls, Stickles, Adhesive, Pop Dots

Monday, May 6, 2013

Spring is for babies!

Hello everyone!  Michele here from www.michelegreen.com.  Today I am sharing with you a simple baby card that you can make in less than 30 minutes.  I know because I did!  A gentleman at work was having a baby shower and so I needed a quick card to go with the gift.  I raced downstairs and grabbed my go-to cart for babies - Baby Steps!  This cart is so simple, I love it for all things baby!

The diaper was cut at 3.5".  The ducky diaper pin was cut at 1.5".


For the inside, I simply put a strip I had cut off of the cover background paper.  It gives it a more finished look.

The next time you need a baby card, I hope you think of the cart Baby Steps!

Cricut Info & Supplies Used
Designer: Michele Green

Machines Used: Expression

Cartridges Used: Baby Steps

Other Supplies: Cardstock, adhesive, baby stamp

Wednesday, May 1, 2013

Technique Tutorial: Adding Multiple Dimension


This is Debbie O'Neal of Scrap Me Quick DesignsHappy MAY DAY to you all !  Hard to believe it is Spring already and Mother's Day is just around the corner.   I do have a couple of ANNOUNCEMENTS to make before I get to my project post today so please bear with me.  
 1) SAY FAREWELL:  I would like you to all join me in thanking ScrapperBecka for contributing her time to host our Monthly Cricut Challenges since we started the blog.  She has done an amazing job coming up with some really fun challenges. Unfortunately, Becky's life has gotten so busy she can longer continue hosting the challenge effective this month. If anyone else is interested in taking over the Monthly Cricut Challenge hosting, please contact me. As much as I love the Monthly Cricut Challenges, I just don't have time to do this myself. 

2) OTHER NEWS:  The reason why I am unable to take on more responsiblity with Cricut FANatics is actually kind of exciting news. I am now a monthly Contributing Editor for Die Cut Crazy, a digital only magazine about all types of die cutting available through the iTunes App Store for the iPAD (only).


I am writing a monthly article titled “LETS TALK DIE CUTS”. My first article appeared in the April issue and the May issue is coming out soon. To find out more about the magazine, check out my blog post HERE.  

As you can imagine, writing the article is taking up a lot of my time. Not to mention, managing Cricut FANatics Blog, starting up my business at Scrap Me Quick Designs and hosting Crafty Cut Ups Facebook Group, PLUS  most importantly helping with my dad's hospital visits for his progessing lung cancer treatments,  I just don't have time for much else. I do miss hanging out on the Circle MB chatting with you all. I try and stop by when I can.  I just wanted to take this time to let you know why I haven't been around much lately. Rest assured I am still using my Cricut.

Speaking of using my Cricut, lets move on to today's featured post: 
TECHNIQUE TUTORIAL: Adding Multiple Dimension 

With Mother's Day coming up, I needed to get started on my gift packaging for my Mother-In-Law's gift.  She really appreciates it when I create something special for her and  she loves dimension so I was inspired to create something fun for her. 

Flowers are so appropriate for Mothers Day so I started out by selecting a 5 petal flower because they are great for layering on projects. There are several Cricut cartridges to choose from with this type of flower such as All Mixed Up, Autumn Celebrations, Mothers Day Bouquet, Serenada, etc.  But I used the flower from the Sophie Cricut cartridge.

1.  I cut multiple flowers at 2" from a variety of small patterned papers. Selecting two flowers from two different patterns, I used a foam pop dot to add the two layers together
      
Tip: 6X6 paper pads are great for this since they have smaller scaled patterns to choose from.

      That created our 1st flower dimension step.

2.  Using my fingers to manipulate the flower petals of the flower shapes, I bent each one slightly in towards itself.

      That created the 2nd flower dimension step.

3.  I added some twine to colorful button and you guessed it, added it to the center of the flower with a pop dot. 

     This created the 3rd flower dimension step.

4.  Here is the final dimensional flower. I repeated the above steps and created multiple flowers.


5.  I cut some butterfly shapes from the Artiste cartridge at 1" out of another small patterned paper. I folded the wings on each side of the center of the body so the wings stood up.


Once I created these dimensional elements, I put together a gift bag, a tag and a card.
 
As you can see, I used a plain white gift bag, and added the dimensional elements I created to the front of the bag.  The grass for the flowers I used my scissors to create fringe to make it dimensional as well. The gift bag is going to hold a cookbook signed by her favorite author. But shhhh, dont tell.
 
 
I made a coordinating Mothers Day Card using more dimensional elements I created.
 
 
And since we are giving her a gift card to her favorite store, I even made her
a matching gift card holder using another dimensional flower on an A2 envelop.  
 
To help all of you get ready for Mother's Day too, drop by the MADE FOR MOM WITH LOVE BLOG HOP  for more inspiration AND you can pick up the FREE WORD PRINTABLE I made with all kinds of appropriate Mothers Day words I used on my projects. You could even print it out and give your kids to help make your Mothers Day gifts this year more special ! 


Happy Mothers Day to all !
 
Cricut Info and Other Supplies:
Designed By:  Debbie O'Neal
Cricut Machine:  Expression
Cricut Cartridges: Sophie, Artiste
Other Supplies: Patterned paper, buttons, twine, foam dots, word printable