I used a 5 x 7" ivory card that I already had. To cut the oval out of the gold cardstock, I used the Easter 2010 cartridge. I cut out the regular easter egg at 5 inches. The trick to this cut was to set the blade on your mat at 3/4 inches over and 3/4 inches down. This is so you have enough cardstock to make the frame. (I did see this trick on another site but I am not sure who it was-they made an Easter card with a cross and lillies on it). I left two inches on each side of the egg and cut down my 12 x 12" paper to match my card. Sorry I didn't use measurements. I have about an inch on each side of the egg.
I embossed my gold mat with a 5 x 7 folder from Darice called Argyle Diamonds.
I used Divine Wedding to cut the Bride and Groom image on page 38. I used orange for the background color, the tie and on the bouquet since this is the main wedding color.
I embossed the skirt using the Cuttlebug D'vine Swirls folder and added some bling. I pop dotted the skirt onto the bride image.
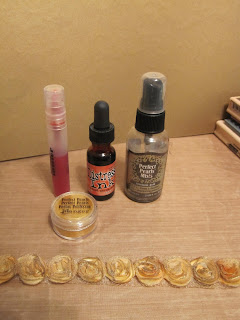
The flower trim was sprayed with Heirloom Gold-several coats and dryed with a heat dryer. I sprayed one coat of pumpkin spice/perfect pearls gold spray/water mix on my craft mat and pushed the trim through it and dryed again. There are You Tube vidoes on how to make distress inker sprays if you are interested.
I glued gold rings and silver bling on my card. I added my wedding rubon to some vellum and distress inked the edges of the vellum, frame and bride and groom image. I also pop dotted the Bride and Groom image.
I hope you like my card and Thanks for stopping by.
Supplies used:
Cricut Expression
Cricut Cartridges: Divine Wedding and Easter 2010
Cuttlebug & D'vine Swirls folder
Darice Argyle Diamonds 5 x 7" folder
Tim Holtz Trims (flowers/roses)
Tim Holtz- Vintage Photo Distress Ink and Pumpkin Spice Distress Reinker
Ranger: Heirloom Gold Spray and Perfect Pearls Gold Powder
Kaisercraft Forever Rubons
Gold Rings and Silver bling
Vellum
Paper: Gold, Silver, Orange, White and Black
pop dots and glue


What a lovely card.
ReplyDeleteThank you for all the detailed instructions for this elegant card! Great work!
ReplyDeleteReally nice.
ReplyDelete