While we are no longer making active post of Cricut projects on this blog as of 8/1/2013, we invite you to use it for continued die cut inspiration as we will leave the blog up for viewing. Happy Cricuting !

Showing posts with label Flower Shoppe. Show all posts

Monday, May 20, 2013

Flower Bouquet


Hi Everyone! It's Melody Lane here from www.MelodyLaneDesigns.com I wanted to share my first bouquet of flowers with you. I made these for my mom for Mother's Day.

 I made the Poppy flower from the Cricut cartridge Giant flowers. It is fairly easy to make, I did a video on making all the flowers and decorating the vase. But I had not had a chance to edit it yet. They will be in separate videos.

The Poppy flowers was cut at just over 3" and I ran the petals through a crimper and inked the edges. I put the petals together secured them with hot glue. I then turned the flower upside down and put a 16 gauge wire in the center and lots of hot glue.I also cut leaves out from the same cartridge and folded them in half and put through the crimper.  I added a little hot glue to center of the leaves and added 22 gauge green wire and folded the leaf just to cover the wire. I wrapped the wire with the leaf, to the wire I attached to the flower, and then wrapped it all in floral tape.


The daisies are made from the Flower Shoppe cartridge I do not know the size, I did many sizes. I ill also have a video on just the daisy. I curled back the petals and added a little color to them with an ink pad. I did not add leaves to the daisies. 


I made carnations with 3 sizes of Fiskers scallop circle punches and tissue paper. I used the large, x large and 3x large punches. It was a little difficult to cut the tissue paper with the punches, its best if you fold and make as many layers at once that you can fit into the punch. I used about 6 layers of each size and attached to a floral stem I bought in the floral section of any craft store. I staked the tissue paper layers smallest on top and one at a time I crinkled them up and then put hot glue underneath the flower at the base and then spread the paper out until it looked like a carnation. At least as much like I remember because I do not remember the last time I was sent flowers. lol.


Here is a video just showing the bouquet.


FYI Never through out tissue paper, you can reuse it. If you want it smooth and nice again to put in a gift bag you can iron it on a low temp. I get mine from the Dollar Tree comes in many colors. Same place I bought the vase, I just painted it and added bling.


 Cricut Info & Supplies Used 
Designer: Melody Lane
Machines Used: Cricut Expression 2 
Cartridges Used: Giant Flowers, Flower Shoppe
Other Supplies: 22 gauge wire, 16 gauge wire, hot glue gun, crimper, floral tape, card stock, tissue paper and scallop circle punch for carnations

Saturday, May 11, 2013

Here’s a Mother’s Day Card for all of you!

Good morning crafty friends! This is Angie from Angie’s Paper Passion! I was inspired to create a card from Split Coast Stampers with some Cricut cuts thrown in! It is called a Tri-Fold card. It looks difficult to make but I was surprised by just how easy it was. I can’t wait to make some more of this type of card!
Tri-Fold-Mothers-Day-Card-2_thumb
I made this card for my Mom and red is her favorite color. I think she’ll be very happy with it!
Below is looking at the card from a slightly left angle…
Tri-Fold-Mothers-Day-Card-3_thumb1
And this next photo is looking at it from the right side…
Tri-Fold-Mothers-Day-Card-6_thumb1
I started with paper from DCWV called The Four Seasons stack (beautiful papers in this stack for each of the seasons with texture and some glitter!). After hand cutting my card in a cream cardstock, the patterned paper, and the mats in red cardstock I then decided which Cricut cuts to use to dress up my card. I used three different Cricut cartridges for the embellishments: Florals Embellished, CTMH Art Philosophy, and Flower Shoppe.
The “Happy Mother’s Day” sentiment, was cut from Florals Embellished @ 1.88”. I added some Stickles to the little pink flower and adhered a flat-backed pearl to the center. This cart has some wonderful Mother’s Day sentiments!
Tri-Fold-Mothers-Day-Card-7_thumb1
The two butterflies were cut from Art Philosophy @ 1.5” and 1.25”. I adhered the two layers together just between the wings–not the wings themselves – to give the butterflies a little more dimension. Then I placed two pearls in the center of the smaller one and three in the center of the larger one.
Tri-Fold-Mothers-Day-Card-9_thumb1Tri-Fold-Mothers-Day-Card-10_thumb1
This next part was really an afterthought. While I was waiting for my bug to cut something out, I started playing around with the DCWV paper that was left over. One of the motifs had this envelope surrounded by roses and had “A Tribute of Love” printed on it. How perfect for my Mom’s card! So I did some ‘fussy cutting’ around it on three sides. The left side of it already had a straight edge because it was on the edge of the 12x12 sheet of paper so I just aligned that side up against the edge of that card panel and adhered it. I added a small pop dot under the right side of it so pops off the card a little bit.
Tri-Fold-Mothers-Day-Card-11_thumb1
The middle top and bottom sections were a little too plain so I added some pearl flourishes.Tri-Fold-Mothers-Day-Card-13_thumb1Tri-Fold-Mothers-Day-Card-12_thumb1
Now for the card front! I made the flower from the Flower Shoppe cart and I LOVED how it came out! I used paper from a 6x6 pad by Echo Park called This & That and cut it out @ 3”. The flower I used from the cart was the <FUN> shapes on page 16 in the handbook. I’ve been on a flower making kick lately (can’t you tell by my previous posts? lol) and this flower was so much fun to make! It was inked and rolled before I adhered it together and added a large pearl to the center.Tri-Fold-Mothers-Day-Card-14_thumb1
And there you have it! This years Mother’s Day card for my Mom! I think that it’s safe to show it here because Mom is 93 and not very interested in surfing the web, lol! It wasn’t that long ago that she asked me to explain what “that word I keep hearing about means?” The word was “Google”! I cracked up! But can you just imagine all the things that she has seen and has lived through? I’ll be so lucky and blessed to live as long and still be able to tell you who I am!Smile with tongue outTri-Fold-Mothers-Day-Card-8_thumb1
Thank you for visiting today and have a very Happy Crafty Mother’s Day tomorrow!
Until next time, Happy Crafting,
Angie
Cricut Info & Supplies Used:
Designed By: Angela Cromwell
Cricut Machines Used: Expression
Project Type: Cards
Project Theme: Mother’s Day
Cricut Cartridges Used:  Art Philosophy, Florals Embellished, Flower Shoppe
Supplies Used: Cardstock, Patterned Paper, Pearls, Stickles, Adhesive, Pop Dots

Tuesday, April 16, 2013

Charmed, I'm sure!

Hello again!  Doreen from polkadotpaperprincess here to show you some of my favorite ways to use my Cricut... to make charms!

I'm just starting out with the Cricut Craft Room.  Although I wish it were offline so I never had to worry about my internet connection, I am finding that when I am home, I am trying it more and more!

I love to make charms!  I made these out of Cricut cuts from Flower Shoppe and Cricut Craft Room Basics.

The first one is cut from a regular piece of plastic.  The second one is the same leaf cut multiple times, glued together, edges inked then glaze applied over top.  The third and fourth ones are  pieces of shrink plastic.  The sparkly heart was shrank, then a thin layer of glaze added and glitter over that.  The fourth one is dipped into my melting pot full of embossing powder.  The 5th one is multiple layers of paper.  You must remember to flip the last one.  I found with this particular leaf, it is better to just flip a piece of paper and not the image.  For some reason when it flips, it cuts smaller!  The last one is a piece of shrink plastic that I colored with a sharpe and then melted with my heat gun.

There are so many different ways to make charms with our Cricuts!

Here are a couple of completed charms.

I may try to retake the photos in the day light to help you see the charms better.  IRL they look really nice and will be making their way onto some projects! 

Enjoy your Cricut for more than just cards!


Sunday, January 13, 2013

A Floral Bouquet Birthday Card (with a Skunk)

It's Sis from Paper, Craft & Scissors with a quick birthday card.  Sometimes it is nice to give someone a card that is less than serious but still pretty.  Okay - I almost always give someone a whimsical birthday card and this one is no exception. 

I have the perfect stamp sentiment that reads "another year older?  no stinkin' way!" from Darcie's Heart and Home.  The stamp set includes a darling skunk but I wanted to make a little larger card with a little dimension.  I found a cute skunk on one of my "go to" cartridges, Birthday Bash.  As designed, the skunk holds the number "7" and a balloon.  The added value of this cut is that is large enough to completely cover the Action Wobble spring that I wanted to use.  I cut the skunk at 4" tall.


While I could swap the number easily, I decided I wanted to add a bouquet of flowers and skip the balloon.  You can see the skunk has one arm down and one arm up.  Rather than hand cutting another arm, I used the area with the raised arm as the base of my flower bouquet.  First, I hand cut a triangle to serve as the flower bouquet wrapping and tucked it underneath the downward facing hand.

I cut a three types of flowers from the Flower Shoppe including one that has a flap to make the flower have more dimension.  I used a variety of sizes with the largest flower measuring 1.30" tall and the smallest measuring .90" tall.  I assembled my flowers and add a pearl accent to each.  I adhered the largest flowers first and then worked in the smaller flowers which were adhered with a pop dot.  The fern sprays are from the McGill Pine punch.


Once I finished assembling the flowers, I added the Action Wobble spring.  He was a little off balance so I glued a penny on the backside of the skunk head to counter the weight of the flowers.  The skunk and his bouquet are attached to a Spellbinder cut-out (the floral patterned paper) that is adhered to a piece of chipboard in order to give the skunk plenty of "wobble room."  The background patterned paper measures 5.25" square.


I used my Copic markers to add some texture to the skunk's white fur and face.  His eyes were cut out of white cardstock.  I added blue irises by punching light blue cardstock with my Crop-A-Dile.  I added pupils with a Micron pen.  


Tuesday, December 18, 2012

oh Happy day

Hello there! This is Michele from Scrap -n- Dance!  Let's take a little break from the holidays for just a moment! I have to admit that I am getting a little overwhelmed by it all, so I'm going to post a layout idea I had that has nothing to do with Christmas! (officially that is... who knows what pictures may end up on the layout eventually! lol)

I love looking at quilts, and wish I had the patience for quilting myself. I've also seen a few scrapbookers use quilts as an inspiration for their pages. That that is where I too decided to look for inspiration!

The bottom half of this layout is made with quite a few "squares" pieced together to look like a quilt. I cut half of them from a blue patterned printed paper and the other half of them from an off-white pattered paper. The "squares" are not true squares at all. The edges curve slightly inward. The shape is button 14 on CTMH Art Philosophy. The edges are inked to give them more depth. Behind these squares is red cardstock, to give the shapes a contrasting background.

The flowers come from Flower Shoppe; the words "oh" welded from Songbird, "Happy" from Cake Basics, and "day" from Graphically Speaking. Oh and the blue scallop border is also from Art Philosophy! I just cut two at an inch so that the two would equal 12".

I will say, getting the "squares" lined up like this was painstaking work at first. Repositionable adhesive tape really helped! But I think the result was worth it. I won't be able to cover the all that "quilting" with pictures, that's for sure!

Cricut Info and other supplies used:
Designed by Michele Donner-Ramsey

Cricut machines:  Expression and Gypsy
Cartridges used:  Cake Basics, Art Philosophy, Songbird, Graphically Speaking, Flower Shoppe
Supplies: Off-white and red colored cardstock, Printed cardstock, buttons, ink, adhesive

Thursday, September 13, 2012

Hoo Loves You - An Operation Write Home Card

It's Sis from Paper, Craft, and Scissors with an Operation Write Home (OWH) card to share.  For those of you that may not be familiar with OWH, it is a wonderful way to share some crafty goodness with service members.  Crafted cards are collected and forwarded overseas for members to use and send to celebrate the holidays and the every days with their families and friends.  


The guidelines on OWH state that some dimension is okay (and loved) but not to go crazy with big buttons and embellishments.  So, here is my first OWH card with a total of one pop dot and six Viva Decor pearl pen dots.  I will be sharing the details with you and some insights into gaining dimension through color.

To start, cut an A2 card base (mine is khaki colored card stock) by cutting an 8.5" x 11" piece of card stock in half.  I like to cut this size by placing the long edge along the top of my guillotine cutter and cutting at 5.5 inch mark.  Fold the cut in half and while matching corners, crease with a bone folder. You get two card bases from one sheet of paper.  In this card, I wanted the dimension on the inner layer, so I used Cricut Craft Room (CCR) to cut a scalloped heart shaped window in the front of my card base. 

Before cutting the heart window with my Expression, I cut the patterned wood grain paper layer at 4" x 5.25".  I put good quality adhesive (like ScorPal tape) on my patterned paper.  As I planned to adhere the patterned paper to the card base and cut through both layers at the same time, I wanted to make sure to use a good quality adhesive to keep the papers together while cutting.  I edged the patterned paper with Tim Holtz Wild Honey Distress Ink before adhering it to the card base.

Step 1 - Firmly adhere patterned paper layer to card base on the front right side of the A2 card base using the card crease line (on the left) as an alignment tool. 

Step 2 - Cut the heart window in your card base with adhered patterned paper layer.  Use CCR Basics and select the scalloped heart (2.5" wide x 2.75" tall).   Carefully line up the long edge of the card stock across the top edge of the mat.  The edge of your card should be flush at the 11" line.  The left edge of the card should be aligned to the left edge of the mat.  This screen shot shows the position for cutting on the right hand side (front) of a card that opens from the right.  Unless you have a super sticky mat, use painter's tape on all the edges of your card.  Remember, you are cutting through two layers (the card base and the patterned paper).  I cut my card on the Expression using medium pressure and a blade depth of six.  I selected 2 in the "number of times" drop down menu on the "Cut" menu.  After cutting and WITHOUT unloading the mat, I determined that it needed additional cuts (another two), and the cut easily popped out after that.  I added some dimension by shadowing the cut edge with Copic E55 Light Caramel.  The dark patterned layer with the darker shadowed edge around the heart adds some visual dimension.


Step 3 - Cut the interior heart in bright rose patterned paper.  Using a brighter interior color also builds visual dimension.  I cut the interior heart slightly larger at 2.625" x 2.875" tall so that the interior heart would easily cover the window heart cut.  Once cut, I used E55 to edge the heart.  To attach the interior heart in the right location, I opened the card (so the cut window was face down to my left) and placed the interior heart right side down on top of the window.  Holding the card and interior heart in place, I carefully picked up the card and looked at it from the front.  After adjusting the interior heart location and carefully laying the open card back down on a flat surface, I added small drops of Glossy Accents on the backside of the interior heart cut and then closed the card by turning the interior card page onto the back side of the heart so now the back of the card was facing me.  Press firmly adhere to adhere the back side of the heart to the interior page.

Step 4 -  Cut nine leaf spray cuts from Mother's Day Corsage at 1.2" x 1.3" tall.  Edge with Copic E55.  Cut 20 "daisy2" flowers from Flower Shoppe at approximately .65" tall.  Assemble 10 flowers by placing a small dot of Glossy Accents on top of the base layer and adding the second layer.  Try to keep the petals fanned out rather than directly on top of each other.

Step 5 - Cut the owl at 2" tall and all its layers from Everyday Pop-Up Cards.  Add shadows with Copic E55 and use Glossy Accents to add dimension to the eyes and beak.

Step 6 - Assemble the inner heart layer.  Arrange leaf sprays as you wish and determine owl location.  Add flowers.  To add dimension, attach owl with one pop dot under the head and glue the feet down.  Place one trimmed flower spray under the owl's feet.  Here is an close-up of the interior heart.  The leaf sprays extend past the heart's edge.  I used five sprays; I always cut extra when dealing with smaller cuts and make sure to take down the pressure and blade depth.  Multi-cut when necessary.


Step 7 - Print sentiment or stamp sentiment and attach.  This sentiment uses Birch Std at 36 point.  The edges were inked with Tim Holtz Wild Honey Distress Ink.  Add one spray and two flowers.

Step 8 - Add ribbon or twine and tie a bow. 

Step 9 - Add flower centers with a Viva Decor Pearl Pen in Icy White.  Once dried, slightly curl flowers.

This card used paper from My Mind's Eye Stella and Rose and Echo Park's Hello Summer.  Using 6" x 6" paper pad is a great way to keep scale and color in your card creations.

Cricut Info & Supplies Used:

Designed By:  Sis Patterson

Cricut Machine Used:  Expression (with Cricut Craft Room)

Cricut Cartridges Used:  Mother's Day Corsage, Flower Shoppe, and Everyday Pop-Up Cards

Other Supplies Used:  My Mind's Eye Stella and Rose and Echo Park's Hello Summer. Papertrey Ink Rustic Twine.  Viva Decor Pearl Pen in Icy White.  Copic E55 (Light Caramel).  Tim Holtz Wild Honey Distress Ink.

Sunday, September 2, 2012

Getting crafty with the Cricut

Greetings-Christel AKA the scrapworm here of Scrapworm Blog ! Very delighted to be part of this incredible blog. I have several projects to share with you today but first I would like to tell you a little about myself. I live in western Kentucky. I am employed a school teacher. I teach history and special education. I have a wonderful husband and four children(two girls and two boys). My children's ages range from 18 to 14. To top it off, we have two dogs(a havanese and mountain cur) and two cats(shorthair and longhair). One of the kids,Allee, graduated this year and she is now enrolled studying to be a nurse while working fulltime as a CNA. She had a full ride to play softball but decided to stay home and go to school. Katee who is a junior runs cross country and track. Brett and Bryce both play football. My husband and I are constantly on the run shuffling kids to practice, meets or games. Well more than enough about me. Let's get onto crafting!

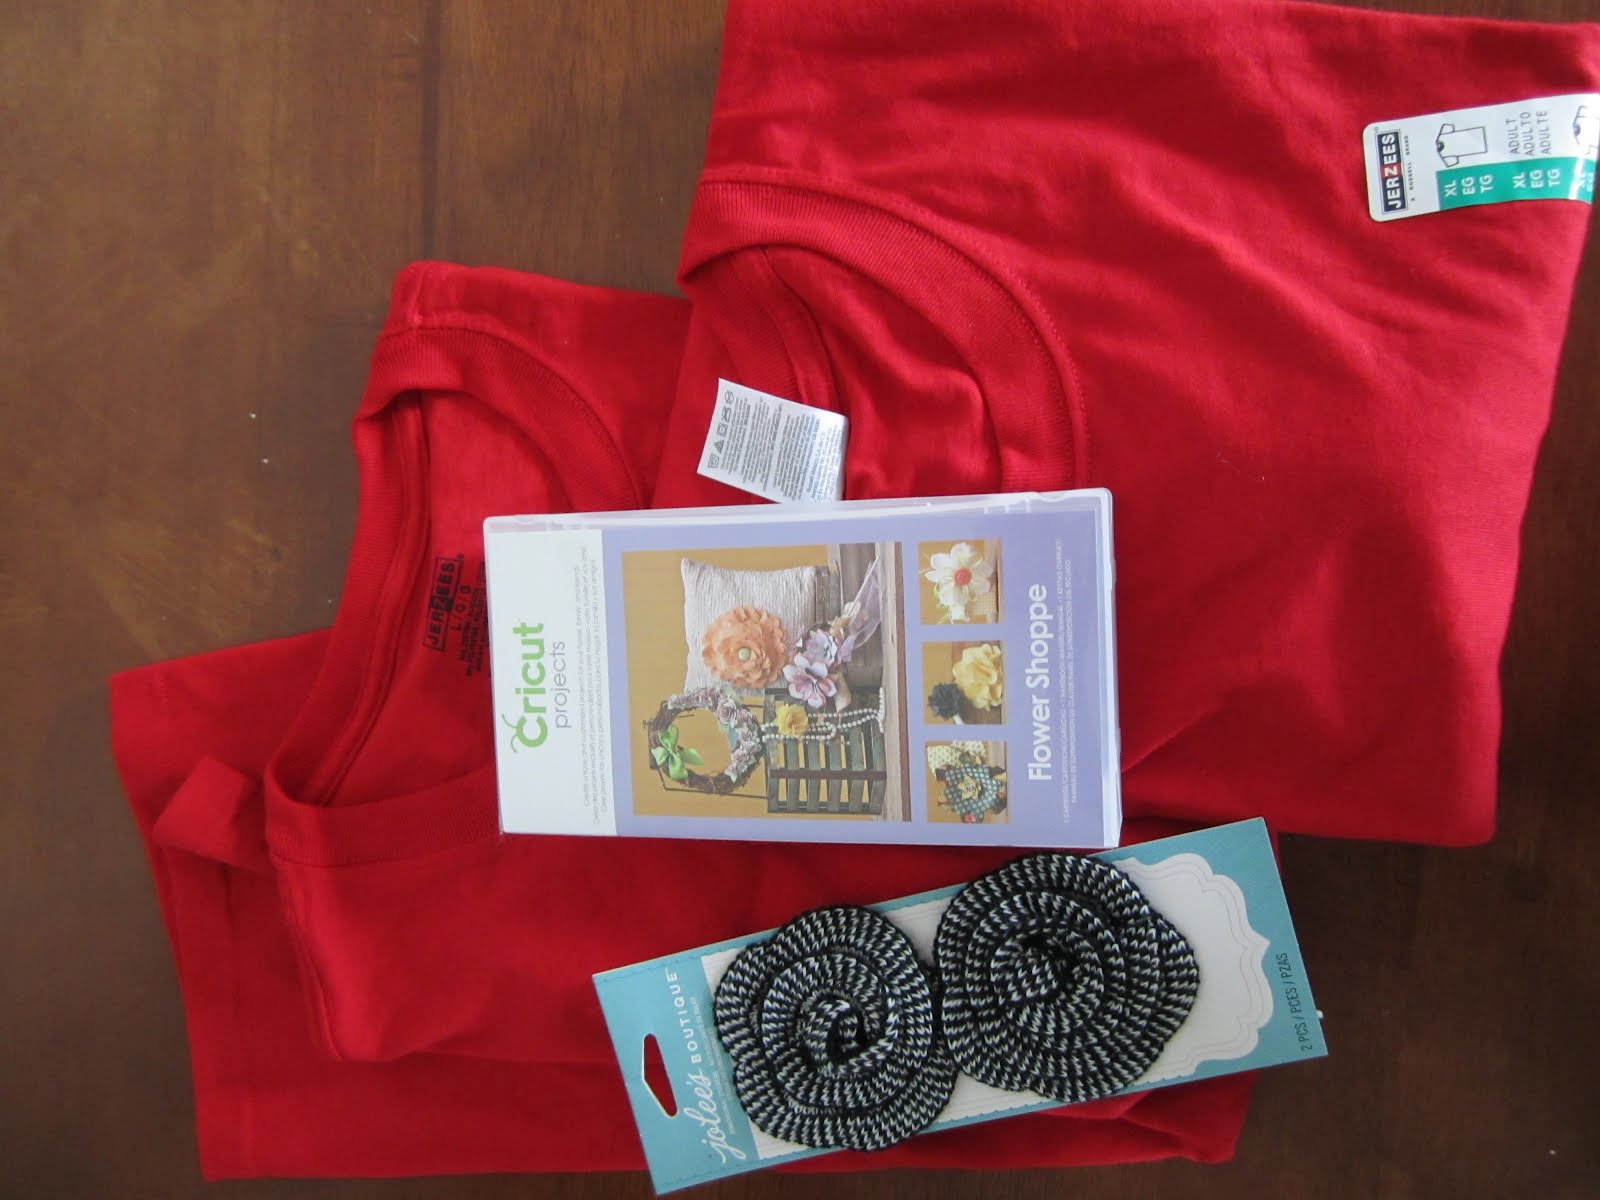
Using the cricut to make a ruffled spirit scarf: First project I would like to show you today is what I call a spirit scarf. I saw this on Pinterest and decided it would make a great accessory to where to games to try and spiff up wearing blue jeans and a tee. I used my cricut to try and make one. Here are the steps to make a ruffled scraf.

1. You will need Flower Shoppe cartridge, two XL tees, fabric glue or sewing machine and flower embellishment (if you choose to put a flower on the scarf).And of course, your cricut expression.
2. Cut of sleeves, neckline and bottom seam. Next, cut the sides.
3.Cut 12 ten inch squares.
4. Place one square on the cricut mat. Put in the Flower Shoppe cartridge. Using the Fun1 image cut a 9 inch segment. Note: I used the heavy cutting blade instead of regular. I put my settings on medium cutting each image twice. You may want to play around to see how your cricut reacts to fabric.
5. Once you have cut out all twelve pieces, take each piece and stretch it. Do not be timid. This stretching allows the fabric to curl inwards. Hence, no sewing for the strands. Then, hold one piece by the end and run your hand down the fabric. Kinda like milking a cow! Do this for each piece.
6.Taking two strands, place them end to end. Join them together with fabric glue or sewing. Do this until you have no more fabric. You should have six strands all together. If you glue them, allow ample time to dry before going on to the next step. 7. Gather strands together grasping in the center, place around neck. With a scrap from the tees tie the strands together in front about in the middle. 8. Take a flower embellishment and pin to the scrap. Now, you are ready for the game!
Note-I have an alternate version. Instead of using Flower Shoppe, use Cricut Basics circle. Once you have cut 12 circles, cut about two inches into the circle making a swirl. Do not worry about being precise, the stretching and pulling will take care of minor impurities. Follow the rest of the directions. Another option is to cut four "fun1" images and 8 circles. Just have fun with it.

Using mulberry paper for dimension When using my Create a Critter or Camping Critters, I like to use mulberry paper to add depth to my scrapbook pages or cards. Another thing I like to do is tell a story using several pages. Materials needed are the Camping Critters cartridge, Zombies from CCR. Mulberry paper, 12 by 12 paper of your choice, glue, leaves, glue, ink and chalk. Last but not least your cricut expression.
For the first two scrapbook pages, I used the Camping Critters cartridge. I cut out the raccoon and bigfoot images. I used mulberry paper on the outer layer to give the images dimension. The raccoon was cut at four inches. Big Foot was cut at six inches. Also, on the raccoon, I chalked the mask. I used leaves and an evergreen branch (which was secured down with a glue gun)to give the pages a more wilderness feeling. The pictures I added were from this summer which commerate my first mountain biking experience. Look how happy my daughter and I are. An 11 mile trail should have took about an hour and half took us over four hours.
The final image was cut using the CCR exclusive file called Zombies. I used the girly skull and nuclear symbol. The skull was cut at five inches. I dropped ink on the notebook paper where the word zombie is. This page is the final of our mountain bike narrative. Katee contracted some funky mess in the woods. Hence, the zombie title. I said she had zombie bumps because all of the crazy news stories about zombies. She had to get a steriod shot and passed out in the doctor's office which landed her in the hospital.
Hope you enjoy the rest of your day! God Bless and craft often!

Cricut Info and Supplies Used:
Designed by:  Christel
Cricut Cartridges Used: Campin Critter, Flower Shoppe, Zombies
Cricut Machine Used: Expression
Other Supplies Used: t-hsirts, fabric glue, sewing machine, mulberry paper, cardstock, patterened paper, ink, chalk, artificial foliage

DON'T FORGET TO LEAVE A COMMENT TO BE ENTERED TO WIN OUR WEEKLY DRAWING IN SEPTEMBER.