While we are no longer making active post of Cricut projects on this blog as of 8/1/2013, we invite you to use it for continued die cut inspiration as we will leave the blog up for viewing. Happy Cricuting !

Wednesday, May 29, 2013

Jake and the Neverland Pirates

Hi There,
Yvonne from Ink-spirations stopping by with a scrapbook page to share.

I was recently visiting my grandson for his 4th birthday. Birthday theme was Pirates or more specifically "Jake and the Neverland Pirates. Mom did the decorating.

The map and yellow pirate chest paper printed from Buccaneer cartridge. The images of the crab, mermaid, Happy Birthday and ship mast also cut from Buccaneer.
The sea monster cut from Pirates and Mermaids.
Old West and Black letter for font.
 
 
Cuttlebug folder bubbles to emboss sea monster.


Sizing
Buccaneer - Mermaid 3"
                    Happy Birthday Matey 3"
                    Crab 1.8"
                    Anchor 2.75"
                    Mast 4.5"
Old West - Jake .8"
                   Neverland Pirates .5"
Pirates & Mermaids - Sea Monster 3"
Black letter - and the .4"
Tim Holtz Distress Inks - Frayed Burlap & Rusty Hinge to ink the sea monster and red mats.
Twine, Dimensionals, misc pattern paper and cardstock
Machine Used: Cricut Imagine
Designed by: Yvonne Balmer

Thanks for stopping by.
Yvonne

Monday, May 27, 2013

Glass Pebble Jewelry

Good morning Cricut Fanatics!  Hope you are having a wonderful three day weekend as we celebrate this beautiful Memorial Day.  Thank you to all who have served in our military to ensure the freedom we enjoy.

This is Rita from Rita's Paper Obsession.  Today I have a very easy jewelry making project to share with you.

I have a friend that is battling ovarian cancer.  To let her know we are thinking of her, we wear teal ribbons to work.  I wanted a little something to dress up my ribbon so I made a glass pebble pin and pendant.


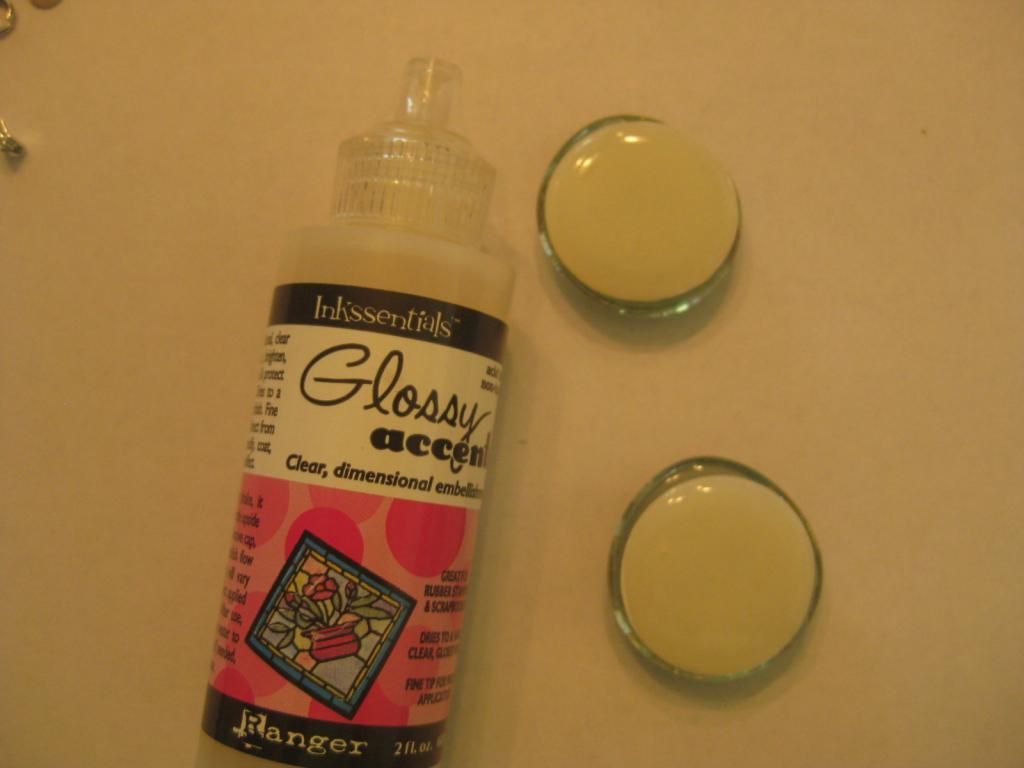
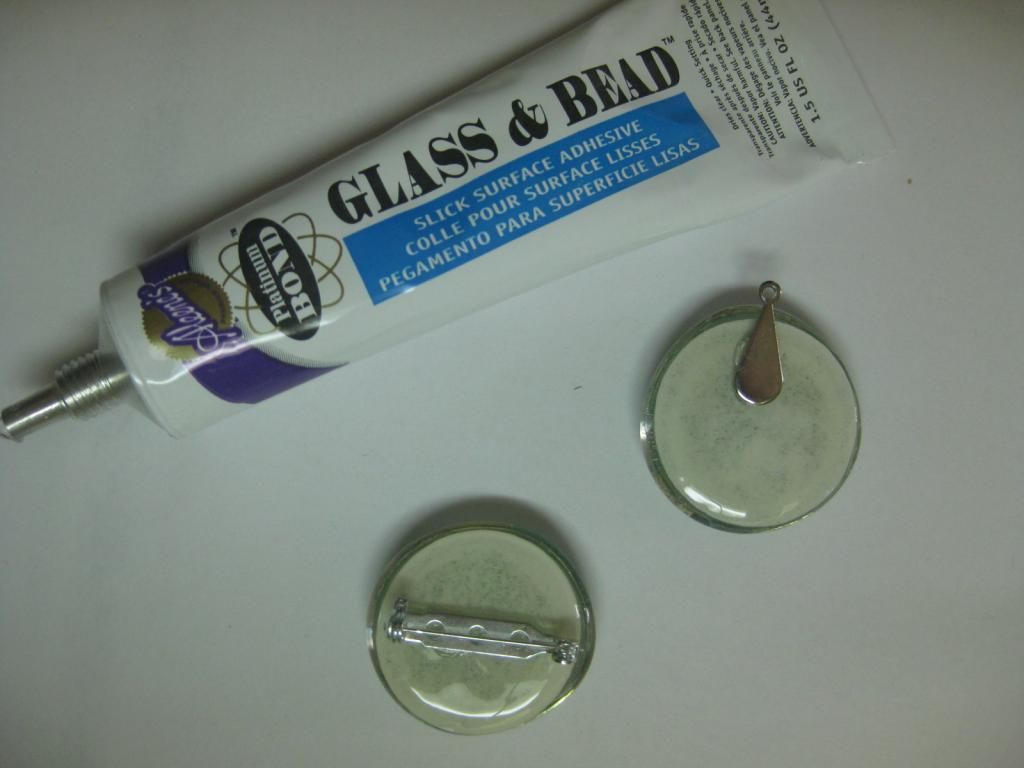
To create glass pebble jewelery, you will need a few basic supplies:  glass pebbles (purchased from a dollar store); Glossy Accents; a jewelry bail, pin backing or even a magnet; and a slick surface adhesive (I used Aleene's Glass and Bead); paper of your choosing (I used scraps and found that the light weight paper is easier to work with).


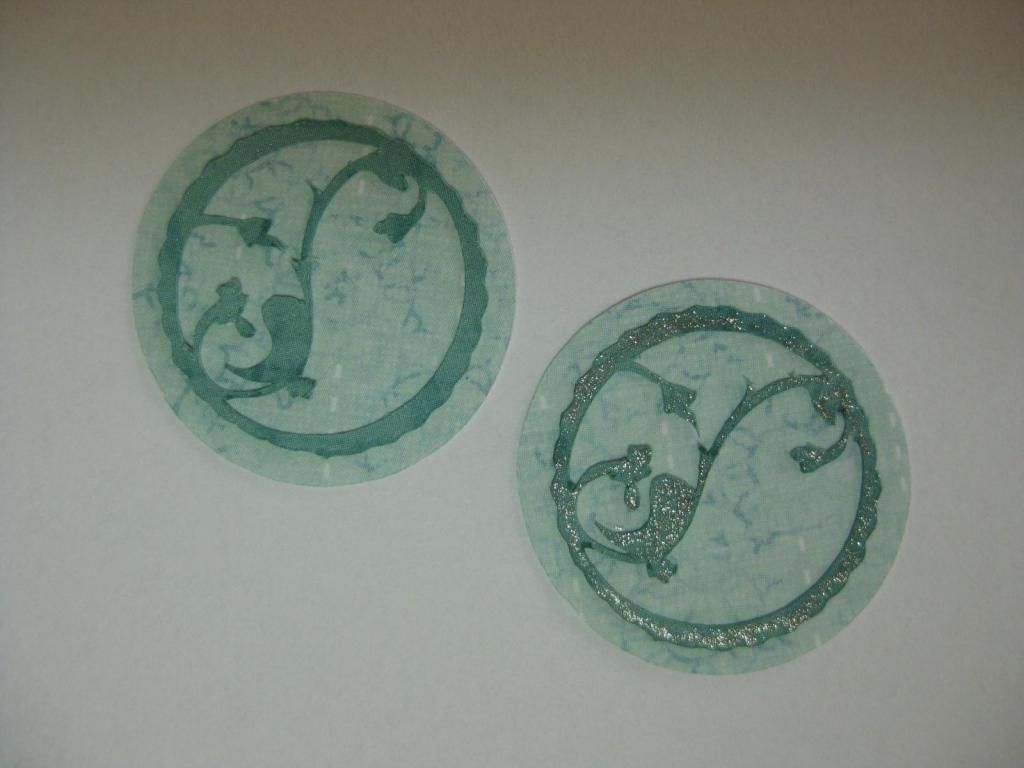
For this project I used my Sophie cartridge and selected the image found on page 50, Label9.  The glass pebbles come in varying sizes.  Cut a circle to cover the back of the pebble.  My circles were cut at 1 1/4 inches.  I cut the image smaller at 1 inch  as I wanted to see the entire image on my piece.

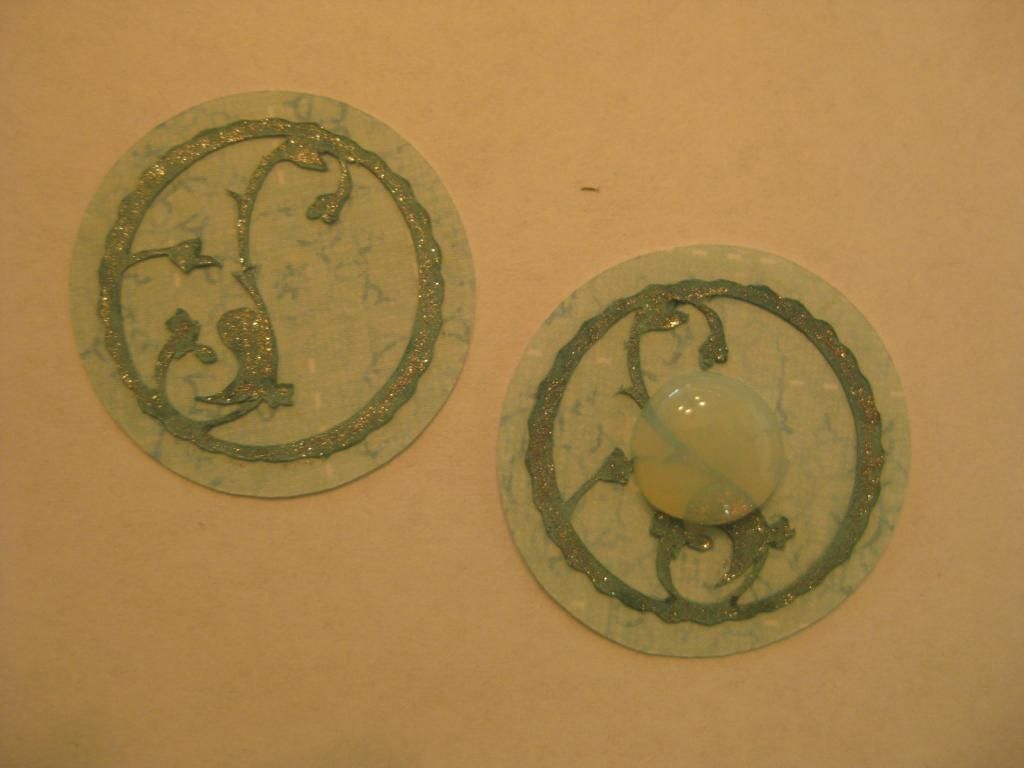
Layer and embellish your images onto the background circle.  Keep the artwork as flat as possible as this will be butted up to the backside of the glass pebble.  As I mentioned, light weight patterned paper works best.  I like adding some sparkle to the cuts with my Gelly Roll pen.  Clear Star is my favorite as it gives the shimmer but lets the paper pattern and color through.


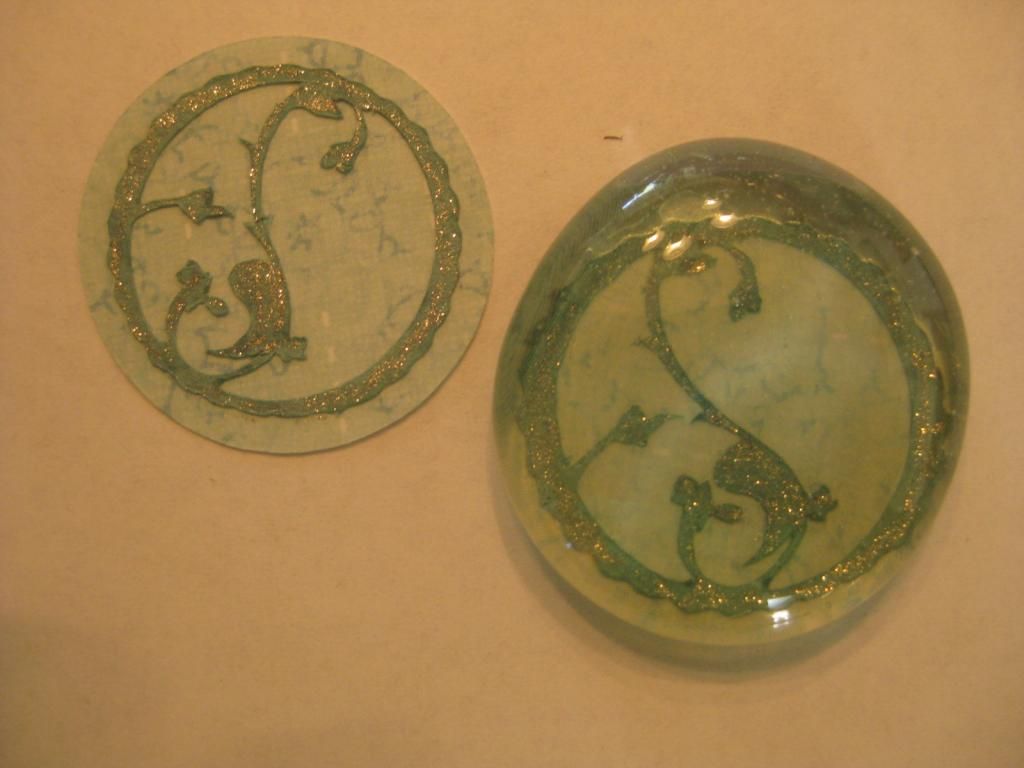
Next adhere the image to the back of the glass pebble with Glossy Accents.  I found it easier to put the Glossy Accents in the center of the image and then place the glass pebble over it.  Press down so the Glossy Accents covers the entire image.


Flip the glass pebble over and cover back of pebble with Glossy Accents.


Once Glossy Accents has dried completely (I waited 24 hours), adhere pin back or jewelry bail.


Jewelry is ready to wear as soon as the adhesive dries.  I glued the teal ribbon to the back of the pin.


Thank you for stopping by today.  Enjoy the rest of your day.

Designed by: Rita Poteat
Cricut Cartridges Used: Sophie
Cricut Machines Used: Cricut Expression
Project type: Jewelry


Saturday, May 25, 2013

Thanks Teacher


Hello again fellow crafters it's Terri from http://www.scrappinwiththebug.blogspot.com/ bringing you a quick and simple little card.

On Wednesday it was my daughter's last day of preschool - (Sniffle Sniffle). So I wanted to give the teachers a special gift and a fun little simple card to. My daughter had 2 teachers both who I've grown to adore over the past 2 years she was in preschool. They are so sweet and wonderful I wanted them to feel special. So I bought them a fun little locket style necklace that holds little charms. I had the charms customized with their initials, and a sweet little apple.

Since I made them an apple card for Teacher's appreciation I waned to make a different card for the last day. I made these cuties. I was debating on using the graduation bear or the little school girl bear. As you can see I chose the school girl bear. Isn't she just so sweet.

I used Teddy Bear parade and cut the bear at 3" - if you notice I took Nadia's advice to make the object a little more dimensional. I inked around her and around her face to give her a little depth. You can't really see it here but I added glossy accents to the nose, and apple.

I then attached her to an action wobble spring to make her move.

I added a small brown square and then also some SRM stitched stickers on the side along with stickers saying, Thanks, Thank you... I thought it was perfect little addition to these cards.

They were simple and fun to make.

Hope you enjoy..

Made by Terri Szymanski

Cricut Cartridges: Teddy Bear Parade
Cricut Machine: Expression

Other Supplies: DCWV pre folded cards, rhinestones, SRM stickers

Tuesday, May 21, 2013

A Sweet Treat

Good morning everyone. I'm L.B. from Cool Beans By L.B. I hope everyone is having a wonderful day. I try really hard to create more masculine themed cards to share with you,but right now I am overflowing with female birthdays so I am fun wobble card I created for a good friend.
I love this old school DCWV paper from the Sweet Stack. It layered just right on the birthday girls favorite color.
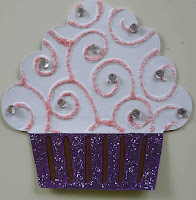
Next came the cute cupcake off of Simply Charmed, of course I have a habit of cutting of the cherry topper. I embossed the icing with my Swirls folder then added gems using some Stickles and tiny gems. I also added Stickles to the cupcake wrapper.
 I had never put gems on this way before but it turned out great and they all stuck on quite well. After everything was all dry I attached my cupcake with an Action Wobble.
 I hope everyone is having a wonderful day. See you next month!

Project Details:
Made by: L.B.
Cricut Cartridges: Simply Charmed
Other Supplies: Swirls embossing folder, DCWV Sweet Stack paper, Stickles in Cotton Candy and Lavender

Monday, May 20, 2013

Flower Bouquet


Hi Everyone! It's Melody Lane here from www.MelodyLaneDesigns.com I wanted to share my first bouquet of flowers with you. I made these for my mom for Mother's Day.

 I made the Poppy flower from the Cricut cartridge Giant flowers. It is fairly easy to make, I did a video on making all the flowers and decorating the vase. But I had not had a chance to edit it yet. They will be in separate videos.

The Poppy flowers was cut at just over 3" and I ran the petals through a crimper and inked the edges. I put the petals together secured them with hot glue. I then turned the flower upside down and put a 16 gauge wire in the center and lots of hot glue.I also cut leaves out from the same cartridge and folded them in half and put through the crimper.  I added a little hot glue to center of the leaves and added 22 gauge green wire and folded the leaf just to cover the wire. I wrapped the wire with the leaf, to the wire I attached to the flower, and then wrapped it all in floral tape.


The daisies are made from the Flower Shoppe cartridge I do not know the size, I did many sizes. I ill also have a video on just the daisy. I curled back the petals and added a little color to them with an ink pad. I did not add leaves to the daisies. 


I made carnations with 3 sizes of Fiskers scallop circle punches and tissue paper. I used the large, x large and 3x large punches. It was a little difficult to cut the tissue paper with the punches, its best if you fold and make as many layers at once that you can fit into the punch. I used about 6 layers of each size and attached to a floral stem I bought in the floral section of any craft store. I staked the tissue paper layers smallest on top and one at a time I crinkled them up and then put hot glue underneath the flower at the base and then spread the paper out until it looked like a carnation. At least as much like I remember because I do not remember the last time I was sent flowers. lol.


Here is a video just showing the bouquet.


FYI Never through out tissue paper, you can reuse it. If you want it smooth and nice again to put in a gift bag you can iron it on a low temp. I get mine from the Dollar Tree comes in many colors. Same place I bought the vase, I just painted it and added bling.


 Cricut Info & Supplies Used 
Designer: Melody Lane
Machines Used: Cricut Expression 2 
Cartridges Used: Giant Flowers, Flower Shoppe
Other Supplies: 22 gauge wire, 16 gauge wire, hot glue gun, crimper, floral tape, card stock, tissue paper and scallop circle punch for carnations

Saturday, May 18, 2013

FATHER'S DAY GIFT BOX

Sorry about the delay... I picked the wrong date so it didn't post at midnight...lol

Hi, it's Freda from CannCreate Designs, I'm back with a quickie 3D Father's Day gift box project using SVG files, MTC and my Expression. 

I was looking for a gift box for my hubby's father's day gift.  He has been wanting a new wallet so I though the size of this box would be perfect...


This project comes from "The Green Room" set at SVGCuts.com.  I was really amazed at how easy and quickly this project came together.

For the top I found this great green velvety specialty paper from HOTP called Forest Suede at my local LSS that cuts like butter.  Just to be certain I taped it down all the way around so I didn't waste an ounce......


I assembled the top before I decided the "balls" looked a little flat.  So I would advise that you assemble the rack of balls and embellish before attaching to the table....I was a little worried that I was going to mess up the suede.  Draw stripes and dots on the ball pieces, assembled rack base and frame then glued the balls in place on the rack base piece.  Place rounded blobs of Glossy Accents on each ball to make them look a little more realistic....let dry...


Use a tape runner adhesive to attach the velvet to the table top base. Next put the table top frame in place and embellish as desired.  (I put Queen & Co. black gems in the holes around the edges).  Draw the embellish lines (gold and black stripes) and color the chalk tip white on the stick, allow inks to dry then color the white tip with a little bit of blue on the end. Fold the stick along the scored lines and glue (it will be a square shaped tube). There are 2 holes in the suede to help with placement of the ball and stick, I placed a pearl on one and glued the stick to cover the other one...

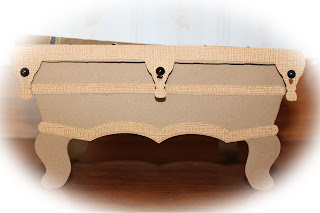
Fold the sides of the table top under and glue in place.  Glue the "fringe" pieces along the long side (there aren't any pieces for the short sides of the top).  I put Queen & Co. large black pearls just above the holes cut in the fringe pieces.


For the bottom of the table fold the "Box" pieces and glue to form the table base, they are pretty self-explanatory.  Glue the 3 straight and scalloped trim layers together and glue in place on the leg pieces.  Attach the leg pieces to the long sides of the box.


Wallah....you're done....What Fella wouldn't enjoy getting a gift in something this special.....I thought this project was pretty special as a gift box...but last week someone made the bottom of the table and filled it with flowers to look like a planter-I thought it was even more amazing....check it out here...
  

Thanks for stopping by, 

Freda


Designed by:  Freda Cannon 
Machine Used:  Cricut Expression
Project Type:  3-D Gift Box
Products Used:  MTC Software; The Green Room SVG Files from SVGCuts.com, Glossy Accents, Queen & Co Pearls and Black Gems, Ink Gel Pens.


Friday, May 17, 2013

Flip Flopping Fabulous

Hi Everyone!
Susie Craft Happy here today with a flip flop fabulous card!  I like when the weather starts getting warmer.  It gives me more inspiration for my cards and craft projects.
Using Cricut's Pack Your Bags cartridge I cut the flip flop and sunglass image at 3".  The sentiment stamp is from Joy's Life Stamps, Pun in the Sun. 

I hope you enjoyed my easy, breezy, flip flopping card today.  Be sure to come back tomorrow for more Cricut inspiration. Thanks for stopping by!


Cricut Info & Supplies Used:
Designed By: Susie Craft Happy
Cricut Machines Used: Cricut Expression
Cricut Cartridge Used:  Pack Your Bags
Paper:  Stampin Up, Colorbok-Caribbean Coral
Project Type: Cards
Supplies Used: Adhesive, Ranger Stickles-Picket Fence, Yellow, Ribbon,

Wednesday, May 15, 2013

Tea Time


Hello again! 

Doreen here from polkadotpaperprincess.blogspot.com.  Today, I have a simple, but fun project.


 My darling grand daughter came for a visit.  She really wanted to have a tea party.  We made cookies together for our snacks.    It was a small little party for our little family.  Everyone of the girls was given a cup and they all decorated them how they wanted so they all ended up with a unique cup. 

The cups were made from Tags, Bags, Boxes and More2.  They were a little tricky to start, but after a couple, they went together really quickly.  We used them to put our cookies into!  We also decided to decorate the side board with "All things tea!"  We used Storybook for the font.  We used Love you a Latte for the tea set.  We took a Cuttlebug folder to add a bit of depth to the trim.  The girls were tickled pink!  lol!  It's so sweet we still haven't taken it down! lol!

Everyone enjoyed the day.  Making cookies, cups and drinking tea together was wonderful! Great memories were made!

 
I didn't realize I had not taken close up of the projects.  We were too busy having fun!  I hope you will do something fun with the little princes or princesses in your lives!

Tuesday, May 14, 2013

Hello and Good-bye!


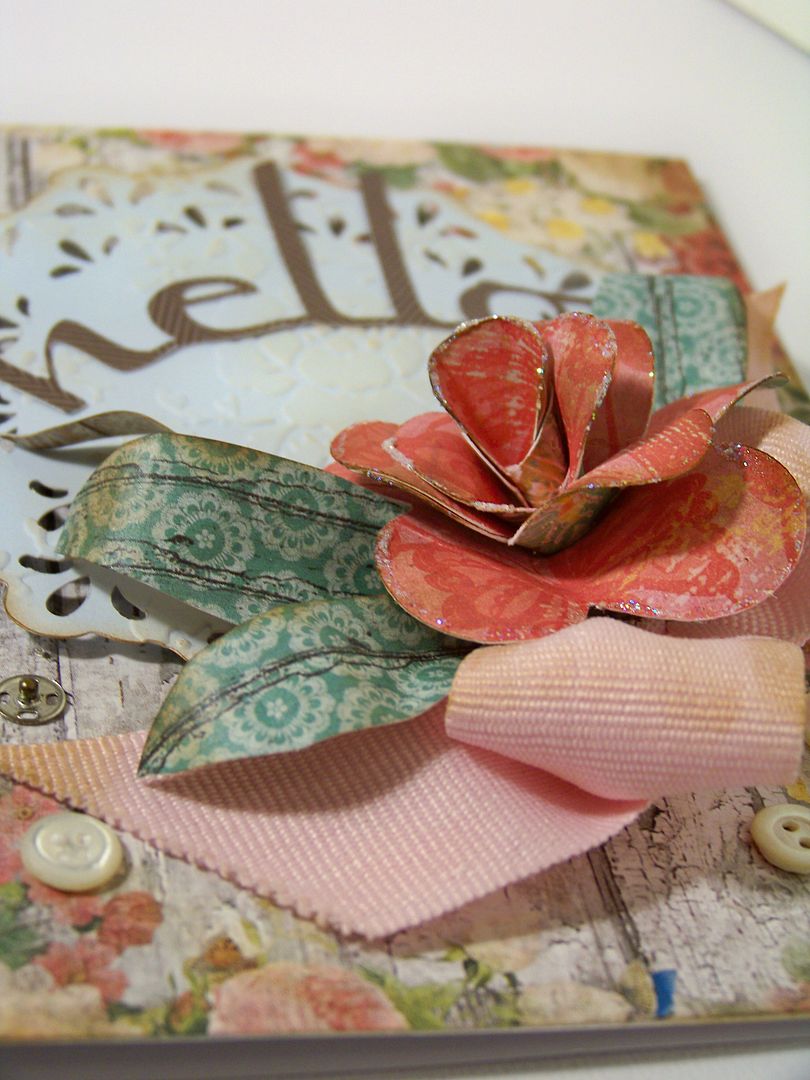
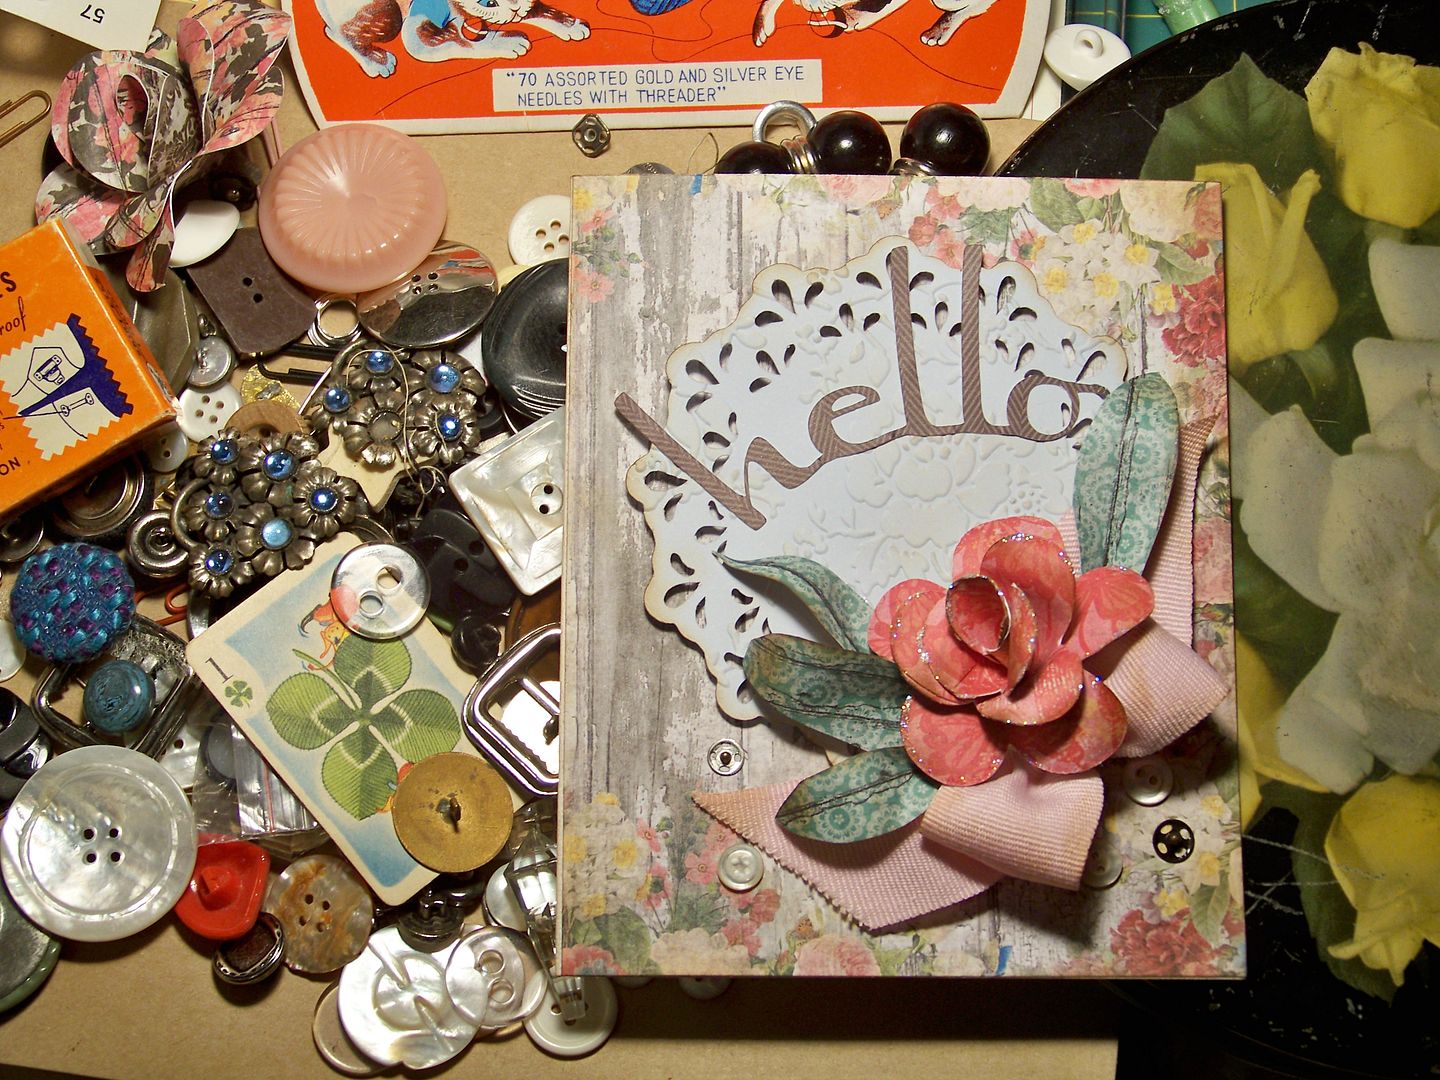
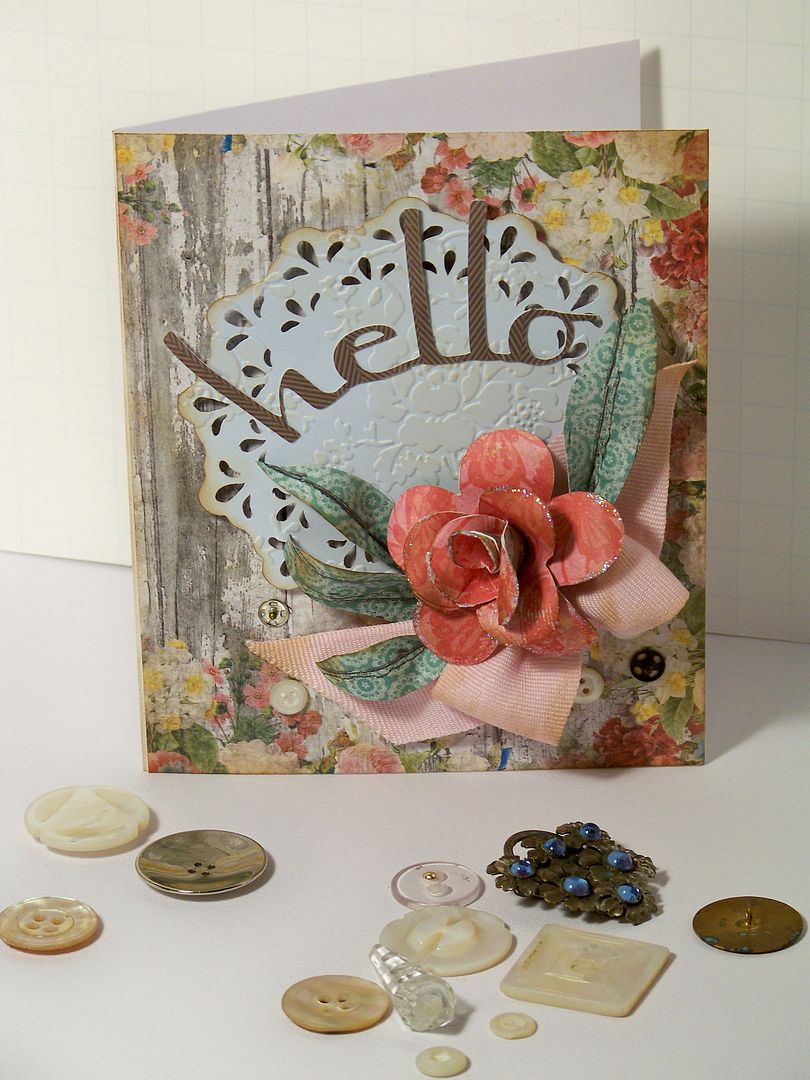
Hello!  This is Nadia from my blog, With Glittering Eyes.  I have been so inspired lately by the beautiful cards created by Michele Kovak on her blog, Thoughts of a Cardmaking Scrapbooker.  I love her style and have learned so much from her since finding her on the old Circle Design Team.  I thought it would be fun to get out my 'Michele sponge' and make a card inspired by some things I have been seeing on her blog.  I love her recent Mother's Day card tutorial,  mini album, and Easter card.  I also wanted to make something that looked vintage.  I thought this would be a fun card for my last project here as a designer on the Cricut Fanatics blog.

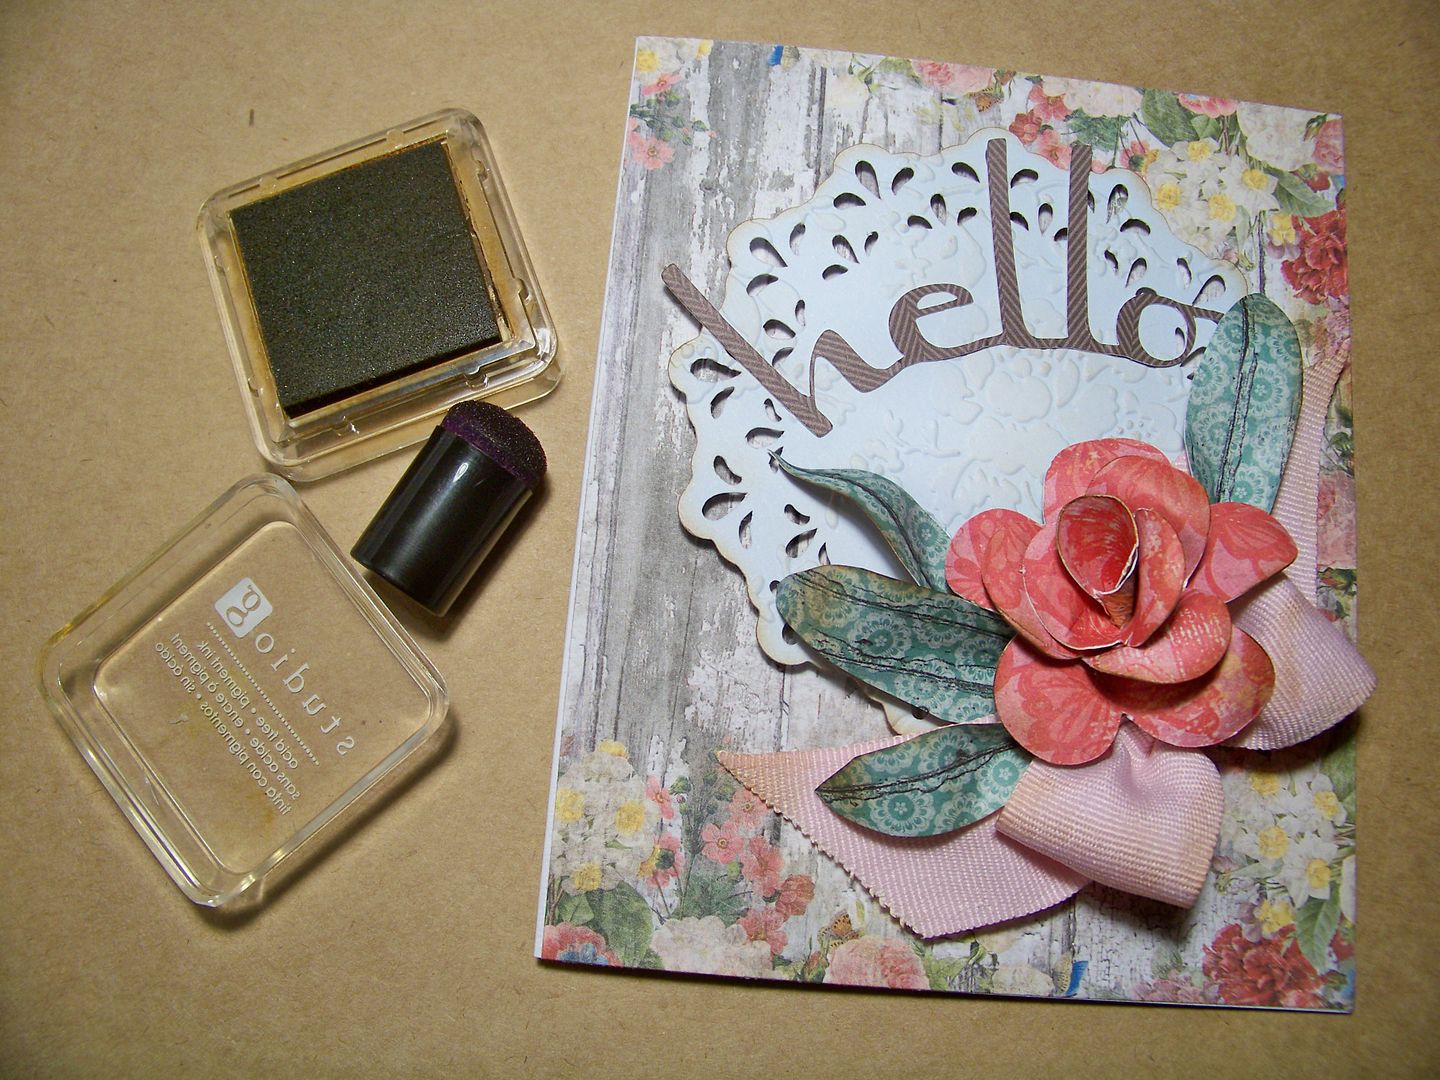
I started with a paper pack from My Mind's Eye with lots of weathered wood and shabby chic florals.

I cut a doily from Artiste (page 31) at 4".  After inking it and embossing it, I popped it up 1/4" so that a natural shadow would separtate it from the card surface.  I added my ribbon.


I created a dimensional flower using directions by Kathy Orta, using Cricut George, as in her tutorial, but cutting the base shapes at 2".  This is the same flower I recently used in a larger size inside an explosion box.  To see my box, click here.  To check out Kathy's video tutorial, click here.  I added a thin, fine line of glitter paint along the edges of the flowers. That felt old-fashioned, like some of my grandma's Christmas ornaments.  I hand-cut leaves, bending and folding to create a little dimension.

Text was cut from Cricut Lyrical Letters at 1-1/2" and manipulated by hand to curve.  (I cut away the butterfly that was part of the text).

To make everything look aged, I inked with brown, including the flower and ribbon.


For a little inspiration, I got out some of my Great Aunt Henrietta's buttons and findings...and added a few buttons and snaps.  


I really enjoyed making this card... and making a mess, revisiting some of my treasures.  Thank you for checking my post today!  I wanted to thank Debbie and the team for allowing me to design here and wish the best for all my crafty friends who make fun things every week here!  Even though I am leaving Cricut Fanatics, you can always find me on my blog, my bloggy Facebook page, and my Pinterest boards!  


Cricut Info & Supplies Used:
Designed By: Nadia Herbst-McConnell
Cricut Machines Used: Expression
Project Type: Cards
Project Theme: Just Because
Cricut Cartridges Used:  George and Basic Shapes, Lyrical Letters, Artiste
Suppies Used: Paper, Quick Dry Glue, pop dots, buttons, snaps, ribbon, ink, scissors

Sunday, May 12, 2013

Happy Mother's Day!

Hi fellow crafters! This is Maria from Stamp, Cut, Create! Today's project is a Mother's Day card I created using a free image from Cricut Craft Room. The basic design of the card was simple, but after some embellishment I think it turned out rather lovely.
I started by sizing the image to be an A2 card (5.5" X 4.25"). I added a 4" X 3.75" piece of printed paper to the top and machine stitched around the edges. To cover up the stitching inside and to make the Mom stand out a bit more, I added a piece of red card stock to the front inside. Adding a pearl and lace flourish, some fabric flowers and a small bit of doodling finished off the front of the card.

 On the bottom of the back inside of the card I placed a strip of the same print paper that I  edge punched with a scallop design. As a finishing touch I added a piece of white lace trim. All in all, this card was quite easy to create, but I love how elegant it looks.
Thanks so much for stopping by today. I hope you are having a wonderful weekend and for all you moms out there, Happy Mother's Day!

Saturday, May 11, 2013

Here’s a Mother’s Day Card for all of you!

Good morning crafty friends! This is Angie from Angie’s Paper Passion! I was inspired to create a card from Split Coast Stampers with some Cricut cuts thrown in! It is called a Tri-Fold card. It looks difficult to make but I was surprised by just how easy it was. I can’t wait to make some more of this type of card!
Tri-Fold-Mothers-Day-Card-2_thumb
I made this card for my Mom and red is her favorite color. I think she’ll be very happy with it!
Below is looking at the card from a slightly left angle…
Tri-Fold-Mothers-Day-Card-3_thumb1
And this next photo is looking at it from the right side…
Tri-Fold-Mothers-Day-Card-6_thumb1
I started with paper from DCWV called The Four Seasons stack (beautiful papers in this stack for each of the seasons with texture and some glitter!). After hand cutting my card in a cream cardstock, the patterned paper, and the mats in red cardstock I then decided which Cricut cuts to use to dress up my card. I used three different Cricut cartridges for the embellishments: Florals Embellished, CTMH Art Philosophy, and Flower Shoppe.
The “Happy Mother’s Day” sentiment, was cut from Florals Embellished @ 1.88”. I added some Stickles to the little pink flower and adhered a flat-backed pearl to the center. This cart has some wonderful Mother’s Day sentiments!
Tri-Fold-Mothers-Day-Card-7_thumb1
The two butterflies were cut from Art Philosophy @ 1.5” and 1.25”. I adhered the two layers together just between the wings–not the wings themselves – to give the butterflies a little more dimension. Then I placed two pearls in the center of the smaller one and three in the center of the larger one.
Tri-Fold-Mothers-Day-Card-9_thumb1Tri-Fold-Mothers-Day-Card-10_thumb1
This next part was really an afterthought. While I was waiting for my bug to cut something out, I started playing around with the DCWV paper that was left over. One of the motifs had this envelope surrounded by roses and had “A Tribute of Love” printed on it. How perfect for my Mom’s card! So I did some ‘fussy cutting’ around it on three sides. The left side of it already had a straight edge because it was on the edge of the 12x12 sheet of paper so I just aligned that side up against the edge of that card panel and adhered it. I added a small pop dot under the right side of it so pops off the card a little bit.
Tri-Fold-Mothers-Day-Card-11_thumb1
The middle top and bottom sections were a little too plain so I added some pearl flourishes.Tri-Fold-Mothers-Day-Card-13_thumb1Tri-Fold-Mothers-Day-Card-12_thumb1
Now for the card front! I made the flower from the Flower Shoppe cart and I LOVED how it came out! I used paper from a 6x6 pad by Echo Park called This & That and cut it out @ 3”. The flower I used from the cart was the <FUN> shapes on page 16 in the handbook. I’ve been on a flower making kick lately (can’t you tell by my previous posts? lol) and this flower was so much fun to make! It was inked and rolled before I adhered it together and added a large pearl to the center.Tri-Fold-Mothers-Day-Card-14_thumb1
And there you have it! This years Mother’s Day card for my Mom! I think that it’s safe to show it here because Mom is 93 and not very interested in surfing the web, lol! It wasn’t that long ago that she asked me to explain what “that word I keep hearing about means?” The word was “Google”! I cracked up! But can you just imagine all the things that she has seen and has lived through? I’ll be so lucky and blessed to live as long and still be able to tell you who I am!Smile with tongue outTri-Fold-Mothers-Day-Card-8_thumb1
Thank you for visiting today and have a very Happy Crafty Mother’s Day tomorrow!
Until next time, Happy Crafting,
Angie
Cricut Info & Supplies Used:
Designed By: Angela Cromwell
Cricut Machines Used: Expression
Project Type: Cards
Project Theme: Mother’s Day
Cricut Cartridges Used:  Art Philosophy, Florals Embellished, Flower Shoppe
Supplies Used: Cardstock, Patterned Paper, Pearls, Stickles, Adhesive, Pop Dots