
Greetings Everyone ! Welcome to our new feature TECHNIQUE TUTORIAL DAY by Debbie O'Neal of Scrap Me Quick Designs. There are so many wonderful ways to enhance die cuts to give them that WOW factor ! On the first day of each month I am going to share with you a different tip to help you grow your technique skills when working with any die cut images.
Today I am starting with the most basic of tips, Die Cut Technique Tip #1: INKING
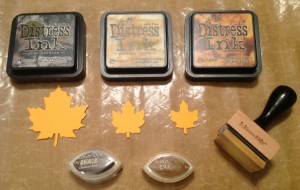
Before you get started: When using ink, I like to have a few basic supplies on hand. 1). A craft mat such as the one made by Inkessentials shown below that you can purchase online or at local craft stores OR you can use an oven splat mat from the kitchen department. 2.) Wet Wipes and paper towels for cleaning up my hands and my craft mat. 3). Ink and ink applicators.
INKS: I prefer to use either Cats Eye Ink pads or a Ranger Distress Pad with applicator for greater control when applying the ink to my die cut shapes. Many other inks work just as well: Stampin Up, Hero Arts, Close To My Heart, Color Box, etc. You can use dye, chalk or even pigment inks. Each gives you a slightly differnt look so it is a matter of preference. Play around and see which type you like to use most. MY TIP: You can use the Ranger applicator with any ink pad OR a foam make up sponge too.
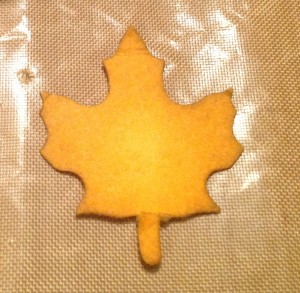
Inking Technique # 1 - You can create shadowing by adding lighter or darker colors to your die images. If you use a distress ink and applicator, lay the die cut image on the mat, ink up the applicators and in circular motions start adding ink to your image. MY TIP: Use your hand or a tool such as a tweezers to hold the image in place while you do this.

Here I used the same color of distress ink and the applicator, and just kept layering the color on the die cut leaf until I had created some shadows to the image. MY TIP: Remember, there is no right or wrong here...keep adding ink until YOU like the way it looks.
Inking Technique #2 - You can add more than one color of ink to your image to add even more depth.
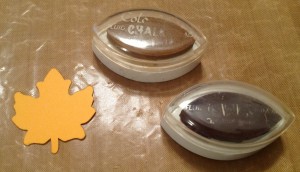
Here I used the Color Box Cats Eye Inks in two different colors. I started with the lighter color to create a shadow, then added the darker brown on the edges.
You can see that by adding two colors you get a much richer look to your die cut image.
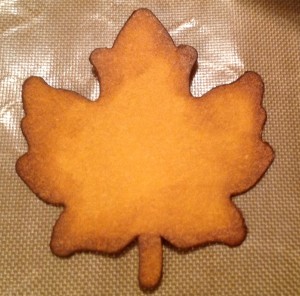
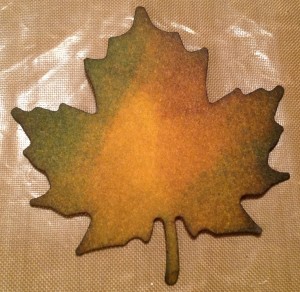
Inking Technique #3 - Don't be afraid to add even more colors to your die cuts. Here I used three different colors of Distress inks, starting with the lighter brown, then adding the green, then using the darker brown around the edges to get this wonderful layering of colors. MY TIP: You can really get a realistic look on many of your die cut images by using colors that would be found naturally on the real images.
So there you have it, some INKING tips to add some pizzaz to your die cut images. I challenge you to give it a try and see what you like best.
My TIP: Practice makes perfect. Cut out a few die cut images out of scrap paper and practice applying ink to it until you get used to this method. Try different types of ink to get the look you prefer.
Stay tuned for other die cut tips next month ! I am working on how to video tape future tutorials to share with you. Post questions in the comment section and I will respond back to you.
Cricut Info & Supplies Used:
Designer : Debbie O'Neal
Cricut Images: Leaf - Destinations Cartridge
Other Supplies Used: Inkessentials Craft Mat, Ranger Distress Inks and Applicators, Color Box Cats Eye Ink Pads, wet wipes and paper towels

Thanks for this tutorial, this is a great way to make the flat cuts dimensional...great job explaining it.
ReplyDeleteI am looking forward to more techniques...you're never to old or experienced to learn something new.
Great tutorial!
ReplyDeleteI ink all of my die cuts but you gave me some new insight into the layering which I don't do often. Love the adding of the green to the brown. Love it!
ReplyDeletelove it!! I ink my diecuts, but your layering technique will enhance them even more! thanks for the tutorial! I also use and love Tim Holtz!
ReplyDeleteGreat tutorial!
ReplyDeleteThanks for the tutorial!
ReplyDeleteWonderful tutorial. I need more practice when it comes to inking die cuts and your tutorial is very helpful.
ReplyDeleteGreat inking tips Debbie! I need to experiment with more colors.
ReplyDeleteThank you so much! This tutorial has helped answer some questions I had!!
ReplyDeleteThanks for the great tutorial! I always make such a mess when I use inks, and now I know I'm not using the right tools. lol, story of my life.
ReplyDeleteThis is one of my favorite things to do especially if you want to match a die cut color to paper. It adds so much depth. Thanks for sharing.
ReplyDeleteAbsolutely love this new segment. Great tips!
ReplyDeleteLove the tutorial. Thanks for sharing.
ReplyDeleteI love adding color. These leaves look awesome!
ReplyDelete