
from SVGCuts and MTC using my Expression.
This project has was made for the top shelf area of my scraproom desk...
makes me smile every time I look at it.
makes me smile every time I look at it.

As soon as I saw the Happy Trails set of designs I knew I had to make it using a picture taken at Sears years ago of my grandson in a hat. The wanted poster was originally intended to be a card, but I wanted it on a 12 x 12 canvas so I enlarged the file to fit the canvas. I purchased the Sasparilla Collection papers by October Afternoon to use because I LOVE the comic strip cowboy paper included in it.
Paint the sides and a little on the front of the canvas black and let dry. Trim the background paper to 11 3/4" and apply to the canvas with Mod Podge and let dry*. Use Black StazOn to ink the edges of the paper once dry.
*NOTE: In a previous project years ago where I used Mod Podge and didn't allow each layer to completely dry before adding next layer I wound up with bubbles and buckling of the papers once the final project was completely dry. I flip the project over and brayer the open area of the canvas and use the Cricut spatula to rub under the wooden frame area. I haven't had any bubble issues since using this technique.
Enlarge the Paper, Text and Frame files from the Wanted Poster Card folder to fit on the 12 x 12 Mat angled slightly then cut it out. (Be sure to cut your frame and text out before printing your photo, you will need to measure the area of the frame you cut to get the correct size for your final picture...speaking from experience....lol. Ink the edges of the Paper file and mod podge to the canvas and allow to dry.
I'm so glad I bought the digital files so that I could tinker with it. I had the photo reprinted on matte paper but found it was to "new" looking for this project. So I opened it in Photoshop and ran the wanted poster action from Panos Effects Old Papers Action Set which I had purchased years ago, you could also use the built in Sepia tone action since the final product you're looking for is the photo. I used the Wanted poster action because you can try out different items like bullet holes, stains, nails and cracks etc. for cool effects on your picture, if you don't like them you just hide or delete them. When the photo looked "right" to me I cropped the file down to just the photo approximately 1/2" larger than the size needed for the area on the frame where it will be placed which you cut previously. I printed the photo on cardstock and used a pair of decorative scissors to trim the picture down to approx. 6" squarish , distressed the edges then inked with StazOn.
Assemble the frame, text and picture layers then mod podge it to the "Paper" layer.
I thought the frame still needed a little something extra so I braided 9 strands of jute into a large flat braid and placed it around the sides of the frame, and a small braid for the hanger.

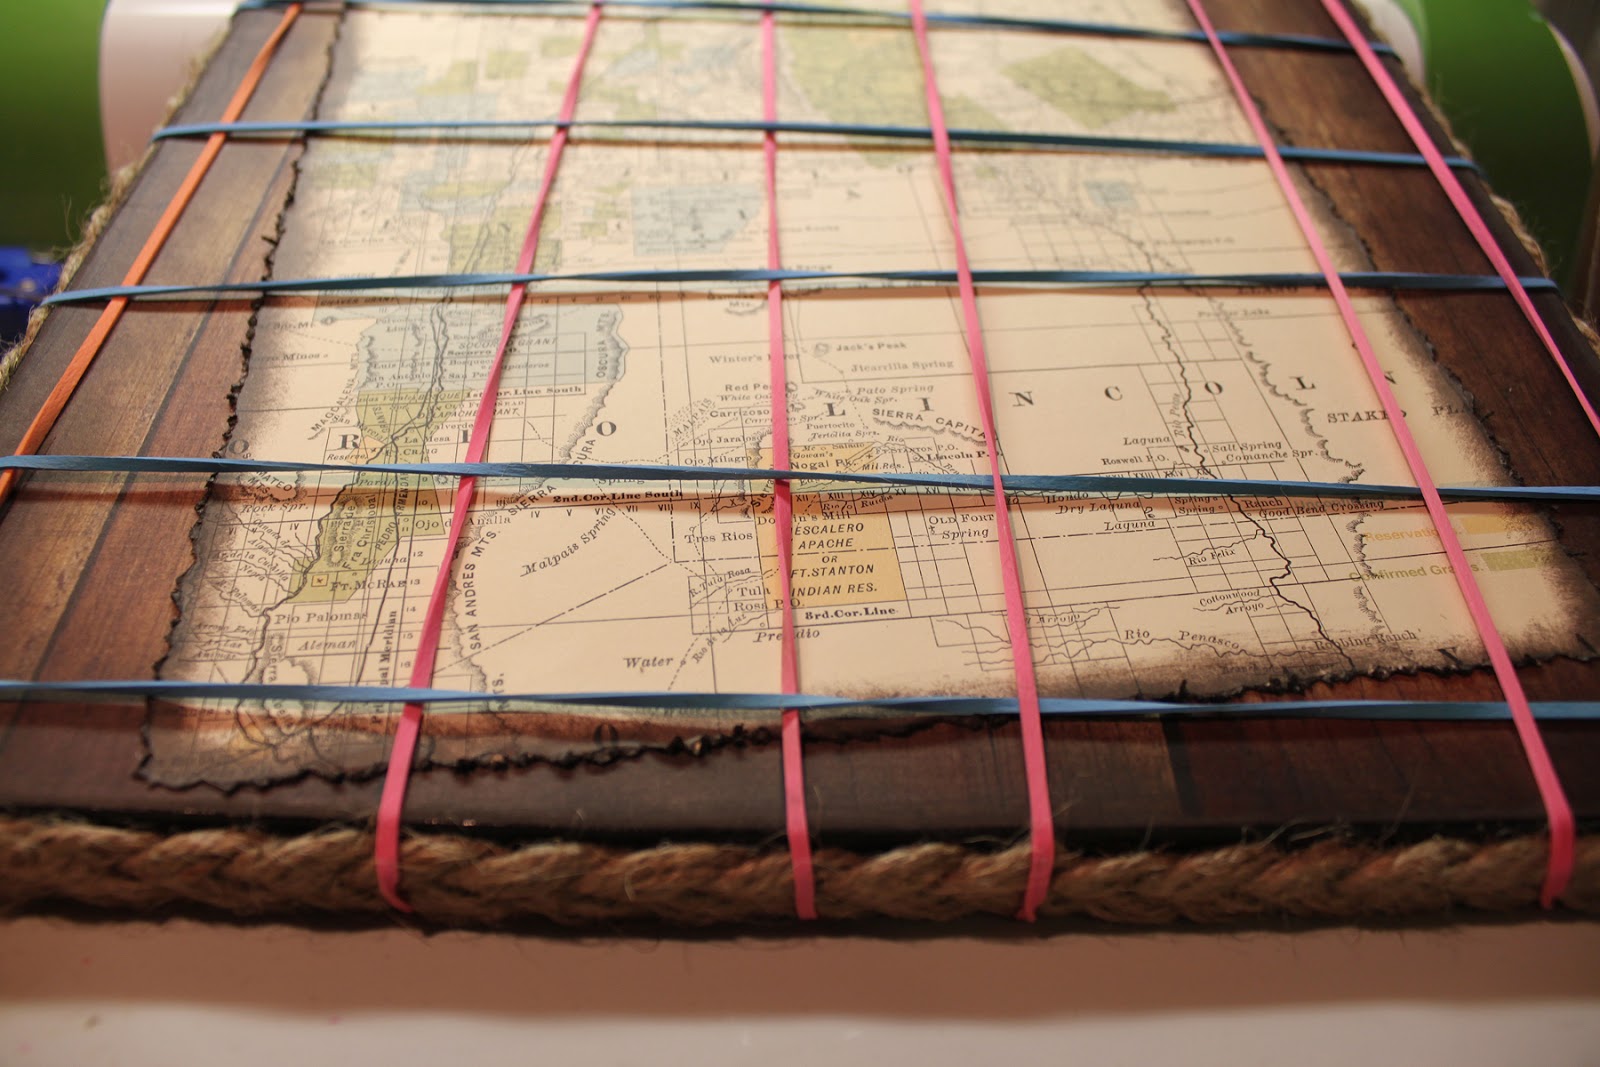
I stapled the start of the braid at the top of the frame and glued it around the sides with Zip Dry adhesive. I trimmed the excess and stapled the other end where they met. I didn't like the appearance of the staples so I cut some jute to create a "fuzz", spread Zip Dry over the stapled area and pressed the fuzz into it...now you can't see the seam or staples. I also did this to cover the staples on the hanger so they wouldn't scratch the wall when I hung it up... I used large rubber bands around the outside to hold the braid in place while the glue dried.


The tag was made using Tim Holtz Distress Inks on a manila tag from the office supply store. The lettering & banner came from Sizzlits dies Typeset and Tattered Banners. The heart was a grunge board shape that I inked and fiddled with for 2 days to get it just right then couldn't wait for it to dry naturally. I used my heat gun and wound up getting to close and suddenly had volcanic like eruption of paint and ink-My beautiful heart was broken. I thought about it for a minute then covered the entire thing with red glitter, then drew lines of glue across the heart and applied gold glitter....let it dry without the heat gun. The next night I applied Glossy Accents thickly and let it dry for a couple days. Add a jute string and "fray" the ends and your tag is ready to be added using pop dots.

The boot and the pot were assembled using the video instructions on the SVGCuts.com website. The boot itself was a little tricky on the front area, but they explain it quite well in the video...I couldn't even begin to explain. Unfortunately I assembled the boot & pot at a crop and didn't take to many pictures of the assembly process.


You might notice that I changed the orientation of the horseshoe before cutting it out. My grandma always said if you turn a horseshoe up side down all your good luck falls out...lol...I'm superstitious so I used the software to move the assembly tabs to the bottom of the shoe so my good luck doesn't get poured out...

Now for the Good Stuff-The Give Away:
If you would like to try your hand at assembling the boot but don't have the ability to cut one, I cut an extra boot to give away. This will come unassembled, it has been inked and embossed you just add the glue...lol....
 |
| Embossing folder not included....it's in the picture so I can remember which one I used |
Mary has a really detailed video tutorial that you can watch to help you with the steps of assembly and of course I will gladly answer any questions you may have just click the link to see it on Youtube:
To win all you have to do is leave a comment on this posting. Don't forget to put your email addy in the comment section so I can contact you for mailing details....I will put the names in a hat, draw and post the winner Friday, April 26th. Everyone is welcome to enter.
Thanks for stopping by and good luck!!!!!
Freda
Designed by: Freda Cannon
Machine Used: Cricut Expression
Project Type: Home Decor
Products Used: MTC Software; Happy Trails Svg files; Sasparilla Collection Paper by October Afternoon; Mod Podge; StazOn Ink; Photoshop Software; Panos FX actions for Photoshop; Tim Holtz Products: Typeset Alphabet, Tattered Banners and Grungeboard Heart, Martha Stewart Red & Gold Glitters, Glossy Accents, Twine and Jute.

What an adorable boot! How awesome to offer one precut! Scraprageous@gmail.com
ReplyDeleteVery nice artwork, Freda.
ReplyDeleteThat boot looks pretty amazing! Not sure I could do as good a job, but it would be fun trying!
ReplyDeleteOh wow! Love your work! would love to have the boot. Wish I had bought the mtc software back when it first came out. I have the surecuts alot program and have not used it much in the last few years. May try to see if I can use it now. Again thank you so much for sharing your work.
ReplyDeleteJackie
thompsonjackie@comcast.net
I have the early version of that software also...have to dust it off every now and then and use it too just so it doesn't feel like the red-headed step child around here...So many machines and softwares to go with them...lol...
DeleteI fell in love with this the first time I saw it. Would so love to win this boot.
ReplyDeletestuff@gt.rr.com
Stinking cute! I didn't know we were allowed to use things other than PC. Woot, woot! Your project is amazing! It would easily look cut in most homes!
ReplyDeleteAs long as they are cut on a Cricut they can be posted (made sure I checked before posting)...can't wait to post some of my projects with my new Gelli Plate which will have screens/stencils cut from cartridges on the E2 or Expression (there is an awesome chain link fence design on one of the sports cartridges that will make a gorgeous stencil)...I'm also working on using the Tim Holtz products and including PC in there some way so I can share here....I love all my toys, and at my house they all get along...lol
DeleteOoh, can't wait to see what you make with the Gelli plates! Love Tom Holtz, too!
DeleteThat set is so adorable! I love the "Wanted" poster.
ReplyDeletesherri_braun@hotmail.om
Awesome project! I wish I had gotten MTC when it was still usable with a Cricut!! You are one smart cookie!
ReplyDeleteLove the boot! My Cameo just arrived a couple of days ago and I'm such a novice - haven't had time to play too much as yet. My granddaughter participated in our County Fair calf scramble and actually caught one. Now she has to raise that thing to show at next years' fair and she is an avid barrel racer. She would love that boot. Thanks for sharing....
ReplyDeleteMelinda Strange
csi275@yahoo.com
I also love the wanted poster...great job.
ReplyDeleteYour wanted poster is just fabulous. What an awesome idea and just too stinkin cute!
ReplyDeleteWhat a fun post! Your projects are great and your story is so entertaining! Love how you 'healed' your broken heart!
ReplyDeleteThis is amazing! I love the wanted poster more than I can convey!!!
ReplyDeleteOh wow this is so cute and cool. I have looked at this svg cut for a while. I sure would love to win that boot. TFS AJ
ReplyDeletejeria22@yahoo.com
That is wonderful and I would love to win the boot. Thanks
ReplyDeleteAnother great project, Freda! Love the "stealing Grandma's heart" - wonderful!
ReplyDeleteAnother great project, Freda! Love the "stealing Grandma's heart" - wonderful!
ReplyDeleteOh lov this! Would lov to receive this. Thank you for sharing your talent with us.
ReplyDeleteJackie
thompsonjackie@comcast.net
OMG! that is just 2 cute! great job! TFS and the inspiration!
ReplyDeletenanapuddin2u at gmail dot com
I want one omg it is sooooo darn cute....Maile lei
ReplyDeleteI have been eyeing that SVG design set for some time. I just love your project. It is so nice of you to offer a free cut of the boot. Crafters are such "giving" people.
ReplyDeleteSandra
sfitzu15@gmail.com
This is just too cute! I love the whole project it's so adorable.
ReplyDeleteYour project is awesome. Of course, it would make you smile - what a labor of love! Thank you for the tip on the mortem lodge. My stuff always bubbles up. Good luck to all of you!
ReplyDeleteWhat a great project. Love the boot but would never try tackling somethng like that. So nice of you to offer one as a giveaway.
ReplyDelete