Greetings-Christel AKA the scrapworm here of Scrapworm Blog ! Very delighted to be part of this incredible blog. I have several projects to share with you today but first I would like to tell you a little about myself. I live in western Kentucky. I am employed a school teacher. I teach history and special education.
I have a wonderful husband and four children(two girls and two boys). My children's ages range from 18 to 14. To top it off, we have two dogs(a havanese and mountain cur) and two cats(shorthair and longhair). One of the kids,Allee, graduated this year and she is now enrolled studying to be a nurse while working fulltime as a CNA. She had a full ride to play softball but decided to stay home and go to school. Katee who is a junior runs cross country and track. Brett and Bryce both play football. My husband and I are constantly on the run shuffling kids to practice, meets or games. Well more than enough about me. Let's get onto crafting!
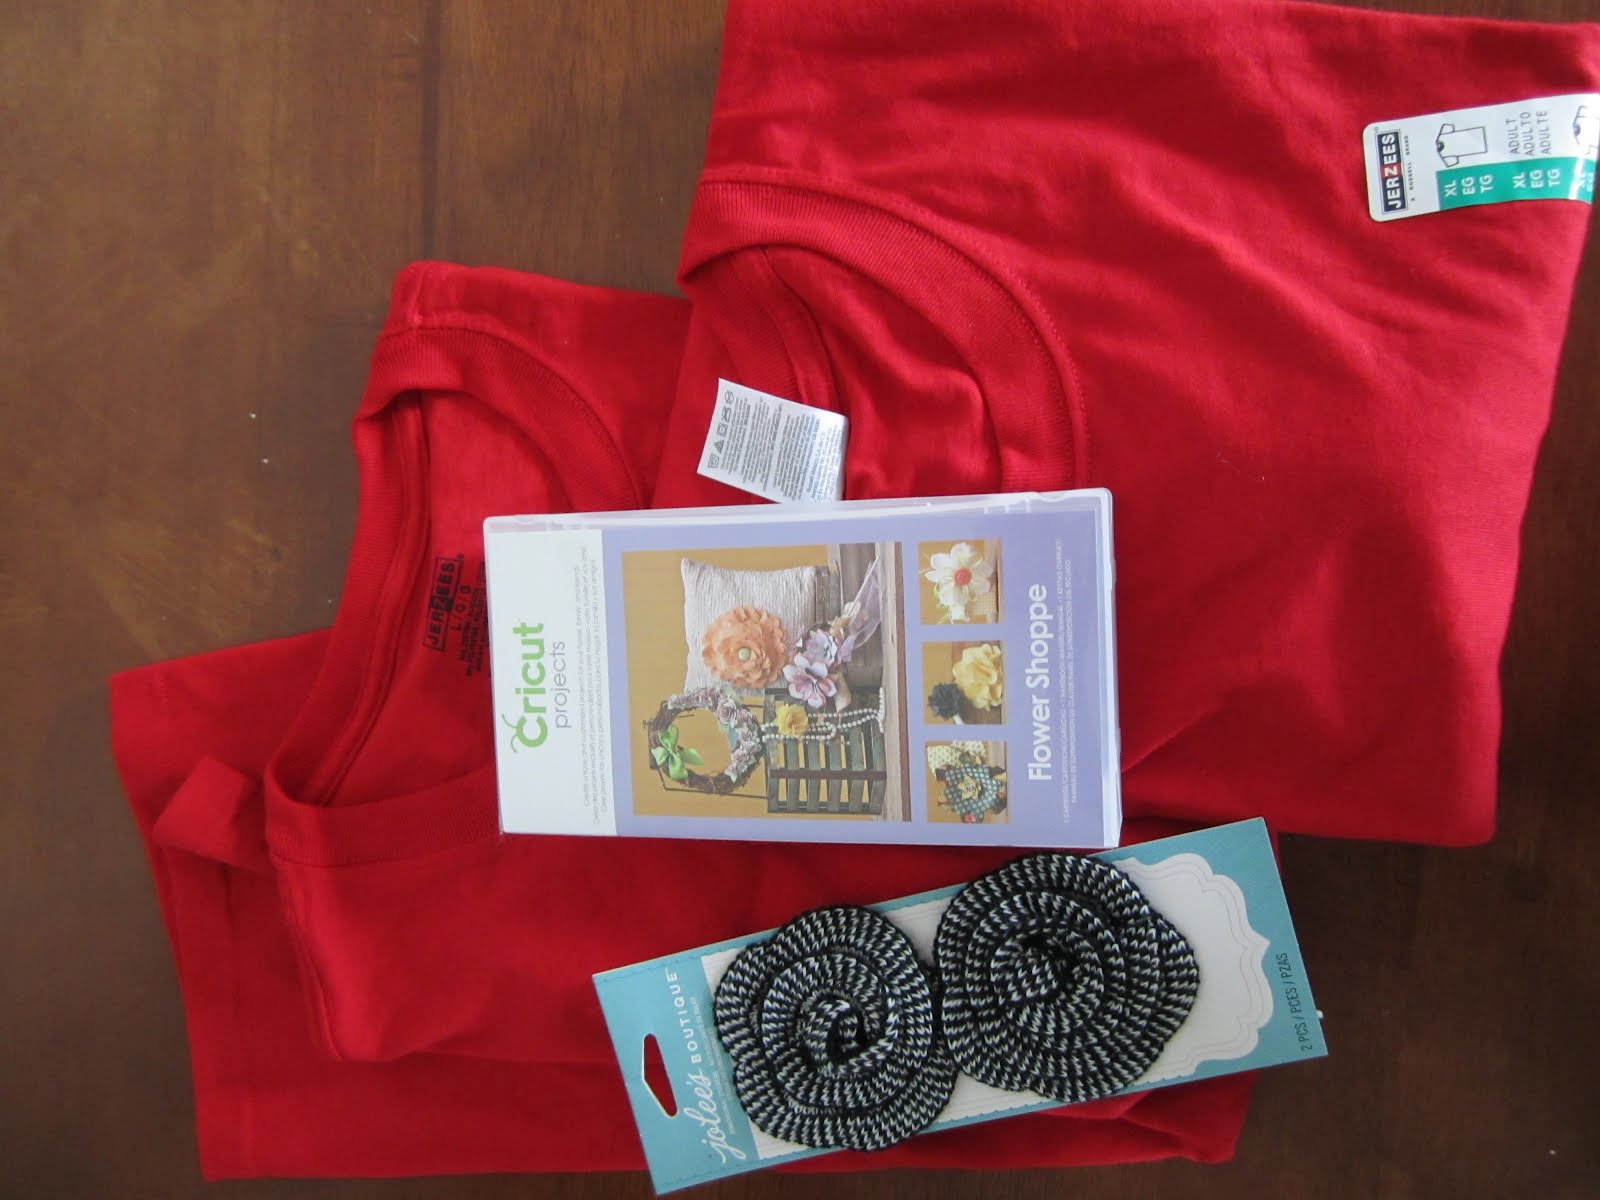
Using the cricut to make a ruffled spirit scarf:
First project I would like to show you today is what I call a spirit scarf. I saw this on Pinterest and decided it would make a great accessory to where to games to try and spiff up wearing blue jeans and a tee. I used my cricut to try and make one. Here are the steps to make a ruffled scraf.
1. You will need Flower Shoppe cartridge, two XL tees, fabric glue or sewing machine and flower embellishment (if you choose to put a flower on the scarf).And of course, your cricut expression.
2. Cut of sleeves, neckline and bottom seam. Next, cut the sides.
3.Cut 12 ten inch squares.
4. Place one square on the cricut mat. Put in the Flower Shoppe cartridge. Using the Fun1 image cut a 9 inch segment. Note: I used the heavy cutting blade instead of regular. I put my settings on medium cutting each image twice. You may want to play around to see how your cricut reacts to fabric.
5. Once you have cut out all twelve pieces, take each piece and stretch it. Do not be timid. This stretching allows the fabric to curl inwards. Hence, no sewing for the strands. Then, hold one piece by the end and run your hand down the fabric. Kinda like milking a cow! Do this for each piece.
6.Taking two strands, place them end to end. Join them together with fabric glue or sewing. Do this until you have no more fabric. You should have six strands all together. If you glue them, allow ample time to dry before going on to the next step.
7. Gather strands together grasping in the center, place around neck. With a scrap from the tees tie the strands together in front about in the middle.
8. Take a flower embellishment and pin to the scrap. Now, you are ready for the game!
Note-I have an alternate version. Instead of using Flower Shoppe, use Cricut Basics circle. Once you have cut 12 circles, cut about two inches into the circle making a swirl. Do not worry about being precise, the stretching and pulling will take care of minor impurities. Follow the rest of the directions. Another option is to cut four "fun1" images and 8 circles. Just have fun with it.
Using mulberry paper for dimension
When using my Create a Critter or Camping Critters, I like to use mulberry paper to add depth to my scrapbook pages or cards. Another thing I like to do is tell a story using several pages.
Materials needed are the Camping Critters cartridge, Zombies from CCR. Mulberry paper, 12 by 12 paper of your choice, glue, leaves, glue, ink and chalk. Last but not least your cricut expression.

For the first two scrapbook pages, I used the Camping Critters cartridge. I cut out the raccoon and bigfoot images. I used mulberry paper on the outer layer to give the images dimension. The raccoon was cut at four inches. Big Foot was cut at six inches. Also, on the raccoon, I chalked the mask. I used leaves and an evergreen branch (which was secured down with a glue gun)to give the pages a more wilderness feeling. The pictures I added were from this summer which commerate my first mountain biking experience. Look how happy my daughter and I are. An 11 mile trail should have took about an hour and half took us over four hours.


The final image was cut using the CCR exclusive file called Zombies. I used the girly skull and nuclear symbol. The skull was cut at five inches. I dropped ink on the notebook paper where the word zombie is.
This page is the final of our mountain bike narrative. Katee contracted some funky mess in the woods. Hence, the zombie title. I said she had zombie bumps because all of the crazy news stories about zombies. She had to get a steriod shot and passed out in the doctor's office which landed her in the hospital.
Hope you enjoy the rest of your day! God Bless and craft often!
Cricut Info and Supplies Used:
Designed by: Christel
Cricut Cartridges Used: Campin Critter, Flower Shoppe, Zombies
Cricut Machine Used: Expression
Other Supplies Used: t-hsirts, fabric glue, sewing machine, mulberry paper, cardstock, patterened paper, ink, chalk, artificial foliage
DON'T FORGET TO LEAVE A COMMENT TO BE ENTERED TO WIN OUR WEEKLY DRAWING IN SEPTEMBER.


Wow, you've been busy! Great projects!
ReplyDeleteGreat projects. Love the scarf. Campin Critters is one of my all time favorite cartridges and who wouldn't love a girly skull with beautiful eyelashes? Poor Katee though. Those bumps look aweful. How is she still smiling? Thanks for sharing your projects with us today.
ReplyDeleteWow! Lots of great tips, tricks and projects. Thanks.
ReplyDeleteI have never tried to cut fabric yet, but this spirit scarf sure will go into the list of must do projects. I'm glad to hear you can also cut mulberry paper, I've got a box full of that somewhere.
ReplyDeleteGreat job, thanks for sharing your wonderful projects.
Wow, you are full of awesome ideas, thank you for sharing! Hope your daughter gets to feeling better!
ReplyDeleteWhat fun projects! I may have to get Campin Critters.
ReplyDeleteOh my...I love the scarf ! And the use of the mulberry paper on the layouts is gives it so much texture...very cool projects Christel. thanks for sharing with us all.
ReplyDeleteTerrific projects. Thanks for the detailed instructions on the scarf project. I think I'm gonna try that one.
ReplyDeleteGreat projects & Thanks for sharing so many with us all at once (I need my drooling smilies!)! Love the scarf...how fun would those be to wear to Friday night football games??! Love, love, love your layouts...I've never used mulberry paper...especially LOVE the branches you added to the pages! Whew!! You're settin' the bar awfully high!!!
ReplyDeleteClever projects girls!
ReplyDeleteClever projects girls!
ReplyDeleteI love your scarf and layouts. Campin Critters is such a great cart :)
ReplyDeleteLots of great creations by you, thanks for sharing them with us! I love your scarf technique and your pages are so creative.
ReplyDeleteWhat a cool technique. I never would have thought to make a scarf that way!
ReplyDeleteGreat job on your layouts too.
Love your projects . Makes me want to make a scarf and go camping.LOL. Thank you for your crafty inspirations.
ReplyDeleteLove all your projects. I loved the use of the mullberry paper!!!
ReplyDeleteCute projects! Love the camping layout!
ReplyDeleteI just love scarves and yours is so cute -- very creative. Your LO is also adorable. What an adventure!
ReplyDeleteLove your spirit scarf and your layouts are super fun! The texture and that periodic table paper are wonderful!
ReplyDeleteLove the LO's Christel and the scarf is adorable!
ReplyDeleteLove the scarf who would have thought to use the cricut for this. Also, your layouts are great and full of techniques.
ReplyDeleteCool idea for the scarf!
ReplyDelete~Rachel
Love the adorable layouts but how sad she had Zombie Bumps and then a Steroid reaction. I have the same reaction to Steroids too, no fun.
ReplyDeleteGood job on the scarf project! Nice to see a fabric project and hope to see more. Thanks for sharing the mulberry paper tips and love the use of the leaves and pine branches in your LO's.
ReplyDeleteI love using mulberry paper as well. The scarf was a neat idea! Love the camping cartridge images. I need to get that one! Thanks for sharing!
ReplyDeleteJulie
Awesome idea for the scarf! And your layouts are really adorable with those cute critters and neat papers!! :)
ReplyDeleteYour scarf is adorable! I love Camping Critters but don't have it yet.
ReplyDeleteOMG - so many projects and they are all so good!
ReplyDeleteThanks for sharing!
I'm going to have to run out and buy some mulberry paper! Those critters are cute! Awesome job!
ReplyDeleteLove the scarf and layouts. Your poor daughter! Made for a great page though :)
ReplyDeleteLooks like a fun bike trip and I love the critters.
ReplyDeleteFANtastic projects! The scarf is a great, creative idea!
ReplyDeleteClever idea with the scarf! Isn't Pinterest the best! Love Big Foot!
ReplyDeleteGreat projects! TFS
ReplyDeletewow! you were a busy and creative lady! love it!
ReplyDeleteLove that you scrapbooked a not so pleasant event. It's part of life afterall! The scarf is great, way to upcycle those old tshirts.
ReplyDeleteLove the scarves that are so popular and love how yours turned out.
ReplyDeleteI have never used mulberry paper in my cricut before but sure need to. I really like how it does add dimension to your cuts and how you used them.
Your poor Daughter! What a scary event but love how it turned out well and could be made into a funny event to remember. Great use of the digital cuts.
Nicely done! thanks for the detailed instructions.
ReplyDeleteI never thought about using mulberry paper in my cricut. I'm going to have try it ... soon.
ReplyDeleteReally enjoyed your post -- great scarf and love the info on mulberry paper -- and how you use several layouts to tell a story!!
ReplyDeleteVery nice scarf and layouts! Never thought about using mulberry paper with the Cricut. Thanks. Deb
ReplyDeleteAmazing projects! You've been busy. Thanks for sharing!
ReplyDeleteWow, great project, thanks for sharing
ReplyDeleteGreat projects!
ReplyDeleteWhat a grreat narrative shared through pictures and Cricut cuts! TFS
ReplyDelete