While we are no longer making active post of Cricut projects on this blog as of 8/1/2013, we invite you to use it for continued die cut inspiration as we will leave the blog up for viewing. Happy Cricuting !

Wednesday, January 16, 2013

Post a Note!

Hi, Doreen here from polkadotpaperprincess.blogspot.com with a quick tutorial.

I made a couple of post-it-note holders for gifts. 

You will need:

1 sheet card stock 5 1/2 x 11 inches
1 piece  5 1/2 x 5 1/2 sheet card stock
1 piece 4 x 4
2 pieces 5 1/4 x 5 1/4 pattern paper (optional)
Post it notes
Adhesive
Things to embellish with.

Score paper at 5 1/4, 5 3/4, 8 1/4
Fold along the score lines.   It will look like this.
 Add adhesive to the smaller folded section.
Add the smaller piece of card stock to this section and embellish.

 Take the 4x4 piece of cards stock and score it at 1/2 " on all sides.  The snip one piece of each corner as show.  I like to keep two side long and two sides short.   Tape on the tabs and fold in to make a box.

This one only used goodies from my stash, sorry no Cricut.  You will notice I forgot to add the post-it-note holder (box) to this one.  I went back and added it on.  I did it really early in the morning!  lol!
 This one I used a Greeting Farms image, colored with Copics and made wings for her from Martha Stewart Elegant Cakes.
These are fast, simple and cute gift ideas that can made to match any size post-it-notes you have.  Now go root through your treasures and make a couple to have on standby for quick gifts!

Monday, January 14, 2013

It's Not Too Late for This Resolution!


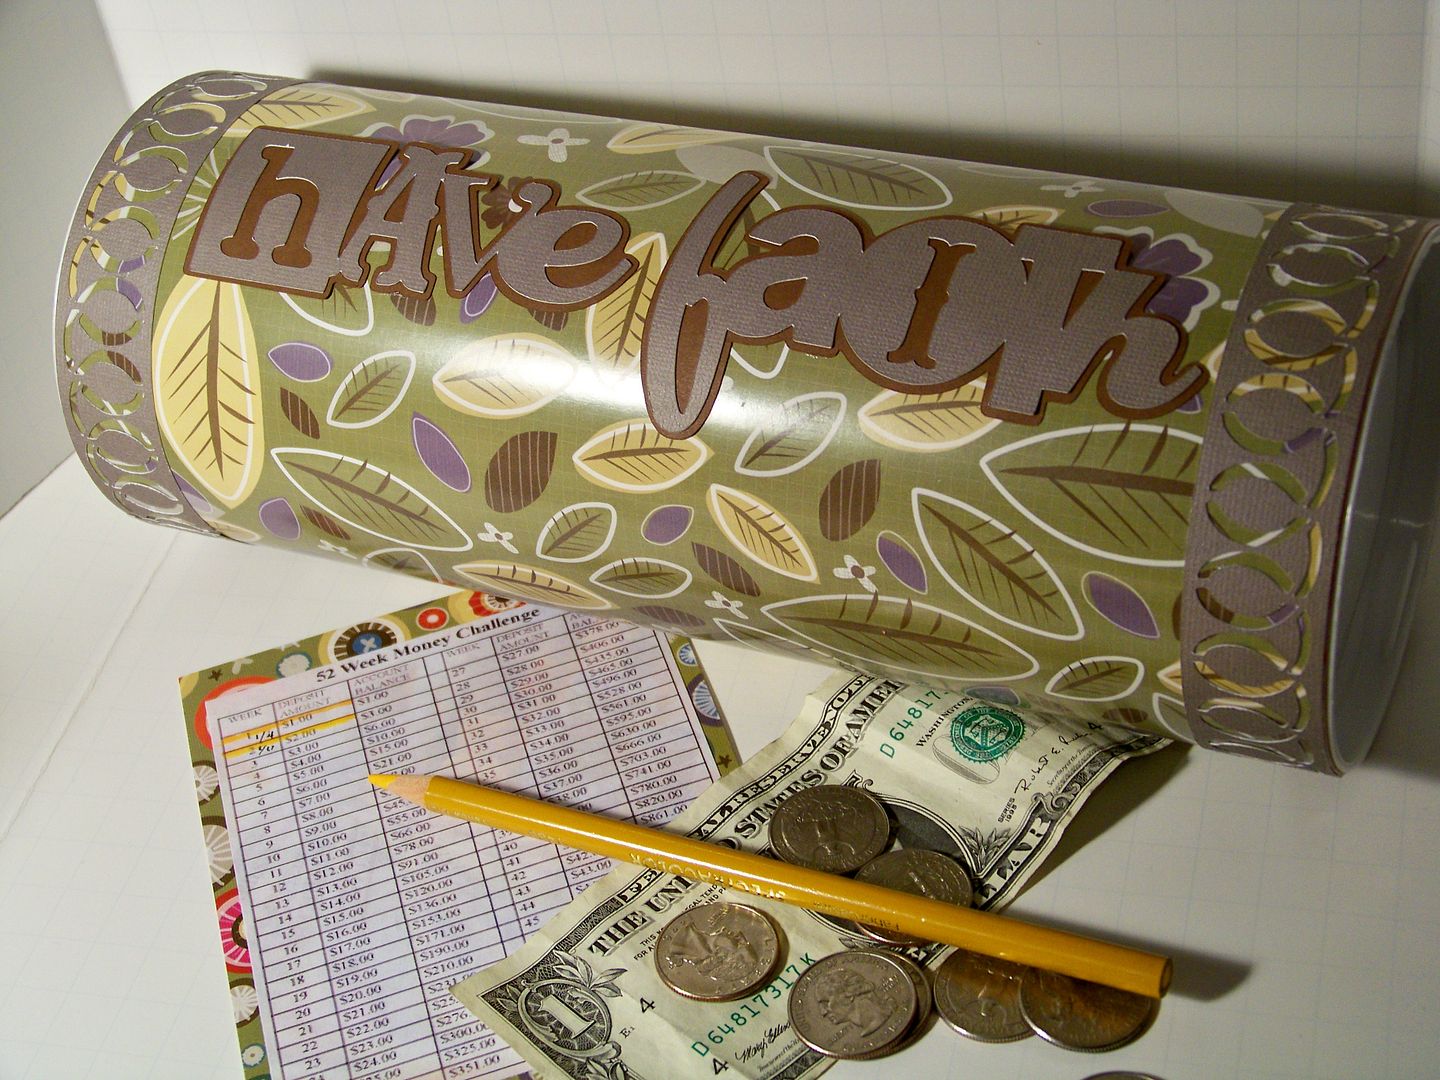
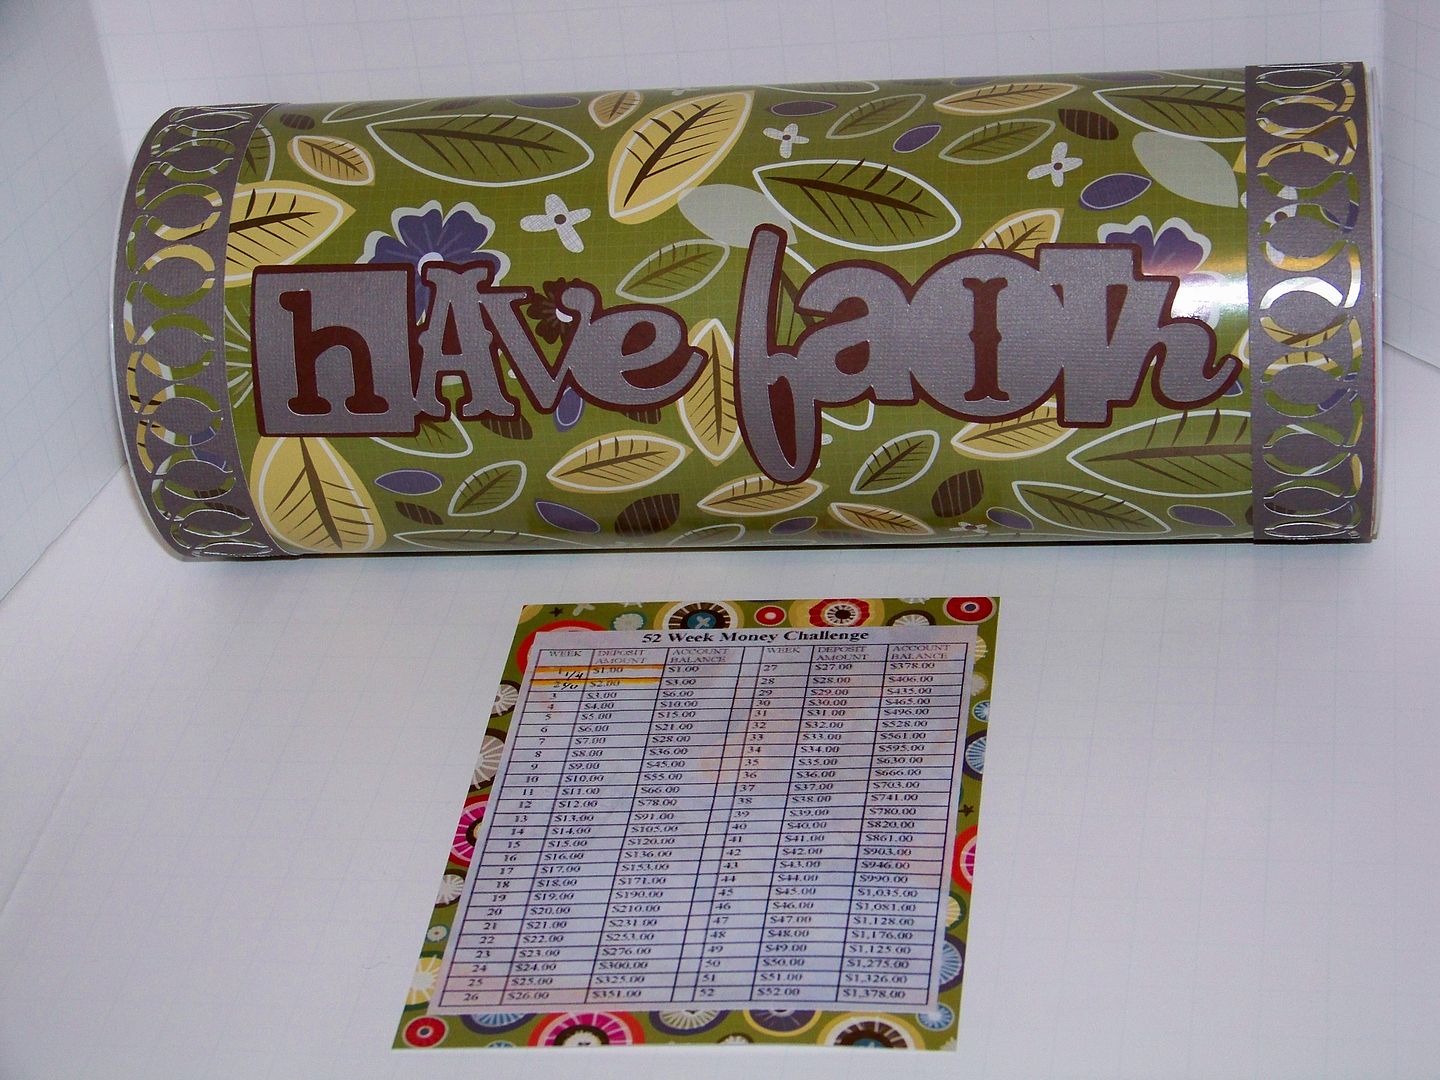
Hello!  This is Nadia from my blog, With Glittering Eyes.  By now, many people have already dumped their New Year's Resolutions, but I have one that you might just want to adopt-- and even though we are halfway through January, it is easy to catch up!  This year, my family is doing a super-easy, extra savings plan that I found on Pinterest.  For each week, one through fifty-two, we put that amount of money aside.  So, for week one, we put in $1.  Week two was $2.  This is week three, so we will put in $3... this will continue until the last week of the year (week 52) when we will put in $52. You get the idea.  At the end of 2013, without doing any extra work and without even noticing the weekly shortage, we will have saved $1378.  Click here to see the pin- and the mini spreadsheet.  (There's no reason that you have to deposit in order so you might prefer to make the biggest deposits earlier in the year and smaller ones during the month of December since the goal is to make this extra saving unnoticed).

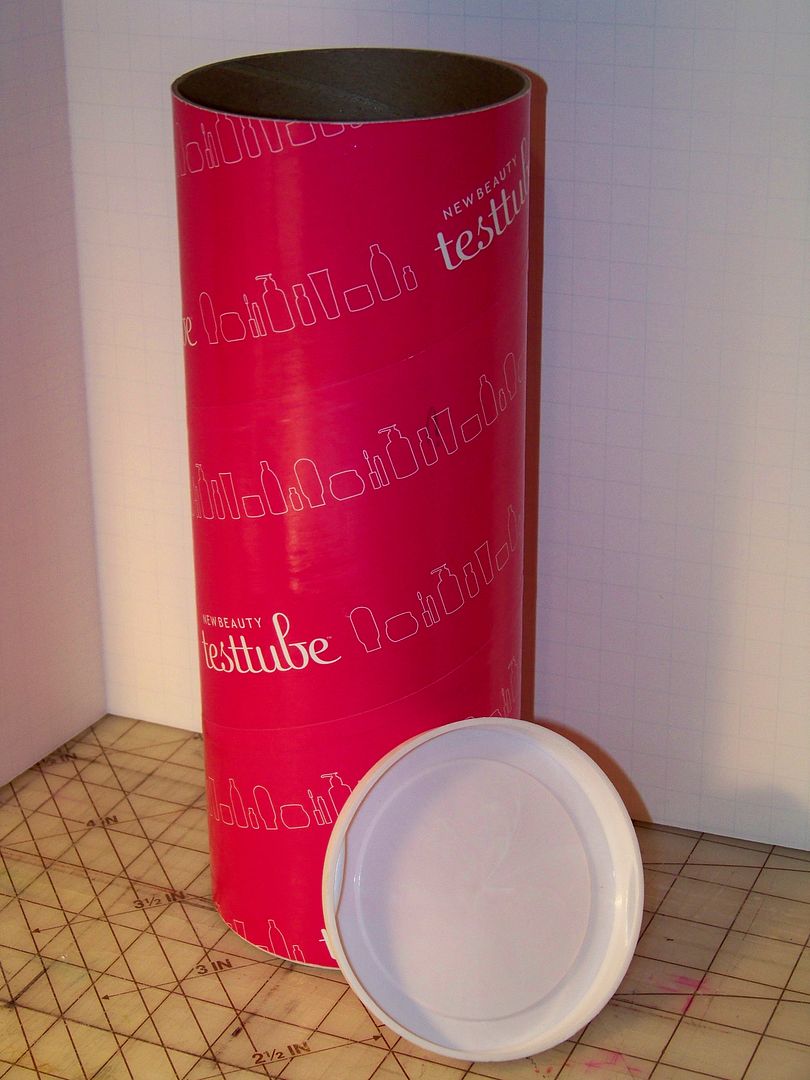
My daughter was concerned that we needed a little bank to hold weekly deposits.  For our little bank, I used a recycled bit of packaging from one of my Christmas gifts and covered it with decorative paper.  She thought this shape looked like a deposit tube from the drive-thru at the bank.


I used Paper Trimmings for borders (page 69, border cut at 1") and Wall Decor and More for the phrase (page 45, cut at 2-1/4").  I picked this text because my OLW for the year is 'faith' so I am trying to work it into some of my projects this year.

I printed off the spreadsheet from the pin-- my daughter particularly likes crossing off the weeks.  We keep it inside with the money.


That's all there is to it-- easy peasy-- and to catch up, it will only cost you three bucks.  This is a great way to make an extra, end-of-year offering at church or to have a little stash to buy a gift for the family to share after the holidays.  ...And it's a LOT easier than keeping that weight loss resolution!

Thank you for checking my post today!


Cricut Info & Supplies Used:
Designed By: Nadia Herbst-McConnell
Cricut Machines Used: Expression
Project Type: Uncategorized
Project Theme: New Years
Cricut Cartridges Used:  Paper Trimmings, Wall Decor and More
Suppies Used: Recycled tube with ends, paper


Sunday, January 13, 2013

A Floral Bouquet Birthday Card (with a Skunk)

It's Sis from Paper, Craft & Scissors with a quick birthday card.  Sometimes it is nice to give someone a card that is less than serious but still pretty.  Okay - I almost always give someone a whimsical birthday card and this one is no exception. 

I have the perfect stamp sentiment that reads "another year older?  no stinkin' way!" from Darcie's Heart and Home.  The stamp set includes a darling skunk but I wanted to make a little larger card with a little dimension.  I found a cute skunk on one of my "go to" cartridges, Birthday Bash.  As designed, the skunk holds the number "7" and a balloon.  The added value of this cut is that is large enough to completely cover the Action Wobble spring that I wanted to use.  I cut the skunk at 4" tall.


While I could swap the number easily, I decided I wanted to add a bouquet of flowers and skip the balloon.  You can see the skunk has one arm down and one arm up.  Rather than hand cutting another arm, I used the area with the raised arm as the base of my flower bouquet.  First, I hand cut a triangle to serve as the flower bouquet wrapping and tucked it underneath the downward facing hand.

I cut a three types of flowers from the Flower Shoppe including one that has a flap to make the flower have more dimension.  I used a variety of sizes with the largest flower measuring 1.30" tall and the smallest measuring .90" tall.  I assembled my flowers and add a pearl accent to each.  I adhered the largest flowers first and then worked in the smaller flowers which were adhered with a pop dot.  The fern sprays are from the McGill Pine punch.


Once I finished assembling the flowers, I added the Action Wobble spring.  He was a little off balance so I glued a penny on the backside of the skunk head to counter the weight of the flowers.  The skunk and his bouquet are attached to a Spellbinder cut-out (the floral patterned paper) that is adhered to a piece of chipboard in order to give the skunk plenty of "wobble room."  The background patterned paper measures 5.25" square.


I used my Copic markers to add some texture to the skunk's white fur and face.  His eyes were cut out of white cardstock.  I added blue irises by punching light blue cardstock with my Crop-A-Dile.  I added pupils with a Micron pen.  


Saturday, January 12, 2013

Hogs and Kisses

Hi , this is Maria from Stamp, Cut, Create! My apologies for the late posting. Seems like I am still playing catch up from the holidays!  I am trying to get a head start on making Valentines this year and today I'm sharing the first one with you.
The card is a standard A2 size, 5 1/2" by 4 1/4". The solid papers are from DCWV.  The print paper is from Sassafras' Count Me In pad. The cut is from the Graphically Speaking cartridge and I used the Gypsy to size it at 5 1/4" by 4". The edges were inked with Picked Raspberry Distress Ink by Tim Holtz.  I added a piece of grosgrain ribbon to this piece before adhering it to the pink mat. I then took another piece of ribbon and folded it to form the tail, then placed a brad from My Mind's Eye through all the layers.
The cute little piggy is from the Cricut Lite Playtime cartridge and is cut at 2 1/2".  I inked the edges of all the pieces with a Copic marker (R21) before assembling it. He's adhered to the card with foam tape. The stamp sentiment is from Paper Trey Ink, On the Farm set and inked with Momento Tuxedo Black ink.
Thanks so much for stopping by the blog today and I hope you enjoy the rest of your weekend!
Maria

Friday, January 11, 2013

A New Year and A New Baby Gift Bag

Hello everyone! It's Angela from Angie's Paper Passion, (TiffysMom on the Cricut MB). Well, it’s a new year and my new Grandson will be here very soon! (less than 2 weeks!) So today I’d like to share with you a gift bag that I made that’s perfect for a new baby gift! (Sorry about the photos, it’s been overcast here for several days – not great photo taking weather!)


I started with a large white plain gift bag from Michael's and added cardstock and patterned paper as the base. I cut the stork and baby from the New Arrival cartridge and the crib, mobile, and onesie from the 9 Months cartridge.


I love using lots of layers on my cuts and putting pop dots between the layers to give my images even more dimension. Then I added some Glossy Accents and Distress Inks to my cuts. The rug is just a circle that I modified in Cricut Craft Room and turned into an oval. I created the tag with my Grandson’s initials on it in CCR by welding a 2” circle to a 3.5” x 2” rectangle using shapes from Cricut Craft Room Basics. Then I welded a slightly smaller rectangle inside the larger one to create an open ‘window’ and then welded his initials in the opening using Gypsy Font. I cut an extra tag layer without the window and initials as a base and used pop dots between the two layers. A mini brad and twine are the finishing touches.


One of the little gifts that I am adding to this gift bag is a hat that I knitted myself with my Knifty Knitter (which is also made by Provo Craft!) I hope that he will be able to wear it when he comes home from the hospital.


The cutting recipe for the gift bag is on my blog - Angie's Paper Passion.
Thanks for visiting and Happy Crafting!
Angela

Info and Supplies Used
Designed By: Angela Cromwell
Project Type: Gift
Project Theme: Baby
Cricut Cartridges: New Arrival, 9 Months, CCR Basics
Cricut Machines: Expression
Other Supplies: Large gift bag - Michael's, doily - Wilton, cardstock - The Paper Studio & Coredinations, patterned paper - The Paper Studio, Glimmer Mist - Tattered Angels, ink - Tim Holtz, Glossy Accents - Ranger, twine - Pink Paislee, brad, pop dots, Knifty Knitter - Provo Craft, yarn - Bernat 

Thursday, January 10, 2013

Working Girl

Hi.  It's Renee from I came, I saw, I created...ummm late!  So sorry.  I was having Blogger issues with posting pictures and had to research how to get around the issue.

Today I am sharing with you an office collection I created for my hubby's admin.  When the Cricut cartridge Suburbia first came out, I knew it would coordinate perfectly with October Afternoon's 9 to 5 collection.

This is the cover to a notepad.


Materials Used:
  • Cricut cartridge Suburbia
  • October Afternoon's 9 to 5 collection
  • Stampin' Up! cardstock in Night of Navy, Old Olive, Daffodil Delight and Groovy Guava
  • Seam binding ribbon in black and white
CCR file:  https://www.box.com/s/599uzmrlslvvh3rv8kz7

Thank you for joining me today!  See ya next month!  =)

Wednesday, January 9, 2013

Happy New Year. This is Maura with a baby shower invitation. A friend of mine approached me with an invitation she found that had a giraffe on it and asked me if I could do something similar but with an elephant instead so what we decided on follows.
 

The card base is black, the animal prints are from an online source and matted on blue cardstock that I got at Joann's. The elephant is cut at 3.25 inches from "Birthday Bash". The flag is attached to a toothpick that I clipped the pointy ends off. Popped the elephant up off the card and used my computer to print the party info and it was done.
Hope everyone is having a wonderful start to the new year.

Tuesday, January 8, 2013

Cupid Bear

Hello- Meg here from PeacockPaperie.blogspot.com .I don't know about you- but if I wait until right before a holiday to make my cards , I feel all pressured and it becomes a chore for me . So I am starting my Valentines now! This pop up easel card features the Teddy Bear Parade cartridge. (I just cannot stop using it- it's too dang cute!) Patterned papers, border punch, and stamp are all from Stampin' Up! Doily -Wilton. Bows-Offray

Monday, January 7, 2013

2013 New Year Craft Resolution

Happy Happy New Year Everyone! It's Melody (aka KauaiMelody on the Cricut Boards and CricutMelody on my Blog) and as always, elated to be your designer today.  I would like to share with you my 2013 New Years Craft Resolution.  I am going to recycle my Bottle Cap Stash, and make little ornaments for a live Christmas Rosemary Tree Centerpiece for 2013.  I always run out of time to do this, so I thought I would start ahead and make a few Bottle Cap Ornaments each month, so I could finally have my decorated Rosemary Tree at the dinner table on Christmas.

Here is an example of a Rosemary Tree I buy each year.  Alas, it never gets decorated despite my best intentions.  I buy these at Home Depot for $8.95.


So I have started now on my Holiday Goal, and I have made 3 little ornaments from my favorite bottle caps.  Being a Master Procrastinator, I have shocked myself, because my mantra is, if it weren't for the last minute, nothing would get done.

Minimilist Bling Ornament:


Lots of Bling Ornament:


Bling with Fancy Soda Can Die Cut Ornament:


PICTURE GALLERY OF ORNAMENT ADVENTURES

Acquiring real ornament tops for the bottle caps:


Getting my friends and family to drink this specific beer so I can have my favorite bottle caps:


Pulling out my Cuttlebug and Provocraft Die Cuts to use on my prepared aluminum can square.


Looking at more Provcraft Die Cuts and bling possibilities for next month's ornaments:


Hope you enjoyed my share today and if you would like to see photos up close and personal of altered tickets that I designed for a winter swap, swing by
http://cricutmelody.blogspot.com/.

(Oh, did I mention my second 2013 Craft New Years Resolution - to keep my Blog up to date!!!)

Here's hoping that all of your New Year Resolutions come true.

Joyful Crafting Always,

Melody

Designer:  Melody
Machines: Cuttlebug
Supplies:  Bottle Caps, Ornament tops, Bling, Provocraft Dies, Soda Can, Epoxy,
                Scissors, Embellishments of your choice



Friday, January 4, 2013

Little Village (long with lots of photos)


I scrap lifted this idea from the cricut website.  They made their houses with a winter theme but I thought it would be clever to use a more traditional look.  I am planning to make some houses with Valentine and Easter themes to sell on Etsy.  I used Pop-up Neighborhood and my cuttlebug.  The buildings are cut at about 6 inches (base to wall top).  I used paper from my scrap stash.  No full sheets were used in the making of this project.  I thought it would be fun to see if I could use my scraps instead of grabbing full sheets of paper. 

 
The Pop-up Neighborhood cart is very easy to follow, just make the cuts for the card, card shift and the necessary layers and layers shift.  I did use my gypsy to hide the small cuts on the sides of the buildings, hiding these cuts prevents the buildings from folding. This photo shows the pieces cut, embossed and ready for the Xyron machine.


I want to show the “foundation” for my buildings.  I wanted these buildings to be very sturdy so I repurposed the football schedule-team photo posters.  We get a huge package of these every year at my school and most teachers do not take any.  I grabbed most of the package before Christmas Break.  They started out as a 25” by 36” poster.  I cut the posters into 12” by 24” segments.  By cutting the buildings with the printed side up I was able to create buildings with white insides. 


I cut a second layer from some heavy craft paper.  The brown color provides plain sides and back for the buildings.  I attached these two pieces with glue and scrapbook adhesive.


This shows one of the buildings after I applied the Xyron adhesive.  I then followed the score marks to fold the buildings.  I placed them on pieces scrapbook paper that were pasted onto scraps from the posters. The bases are 5 1/2” by 6”.
 

These photos show the side of one of the buildings.  I also included a photo that shows the inside of one of the buildings.  I like how the posters and craft paper crated a “finished” look to the buildings. 


Here is my little village as it stands right now. I plan to make a couple more buildings this weekend. 


Thank You card

Happy New Year!!! Hope everyone has had a great new year so far.
This is Trinity from http://trinityscraftingcreation.blogspot.com/ and today I have a thank you card that I needed to make for someone that had sent me a really awsome christmas box.

I made this on a A2 size card and used my Cindy Loo cartridge for the owl and the phrase.
I used Echo Park paper for the background and some colored cardstock that I had for everything else. I cut the owl out at 3.5" and the the phrase and the brown embelish below it out at 1" and then put a couple of MS pearls on either side on top of the yellow ribbon and one in the middle of the brown embelish. I also used thick pop dots to pop the owl up off the card and then used thinner ones for the phrase.
 
Hope everyone has a safe and happy new year!
 
 
Designed by ~ Trinity Wallace
Machines Used ~ Cricut E2
Supplies used ~Cricut: Cindy Loo Paper: Echo Park
Other~ Echo Park paper, colored cardstock, martha stewart pearls, yellow ribbon
 

Thursday, January 3, 2013

Out with the old~

In with the new.

Happy New Year everyone!

This is Sara from www.sarawandrews.com.

I am going to attempt Project Life again this year. 

Last year I made it through the month of May before I became overwhelmed and stopped.

But, I still love looking at the pages I did complete last year.

So, I'm going to give it a try again this year.

My project today is a Project Life Title Card~


How adorable is that little guy? 

Baby New Year is found on the Cricut Craft Room Exclusive Seasonal Characters digital cartridge.

I used my Gypsy to size him at 3" which is perfect to use on the 4x6 title card found in the Project Life Clementine Edition Core Kit.

I added two Studio Calico 2013 New Year Stamps and now he's ready to kick off my 2013 Project Life.

For more information on Project Life visit www.beckyhiggins.com

I used~
CCR Exclusive Seasonal Characters

DCWV Christmas & Winter Glitter Cardstock, MME Merry 6x6 Paper Pad, MME Lost & Found Portobello Road, Studio Calico 2013 New Year Stamps, Project Life Clementine Edition Core Kit

Circut + Pier 1 = Inspiration


Hi, Lori from The Singing Shell.  Sometimes I get inspiration for my cards from the strangest places.  This time I got my inspiration from the Pier 1 Imports Christmas Penguin.  The little penguin with his foot in the cupcake was just too cute to pass up.  I thought it would make a great birthday card for winter if I could find the perfect penguin from one of my cartridges and alter it.  To give the card a more vintage look as opposed to the bright, Christmas original: I chose some soft and feminine colors.  Even the penguin is not solid black.  I used distress inks, lace, distress file for the paper edges to complete the look.

1.  I needed a chubby little gal like the one in the Pier 1 penguin so I got her from Jolly Holidays.  So that just goes to show ya that Jolly Holidays ain't just for Christmas! :)
2.  I hid the face using the Gypsy and drew eyes and eyebrows like the Pier 1 penguin.
3.  Unfortunately, I had to perform minor surgery on my gal.  The little feet were attached right at the tummy so I cut them off (ouch!).  I cut thin pieces of cardstock to make legs and attached the feet.
4.  The bow is from Paper Pups.  I added glitter to add a little texture and fun.
5.  The cupcake is from From My Kitchen.  I added glitter to layer because the frosting layers were white on white and wanted it stand out a bit.
6.  The pennants are hand cut and were added onto the twine with Glossy Accents.
7.  I added the crochet ribbon and distressed the edges of my paper.


Designed by ~ Lori Sjogren
Machines Used ~ Cricut Create
Supplies used ~ Cricut: Jolly Holidays, From My Kitchen, Paper Pups. Paper:  Prima and Webster Pages.  Other: Tim Holtz Antique Linen & Black Soot Distress Pads, Tim Holtz Antique Linen Distress Marker, Webster Pages Crochet Ribbon, Donna Salazar Pralines & Cream Fairy Dust Glitter, other glitter and twine from my stash.


Wednesday, January 2, 2013

The Greatest Gift

Happy New Year and a day! This is Cindy from Scrap-Obsessed. I have a super simple layout for you today and a great way to use up some of those scraps.


All papers and chipboard stickers are from the Close to my Heart Pear & Partridge line. The title was cut using the Cricut Art Philosophy cartridge. This layout could easily be done with all of those little scraps we all have. The small squares are all 2x2". The photo mat on the left will hold a 6x4" picture.


The two photo mats will hold 4x4" photos.


The title portion: The Best Gift, was cut at .75" and Family was cut at 1".


And with pictures:


Sorry this last picture is so washed out. I finished putting the pictures on it after dark and had to use a desk light. Thanks for stopping by. I hope your New Year has started out wonderfully. Cindy

Tuesday, January 1, 2013

Happy New Year!

Happy New Year!


The winner of the Holiday Cakes Cartridge is:
 
Super fun giveaway! I enjoyed the hot chocolate display set, it was amazing! Looking forward to seeing more 3-D items!
 
I have sent you an email.
 
If we do not hear from our winner by Friday, we will choose another name.
 
Thank you to everyone for leaving such sweet comments for us!
We here at the Cricut FANatics blog look forward to sharing our passion for crafting with you in 2013! Our best wishes for the happiest and healthiest New Year to all!