Wednesday, July 31, 2013
Farewell Cricut FANatics and a final Project Tutorial
Tuesday, July 30, 2013
My Last Post for Cricut Fanatics ~ A Heritage Layout
Hello everyone! It’s Angie from Angie’s Paper Passion and I’m so sad that our beloved Cricut Fanatics Blog will be closing after tomorrow, so this is my last post as a Design Team member. I have been very happy and honored to have had the chance to share my projects here along with these other very, very talented designers. I’d like to thank Debbie O’Neal for starting this blog and all of her hard work to keep it going. And this leads me to my layout today. This layout is completely scrap lifted! I first saw this LO when I first met Debbie – at Provo Craft Demo Training back in the Spring of 2010! I had always wanted to recreate it and felt this was just the right time. (Debbie, can you believe that this blog is a year old? And that we’ve known each other for over three years?!?! Boy does time fly!)
So here is my Heritage layout:
Since I’m a new Grandmother, I felt it was important to document my Grandson’s ancestry on both sides of his family. I had researched my family history many years ago but now I needed to find out more about my Daughter-in-law’s family. So after she gave me the names of my Grandson’s great-grand parents I created this layout for him. I am going to frame it for his bedroom wall.
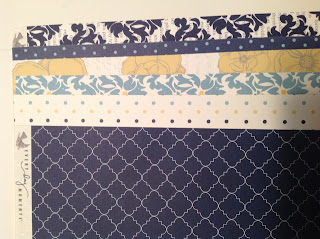
I used the same cartridge, Heritage, and the same paper from DCWV. The one thing that I did change was the tree image but it still came from the Heritage cart. I typed up all of the family names in Word and placed them in the frames under the cameos and they contain my Grandson’s parent’s, all four Grandparent’s and all eight great-grand parent’s names. I know that he’ll really appreciate this when he’s older!
I hope that you will still follow me at my blog Angie’s Paper Passion where I will continue to post all of my crafting & Cricut projects and where I hope to continue to inspire others in their crafting pursuits!
Thanks again to all of you for visiting and to Debbie for bringing us all together!
Cricut Info and Other Supplies Used:
Designed by: Angela Cromwell
Cricut Machine Used: Expression and Cricut Craft Room
Cricut Cartridge Used: Heritage
Other Supplies Used: DCWV patterned paper, American Crafts cardstock, foam dots
Happy Crafting!
Angela
Monday, July 29, 2013
Butterfly Theme
I'm sad to say this will be my last post on this blog. I've really enjoyed sharing my cricut creations with all of you. I invite you to visit me over at Ink-spirations. Butterflies make me think we are always changing and evolving....
The base of the card is 4 1/4 x 5 1/2 folded. Butterfly image cut at 2.5" and then glittered. There are dimensions between the green background and the navy blue background. Pearls on the butterflies and the half fans at top of card.
Butterfly bookmark cut at 5.5" and laminated. Butterfly on gift bag cut from Home Accents at 6".
The Hersey Kiss butterflies cut from Stampin' Up double-sided pattern paper. No glueing needed for assembley. Directions can be found at Qbees Quest. Really easy to make.
Machines Used:
Expression 2, Cricut Imagine
Cartridges Used:
Sophie - card (Feature key card 2)
Sophie - bookmark (Feature key bookmark)
All Wrapped Up. Green cardstock and pattern paper.
Home Accents - Butterfly on gift bag
Other Supplies:
pearls, Stampin' Up designer paper, white gift bag, glitter, dimensionals, laminator, Hersey Kisses
Sunday, July 28, 2013
Divine Wedding Card
Saturday, July 27, 2013
Train Picture Frame
Today I wanted to share a picture frame I created for a picture of my husband and our nephew. We went to the train museum and I wanted to create a keepsake for our nephew.
I selected the train from the Carousel cart and used Design Studio to layout the frame. The train image is 8 inches. The window was too small for my picture so I used the hide contour and placed a 3 inch square from George & Basic Shapes in its place. I cut this out three times on blue, green and red pattern paper and twice from chipboard.
Next using the shadow function, I welded a rectangle to the bottom of the image to give me a flat surface. I cut this out of black pattern paper and chipboard.
For the frame back, I used the welded shadow/rectangle and used the vertical frame back from the Fancy Frames cart. Again using the hide contour function I hide the rectangle utilizing only the stand portion of the image. I cut this from chipboard.
To assemble, I glued the red train to a chipboard cut and the blue train to the other chipboard cut. I hand cut the smoke stack and light off the blue train. From the green train I hand cut the top of the smoke stack, the roof of the train and the cow catcher. I cut circles from George & Basic Shapes to match the size of the wheels and I created a window frame by cutting a 2 3/4 square inside a 3 1/2 square. All pieces were inked with Versa Magic "Jumbo Java"
The frame looked a little plain so I doodled some and added a number cut from the Lovely Floral cart. The numbers represent the date we went to the museum.
Thank you for stopping by and allowing me to share with you this weekend. It has been a pleasure being a part of the Cricut FANatics blog. Happy Cricuting!
Designed by: Rita Poteat
Cricut Cartridges Used: Carousel, George and Basic Shapes, Fancy Frames
Cricut Machines Used: Cricut Expression
Project type: Home Decor
Thursday, July 25, 2013
Princess party
Hi all it's Terri from www.scrappinwiththebug.blogspot.com.
So a fellow scrapbooking friend of mine ask me last year to make the decorations again this year for the Miss Downriver pageant. This is actually part of the whole Miss America Organization. She told me it was a western theme and the colors were pink, brown. I told her about the fun paper from Carta Bella Giddy Up girl. It was perfect!!
She wanted a banner and also some table decorations. So I made several items for the little princess party which is hosted the day before the actual crowning of Miss Downriver and Miss Downriver outstanding teen. The current Miss Michigan normally is in attendance and the girls have a BLAST. They truly are all little princess and just a delight to be around.
The banner is cut from Birthday Bash using the triangle and shadow banner.
The letters are also from Birthday Bash
The cowgirl boots are from County Fair
The horse is from Create a Critter
The crowns also from Create a Critter
I will say I'm sad to see this blog go and want to thank Debbie, and all the other designers and admins who made a great attempt to keep this going. May all you enjoy your next ventures in the crafting industry!!!
Hope you all have a great day and have enjoyed the blog.
Terri
Saturday, July 20, 2013
21st Birthday Card
Friday, July 19, 2013
CHRISTMAS IN JULY
I've been scouring Pinterest for ideas, any possible craft was pinned into my "Christmas in July Ideas" board. I am writing this in April and I decided to make Snowmen gift boxes for each of the ladies. Each box will hold an ornament for their tree.

Okay, here goes....Today I am sharing a Snowman Giftbox using an SVG pattern I purchased from a company called My Scrap Chick . They sell patterns for most cutting machine software formats and even in PDF for printing and hand cutting. This Winter Patio Pavers pattern is their paper version of the patio paver blocks that people paint and make decorations out of. There is also a card file included that matches, maybe I'll get time to make cards too...

Now get one of the 2 same sized pieces, apply adhesive to the back of the piece (if you are using liquid glue do it sparingly and only around the outside edges to minimize waviness on your snowman top). Apply this piece to cover where the tabs are glued inside.
Assemble the box bottom in the same manner...using the remaining pieces. Your boxes should fit together like this:
Now add your face and buttons to the top of the box, and you're good to go...I hope you enjoyed this little "Christmas Break."
I must say it has been a pleasure to share my projects with you...I'm sure I'll see you all around on the blogs. Thanks for stopping by,
Freda


