While we are no longer making active post of Cricut projects on this blog as of 8/1/2013, we invite you to use it for continued die cut inspiration as we will leave the blog up for viewing. Happy Cricuting !

Thursday, March 14, 2013

A Birthday on Saint Patrick's Day!

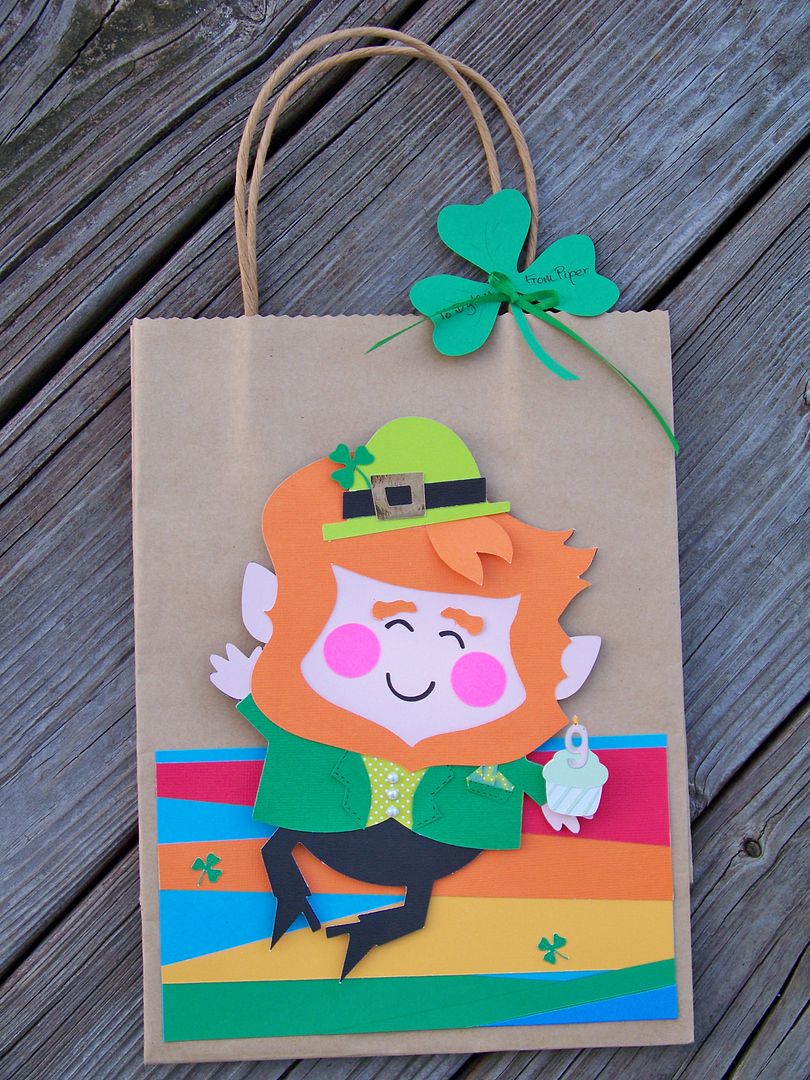
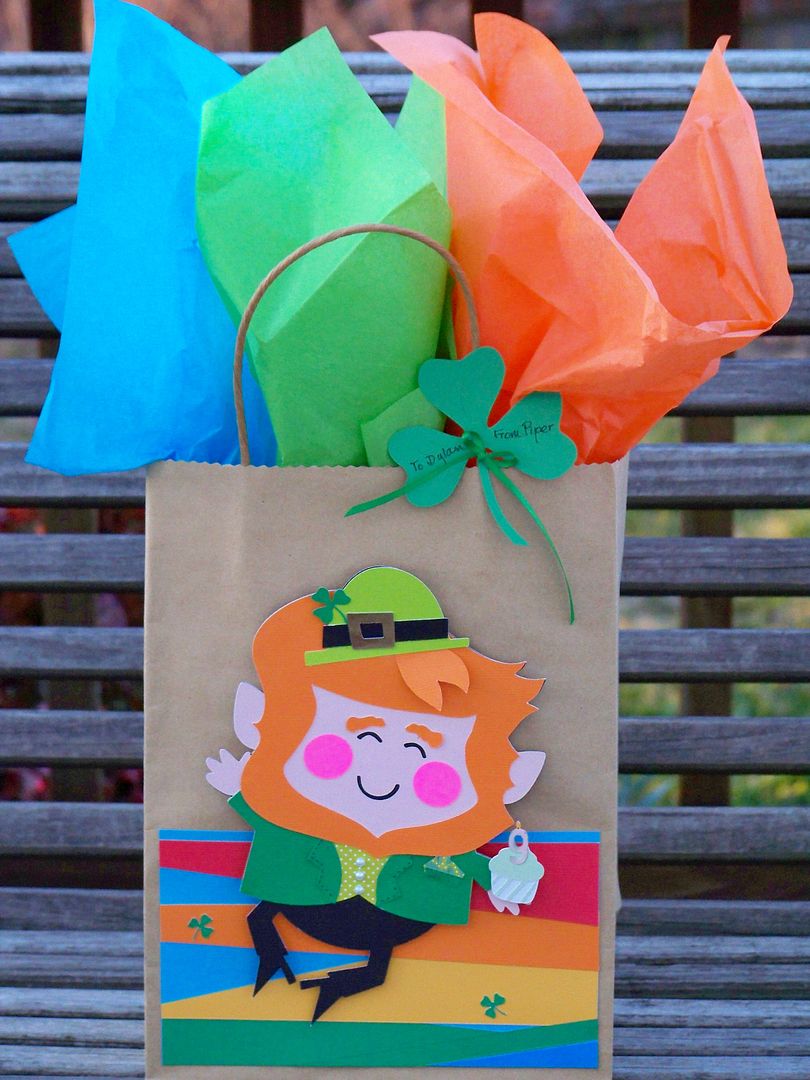
This is Nadia from my blog, With Glittering Eyes.  (If you have visited me before, please note that I have a new blog address:  www.withglitteringeyes.blogspot.com.)  Today I have a project to share that I made for one of my daughter's little BFFs.  Her birthday is on St. Patty's Day so I came up with a little gift bag for her with a birthday leprechaun.
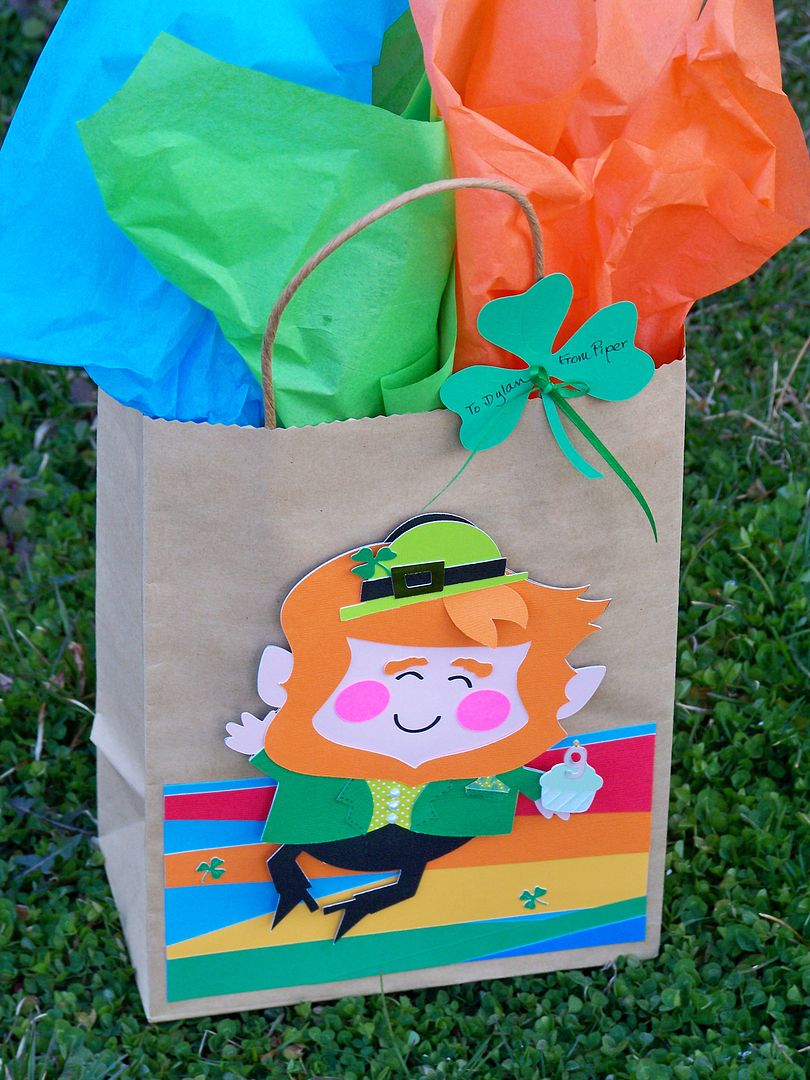

I keep on-hand 7-1/2" x 10-1/2" kraft paper gift bags-- that was my base.  (That is the measurement minus the handles.)  I cut the jumping leprechaun from Simply Charmed (page 32) at 7".


The thing with a big cut is that you kind of have to add extra details and pop up some elements to keep the die cut from flattening out.  For this little guy, I hand-cut an extra lock of hair.  I glued it flush on the 'scalp end' and popped it up with 1/8" pop dots on the 'curl end'.  I also popped up his little hat and added a shamrock to the hat band cut from A Child's Year (page 31), cut at 3/4".  I added a vest layer to his outfit but cutting two jackets and cutting one away so that I could layer them and see the second layer, like a vest.  I added adhesive pearls for vest buttons.  I hand-cut lapels for the top layer, the jacket, and added a breast pocket and pocket square.  
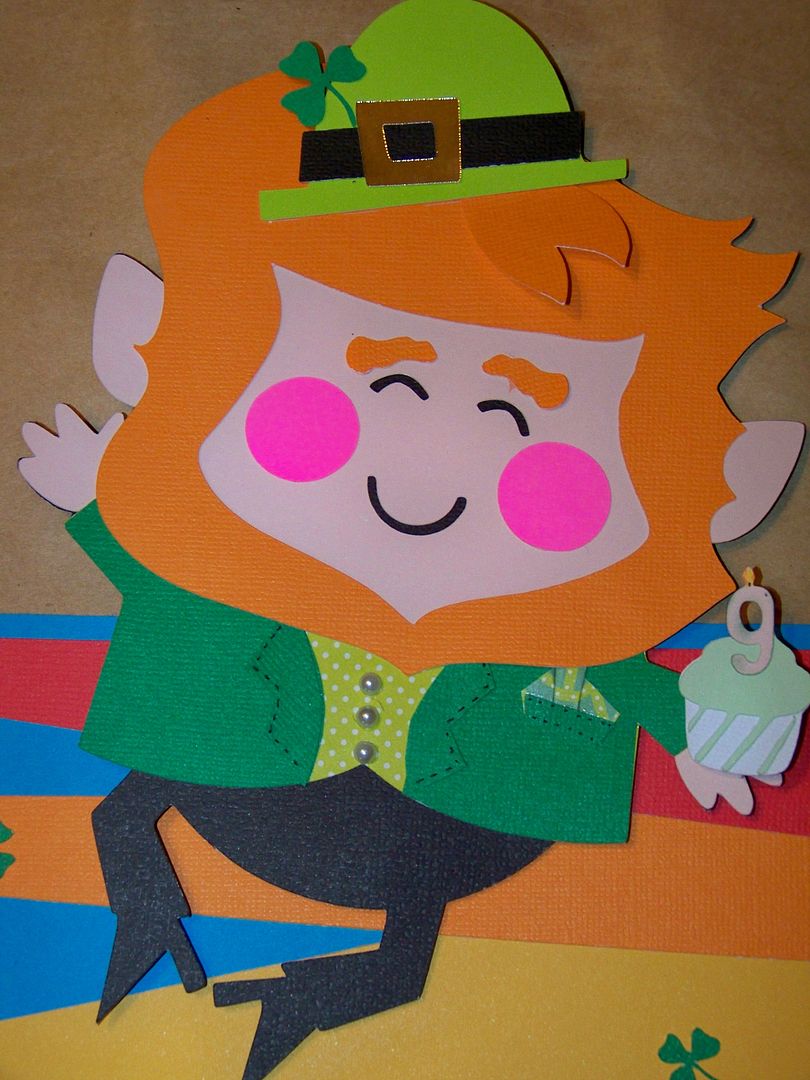

To make him a 'birthday' leprechaun, I cut a little cupcake from Something to Celebrate (page 22) at 1".  I only cut the first two layers since it was so tiny.  I cut a "9" candle from the same cart (page 30) at 3/4".  I hand-colored (with pencils) the flame and wick.

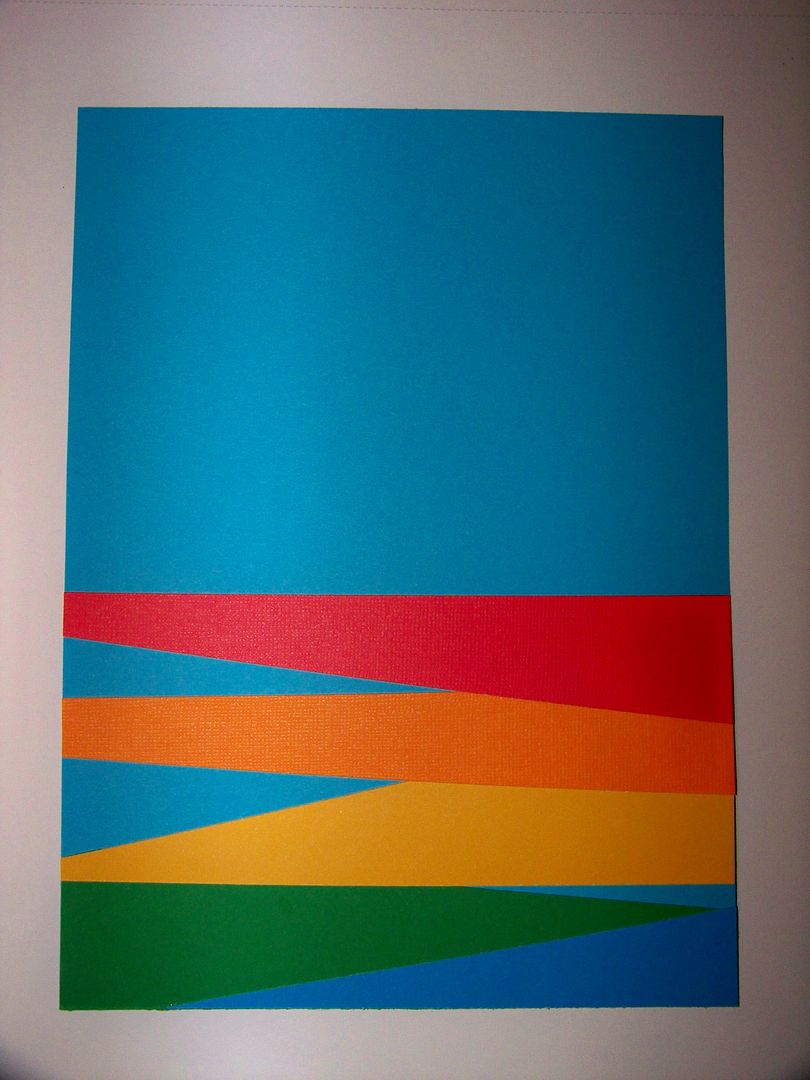
To give him a "place" to exist, I trimmer-cut rainbow-colored solids and layered them to create a ground and horizon line.  I placed a couple of tiny shamrocks, cut from A Child's Year at 1/2".


Lastly, for a tag, I cut a last shamrock, also from A Child's Year, at 3-1/4", and tied it on with 1/8" ribbon.

Lately, I have taken a little inventory of my Cricut cartridges and, as you have also probably figured out, there are many repeating icons among them!  I used to 'need' all the cartridges and came pretty close to getting them all before last autumn.  The good thing about this economy, hopefully there is a silver lining, is that many of us have gotten a chance to re-prioritize and to be more creative!  So... if you don't have the cartridges listed above, you can find shamrocks on the following cartridges that you may have:

  • Create-A-Critter 2
  • Designer's Calendar
  • Elmo and Friends Holiday
  • Give A Hoot
  • Imagine More Cards
  • Celebrate with a Flourish
  • Paper Doll Dress Up
  • Phrases 
  • Spring Fever
  • Holiday Cards
You can find leprechauns on the following cartridges that you may have:
  • CCR Exclusive:  St. Patrick's Day
  • Teddy Bear Parade
  • Paper Doll Dress Up
A cupcake image can be found on dozens of cartridges.  This is just a sampling:
  • A Child's Year
  • American Alphabet
  • Best Images of 2006 and 2009
  • Birthday Bash
  • Create-A-Critter 1 and 2
  • Storks Delivery
  • Divine Wedding
  • Doodlecharms
  • Elmo's Party
  • Every Day Paper Dolls
  • Hello Kitty Greetings... and the list goes on and on!!!!
Numbers can be found on any cartridge with font of course.

Thank you for checking my post today!  I hope you will visit my blog in the future.  You can always find my blog on Facebook at facebook.com/WithGlitteringEyesBlog and on Pinterest at pinterest.com/nadiahm/withglitteringeyes-blogspot-com-my-crafts/.  

Cricut Info & Supplies Used:
Designed By: Nadia Herbst-McConnell
Cricut Machines Used: Expression
Project Type: Gifts
Project Theme: Birthday, St. Patrick's Day
Cricut Cartridges Used:  Simply Charmed, A Child's Year, Something to Celebrate
Suppies Used: Paper, Quick Dry Glue, pop dots, adhesive pearls, microfine pen, ribbon

Tuesday, March 12, 2013

Easter Chick with Sweet Tooth Boxes

 Hi there, it's Maria again with my monthly post. Don't you love it when you get an idea in your head and the finished product actually comes out just as you imagined? Well, it doesn't happen to me very often, believe me, but today I am so thrilled to share with you one project that did. I think it may even be better than  I hoped! I was looking for a cute way to make a box to put some candy in for Easter. There have been some really creative things done with the ice cream cone on the Sweet Tooth Boxes cartridge and  I decided to try it. For the my project I used cuts <ConeLy1> which is the egg and <ConeLy2>, the chick. I cut them at 10"
The chick's comb and eyes are from the County Fair cartridge. His beak is a diamond cut from George and Basic Shapes. I scored and folded it just either side of the center so I would have a flat surface to glue to his face. His wings are paisley cuts using the shadow feature from the Paisley cartridge.
I decorated the shell by weaving three pieces of baker's twine through a piece of lace ribbon then gluing it around. I then added a button with a piece of hemp twine.
Hope you like my little Easter chick as much as I do! Thanks for stopping by today!
Maria

Cartridges used: Sweet Tooth Boxes, George and Basic Shapes, County Fair, Paisley
Machines used: Cricut Expression, Gyspy
Printed paper from The Paper Studio, White paper from Colorbok

Monday, March 11, 2013

St. Patty's Day Candy Cracker!

Hey guys, it's Angie from Angie's Paper Passion! Do you know that St. Patrick’s Day is next Sunday? Well, I’m sure you all know that I’m not Irish, lol, but like my friend Danita said, “you can kiss me anyway”! Today I made this candy cracker for St. Patty’s Day.
 

It's filled with 'lucky" chocolate coins (They're chocolate, THAT"S why they're LUCKY, duh!) 
But I've created a window in my cracker so you can see all of that chocolate luckiness, lol! And I've added a lucky horseshoe, "Good Luck", and some green bling to make this a festive St. Patrick's Day candy cracker!


The recipe with sizes is on my blog HERE! 
I hope your St. Patty's Day will be filled with fun and luck!

Until next time, Happy Crafting,
Angela

Designed By: Angela Cromwell
Cricut Cartridges Used ; Artiste, TBBM2, CCR Basics
Machines Used: Cricut Expression
Other Supplies Used: cardstock, transparency, gold garland, Stickles, Gems by EKSuccess, Scor-Tape

Friday, March 8, 2013

St Paddy's Bear

Hi-Meg here from PeacockPaperie This months offering is a fun St Patrick's day card that I made featuring 2 cricut cartridges- Teddy Bear Parade and Spring Holiday Cards. The card is cut at 5 1/2 inches and the bear is cut at 2 1/2. Wishing you a happy ST Paddys day and may the luck o' the Irish be with ye!

Musical Birthday Card

Hi fellow fanatics!  This is Erika from http://www.EKittyScraps.blogspot.com.  I am glad to be able to share my new project with you today.  I designed this card for my stepdaughter Kim using the Quarter Note cartridge.  Kim is a music major in college so I wanted to make a musical themed birthday card.
I started with a kraft cardstock for the card at 5 x 7 inches.  I add a piece of black cardstock at 4.75 x 6.75 inches and attached to kraft cardstock.  I cut Bazzill Basics Antique Sheet Music paper to 4.50 x 6.50 inches and adhered to black cardstock.  I added a silver treble clef embellishment that I had in my stash.

Next I stamped a birthday cake from Inkadinkaclings birthday stamp.  I wet embossed the stamp with Ranger Inkssentials tinted embossing ink and used Stampendous Marcasite Opaque embossing powder which has a nice glittery black color.  I used my Copic markers to color the stamp. 
Hint-an advantage to wet embossing and coloring is that you have raised lines when wet embossing to color in versus just stamping a flat image with regular ink and trying to color inside the lines.

  Now I used my Quarter Note cartridge and cut out Happy Birthday in music notes using font 3 and shift font 3 for capital letters B and H at .75 inches.  I also cut out two corner roses at 1 inch and adhered with Scotch quick dry adhesive.  I pop dotted the stamp and added to the card.  The stamped image above does not really show how glittery the cake stamp from the embossing power is nor the nice colors of the copic markers.  I hope you like my card.  Have a nice day and keep crafting!

List of Supplies used:
Cricut Expression Machine
Quarter Note Cartridge
Cardstock-kraft, pink, red and black (Tim Holtz Craft core)
Bazzill Basics Paper-Antique Sheet Music (has french words on it)
Inkadinkaclings-Happy Birthday Cling
Ranger Inkssentials-Emboss It Tinted ink pad
Stampendous-Marcasite Opaque embossing powder
Copic Markers-RV11-Pink,  R29-Lipstick Red, W5-Warm Gray, Y13-Lemon Yellow and YR07-Cadmium Orange
Scotch Quick Dry Glue
Silver Treble Clef embellishment


Thursday, March 7, 2013

A Mousetrap Easle and Mousetrap Box

Welcome and a big hello to all of our Fabulous Crafty Cricut FANatics.  It's Melody, your designer for the day, and I can hardly wait to share my project with you.

A little teaser hint first.  You can share this with the kids.

QUESTION: What animal needs a daily dose of oil???

ANSWER:   A MOUSE because it SQUEAKS!!!

Now, can you guess what today's craft entails?   Why mousetraps of course.  I did share some traps with you before .  You can search by putting Designer Melody in the search box if you missed it.  They were used to hold a note, or as an embellishment for an altered project.

MOUSETRAP EASLE:

I made an easle from a mousetrap to show off my lovely St. Patrick's Tag I received from a partner swapper.


I covered the trap with designer paper, but did not glue it, as I can then change it for the different cards I am displaying.  It is just a strip that goes all around the trap and the metal holds it.  I made a stand with a rolled up paper strip with half of a wooden clothespin (tucked and glued inside) and a strip of fabric to make it sturdy.


I added a little metal clip to hold the ribbon and further the sturdiness of the stand.


The mousetrap snapper acts just like a mini clipboard, a great
substitute when you have a small space but want to display your special treasure.
 

MOUSETRAP BOX:


I took 5 traps, and completely stripped all but one. I just left the " snapper " on it. 
One trap was sawed in half for the top and bottom.

Please don't be afraid of these.  Simple jewelry tools will remove the hardware. It is like working with a clipboard, how many of you have ever hurt yourself on one of these.

Add designer paper or just paint and distress, you can even leave the wood finish and stain it.

I made a layered paper flower and attached it to a Tim Holtz chain. I went through my stash and and went a little wild with my glue gun and all of the embellies.


Think of all the different styles and themes you could use, to make a unique little box, that is one of a kind, the only one like it in the whole world. 

I just used a hot glue gun to glue the sides , and bottom, and made a fabric hinge with a strip of fabric.

I am not done with this rodent craft concept yet.  On to bigger and better, I am going to make a box with RAT TRAPS.  But that is for another blog.  Hope you enjoyed my squeaky project. 

PHOTO GALLERY;


o
 
I used my Cuttlebug and Provocraft flower dies to make the fleur embellie out of  cardstock.
 
HAPPY MOUSETRAPPING EVERYONE
 
Joyful Crafting  Always,
Melody  :) 


Wednesday, March 6, 2013

St. Patrick's Day parade layout

Hello!  This is Michele Green from www.michelegreen.com, here to share a layout with you today.  St. Patrick's Day is a huge celebration in my town, complete with the state's largest parade.  It's an event to behold!


Something I challenged myself to do with this layout was to create it without looking at my photos first.  I am always impressed by people who can do this.  It turned out well but truthfully, I was there so I knew in the back of my mind what pictures I had in my stash...

Now for a dew details:

The horseshoe is from Everyday Pop Ups @ 3".  The mini shamrock circle on the other side of the layout is from Designer's Calendar @ 1.25".  I hand cut the flag.  I inked anything that was a solid color with a light green cat's eye stamper.

Here is what the layout looked like after I added my photos.  The thing about used patterned papers as mats is that when you put your photos in, all that gets covered up!

My tip for today - If you are going to blog about or recreate your project again later, keep notes as you go along about the materials you are using.  Here is my "note sheet" for this layout:

I hope you enjoyed my layout today and be sure to come back and visit this blog often!


Cricut Info & Supplies Used:
Designed By: Michele Green
Cricut Machine Used: Cricut Expression
Cricut Cartridges Used: Everyday Pop Ups, Designer's Calendar
Other Supplies Used: Cardstock, Studio G stamps, Staz On green ink, twine, Reminisce March paper 

Tuesday, March 5, 2013

Cricut Crafty Challenge #6- Easter/Spring Gifts

Welcome to the Cricut Crafty Challenge #6- Easter or Spring Gift Baskets

I hope you all have a great weekend and were able to get some crafting done, time with family and everything else that can't get done during the week. LOL! I did get some crafting done this weekend and I can't wait to share with you what I made.
Easter is coming up fast and I knew this weekend would be my last chance to make something for it, so I crafted up and made this cute little Easter basket to give to my nephew. Now I just need to go shopping to fill it up.


I made this basket cut at 10.5' from the Tags, Bags, Boxes and More cart, the little bunny is from Simply Charmed and I used a Friskers punch for the grass.

I used Peachy Keen stamps for the face on the bunny and just $1 stamp from Michaels for the saying. I also embossed the carrot with a cuttlebug folder.

Challenge: Make an Easter or Spring Themed gift basket to give to someone. You can use your Cricut to cut out the basket or you can use your basket and decorate it with Cricut cuts. It is your choice.
Your Basket must include the following:
 At least 2 Cricut Cuts and Ribbon- Easy Peasy!
Please make sure you link your project up by March 31st to be eligible for the drawing for a prize.
We will draw the winner on April 5th on the post before the new challenge is listed.


Monday, March 4, 2013

A Quick Little Beach Layout


I created this quick layout in anticipation of a trip to the beach during Spring Break. I used Splish Splash for the  words and castle.  they are cut a 2.5 inches.  I used Ashlyn's Alphabet for the title.  SIMP (Sand In My Pants).  The journaling will discuss the battle we always have when we go to the beach -- sand sticking to our bodies.  The papers are from my stash.  The title is green on top of blue.


Sunday, March 3, 2013

Cricut Crafty Challenge #5 Winner

Thanks to all of you who entered the Cricut Fantatics Cricut Crafty Challenge #5 - Be My Valentine.  All the projects entered we awesome and very inspiring.  If you didn't already look at them, please go check out all the entries at the bottom of our challenge post HERE. 

Join us in congratulating our winner of Cricut Crafty Challenge #5
 
....drum roll please !

Tammy Edwards of Paper Pastimes of a Scrapbooking Mimi     Her challenge entry was just adorable. Thanks so much for sharing your creativity with us Tammy.


Tammy, please send us your mailing address to creationswithbecka@yahoo.com so we can get your prize out to you right away.  You have until 3/12/2013 to claim your prize or we will select another winner.

We will be posting another challenge on March 5th, so be sure and check back to see what the next Cricut Crafty Challenge will be ! 

"The Great Gatsby" Inspiration


Hi! Lori here from The Singing Shell blog with a decorative easel card inspired by The Great Gatsby movie coming up in May.  I love the simple but opulent look of the fashion and especially the architecture in that era.  I also  remember reading this book in high school and I have to admit that reading it again as an adult makes me appreciate it more than I did as a teenager.  I guess you have to live a little to understand certain things.

So, guess what cartridge was perfect for this card?  You got it!  The Art Deco Cricut cartridge.  It is filled with a lot of the images can used for that Roaring Twenties look and for masculine cards or projects.

First, I made the circle easel card base.   To make the circle easle base, I used the directions from the Fresh & Fun Blog.  This video is great, too.  If you do no have circle cutter templates, you can easily make it the card base on the Gypsy, CCR, or Design Studio.

1.  I cut the Sugrddy (p43) image at 4 inches.  Love him!  He looks very dapper.


2.  Next, I used a circle edge punch on the black cardstock.  (It reminds me of the Chrysler Building for some reason.)  

3.  I attached it to the front of my card base and added the die cut.
4.  I stamped a clock image with a watermark ink and then the sentiment "what is possible in art becomes thinkable in life" in a light brown color. 


The sentiment is stamped on top of the clock watermark image.

5.  I added some metals gears.
6.  To hold the card up, I used a ticket and pop dots.


 Here is another version of the card in a regular 5 x7 card:


Happy Crafting!!

Designer: Lori Sjogren
Machines: Cricut Create
Supplies: Cardstock - Recollections, Tim Holtz Kraft Resist, SEI; Ticket - Tim Holtz; Buttons - Melissa Frances; sentiments - Unity Stamps & Tori Spelling; Gears - Lisa Pavelka; Circle Edge Punch - Martha Stewart Diamond Lake; Stamp


Saturday, March 2, 2013

A Little St. Patties Day Drink

Hello. Cindy here from Scrap-obsessed. blogspot.com with a fun little vinyl project. I'm not a beer drinker myself, but I know some others enjoy a little green beer to celebrate St. Patrick's Day. 


I saw some of these on Pinterest and knew I could make them with my Cricut. I used Paper Doll Dress Up for the mustache, Birthday Bash for the font and Indie Art for the lips. I used Cricut vinyl in black and red and cut it out using my new Cricut Mini and my Gypsy. I'm very happy with this smaller machine as it takes up a lot less room on my craft table.

I hope you like todays project. I will be making a bunch of these for a friends wedding party (minus the green beer).  Cheers.

Friday, March 1, 2013

Using Recipe Cards...

Hello! This is Christel from scrapworm.blogspot.com.

Almost everyone has photos of their children with food. The Cricut cartridge, From the Kitchen, is perfect to highlight those funny and sometimes messy memories.

I chose a picture of my son eating spaghetti. Next, I picked out paper to match the picture. I used October Afternoon's Homemaker collection.

I picked the toaster, spoon and recipe card from the cartridge to be used on the layout. I wanted the recipe card to serve as the main frame for the picture. The recipe cards come in several styles with various tab placement. The toaster and spoon added a little bit of whimsy to the page. I added "sugar" to the spoon for some sparkle.

Finally, for a little more depth I added a pen, flower and Rick-rac.

For my finally project, I used the recipe cards to make an art journal. Here you can see how the tabs are located in the right,center and left positions.

Hope you enjoyed today's crafts using "From the Kitchen". God bless and keep crafting!


Technique Tutorial Day - March

Welcome March and special hello to all the Cricut FANatics !  Its time again for our new monthly feature, Technique Tutorial Day with Debbie O'Neal of Scrap Me Quick Designs, home of die cutting inspiration. Before we get started I wanted to share a fun March fun fact with you.

Did you know that March used to be the beginning of the calendar year? "The word 'March' comes from the Roman 'Martius'. This was originally the first month of the Roman calendar and was named after Mars, the god of war. March was the beginning of our calendar year. We changed to the 'New Style' or 'Gregorian calendar in 1752, and it is only since then when we the year began on 1st January."  I found this to be interesting and hope you do too.

Cricut FANatic Announcements 
1) We are looking for a few more designers to add to our monthly guest designers.  If you are interested in sharing a Cricut project with us on Cricut FANatics Blog, please contact us at CricutFanaticsOwner@gmail.com . Your term would be from March to July 2013 on your assigned day each month. 
 
2)  If you have not signed up using our new subscribe link, please do so because we want to increase our communication to you of challenges and other information.  Just for  taking a moment to do os, you get a FREE download of a 30 Ways to Embellish Die Cuts Checklist.  

Technique Tutorial - Using Glaze Pens on Die Cuts

This month.  I wanted to show you a way to embellish your die cut that you may not have thought to use before.   

1.  Lets talk about Sakura Glaze Pens.  These pens are great for adding some shiny pizzaz to
     your die cut images.  You may already have some of these in your stash or they are easily found
    in sets or separately at your local craft stores. They are easy to use and don't require any special
    skills. The Glaze pens give you a different look than the popular alchohol pens like Copics
    or Spectrum Noir. Note: If you want a softer look you can always use the Sakura Souffle pens
    which gives you a milky color instead. 

Sakura Gel Pens
 
2. Give it a try.  Cut any Cricut image of your choice
 
Cricut Image out of cardstock
 
3.  Using the Sakura Gel Pens, outline or draw patterns on your Cricut image. The pens dry in
     seconds and are easy to layer multiple colors with each other such as shown below with the
     pink and purple.


See how shiny and pretty the Sakura Pens look on your image
 
4.  Use the pens to color in some of the cut out shapes on your images. See how I used the pen
     to color in the nose, mouth, eye lashes and even outline the bow, ears and added finger marks.
     You can even use the pens to draw added pieces on your die cuts not foudn on the original image.
     I even added some shoes to the bear below so don't be afraid to do a little free-hand drawing on
     your images too.

See how the cut image is so much more defined and personalized now?
 
Your final project will be a real standout by taking the time to enhance your die cuts with the Sakura Gel Pens so give them a try some time.
 
Have you used the Gel Pens before? Did you like them?  Have any questions about them?  Leave a comment what you think about these for embellishing your die cut images.